BoLS Necron Obelisk Apoc Datasheets


We have a double dose of Necron goodness today. First we have 2 new Necron Datasheets featuring the Necron Obelisk (brought over from Epic) and then we have step by step instructions on how you can build your own 40k scale Obelisk.
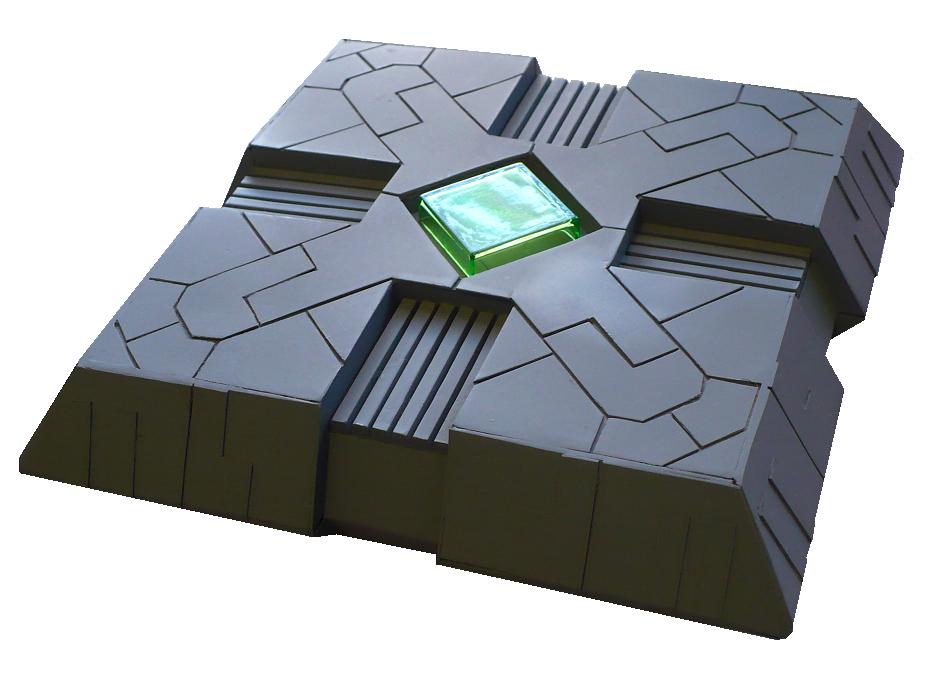
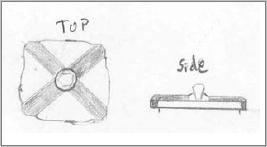
Specialist Games released rules for playing Necrons in Epic a while back. You can find them here: http://www.specialist-games.com/epic/Vault.asp. In there they have the description for a Necron unit called an Obelisk (not to be confused with the Obelisks in Dawn of War). It is described is a flatted cube with a power crystal in the center. They include this wonderful picture as their guide to modeling one 😉
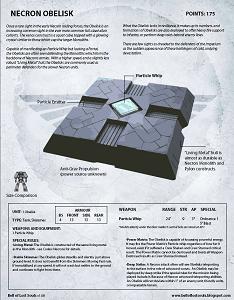
In the epic list they use Obelisks in two ways, as a scout force and as a Monolith escort. Our first datasheet is for the Obelisk as a scout unit. It is basic a unit of 1 to 3 Obelisks in a vehicle formation. The second formation is a bit more interesting.
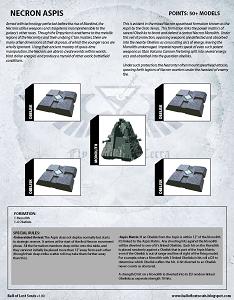
Necrons don’t really get to have any super heavies. I wanted to give the Necron player the ability to field a superheavy unit without having to build or buy anything too crazy. The Apsis formation allows the Necron player to have some of the benefits of a super heavy, without actually having a super heavy.
We have included both of these Datasheets in our BoLS Lords of Battle download. You can get it here.
Building the Obelisk
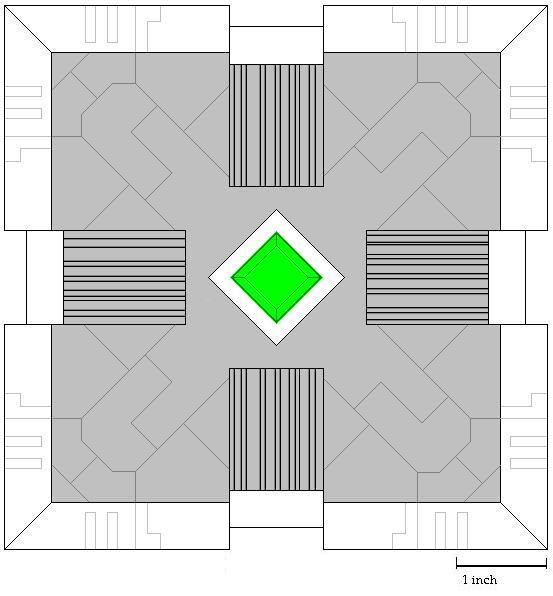 Building a Necron Obelisks isn’t very challenging, but it does take some time to get all the details added to it. You can start by using this template. It is a top down view of the Obelisk.
The Obelisk can be divided into 3 layers, the top and bottom being 5″ square and the middle being 6″.
This template shows the top layer in grey and the middle layer in white.
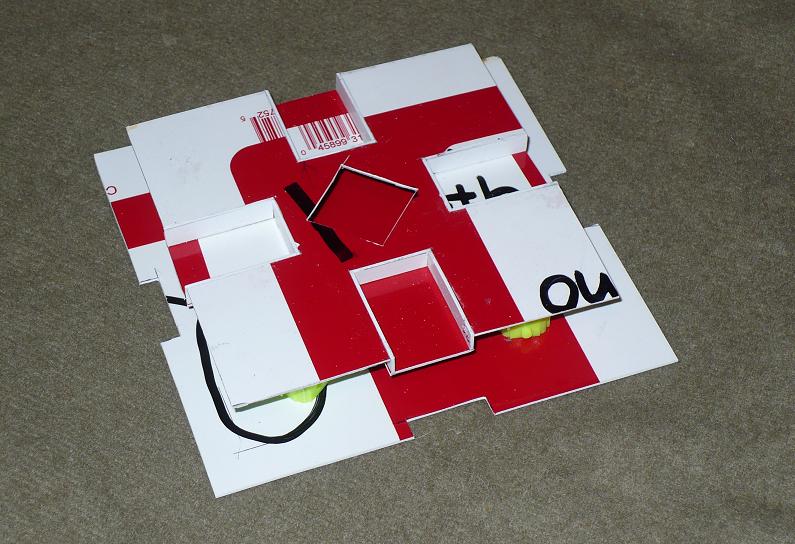
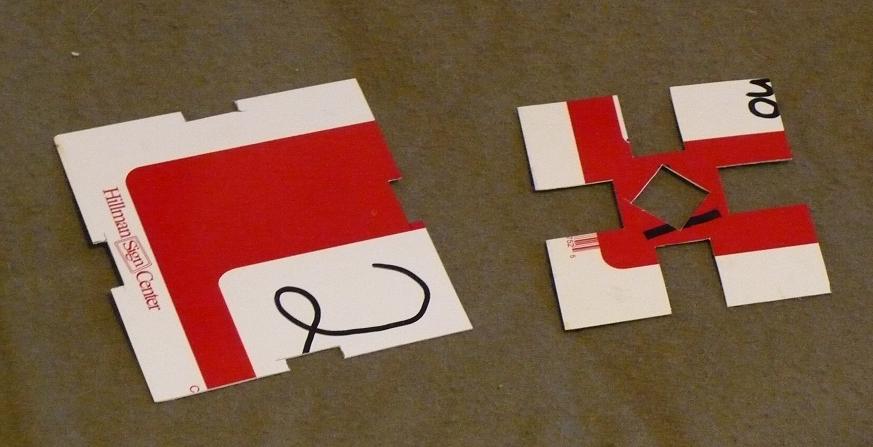 The first thing to do is to cut out the 3 layers in some sturdy plasticard (or a For Sale sign) The bottom 5″ layer is a perfect square, while the middle and top both have notches cut out of them. The middle layer has four 1/4″ notches and the top layer has four 1.5″ notches. The top layer also has a 1.25″ diamond cut out of its center to hold the ‘power crystal’.
 Once you have them cut out, you can prepare the lowered ‘shelf’ sections for the top layer. You will need to cut eight 0.25″ x 1.5″ strips and four 0.25″ x 1″ strips of plasticard. Place these perpendicular to the cut out sections of the top layer as shown in this picture (note: the top layer is upside down in this shot).
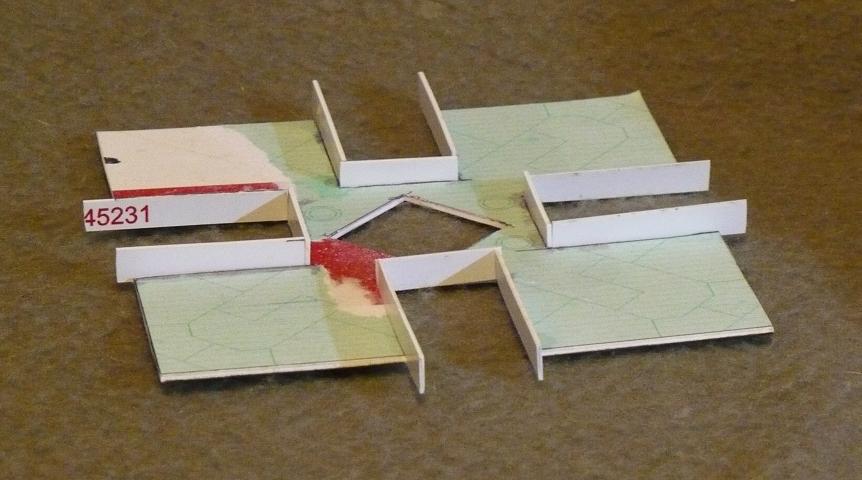
Next, cut four 1.5″ x 1″ sections of plasticard. Glue these onto the bottoms of the four sections you just attached. You should have 4 “shelves” now.
Next, cut out four 1.5″ sections of sprue. You may need to trim down and file off parts of the sprue to get a single, uninterrupted piece. It is also important to get all 4 sections from the same piece of sprue, as not all sprue are equal. Put these 4 pieces under the edge where the center diamond was cut out.
Cut a 1.5″ x 1.5″ square of plasticard and glue it on the underside of these sprue sections creating another lowered shelf in the center.
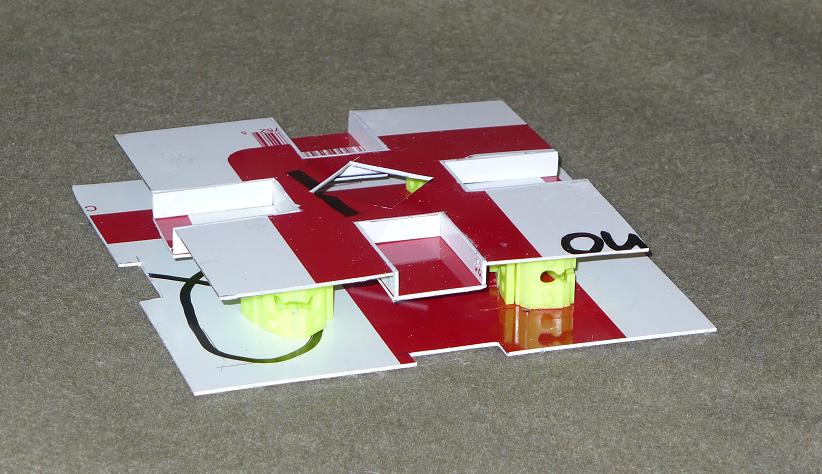 Create four 3/4″ spacers. These can be made of anything that is 3/4″ tall. I used some Electrician’s Caterpillar spacers, but you could easily make some out of plasticard. The important thing is to make sure they are sturdy, as they will be supporting the top layer of the Obelisk. Attach them between the top and bottom layers as I have shown here.
 Pay special attention to the placement of the top layer, it needs to be parallel to the middle layer and centered on it.
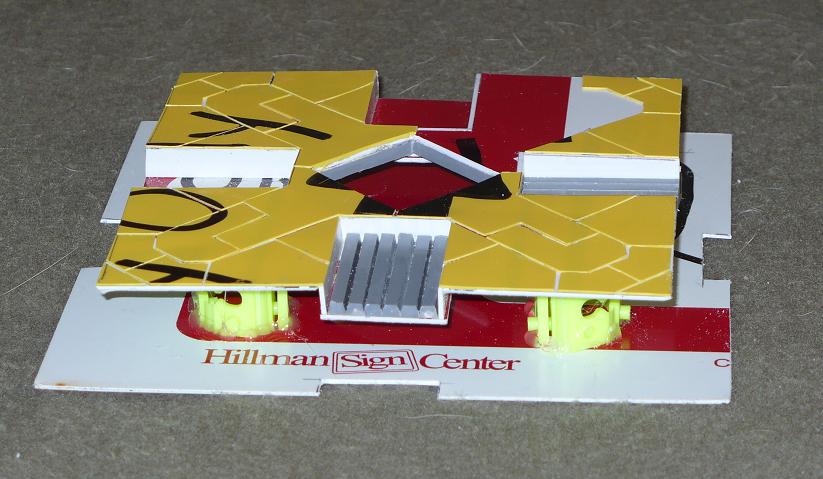 The next step is to add the detail to the top layer. You will need about twenty-four 1.5″ sections of sprue. Again, you will probably have to trim down and file the pieces to get an uninterrupted section of sprue. As before, try to get the sprue from the same piece or similar pieces. The more uniform the sprue size, the better. Place these in the 4 “shelf” sections of the top layer. Chances are, they will not fit in there correctly. You may have to sand down 1 or more sprue section to get a good fit.
Once the sprue pieces are in place, you can move onto the top detail. For this section I printed out the template from the beginning of this article and glued it to a thin sheet of plasticard. I used spray adhesive to get an even stick across the sheet. Once it dries, cut the pieces out of the pattern and glue them on one at a time. It is important to start from each corner and work towards the center. This ensures that the pieces have the best fit.
Once you cut out a piece, you will need to trim the edges to create a gap between it and the other pieces of the design. Don’t worry too much about pieces hanging over the edge. You can file those down later to get a good fit.
Now, create another 4 spacers. These should be 1/2″ tall. Use them to attach the bottom layer.
 Now you are ready for the sides. Cut out eight 2.5″ by 1″ sections of plasticard. Now cut a a corner off of each one so that the top is 2″ and the bottom is 2.5″ long. These are the sides for the upper section. Do the same thing for the lower section , but the pieces should be 3/4″ tall. Because we are all human we sometimes make mistakes. The sections you need may need to be a little smaller or larger. Measure your Obelisk before cutting any of these pieces.
Once you have the sides glued on, you will need to work on the inset section in the middle of each side. You will need four 1″ x 1″ sections for the top and four 1″ x 3/4″ sections for the bottom. There will be a gap between these sections and the side section you just attached. Cut small sections of thin plasticard to fill in these gaps (I think you need a 1/4″ x 1″ rhombus shape for the top, but it is best to just eyeball this section and file down any excess).
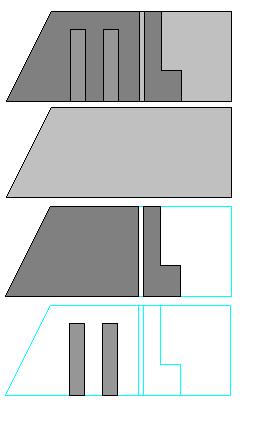
You are almost done. Use this template to create the side details (again, you may need to make them slightly wider or shorter depending on your exact model). There are 2 layers that you will place on top of the sides. The first layer has the corner piece and an L shaped piece. The second layer has 2 shorter ‘bars’ that go on top of the corner piece.
To make the Obelisk “hover” I took some leftover sprue sections and placed them under the obelisk near the center. You may want to stack them to make it a bit higher off the ground.
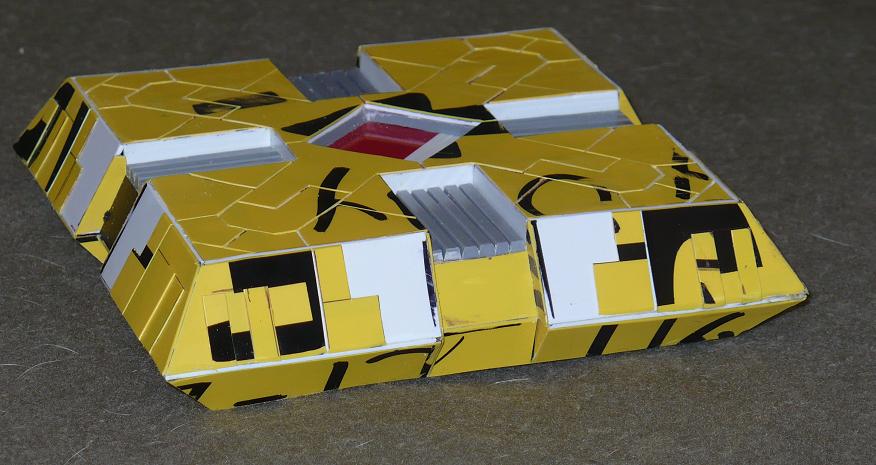
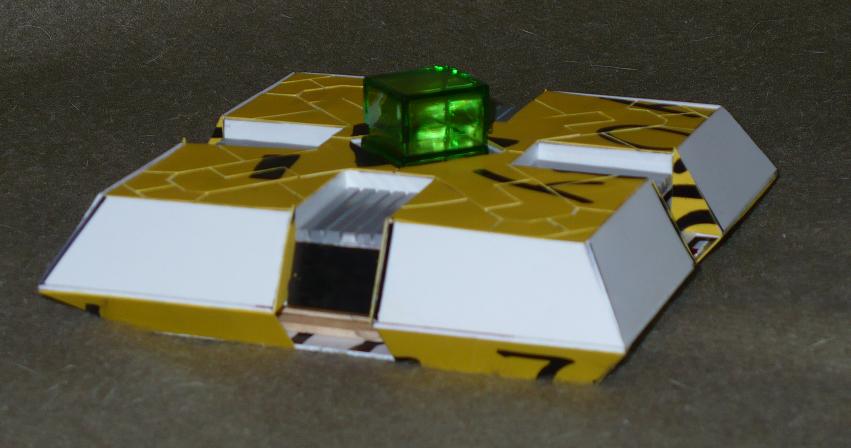
Congratulations, you are now the proud owner of a Necron Obelisk.
“But what about the green Crystal in the middle?”
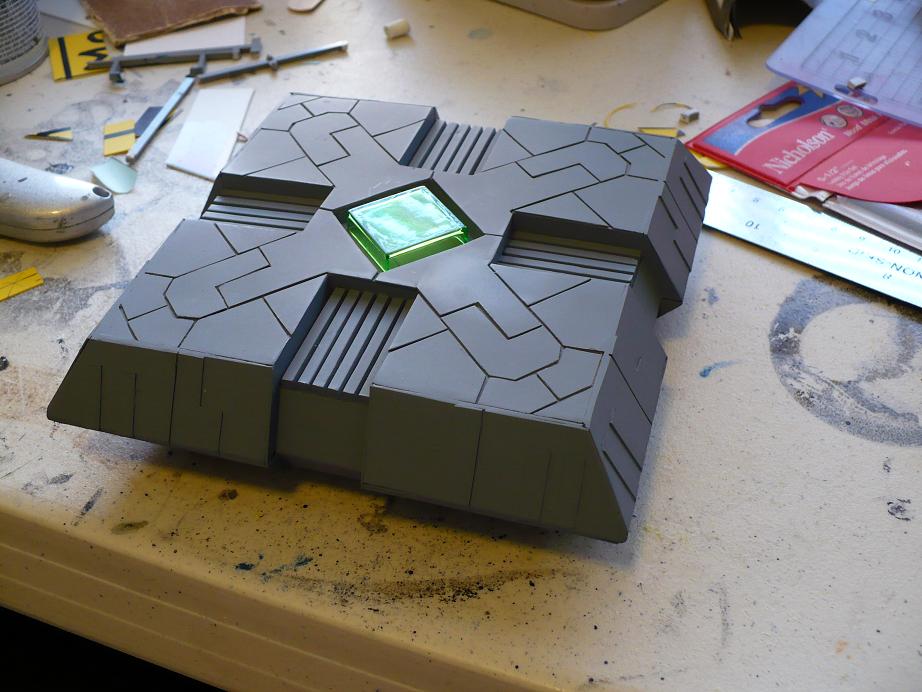
I’m glad you asked. The Container Store (containerstore.com) sells small translucent green boxes for about $0.39 each. If you don’t have a Container Store near where you live, you can order one here . Make sure you pick the smallest one.
Once you have the “crystal” you can either use the base of the box (turned upside down) or the lid. Personally, I think the lid works better, but I tried it both ways. Glue it to the recessed center of your Obelisk and you are ready for your toaster revolution! I’m sure most Necron players already know this, but many glues will create a fog on translucent plastics. Choose your glue wisely.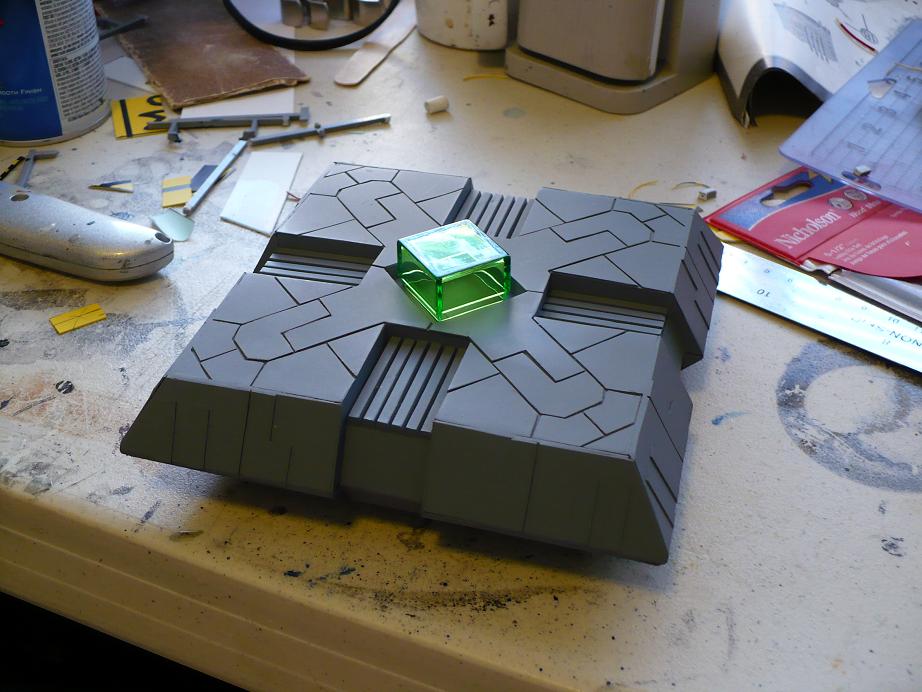
If you have any other questions or if some of the instructions were unclear, leave a message in the comments section and we’ll clear it up