ATC Battle Report #2 Spacecurves’ Dark Eldar

Hello again BOLS readers, today I’ve got another battle report from the American Team Championships that recently took place in Chatanooga Tennessee.
For a description of the tournament, please refer to the first battle report: ATC battle report #1. This game is from the match when we played against the Wrecking Crew team, who were one of the major contenders in the tournament.
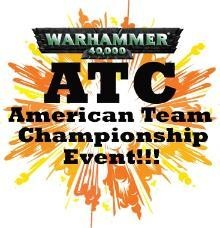
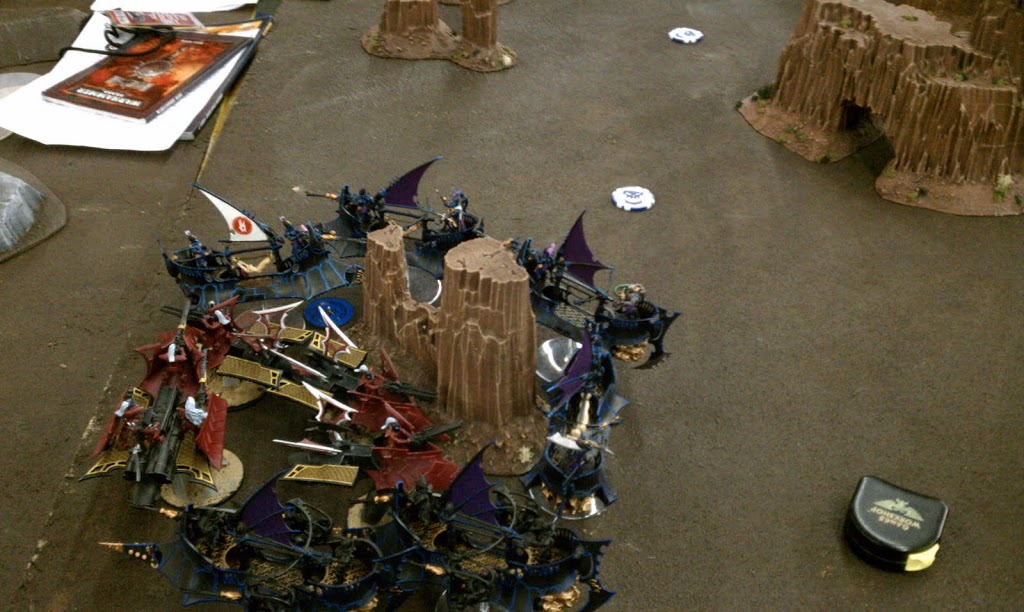
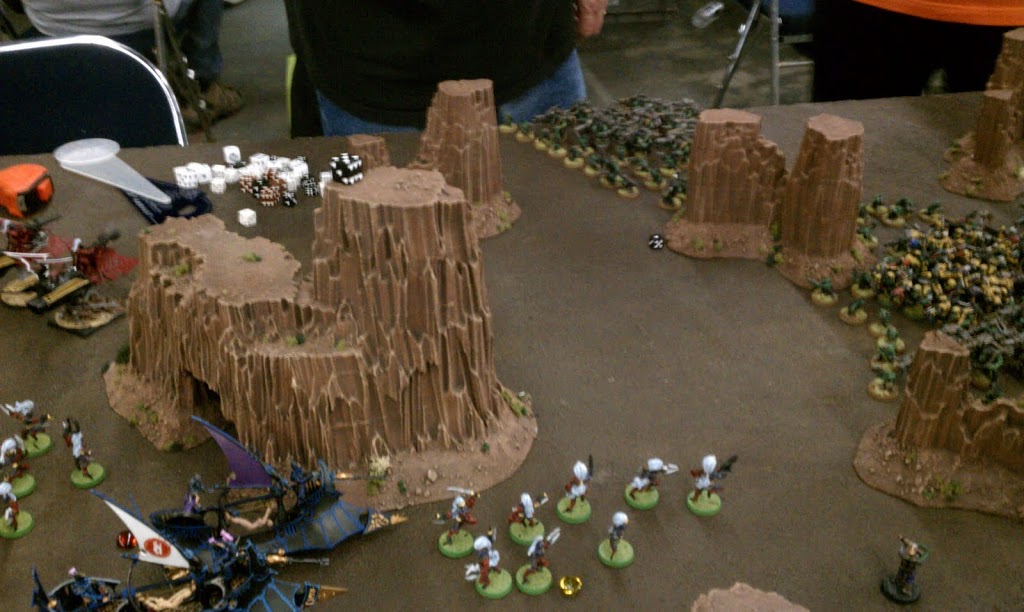
The story of this game starts during the pairing process of the match. I immediately noticed that one table had tons of LOS blocking rock spires.
 |
| Picture 1: Great Terrain for Skimmers |
Based on this, I suggested that I be “point man” this round, meaning the other team would get to pick which of their guys would play me. However, that meant I got to pick the table. Normally Dark Eldar would be a crazy choice for defense because they have some really bad matchups, but in this case the other team had some good counters to our normal defense guys, and I knew I could use this terrain to my advantage.
So with some raised eyebrows the Wrecking Crew discussed who would take me on, and eventually decided upon Neil with his Orks. Neil’s army was pretty simple.
2 Warbosses on bikes
10 Nob bikers full of upgrades
2 big squads of Grots
1 squad of Boyz
45 Lootas
You can refer to the first battle report for my army list. The deployment this time was spearhead. My combat drugs were +1 attack. I won the roll to go first and decided to take it. My plan was to attack immediately and get the jump on the biker squad, firing my entire army into them before they could start turbo boosting. That deathstar was the only backbone of his army, so if I could cripple it early I should be able to swarm him under after that. The 45 Lootas were terrifying though, I had to get on top of him quickly because they will basically kill 3 paper airplanes every turn they fire.
I deploy like this:
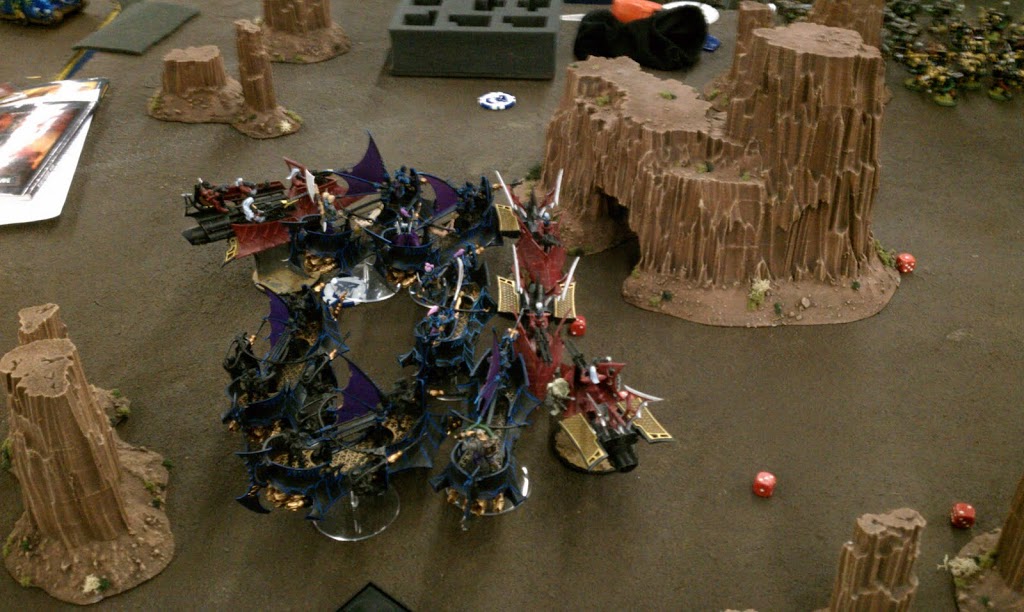 |
| Picture 2: Preparing for the assault |
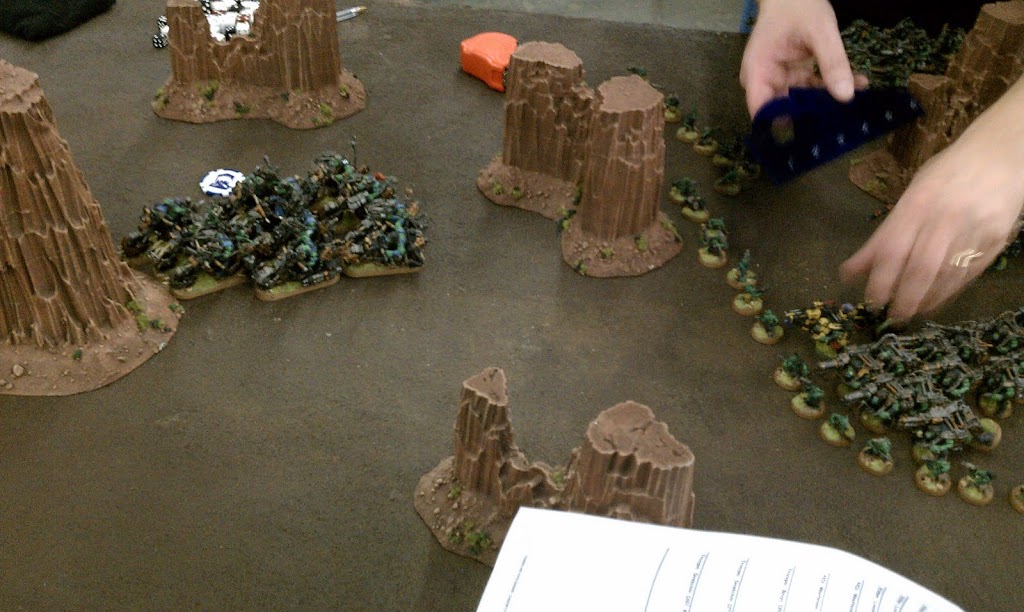
So Neil was obviously doing the same calculations in his head, because he craftily deployed like this, with his Nob bikers in reserve!
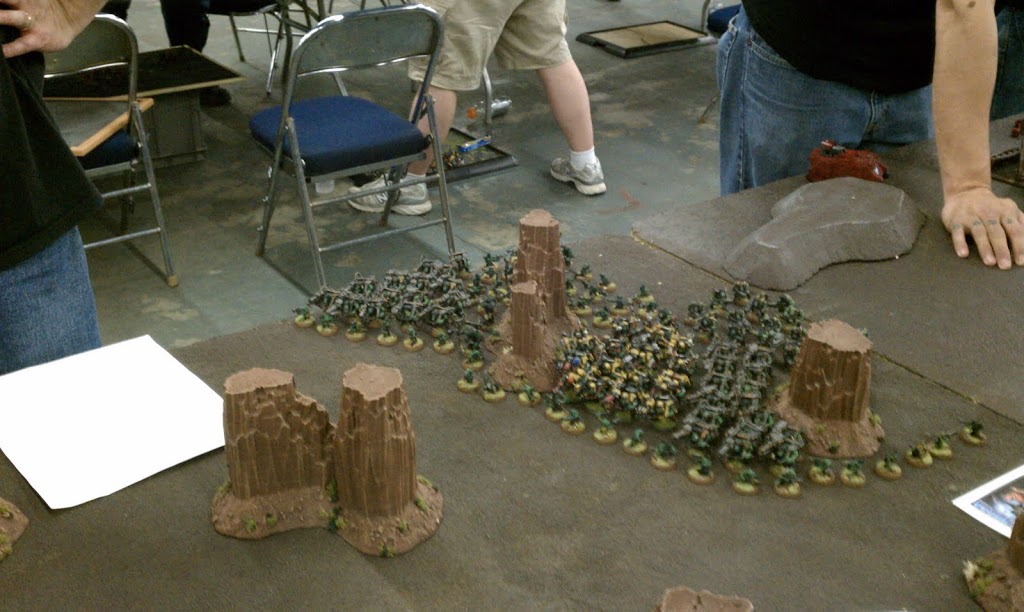 |
| Picture 3: The orks build a castle |
So he has his massive Loota gunline protected by 60 Grots, with the Boyz squad ready to respond to any assault on his castle. With the bikers in reserve, they would get the jump on ME when they showed up. I could try to rush the castle, I could certainly eventually overwhelm it without the bikers there. However, his grot screen meant it would be turn 3 at the earliest before I could reach even a single Loota squad, and it was likely that the bikes would show up and enter the fray on their terms by then. Well played Neil, well played.
This called for a drastic change of plans, so I turned the fleet around and made for the corner!
 |
| Picture 4: Change of plans, Run away! |
I have my night shields in front, and everyone else is as far back as they can go.
Neil considers his options for a while, and realizes that I’m planning to wait in the corner until his Nob bikers show up. At that point, I can execute a version of my original plan, which is to shoot the deathstar a ton before engaging. Neil moves his lines up and runs, extending the range of his Lootas by about ten inches.
On my turn 2, I spend a good few minutes eyeballing the distance between my fleet and the Lootas, and conclude that with night shields, I can stay out of range again. I tuck into the corner, and it is Neil’s turn 2.
His bikers arrive from reserve, and now Neil has a very interesting choice to make. Does he zoom them right into my army to ensure I can’t run away anymore? Does he put them behind the castle wall and count on the Lootas to force me to engage?
He decides to turbo-boost up into the center, using the giant rock spire as cover.
 |
| Picture 5: The cat and mouse game continues |
He carefully places all the bikes, and I am going to have a really tough time getting shots on them. Neil also spends a few minutes trying to guess the range to my Raiders, and also concludes he is still outside 42 inches. The castle walls move forward again, trying to bring my fleet into range.
It is now the beginning of turn 3, and my turn to make some tough choices. Neil has placed his bikers well. They are outside my charge range, and In order to get line of sight to them from the direction of my board edge, I would have to come within loota range. I again carefully eyeball the distances, and conclude that through a combination of blocking line of site with rock spires, hugging the board edge, and night shields, I can stay out of range of the lootas for a third turn. I carefully place all my vehicles, and line up some dark lance shots through the hole in the central rock spire:
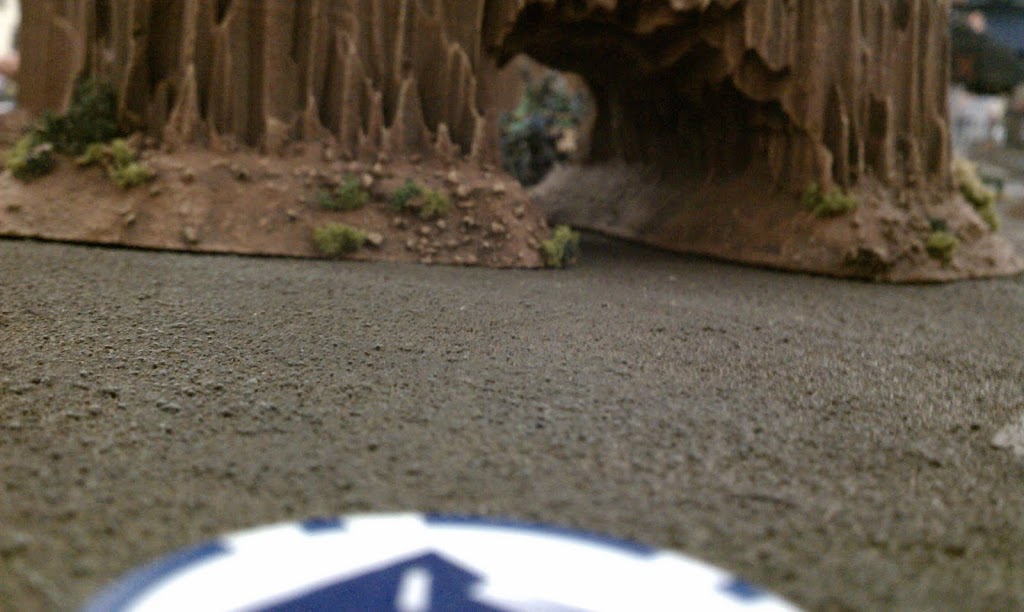 |
| Picture 6: No wonder my dark lances missed, look how blurry the ork is! |
The first shots of the game cause no damage as Neil makes all his 3+ cover saves.
It is now the bottom of turn 3, and I have again deferred the choice to Neil about how the game will be decided. He could commit the bikers and force the engagement, or he could turbo-boost away again. However, because he has to go at least 18 inches to get his cover save the turbo-boost option is complicated. He can go north or south if he wants to stay out of charge range. If he goes south, I’ll be able to see him with my whole army and do a lot of damage, if he goes North, I could swing my entire army south, and be out of charge range of the bikers on the following turn, and tear into the castle before he can re-position.
If he declines to engage for much longer, I am all but ensured a tie, since I can grab all the seize ground objectives, tie the capture and control objective, and surrender killpoints. This would get us each 15 points, and since I was point man this round, that is fine by me. Neil on the other hand is committed to going for the win since his team got to pick the matchup.
Neil gets his pencil out and calculates how much damage my shooting should do to his bikers, and with a grin decides the weedy Eldar have run away for long enough. He turbo-boosts the bikers up into my face, and moves the castle forward again further extending the range of the lootas.
My turn 4. Alright, the cat and mouse game has ended, its time to take some souls! My entire army pivots around and descends upon the death star. I fire everything into them, and I begin to get worried as Neil makes tons of 3+ cover saves. The fact that there are two Warbosses in the unit mean it is almost impossible to get dark lance hits on Nobs. He keeps allocating to the Warbosses and making 3+ saves, and my shooting has a minimal effect.
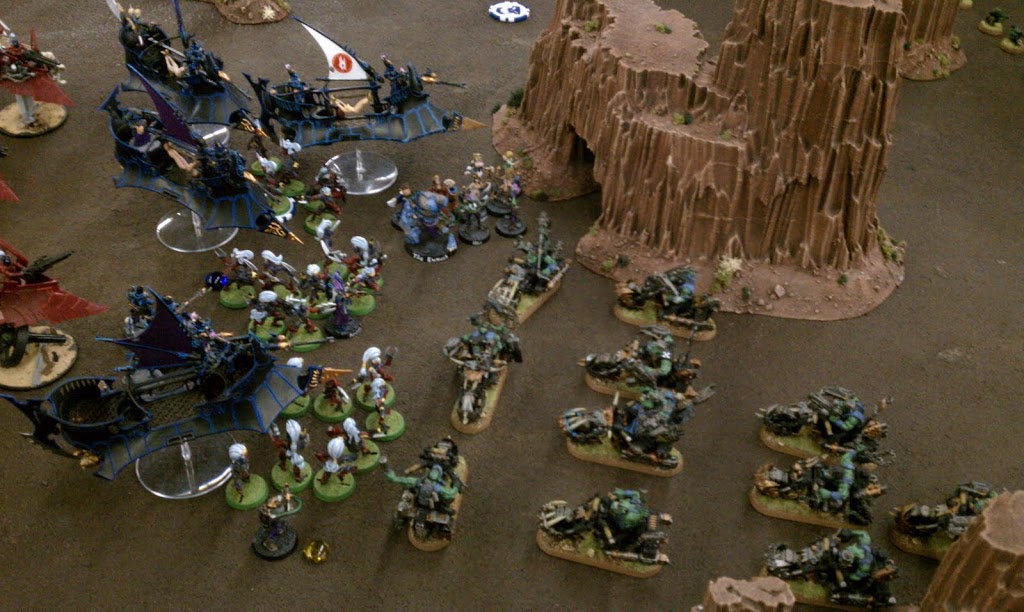 |
| Picture 7: The climactic assault |
All my Wyches and Vect charge into the bikers, and a massive melee erupts. I put all my attacks on the Nob squad and kill almost all of them. I had 15 agonizer attacks and 7 attacks from Vect, and the power weapons started dropping models even with wound allocation shenanigans. Then it is time for the power claws. Neil ignores Vect and tries to even the combat resolution by hitting Wyches. He does five wounds to one squad, and I make all five 4+ dodge saves. He does 5 wounds to a second squad, and drops four of them. When the smoke clears, I have won combat by six wounds. In addition to this, he is within range of my tormenter grenades so has -1 LD. He needs snake eyes to not run away. Neil calmly picks up the dice and rolls snake eyes. Alright then, that’s how it’s going to be.
It is Neil’s turn 4. I am now within range of the Loota hordes, and a wall of bullets rips into my poor skimmers. he targets the vehicles near the melee, and with so many penetrating hits 3 of them explode, spraying the wyches with shrapnel and no cover saves. Half a dozen of my ladies die and the beleaguered Warbosses get some much needed help. Very cunning!
In the assault phase I even the score by killing both Warbosses and the last biker in a hail of power weapon attacks. My surviving Wyches consolidate toward the Loota castle.
Kill Points after turn 4
Neil: 3 Ben: 3
My turn 5. His deathstar is gone, but so are most of my transports, and I have a long way to go to reach his lootas. He is claiming his capture and control objective in the back with his Boyz squad, and his Grots are steadily moving up to reach the seize ground objectives. The game is still very even. I am likely to win seize ground because I can claim and contest the markers with my venoms, while he is likely to win kill points because he’s going to rack up 3 every turn with his shooting from this point on. Capture and control is likely to be a draw because both our markers are tucked safely behind rock spires.
I have to rush like crazy and try to get into melee with his gunline. I have two Wych squads that are close enough to make it by turn 7. The third one moved towards the seize ground objectives.
 |
| Picture 8: My wyches choose a bad time to be slow |
I split off the Haemonculi so if the wyches get a good run move, they can reach the Grots this turn. The Haemonculi runs to his right, and succeeds in getting out of LOS behind a rock spire. We both hold our breath as I roll for the Wyches run, and I get a 1. They are just outside 6 inches, and are stuck in the open.
I direct all my shooting at the lootas and manage to kill a few. The Grot provided cover save protects most of them.
It is the bottom of turn 5. Neil knows that if he gets one more kill point, he will win that goal, and we will each get 15 points for the game. He moves his northern Grot squad forward. The only units I have up north are Warriors in Venoms, and he knows there is no way I can shoot down 30 Grots in cover. In one more turn they will reach the objectives and threaten to take seize ground away from me.
The rest of his army open fire again. The front Wych squad in the open survives with a few models. Grot cover works both ways! His lootas crucially kill one Ravager, putting him ahead in kill points.
We roll to see if the game ends, and it goes to turn 6!
Ok it is my turn 6, and I can now see a path to victory. It is going to be tricky though. I move Vect up and string the surviving Wyches out, and he joins the squad. They then run forward into charge range of the Grots.
I need to kill more Lootas, and decide its time for some fancy flying. My northern Venoms fly up on top of the central rock spire. It is impassible, but I can balance the model up there, and I pass my difficult terrain tests. They now have a clear line of site to the Loota squads, and the splinter cannons wipe out the unit I damaged last turn! Meanwhile my wyches who stayed behind string out to claim two of the seize ground counters.
My Wyches charge forward, pulling Vect closer (although he is too far away to strike in the assault) in a sort of reverse slingshot engaged. Both squads make it combat and I wipe out the Grots. I use my consolidation move to put the smaller squad in front of the larger one.
On Neil’s turn he makes me pay for my cleverness, and blows up one of the Venoms on the rock spire. This means the Warrior squad inside dies as well, because they have no where to disembark. Two KP in one shot!
Meanwhile the central Loota squad despereately fires into the Wyches, but my consilidation move meant the larger squad with Vect got a cover save, and they survive with a handful of members. The Ork Boyz also fire, and reduce the front Wych squad to just the succubus.
We roll to see if the game ends, and it goes to turn 7!
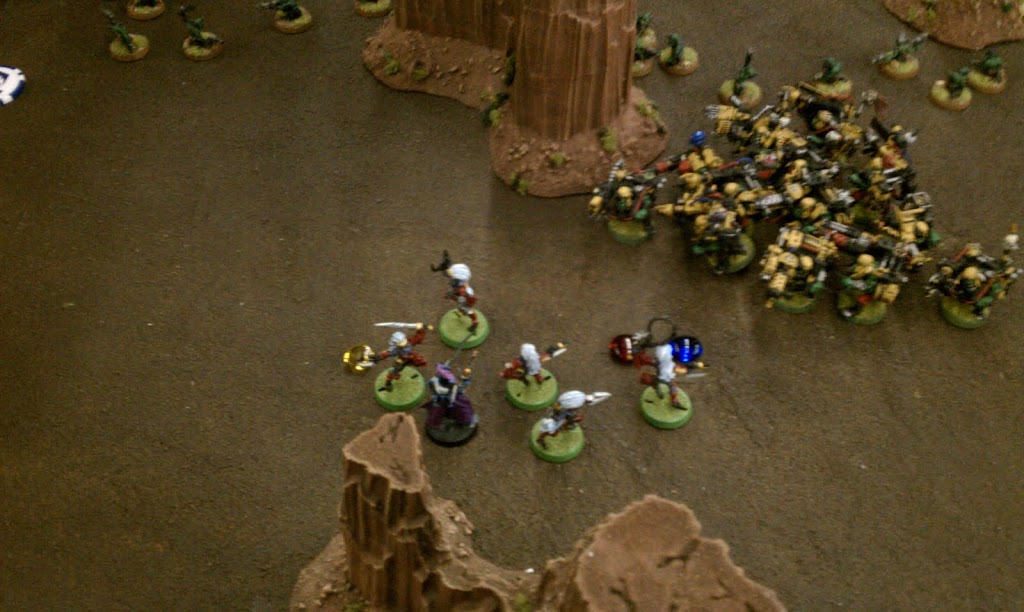
Now its time for my plan to come to fruition. I move my surviving Venom on the spire down, and disembark the Warriors on the left flank of the Grots. The Venom is contesting the seize ground marker there and the Warriors charge the Grots. Because I went to the extreme flank of the unit, only a few Grots got close enough to fight. My five Warriors kill four Grots and take no casualties. The Slavers use their grot hounds to re-roll leadership and the grots pass morale! My brave Warriors are surrounded by 15 or so howling little buggers. On the bright side, they can’t be shot at next turn!
On the right flank I execute my plan to win the capture and control goal. Vect and the rightmost Wych move towards the Boyz squad on Neil’s capture and control marker. Vect join the Wych, and with their run move they barely reach the front boy. The Boyz pile in move pulls them off of the capture and control marker! Bwahaha! Vect kills a bunch of Orks, and the Wych somehow survives the return attacks.
I put all my shooting in the central loota squad and kill almost all of them. The Wyches Vect was originally with charge the survivors and wipe them out.
It is the bottom of the last turn. Neil uses his last Loota squad to blast down the closest Venom. Pulling him ahead in kill points briefly. Then it is the assault phase. We do the Warrior-Grot battle of the titans first. I kill two Grots with my five attacks, and he does three wounds in return. I make two out of three 5+ armor saves and win combat by 1, breaking the Grots and running them down! Go Warriors! We are now tied on killpoints.
The last melee with Vect and my Wych is all that remains. He puts all his attacks on the lone Wych, and succeeds in killing her. I still won combat by a ton, and there are only a few Boyz left. He needs a morale check on a three to pass morale and deny me a killpoint. Neil calmly picks up the dice and rolls a 3!! This fantastic game comes to a end.
I won capture and control and seize ground, and Neil won killpoints. So I won the game 20 points to 10.
This was one of my all time favorite games. There wasn’t a single casualty until turn 4, but the entire game we were on the edge of our seats calculating threat ranges, thinking three turns ahead, and trying to out-maneuver each other. Then there was the awesome combat between the deathstar and three Wych squads plus Vect followed by the dramatic charge into the Loota gunline. The last turns of the game were full of improbable outcomes, with my heroic Warriors beating 30 grots, and his brave Boyz refusing to run away despire Vect slaughtering five of them each turn.
That concludes this battle report, I hope I conveyed the suspense and battle of wills. As always send me your feedback at [email protected].
-Spacecurves

