Warmachine: Painting Hyperion
6 Minute Read
Dec 18 2012

Advertisement

October Privateer Press released the Retribution of Scyrah’s Colossal Hyperion and after a month of this guy sitting on my desk in varying stages I finally had the time to finish him, squeaking out a few “monster, infused” late night session. I’ll go through the methods I used to get Hyperion on the table, some of the pitfalls I encountered and lessons learned that will hopefully help someone out as they tackle their own Colossal.
Guest article by Steven Garcia
Hyperion was pretty straight forward in assembly, boasting all the pose-ability Privateer has been putting into their plastic jacks. The join of the two halves that comprise his upper torso wasn’t flush, leaving a pretty significant gap between within the Starburst chamber and Hyperion’s back. I took sandpaper and leveled out the innards of that join, filling what gaps remained with plumbers putty. This stuffs great because it dries within 5 minutes to a sandable, paintable surface. With that pesky thing called work in the way of my hobby, having to wait hours for green stuff or Milliput to dry is super annoying on the limited time I have. After the short dry time, I used fine grit sandpaper to smooth out the joins again and they disappeared completely. The other assembly problem I ran into, in the last day of painting argh!, was stabilizing Hyperion. He was fine during initial assembly and painting but once I put him all together and handled him a few times his “shin” joints became slightly wobbly, even sitting on pins, with the Iosan jack design making him so top heavy. With this in mind I would highly suggest that you use some type of modeling compound, green stuff, plumbers putty, Milliput etc, to secure both sides of his “shins” to his feet and thighs.
I chose to paint Hyperion in sub assemblies. This let me paint all the pieces with nothing getting in the way of each other and also helps to speed the process somewhat since you don’t have to slow down to avoid a stray brush stroke …can’t stray if the entire piece you’re doing is one solid color.

I love the studio scheme for Retribution, it’s bold and easy to pull off. Best of all you can primer and do minimal work to get it to a “gaming” standard so I’ve stuck with it for my army so far… with the exception of an alternate scheme I’m hoping to showcase in a later article. Another goal I had in mind with Hyperion was to try out the hairspray technique for simulating battle damage, it’s a method I’ve always seen as being more suited to lighter colors and Retribution fits that bill perfectly. After taking a look online and the Colossal’s painting section for Hyperion I decided to incorporate zenith highlighting to further speed the project getting on the tabletop.
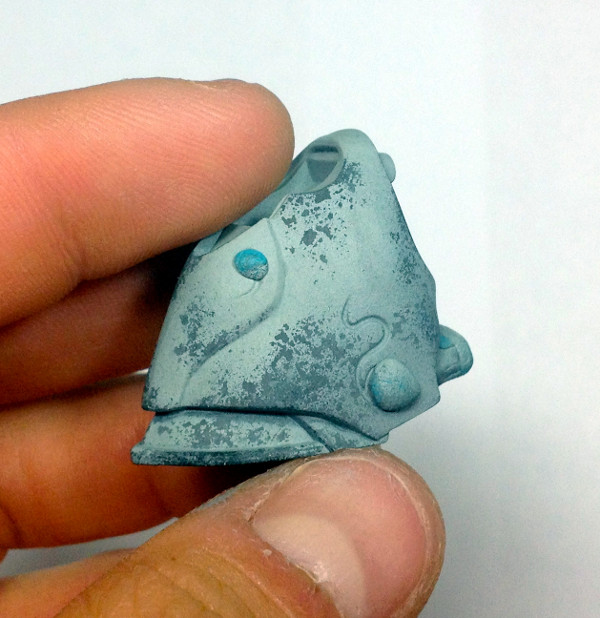
I started by priming Hyperion with a flat black primer from any local hardware store or market. I then airbrushed P3 PigIron onto the metal areas at a 35-40 degree angle to start building up the zenith effect. This was followed by P3 Quicksilver at a 20-25 degree angle and then VallejoModelAir Aluminum front straight over the metal areas. All the metal areas where then covered with masking fluid. (Use an old/cheap brush cause you’ll never use it again after this)

From here I followed Matt Dipietro’s hairspray technique from Privateer Press’ Colossal expansion but to save time I used Isopropyl Alcohol to scrub away the simulated damage instead of water. I don’t recommend this for every model you use this technique on, just ones that timeliness is a concern. You get more control with water if the mini is more for show.
Hyperion was given a coat of “maximum hold” hairspray before a coat of Vallejo Model Color Grey Green was applied with the airbrush. The little bit of green in this shade will sync up well against the purple treatment the metals will be getting later on. Once dry a stiff bristled brush and alcohol were used to rub away the top layer, leaving a natural, random weathering pattern.

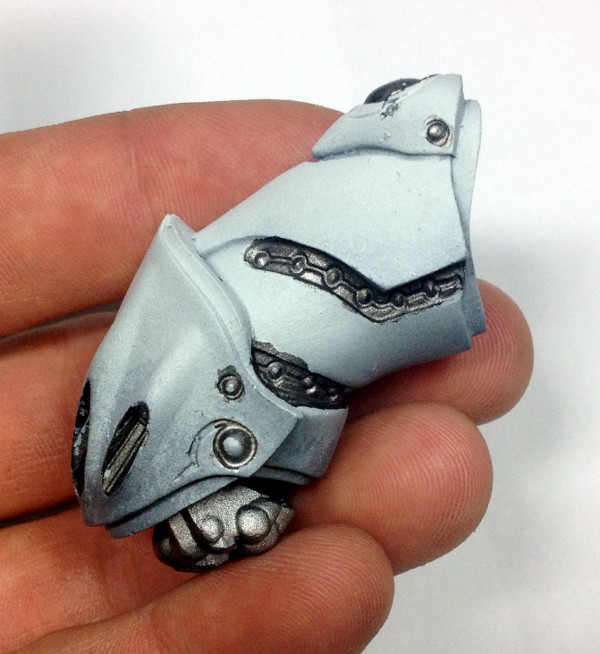
This was followed with another coat of hairspray applied with the airbrush. Once dry, Hyperion had a coat of Citadel Foundation Astronomican Grey applied from a 50-60 degree angle. The color transition is starting to come through from the zenith effect at this point.

The process was repeated with another layer of hairspray and Citadel Layer Ulthuan Grey from a 35-40 degrees angle.

One final repeat of the process with P3 Morrow White from straight above the model before “scrubbing” off the battle damage. The first two pics below show how thin the layers are being put on top of one another, you can see the previous layers showing through slightly. (Also removed the masking fluid protecting the metals completed earlier)

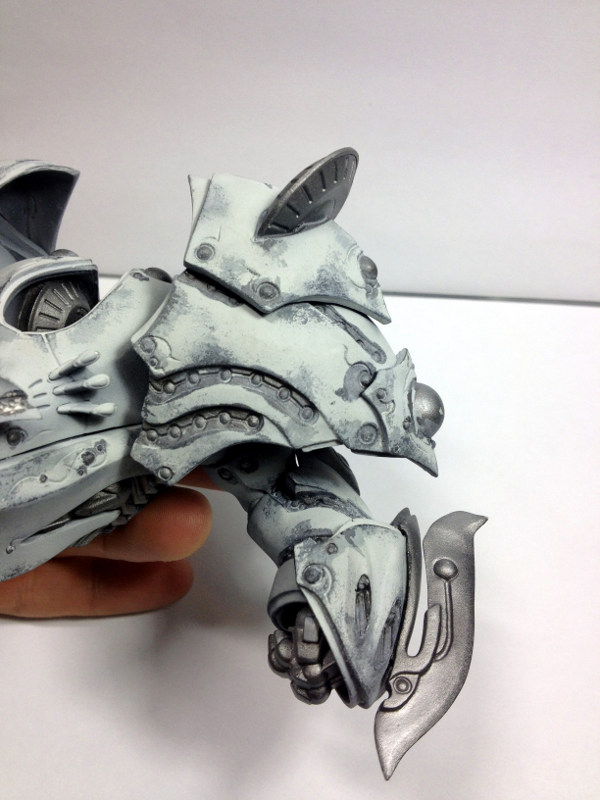
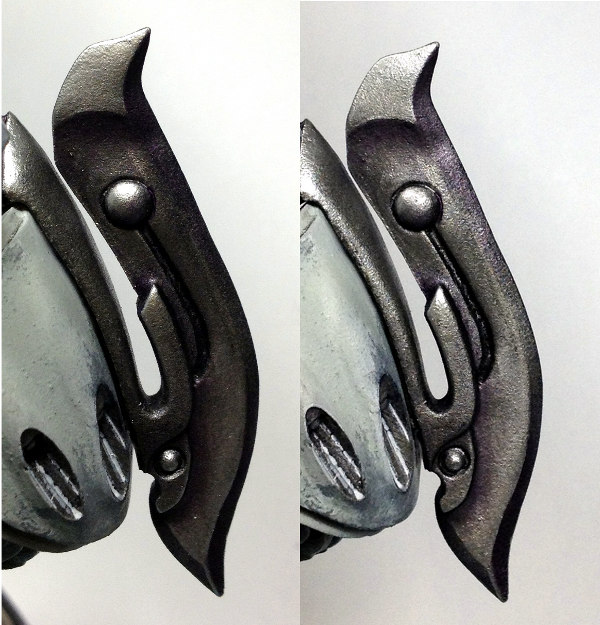
The metals started on Hyperion received an initial 1:2:5 Winsor&Newton Lamp Black: Dioxazine Purple: Mineral Spirits, after applying a gloss varnish to those areas with the airbrush. The whole model received a matt varnish to seal the oils. I went back into some of the larger areas of bare metal like the nodes on his shoulder guards and his forearm blades to give further definition since they’re such prominent areas of the model.
The picture on the left shows additional shades of Citadel Druchii Violet and Nuln Oil, dragging both successive washes toward the shadows following a natural light source.
The picture on the right is reclaiming the lights starting with P3 Pig Iron, working through P3 Quicksilver and a finishing with Vallejo Model Air Aluminum.
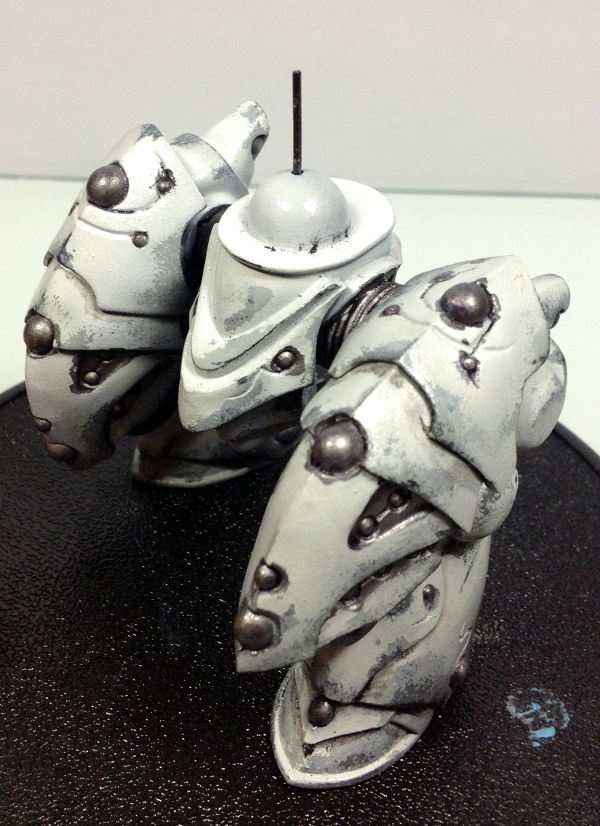
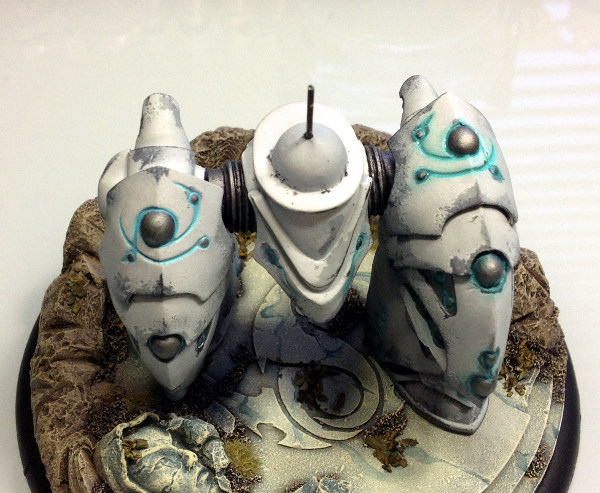
Next was tackling the arcane glow all the Retribution jacks sport. I started with a mix of 2:1:1 Vallejo Model Color Blue Green: P3 Turquoise Ink: P3 Morrow White. Water this down and apply directly to the areas you want the glow (the left leg in the pic below shows what this stage looks like).
From here, I did the ambient light that will bathe the new by areas. This is a 1:3 mix of P3 Turquoise Ink: Vallejo Glaze Medium. Start your brush stroke about a quarter inch out from the source and drag it in. You’ll want the mix to go all the way into the source so that it lines and darkens the edge of the source adding to its definition. With another damp brush, trace along the outer edge of where you started your brush stroke. The moisture in the damp brush along with it weight from the glaze and water will feather it out. The finished glow is shown on the right leg. Be sure to do this on the metal nodes as well…the ambient glow doesn’t just go one way. In the case of his Starburst chamber, I added more P3 Morrow White to each successive layer with the center of the nodes being the light source.
Some final assembly, a coat of Gloss Varnish, two light coverings of Dullcote and Hyperion was ready for action….happy painting!


~ So what big plans do you have for your Colossals as they get prepared to hit the tables?
Author: Ben Williams
Advertisement
