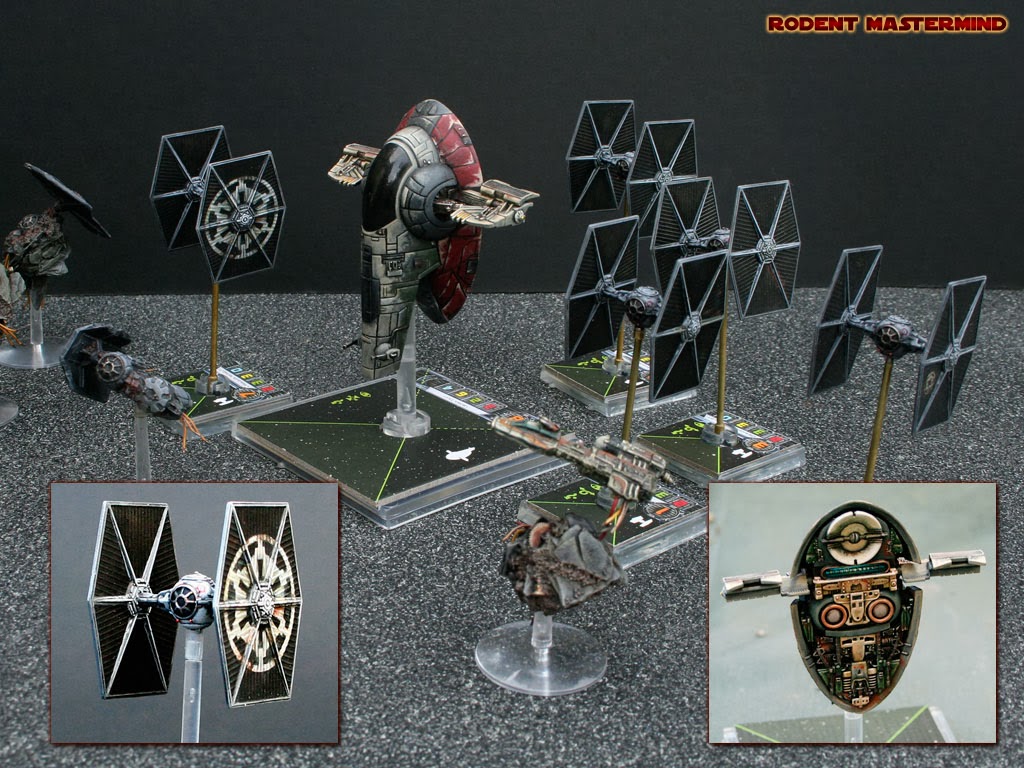
SHOWCASE: Stunning X-Wing Repaints

Most people think FFG’s X-Wing minis look fantastic out of the box. But some folks go above and beyond!
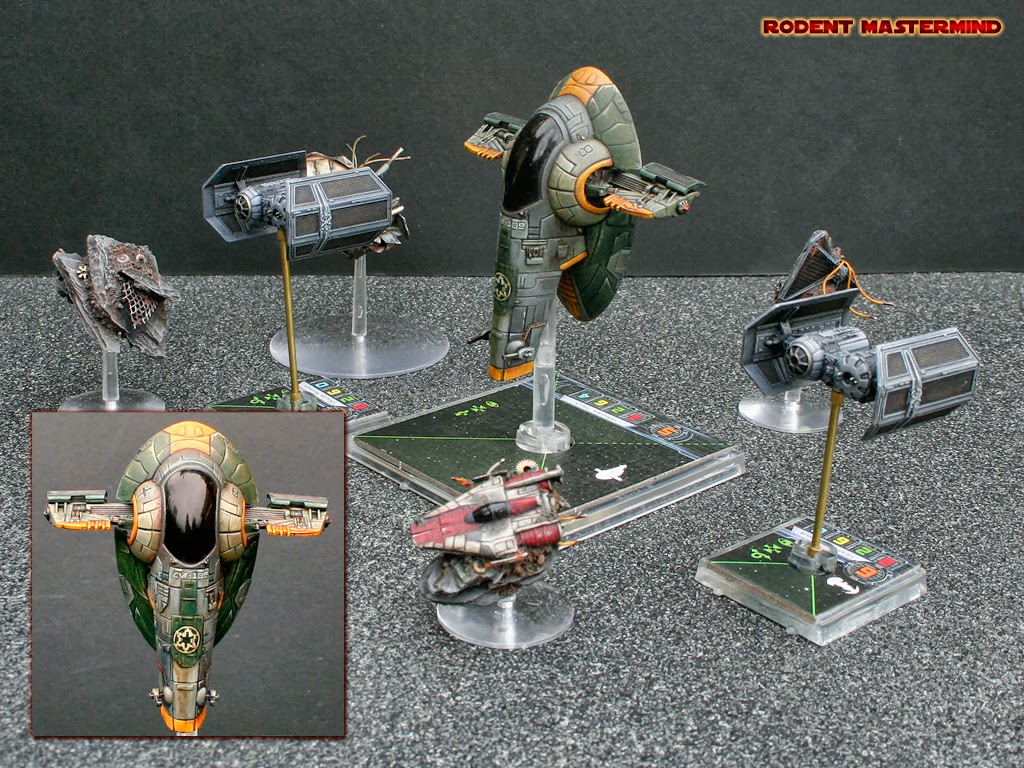
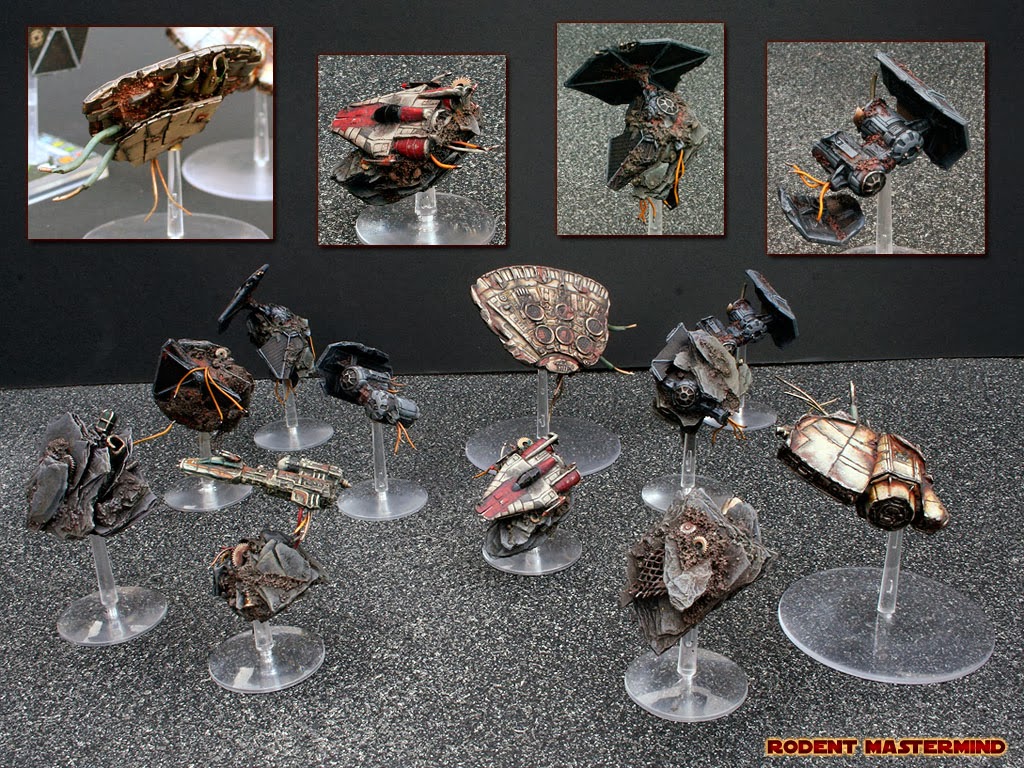
One thing I find when painting such small models is that I need side projects which are a bit faster and messier to break it up a bit. The “Asteroids” filled this role for me. The basic bulk is made out of slate, which I break up into small pieces, then push into a blob of putty. This makes up the core of the Asteroids. While working on Epic I found I ended up using Gedeo Siligum occasionally when a turret or a part I needed was out of production. I found I could scratch build a template and then cast out the parts I needed. I used this technique to create the wreckage to mix in with the rocks. I also added bits of wire, mesh and parts from broken watches (these are great, get a little baggy of them, you won’t regret it). Once this was all in place I filled any gaps with a mixture of sand and PVA and left to dry. If you work on a batch of these you can get them done quite fast.
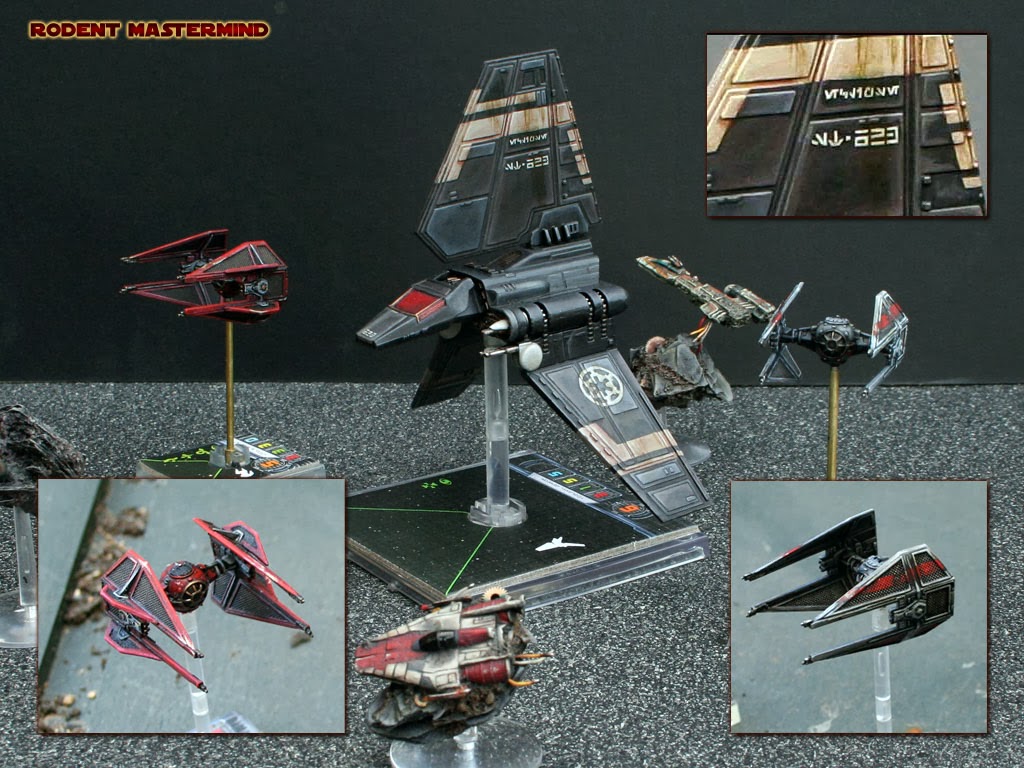

When it comes to painting X-Wing models, I’ve found you can strip them using Dot5 Brake Fluid (though it doesn’t touch the gloss cockpit of the Firespray, this isn’t really an issue I masked it while painting, and left it with it’s original finish). I then thoroughly clean them and give them an undercoat of Black Spray. From there I generally give them a drybrush up to a lighter shade, I lay down about 6 or 7 layers gradually getting lighter and putting less pressure on the brush. I will then put a wash over them. Though this drybrush will mostly be painted over in the finished model, it brings out all the fine details, so it’s much easier to see where panel lines are than working on a pure black base. I will then build up progressive layers of highlight, feathering the edges between each layer and the one beforem as I go. This can be quite time consuming but you get a nice finish in the end.
Here’s more pics on FFG’s site, and even more here.
Thanks for checking out my squadron! –Ratty / Rodent Mastermind