HOBBY SHOWCASE: Painting the Earthbreaker Pt. 1
4 Minute Read
Nov 11 2013

Advertisement
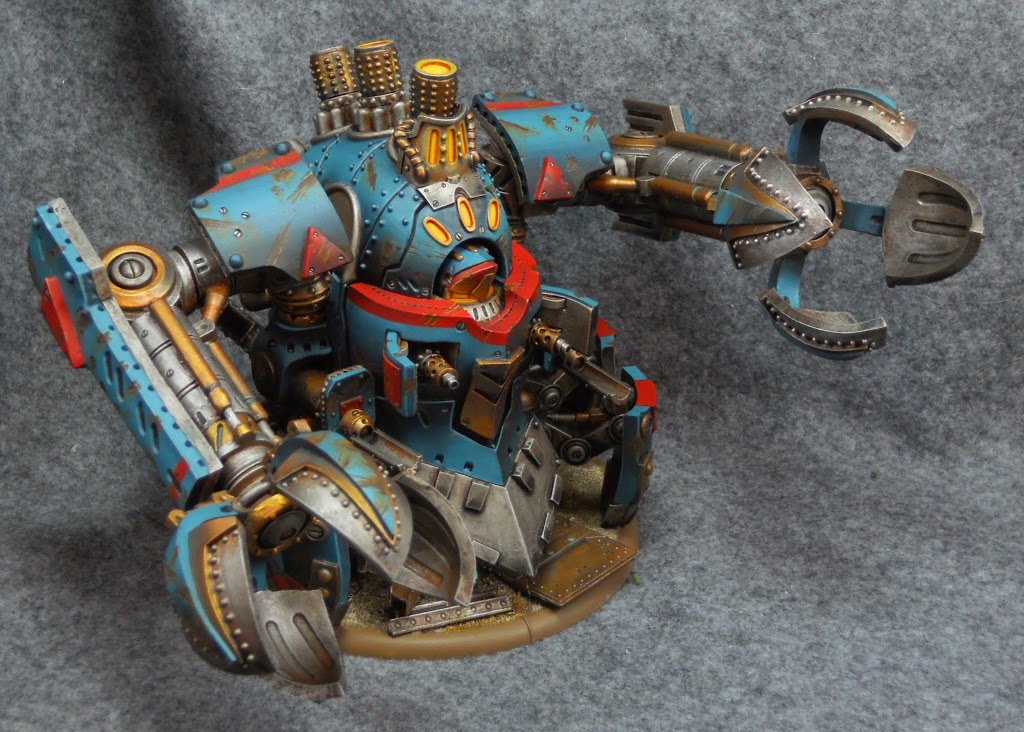
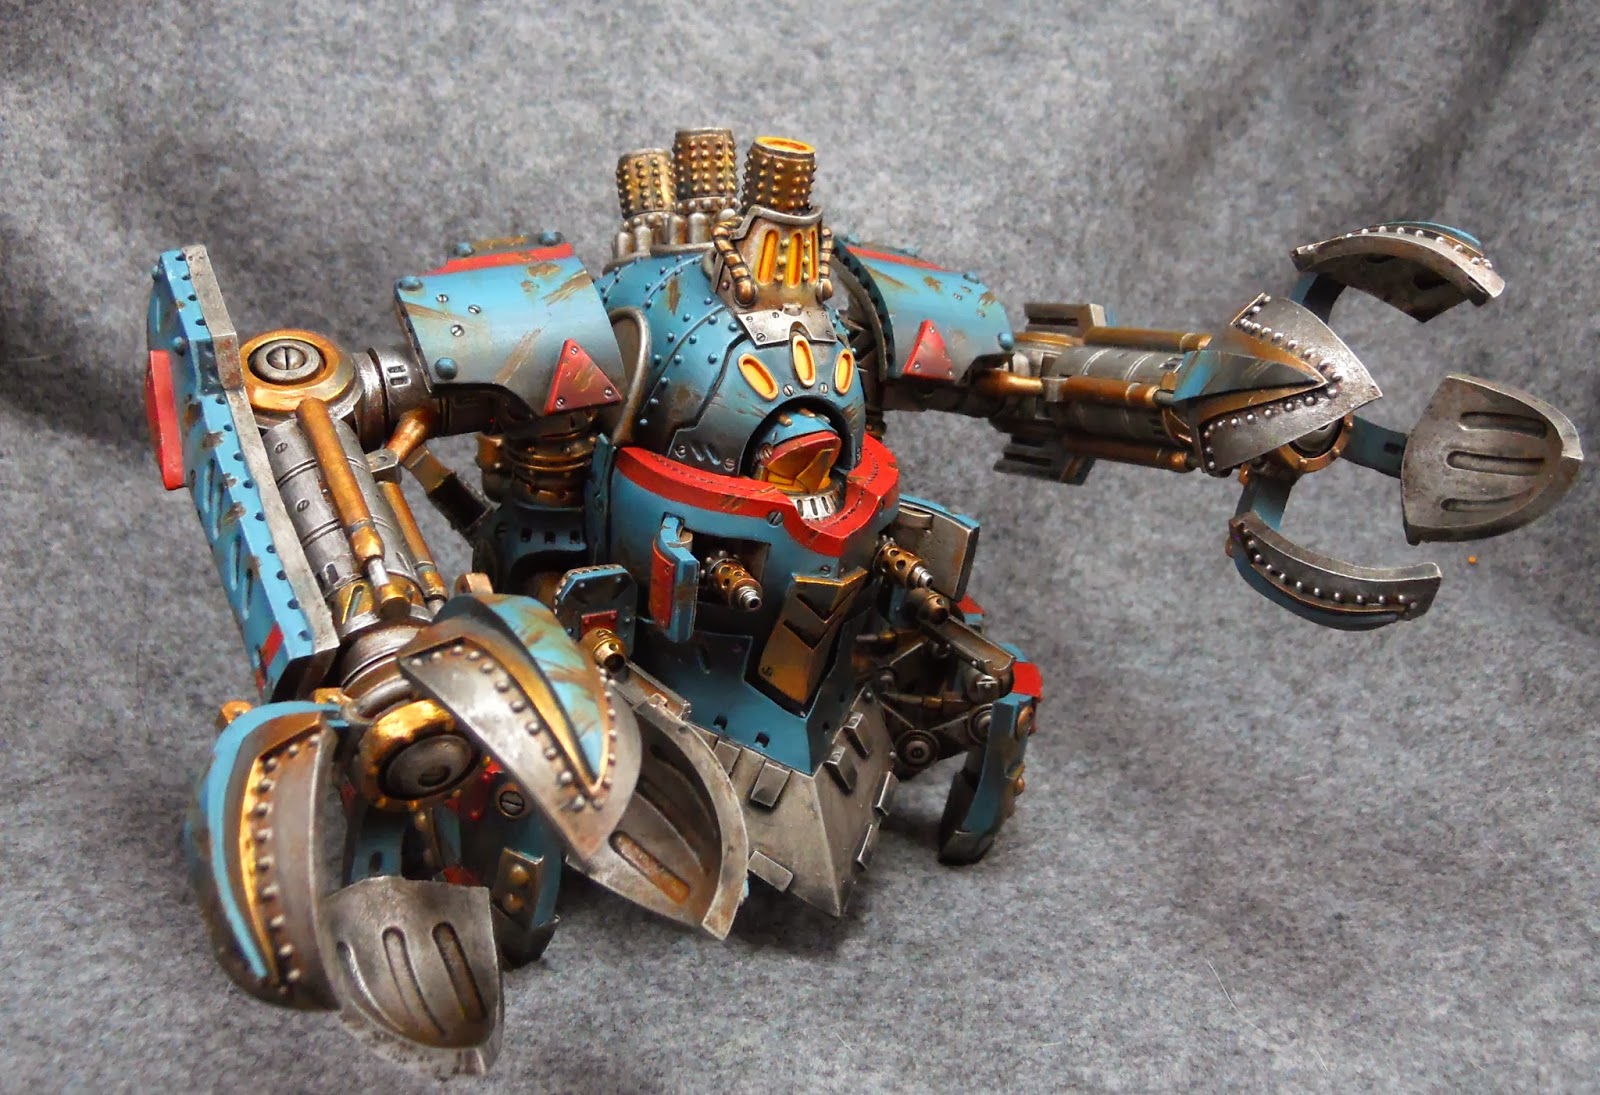
My mighty Rhulic weapon of mass destruction is complete. Here’s the play by play. Grab that paintbrush and follow along my friends.
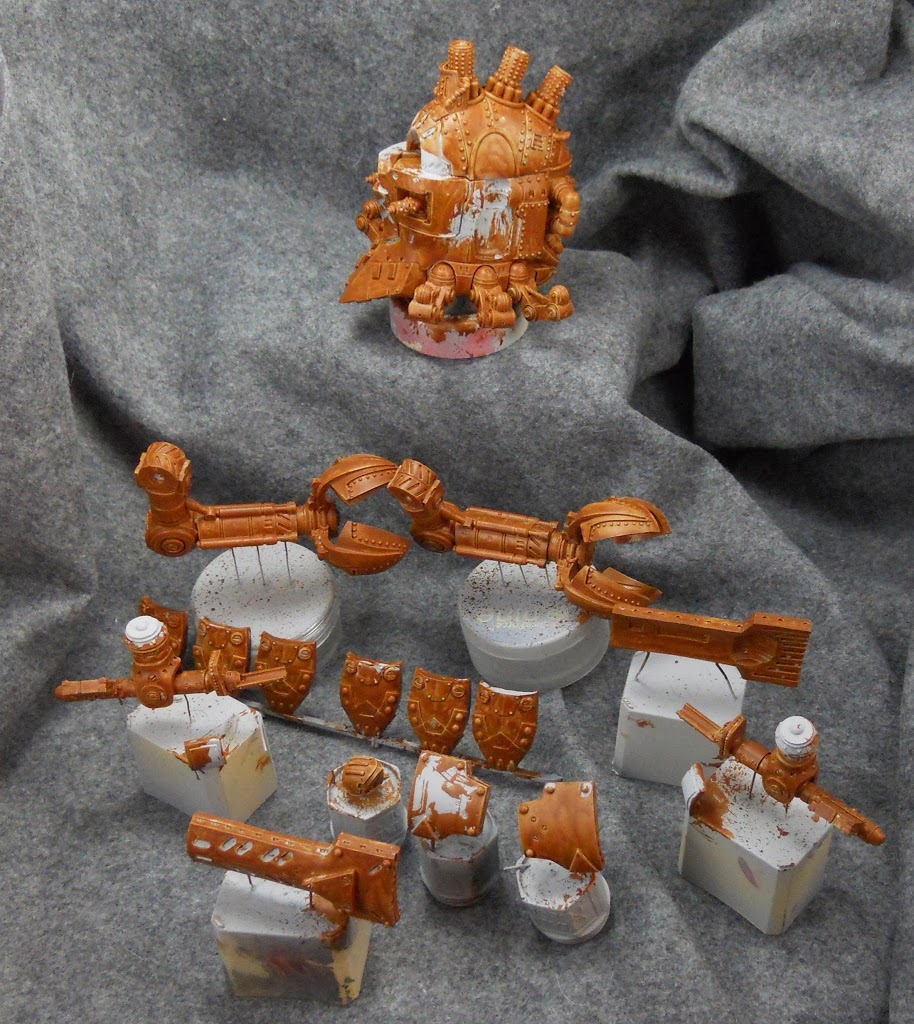
After every piece was cleaned and filed and every gap filled, I began to assemble everything into the most manageable chunks possible. Painting a fully assembed Colossal is daunting for two reasons. First of all many of the parts will be tough to reach with your brush when there’s a big piece overlapping it. Second, the big things are unwieldy to hold on to. It’s important to be able to easily rotate your the model you’re painting, and the bigger they are, the harder this is to do. Even if you insist on assembling all your models all the way before you paint them, I’d recommend at least leaving the arms off this guy.
Once I have my pieces figured out, I pin them all onto something to give me a handle to hold them with. You’ll notice some old GW paint pots, Gale Force 9 flock containers and a few other assorted plastic objects in the picture above. After priming it all with a nice neutral gray I paint everything with Bloodtracker Brown. This color and most of the others I’ll be using are from the P3 line.
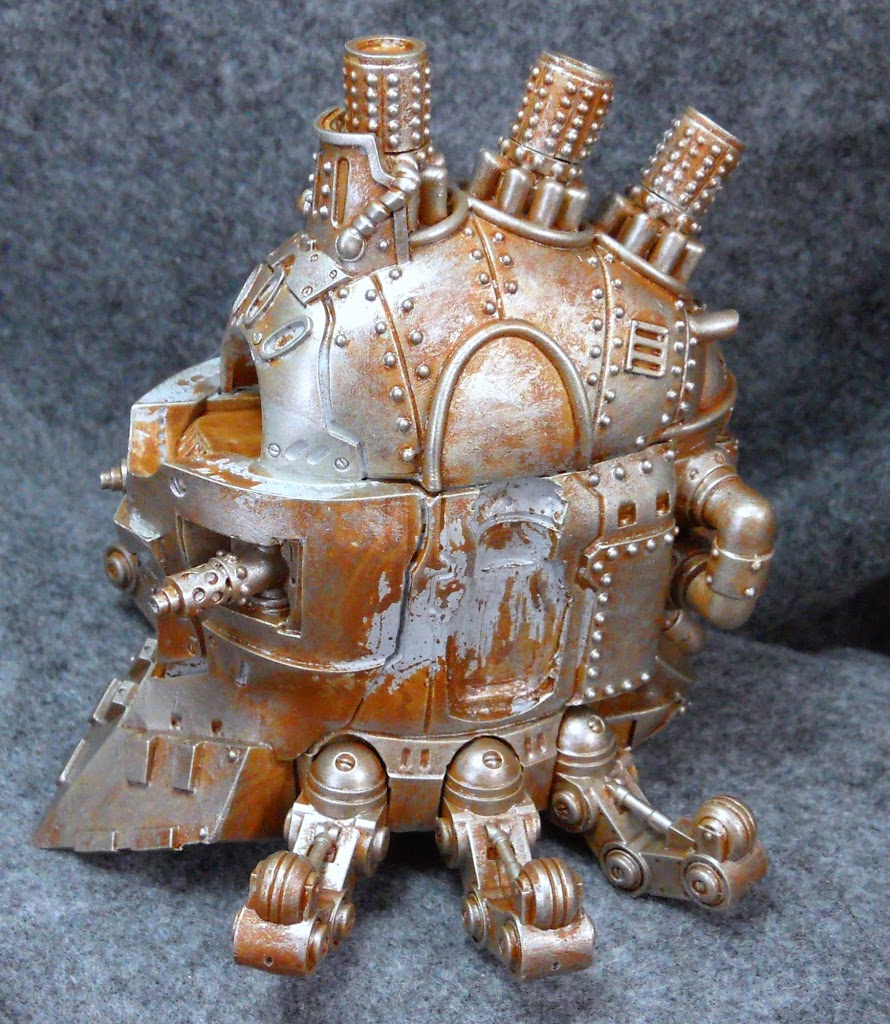
We’ll just focus on the Chassis since all the pieces will be undergoing basically the same treatment. Here it is after getting a nice thorough drybrushing with Radiant Platinum.
Next it’s a custom wash mixed of about a 2-2-1-1 Agrax Earth, Nuln Oil, Guilliman Blue, and water plus a few drops of matte medium to help with binding. All washes are Citadel.
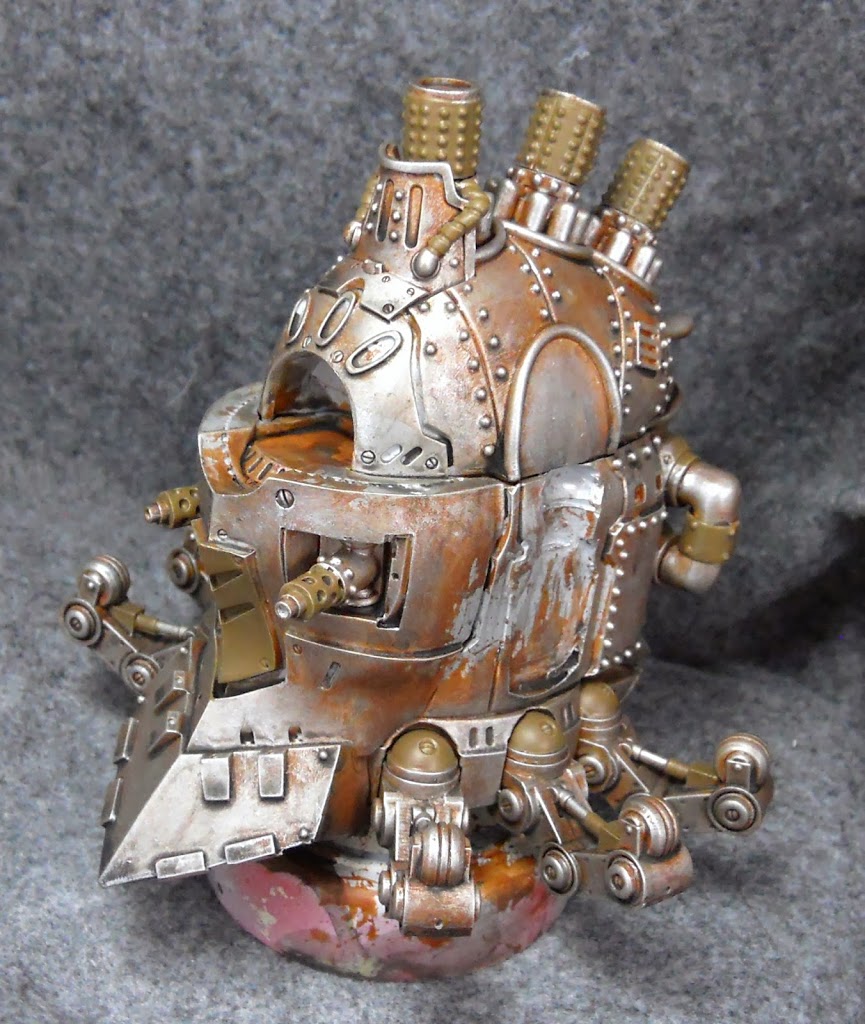
I begin the brass areas with a basecoat of Traitor Green. Different basecoats can give your metallics different hues so sometimes I’ll try new colors to see how they work. There wasn’t anything particularly special about the final result here so I don’t know If I’ll use this color as a basecoat again. Of course, nothing bad came of using it so it wasn’t really a loss either.
The green areas are drybrushed with Hashut Copper, another Citadel paint. The store was out of my usual Molten Bronze. Then the Copper is washed with the same custom wash from above.
A little bit of a Patina is added by applying some thinned down Meridius Blue mixed with Agrax Earth to some of the recesses. Then everything is drybrushed again, a bit less vigorously this time, with the Hashut Copper followed by some Rhulic Gold.
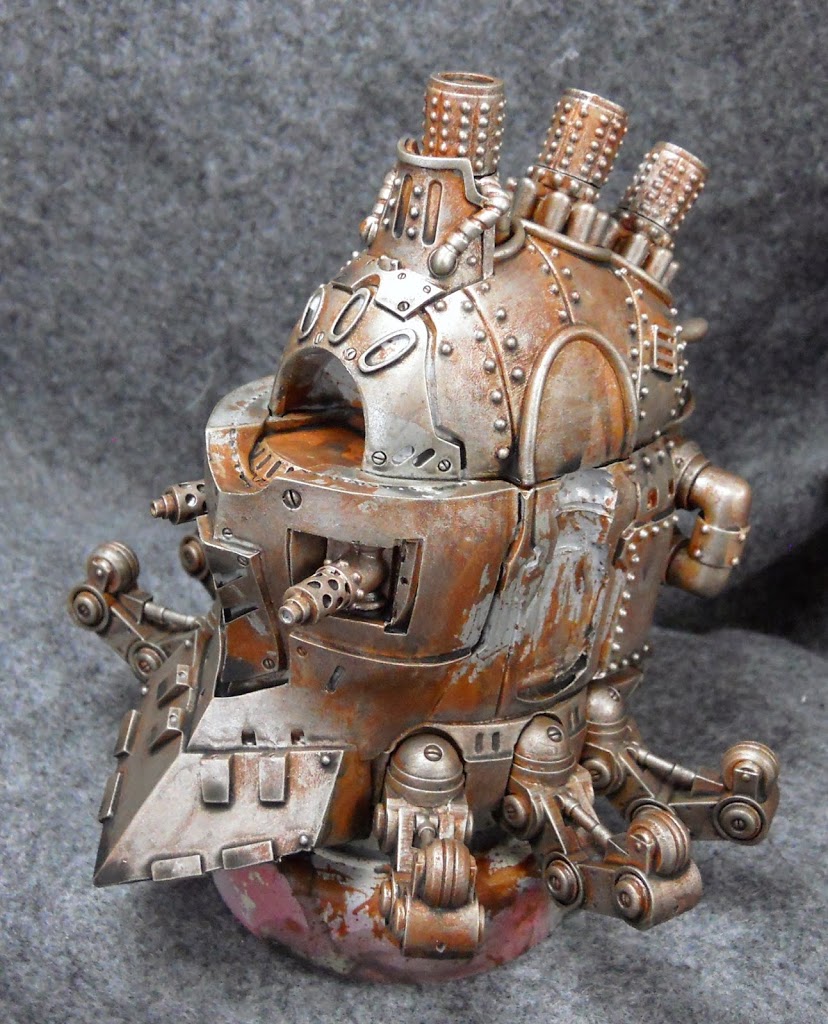
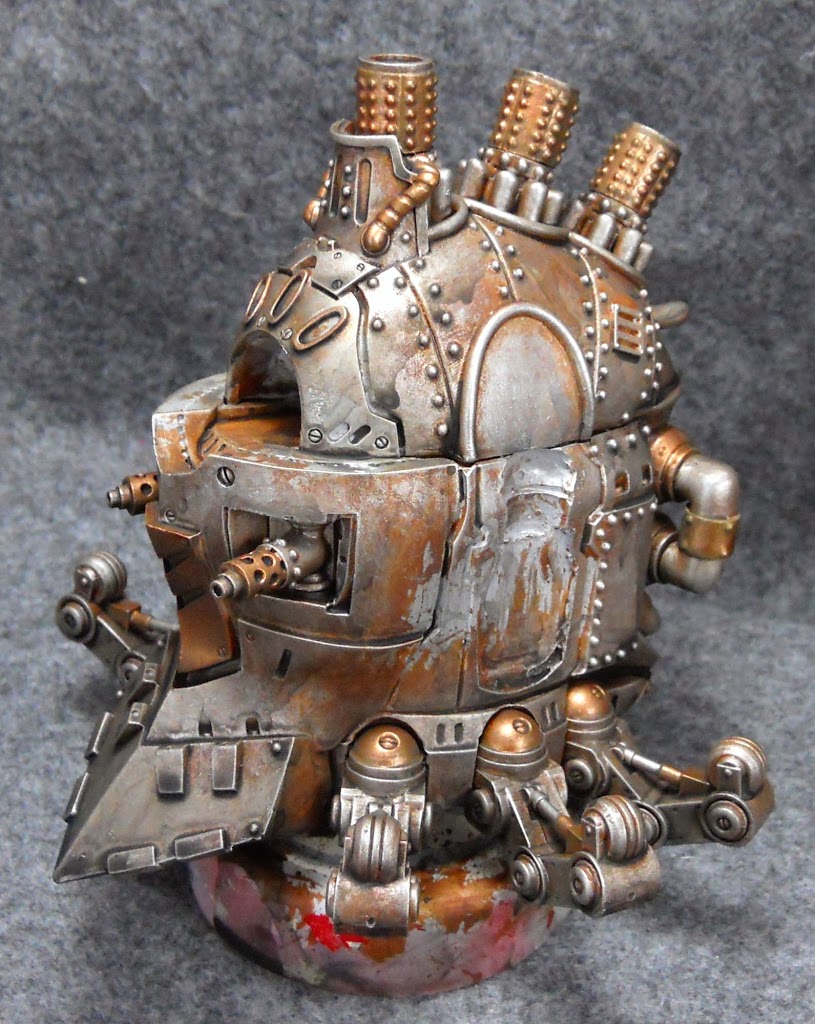
Then I begin the Chassis by giving it a basecoat of Coal Black. As you can see, the color is not really a black by any means.
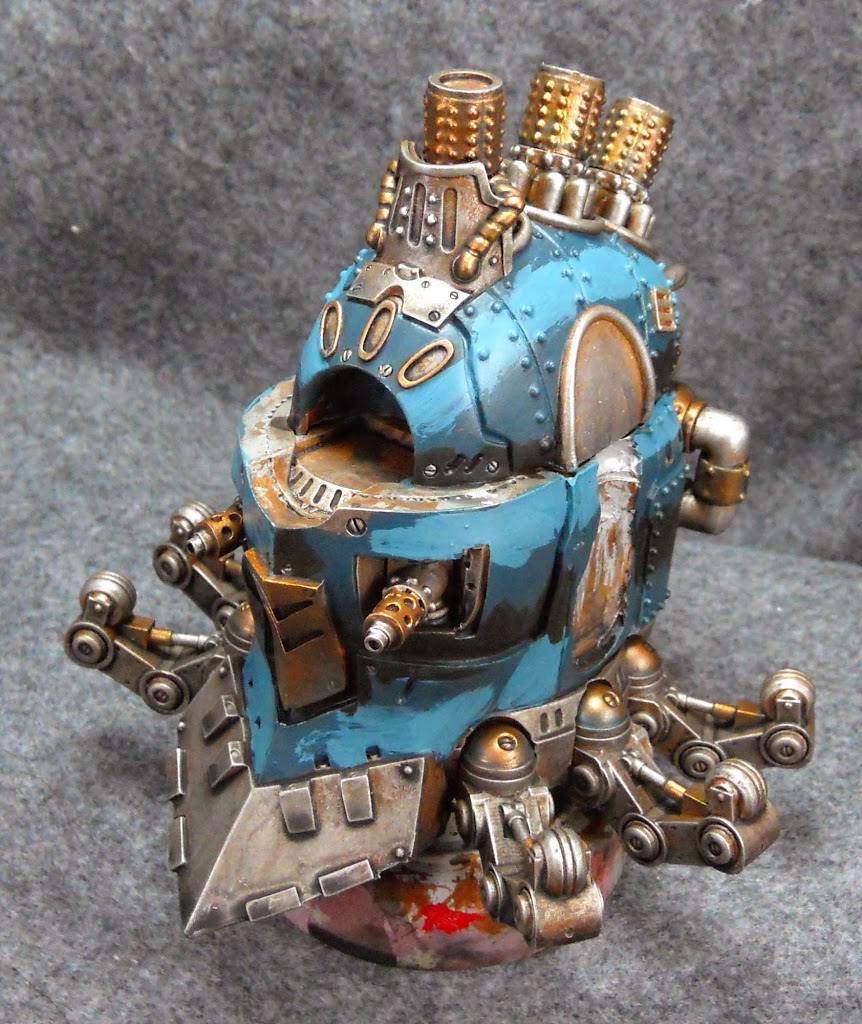
I apply the highlights and shadows boldly at first to try to get a sense of where everything will go. For the Highlight I’m using Trollblood Highlight and for the shade tone its Thamar Black toned with about 33% Bloodstone. This earthy orange tone will add a bit of contrast to the bright blue greens.
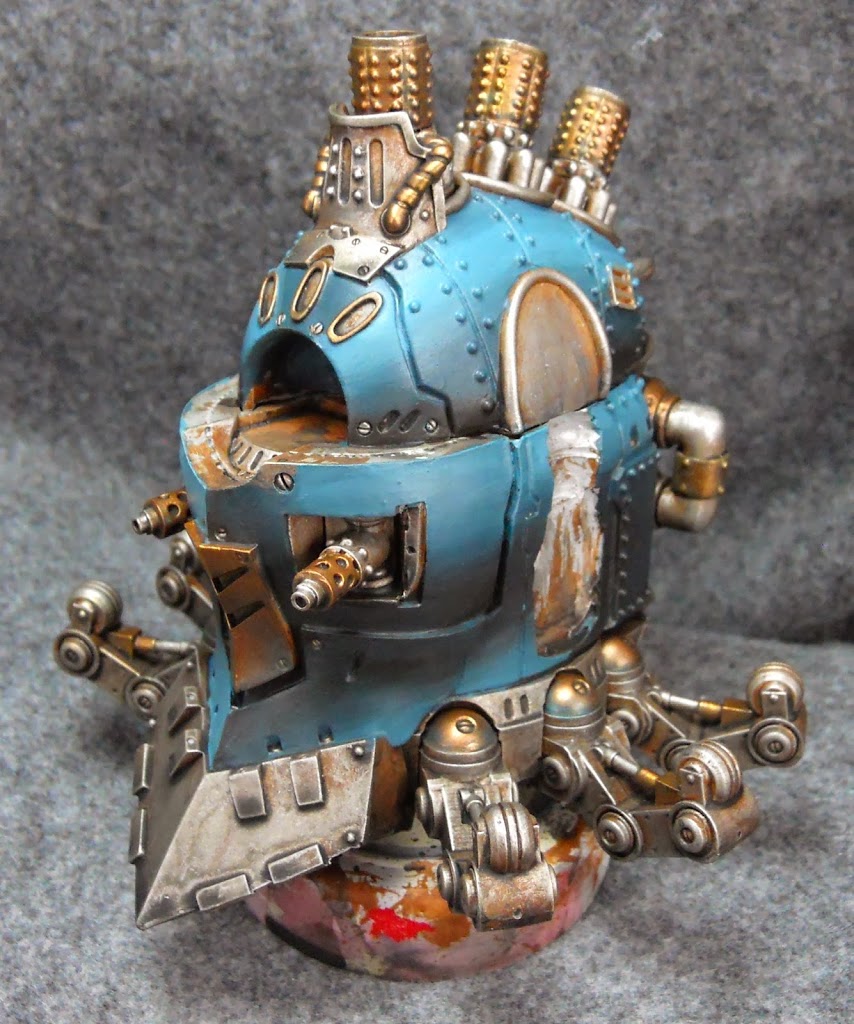
Then it all gets blended together. To blend, I mix up a decent amount of a transition color and add a bit of matisse drying retarder. What I mean by transition color here is a tone that will transition two of those thick bands of color you saw in the previous picture together. So to blend the basecoat into the highlight we’re talking about like a 50/50 Coal Black/Trollblood Highlight mix. This is applied between the two different areas of color, and while its still wet, I clean off my brush, load it up with some of the original color and blend it into the transition color. This is definitely something where trying it yourself and experimenting will help more than any explanation I can write. Big models like this are a great place to start trying wet blending. It’s easier to see what you’re doing and doesn’t require such fine control. Just be sure to use a suitably large brush. I use a nice fat number 3 for areas this large.
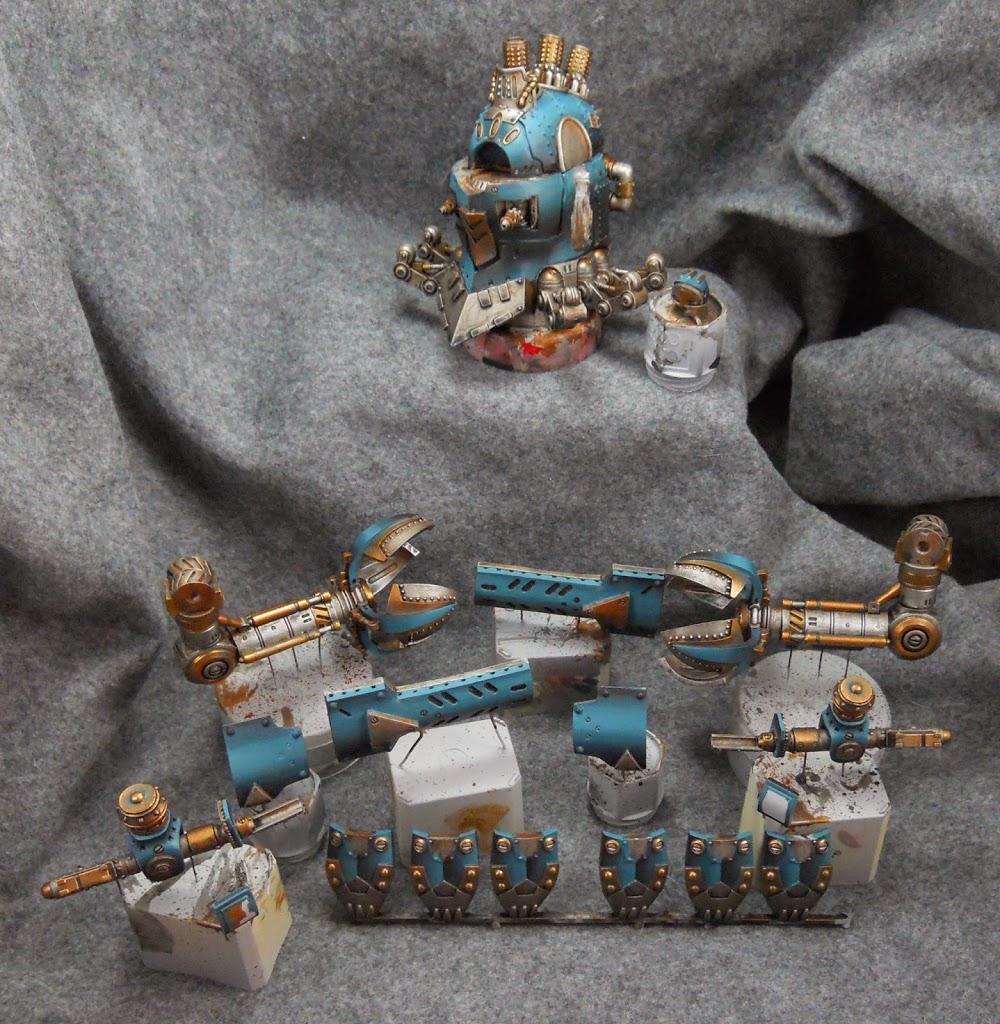
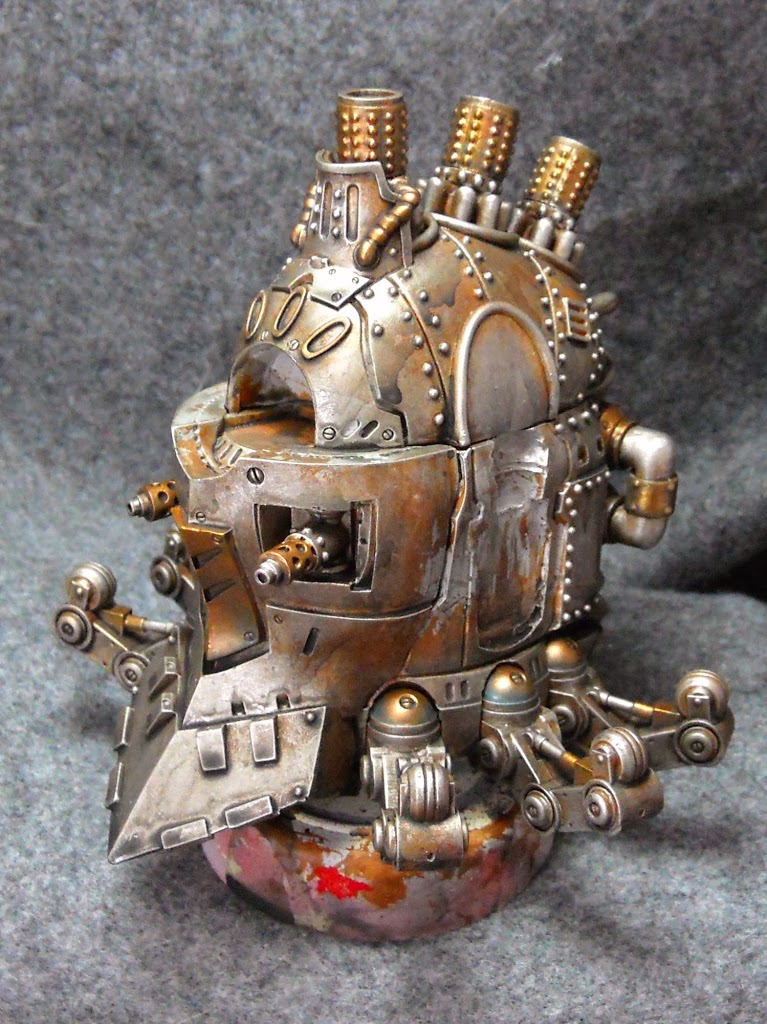
~And to end Pt. 1, here are all the pieces of the Earthbreaker at this stage of painting. Check back for the rest soon.
Author: Ben Williams
Advertisement

