40K HOBBY: Heave, Yaw, Pitch, Roll – Making Dynamic Flight Stands!

One of the best reasons to attend a GT is to see all the amazing, cooly converted armies. A trend I’m starting to pick up on now is flight stands that cant to one side, thereby making the model appear to bank or roll like during a maneuver. I got to wondering how folks were pulling this off, but since I was too busy losing, er . . playing . .. at the last GT I attended I completely forgot to ask folks how they were doing it.
Never fear! A little experimentation and I was able to replicate their results with ease. So, here is how to get a more dynamic flight stand in just about 5 minutes or so.
Here is what you will need for this tutorial:
– A flight stand (duh), plus your flyer of choice and presumably an oval flying base (120mm oval)
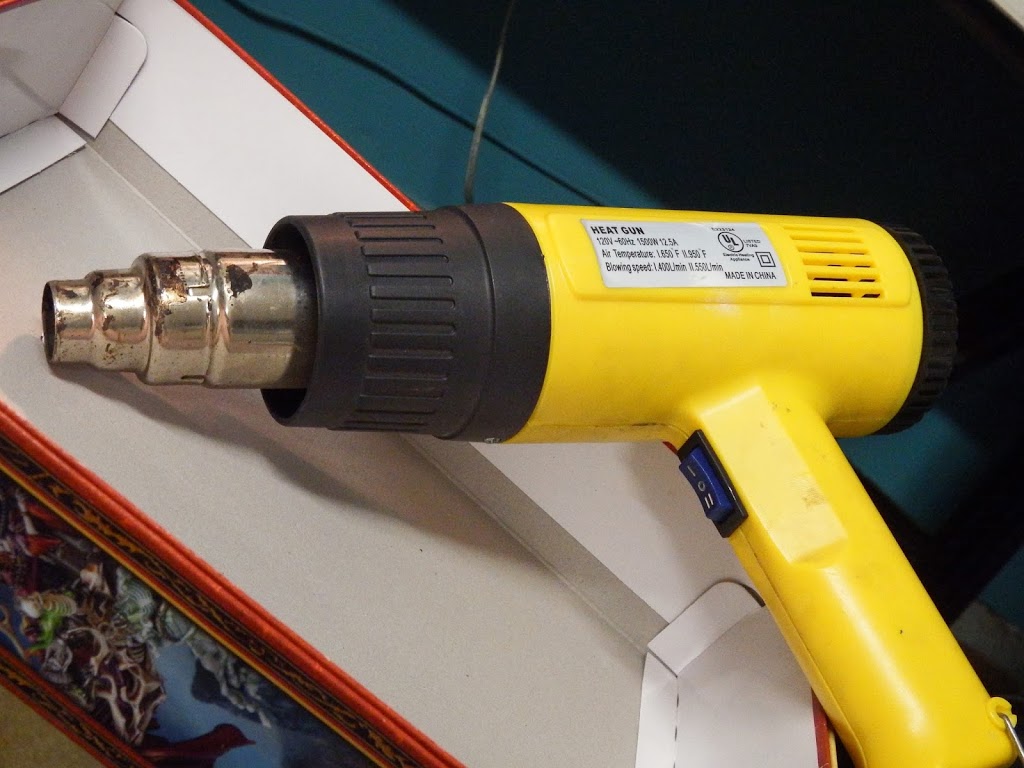
– A heat gun
– An empty box top
This tutorial is best used on ‘light’ flyers. What I mean by light are flyers like:
Heldrakes, Storm Talons, Dark Talons, etc. It could possibly work for Necron Scythes and Valkyries, but I wouldn’t try it on Stormravens or Storm Eagles. They’re just too bulky IMHO, but someone undoubtedly will prove me wrong =) Bear in mind as well that you are going to want to think about counterbalancing your model, either by weighing the model in such as way that it doesn’t tip over or adding some extra base weight. In the former case consider adding some lead weights inside the models wings or the like to help redirect the weight balance. In the case of the later, consider adding some rocks to the oval base, or perhaps a heavy texturing medium like drywall repair spackle.
If I were better at computer stuff, I’d have this cool picture here with red arrows and other signs pointing to the parts of the model or base I was referring to. But since I am a technical heathen, I’ll just show you this weird picture I found while Googling Top Gun. Now I’m a Beyond Two Souls fan but . . . Ellen Page in Top Gun? Weird.
Anyway, here’s how it works. You are going to use the heat gun to, you guessed it, heat the flight stand to the point that it becomes malleable (we learned this word a few weeks ago). The trick is you CAN’T heat up the tip. If you heat up the tip, it will likely no longer be able to fit into the slot intended for the flight stand underneath the flyer. There’s a dirty joke buried in here somewhere, but this is a kids friendly blog post, so keep it PG-13 in the comments, guys. 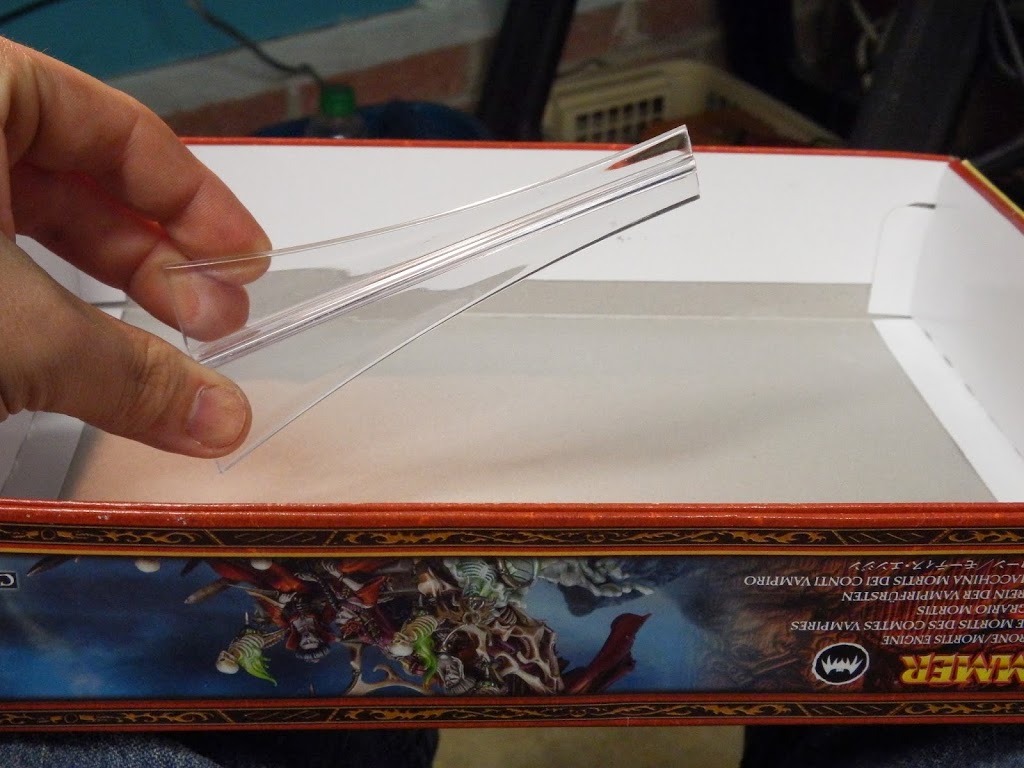
So, take your trusty box top, take you heat gun. You are going to heat the flight stand in the box top. The reason being is something I call the ‘Sauna’ effect, or Saunicus Profundus in the Latin. As the heat gathers in the box top, not all of it will escape. Some will be left behind, raising the temperature of the box top not unlike . . you guessed it, a sauna. Now try to aim at the middle of the flight stand with the heat gun. Use the low setting, be patient, and rotate the flight stand as you do so to try to hit it from every angle. It goes without saying that a heat gun CAN BE DANGEROUS. The heat is extreme. Never aim the gun at a living creature and never touch metal tip of the heat gun.
DON’T RUSH IT. When the flight stand is getting close to ready to bend, it will feel a little ‘bendy’. The heat in the box top will rise and you’ll just get a sense that you are getting close. I like to test it from time to time. Just give it a wiggle and when it’s ready, you’ll know.
When it is ready, and the flight stand is hot enough to bend, simply put down the heat gun, and bend the flight stand in the direction you want it to go. Try not to exceed a 45 degree angle to help avoiding tipping when the model is mounted. Also try to avoid touching the side of the flight stand. Bend it by manipulating the tip only. Again, let’s be careful with our comments below. This is a kid’s show! 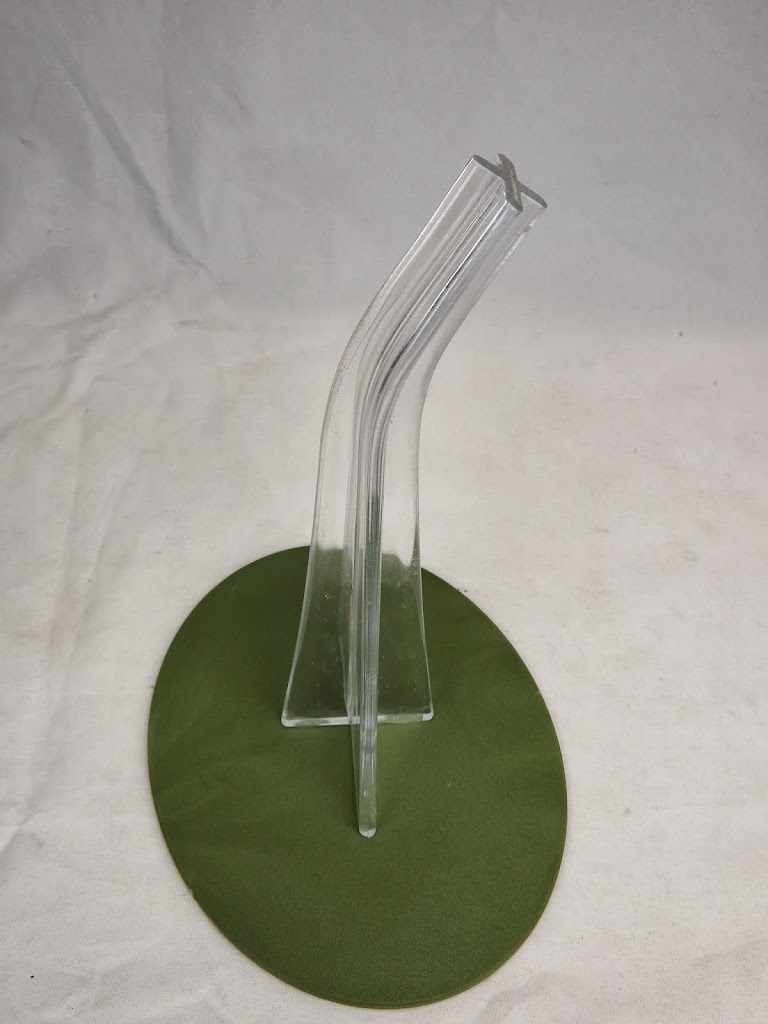 Now, just hold the flight stand in place for 10-20 seconds. After that will be be cool enough that it will stand in place. If you aren’t satisifed with the results, tough. No, just kidding. If you aren’t satisifed with the results, go ahead and repeat the process. Do it now while there is still some residual heat in the plastic. BUT remember that the more you do this, the more likely you are to bend the flight stand in such as way it can’t be bent in the right direction anymore.
I’m done trying . . . make any comment you like. Its unavoidable.
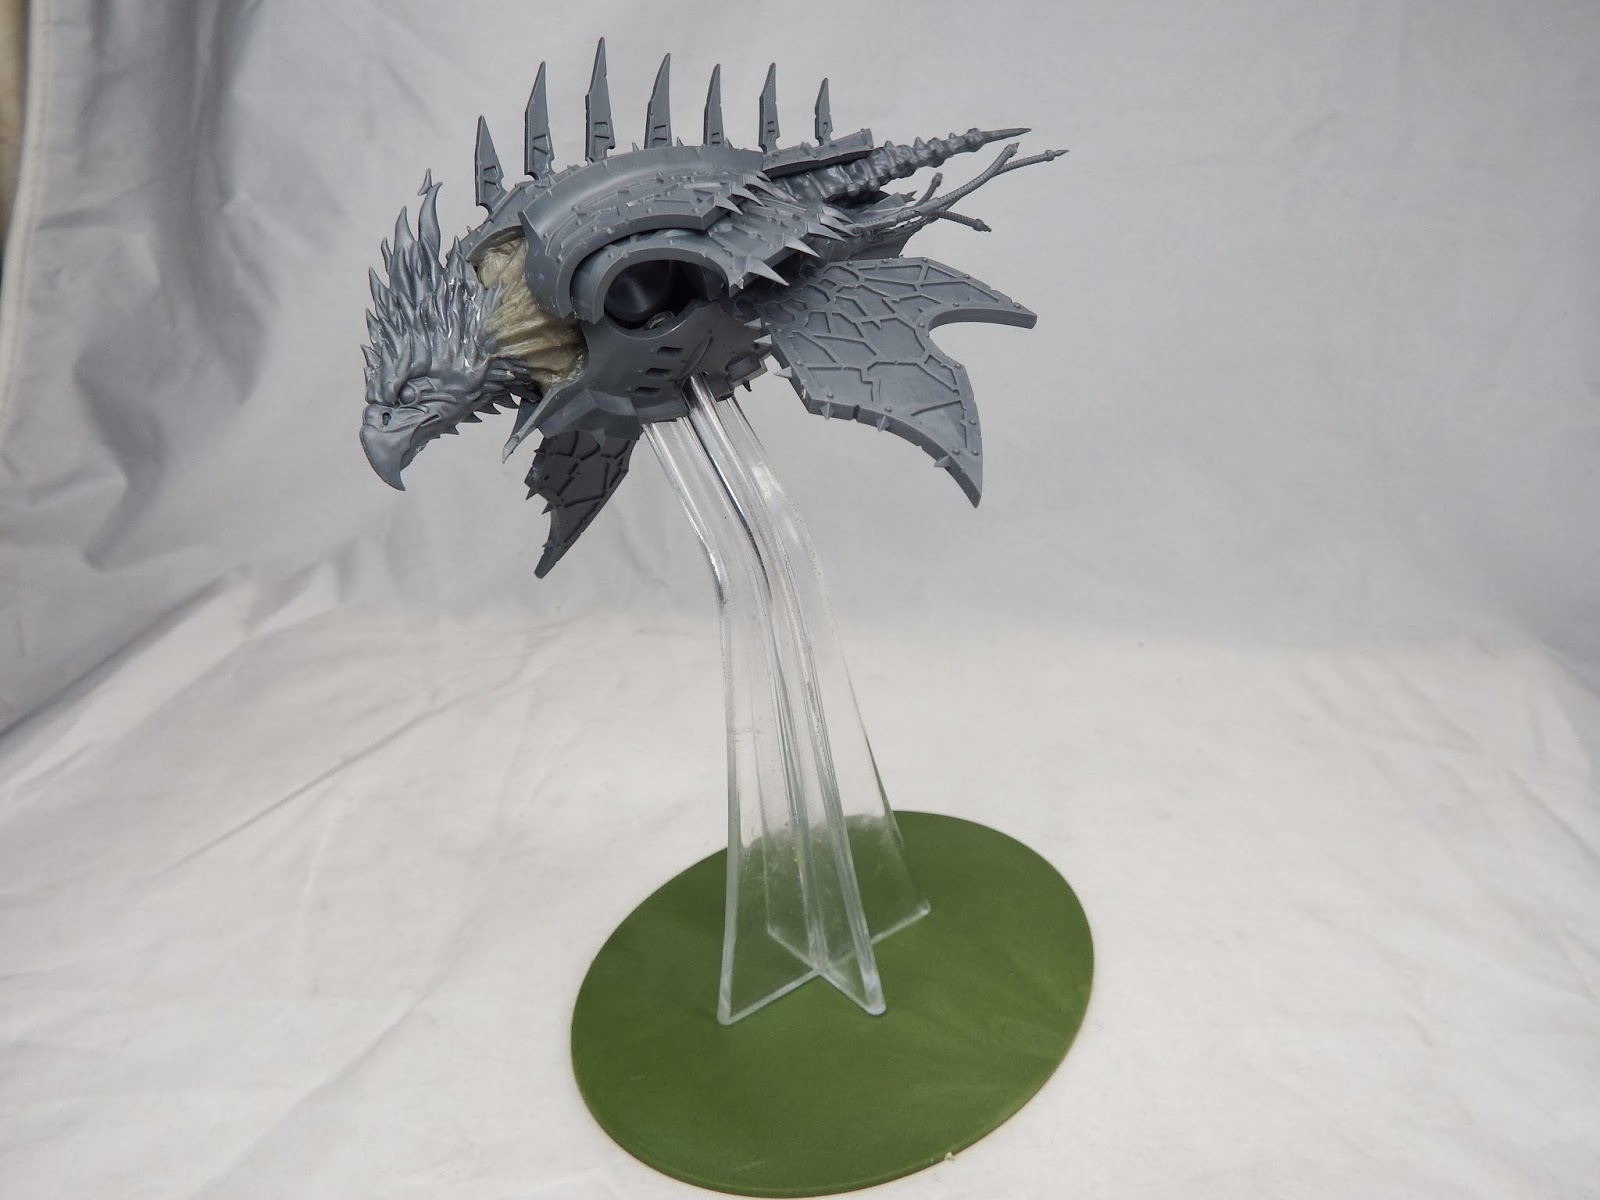
To show you the flight stand in action, here are some sample pics of a Heldrake we are working on for a studio project. 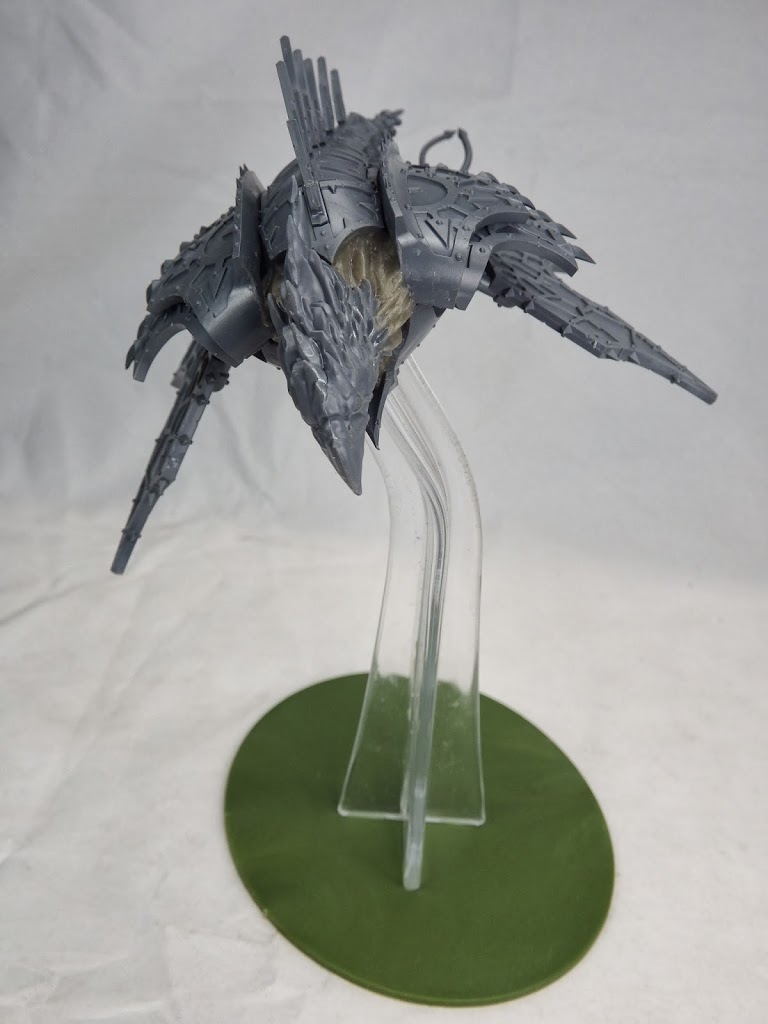 We also did a video further outlining this tutorial on our youtube page. In addition, my cat Felony makes a guest appearance and proves he lives up to his namesake.
If you found this tutorial useful, be sure to check out more of our work on our homepage, or at the very least, like us on facebook! We also have a new podcast called Warcouncil where we share other cool hobby tips!
And til next time . ..
PUT YOUR MINIS WHERE YOUR MOUTH IS! 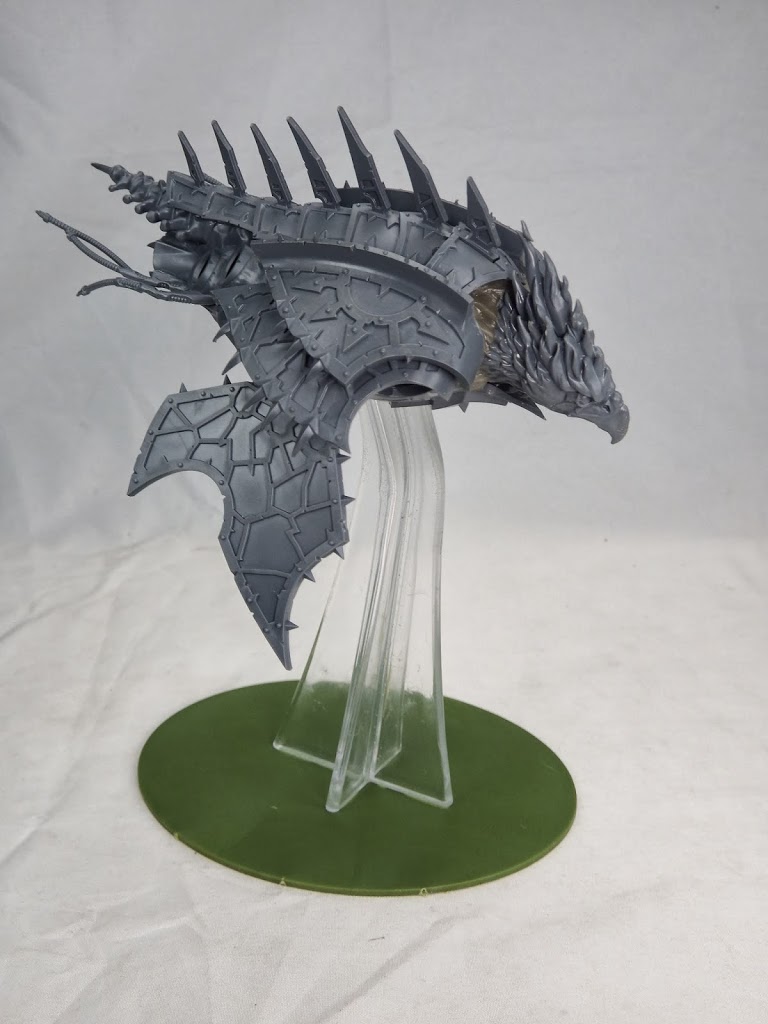
Caleb,
White Metal Games

