X-Wing: DIY Starfield Mat

X-Wing may be the game with the lowest terrain requirements ever. Here’s a cheap and easy DIY Starfield Mat for you to spruce up your games.
As anyone who has played miniatures games will tell you, the scenery adds a ton to the overall experience and enjoyment of your game. Today, I’m going to show you how to produce a respectable little starfield map that will only take you an hour to make using stuff you probably already have lying about. Hey, it sure beats playing on top of plain wood grain, am I right?
As I’ve mentioned before, I started out playing Warhammer 40k as my first miniatures game. Not to get completely sidetracked, but there was such a modelling, painting, and crafting learning curve associated with that game, it comes as no surprise to me, and I’m sure a lot of other folks who come from other miniatures games, that one of the appeals of X-Wing Miniatures for a lot of people is the fact that everything is already assembled and painted, right out of the box.
Sure, I enjoy painting and assembling models now– it’s actually one of the aspects of the 40k hobby I enjoy most, as I’ve become decent (not good mind you, but at least I don’t embarrass myself when I put an army on the table), but for a long time, it was one of the more frustrating parts of the hobby for me.
Anyway, if you’ve played other miniatures games, you know how much cooler it is to play with painted armies on a tabletop with some cool scenery and terrain and stuff. I’m not trying to hate on people who don’t paint and play with books and soda bottles and stuff for their terrain, but there’s absolutely no way anyone can look me straight in the eye and tell me that one of those games isn’t better than the other.
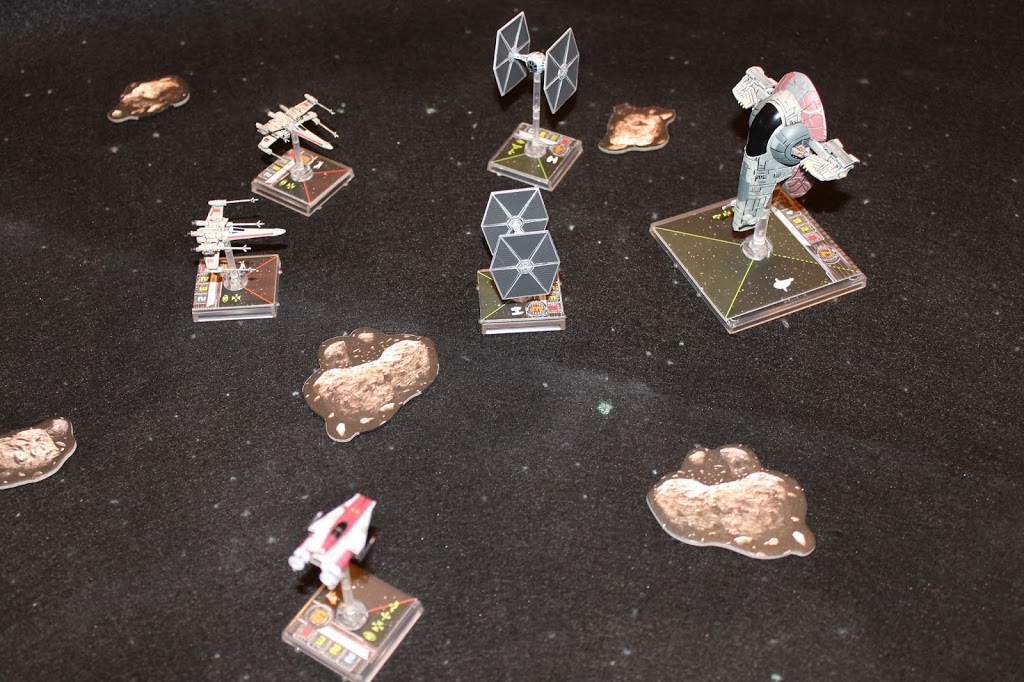
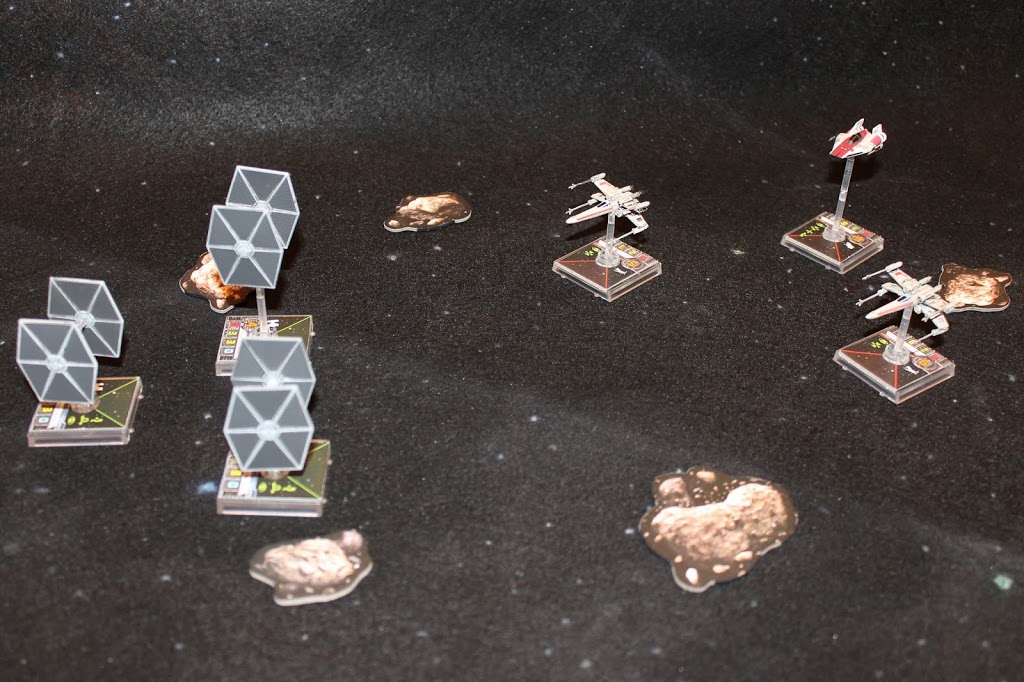
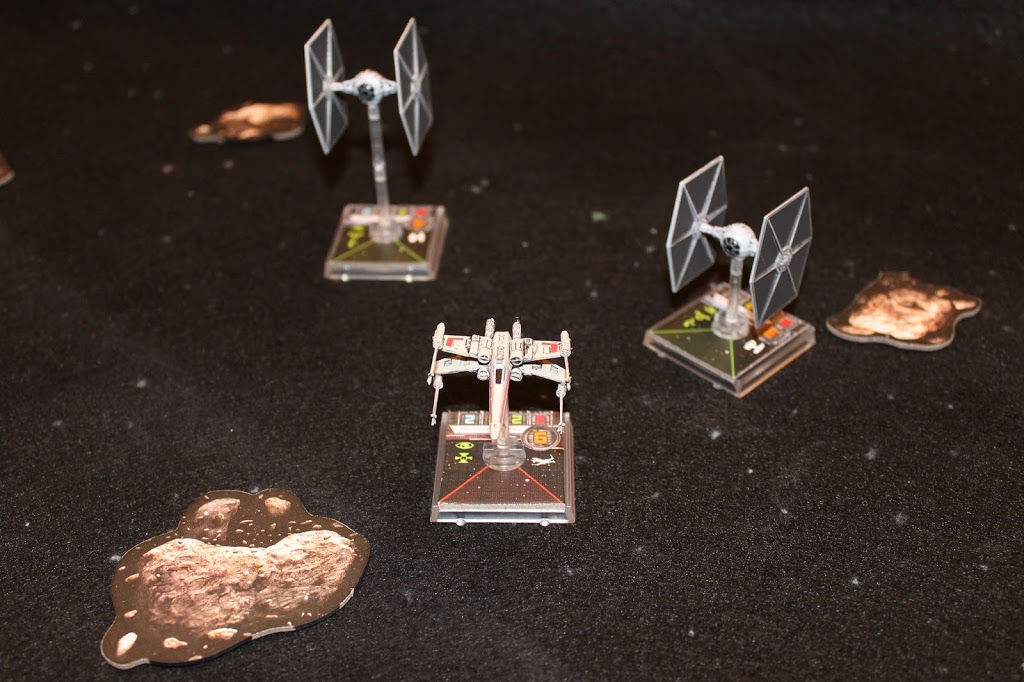
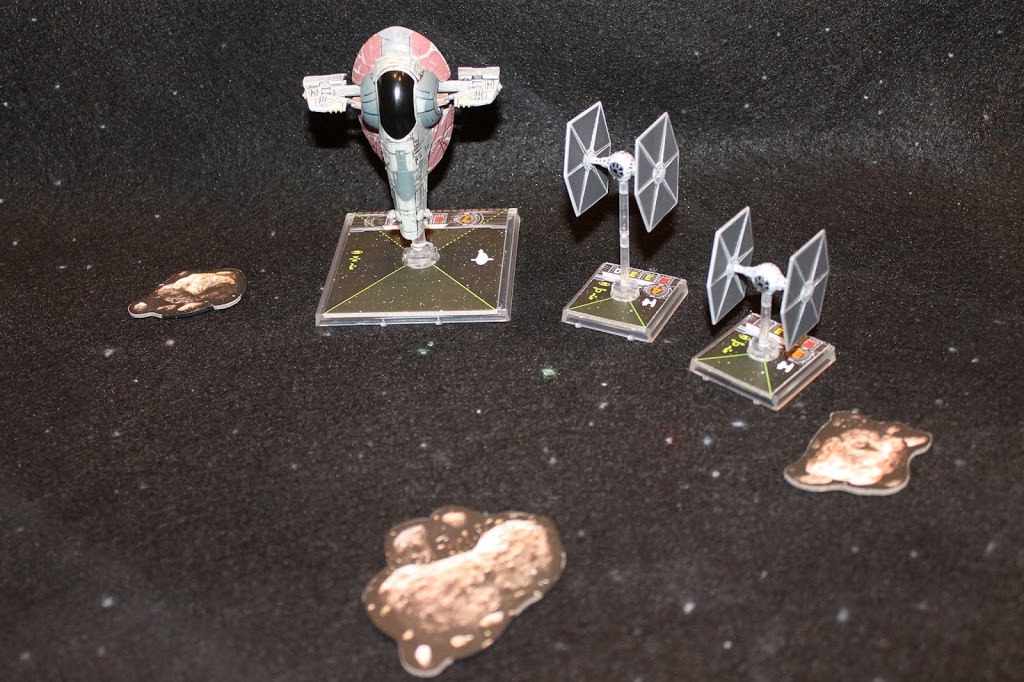
In the background of nearly every picture on TheMetalBikini.com, you see a starfield mat. It’s one I made myself back in October of 2012. There wasn’t much to making it, but it does definitely make the X-Wing Miniatures experience more enjoyable so I thought I’d run you through the steps of making your own cheap and easy starfield mat.
Now, this isn’t one of those 40k rulebook terrain articles where they say, “Oh, anyone can do this with the odd bits lying about your house”- it’s much, much simpler. I don’t know about you, but I don’t usually have 20 square feet of foam insulation, a heat knife, a sheet of 3/4″ MDF, a gallon of PVC glue, and 10 pounds of sand just lying around my house. I also don’t have six weeks without the wife, kids, or job to actually build a friggin’ table I’m not embarrassed to play games on. No dear readers- you might actually have all this stuff I’m going to talk about lying around your house. For serious. You also don’t have to be a master woodworker or painter to get this thing to go.
Again- note the title of this article- this is a cheap and easy way to produce a serviceable starfield mat to play your X-Wing games. Following my directions will not produce the Sistine Chapel of gaming mats. It will not cause you to be the envy of your entire gaming club. It won’t score you chicks. It will not make you a beautiful or unique snowflake.
It will however be better than playing on a woodgrain table top or kitchen floor and it’s something I made in literally an hour this afternoon after I got home from work one day.
Materials:
3′ x 3′ piece of black felt (or whatever you intend to use- could be an old sheet dyed black, a vinyl tablecloth spray painted black, whatever).
Aluminium foil
A couple of pointy items (nails, thumbtacks, tiny screwdriver, needle, etc.)
Bricks or simliar heavy item
White spray paint
Optional Materials:
Tamiya (or whoever) Translucent Paints
Old Paintbrush
Clearcoat
Really the only thing you BoLS readers might have to go buy is the mat itself. I like using felt because it’s cheap and it keeps the X-Wing Miniatures bases from sliding all over the place. You can also fold it up and not worry too much about creasing, so long as you don’t fold it up super tight and take it out once in awhile.
I got my fabric from a place called Joann Fabrics. The wife and I were in there buying Halloween decorations and I got a 6′ x 3′ for like $9 or something around there. You can get black felt other places like Wal-Mart though too. There’s lots of options for fabric out there- glittery black felt, space scenes, whatever. I just went with plain black.
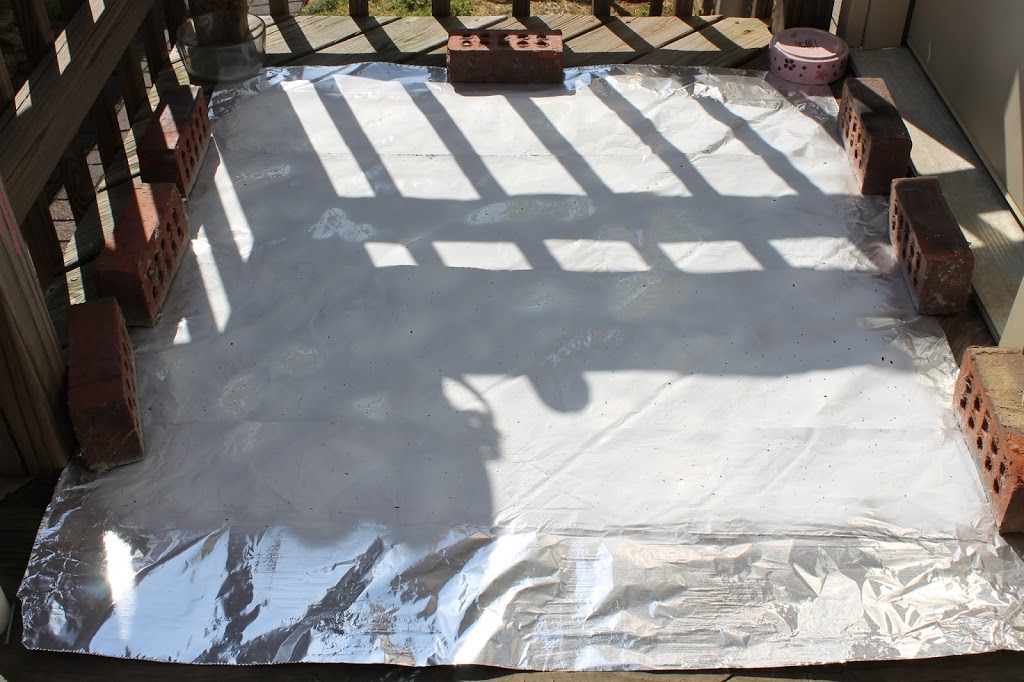
After you’ve gathered up the rest of your materials, lay your fabric out someplace like a garage floor or deck. I had to use the little side deck today because my wife’s Jeep was in the garage.
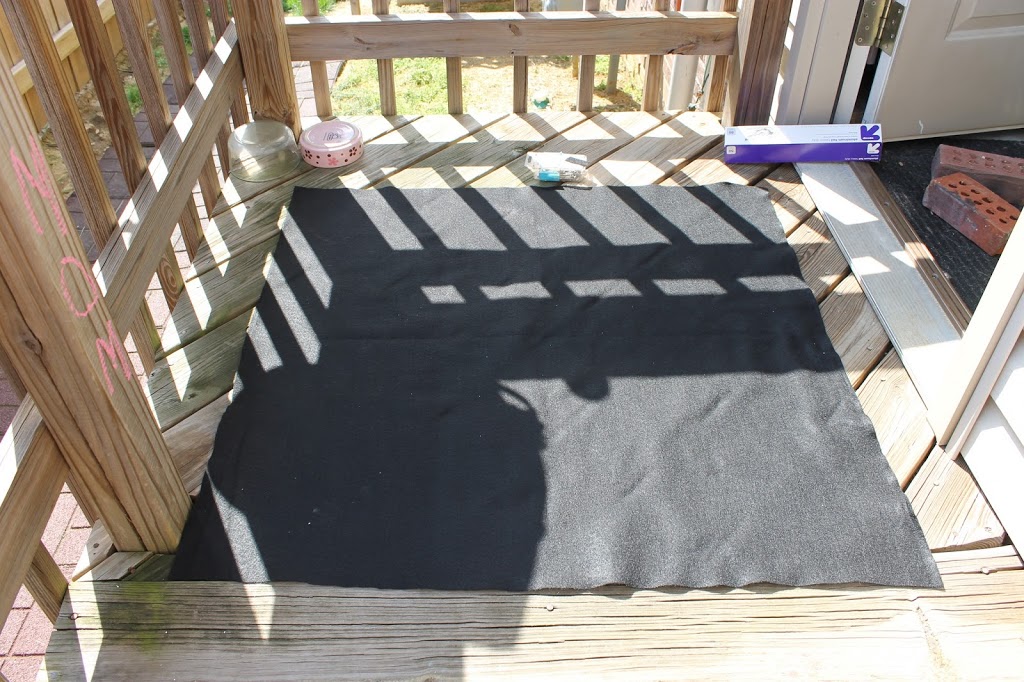
Next, get your aluminium foil and start tearing sheets of it off so that it covers your piece of felt entirely. If you’re outside, now would be a good time to put the bricks on the aluminum foil to keep it from blowing away or moving around too much.
Get your pointy nails and stuff and poke a bunch of little holes in the foil. These of course, will end up becoming your stars.
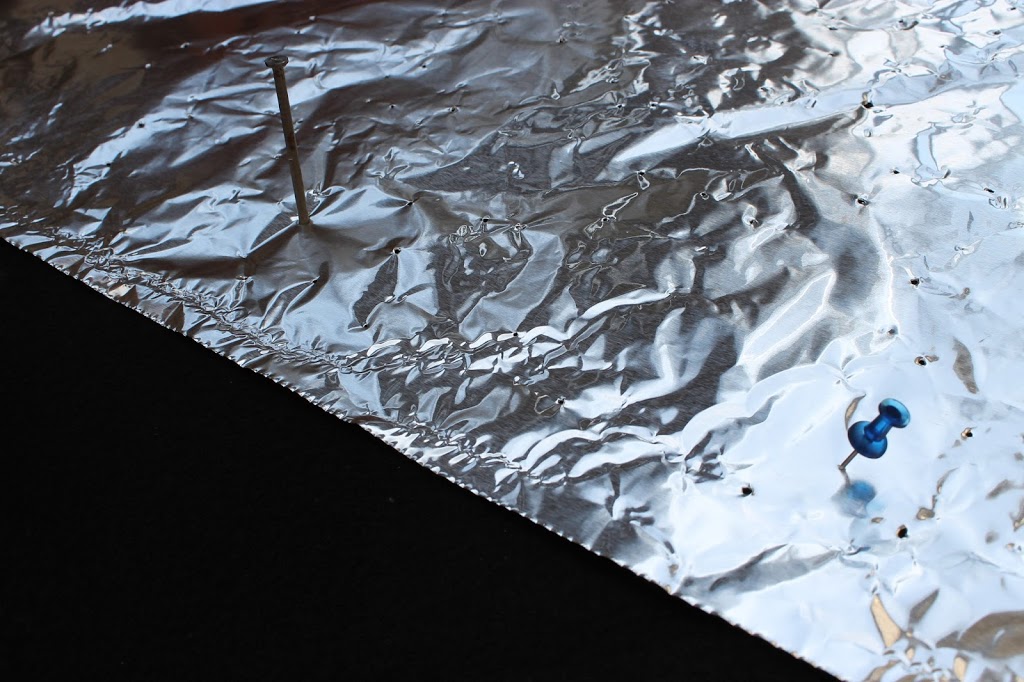
You can get as creative as you want here poking out constellations or whatever. Poke more holes than you actually need, because all of them probably won’t actually “come out.”
After you’re done poking your holes, smooth out the foil with your hands and try to get it as close to the felt as possible, eliminating any tents or creases or voids, then lay the bricks down on the edges to keep things nice and flat. Note that if you want stars that are very defined and sharp, your foil has to be as close to the felt as possible. If you don’t mind your stars being a bit fuzzy, the foil can get away from the felt a bit- it still has to be pretty close though.
Understand that unless you’ve got huge rolls of aluminium foil lying around, you’re probably going to have to tear off four or five different sheets to actually cover your entire piece of felt. The only thing to keep in mind here is since you’re using spray paint, there’s a pretty good chance your spray will get under the places where one piece of foil overlaps another. You can either tape them together, spray in the direction of the overlap, or just try and be careful. It’s up to you. I just tried to be careful. Tried being the key word… More on that in a sec.
Ok, so once you’ve covered the entire piece of felt with your foil and poked your holes, uncap your white spay paint and go to town. And by go to town, I mean spray the entire surface of the foil covering your mat.
It really doesn’t hurt to spay it on a little thicker than you think you need or to do multiple coats. I mean, don’t like spray until you’ve got a puddle, but some accumulation isn’t necessarily a bad thing. If you want, you can vary how much paint you spray on to give a little variety in the brightness of your stars.
Once you’ve sprayed your entire surface a few times, let it dry, then move your bricks, pull the foil off, and pitch it.
Depending on how much time you’ve got left or how far you want to take this, this can be the end of it, right here. You should end up with a starfield that looks quite a bit like the one I’ve used for the background in the majority of the pictures I post here on BoLS or my site. If you want to go a few steps further, continue on!
All right, after I did the above, I took my felt inside and thumbtacked it to the wall of my garage. I’d not taken into account how windy it was today, and as such, I had some pretty obvious paint lines where my sheets of foil were overlapping.
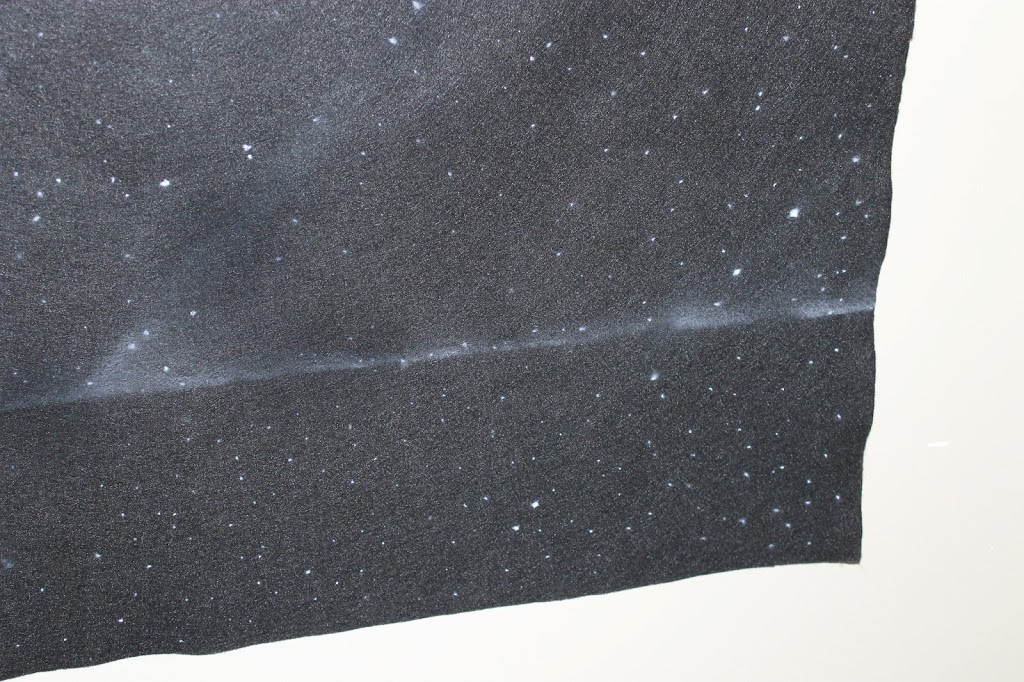
I didn’t have time to start all over again on the backside of the felt (which you can do, of course, if you’re disappointed with your first pass at this), so I decided I’d try to fix it. I did a little looking around and found a can of black spray paint. I sprayed a bunch of little irregular shapes over the areas where the white lines were most prominent, then I kind of backed up (like a foot and a half away or so) and did a little fogging to try and even out the transitions between the spray paint shapes and the black felt.
It’s not as pretty as my original attempt at this, but I did that one in the garage with my airbrush and spent a lot more time on it. It’s still not horrible though, even having to fix those paint lines at every… single… overlap.
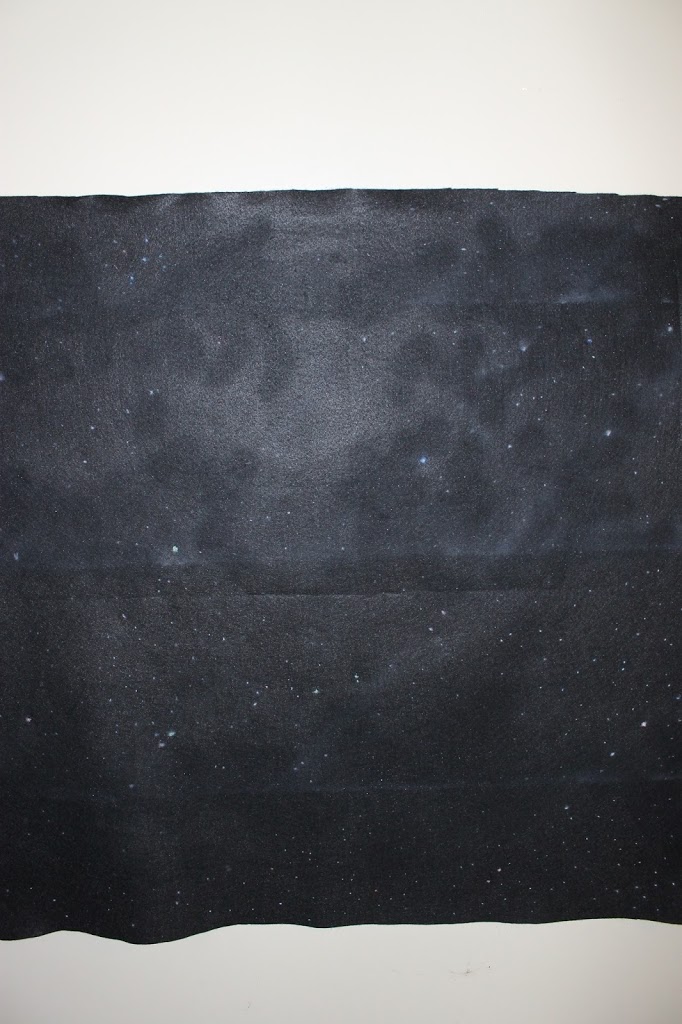
If you want to add a little more character to your starfield, get your translucent paints (or even just regular paints) and dab on some color to some of the white stars. I tried to pick the larger ones to give the illusion of them being distant planets or whatever. I had some translucent red, blue, and green lying around from some 40k projects I’d been working on, so I tried all three. Red came out the best, as you’d probably expect, but the blue and the green does add more variety, if a little on the subtle side. I just dabbed it on with a paintbrush; nothing particularly interesting to note there as far as technique or amount or anything- just paint a little bit on to shift the color from white to blue, green, or red as desired.
Finally, I fogged the whole thing with clear coat. I don’t know how that’ll work on fabric, but I figured, “why not?”
So how’d it turn out? You tell me. Like I said, it’s not fantastic, but bear in mind these pictures are taken with a Canon DSLR camera with flash, so it kind of doesn’t look this bad in real life. If you look really closely, you can see a few of those colored stars in the pictures.
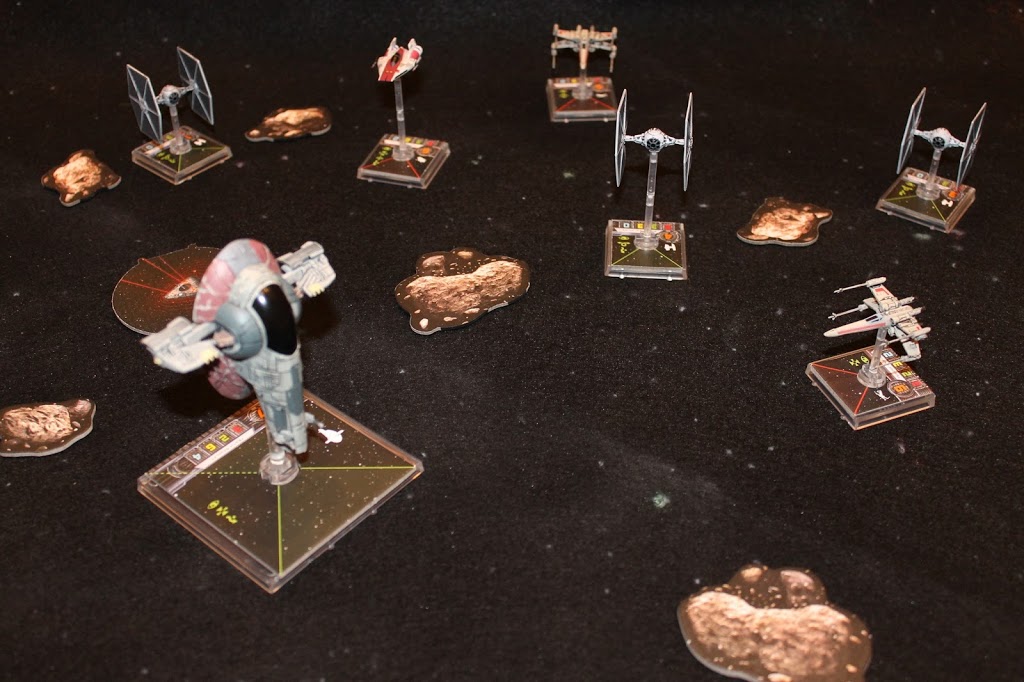
Not bad for an hour’s worth of work, right?

