REVIEW: Chaos Dreadhold Battletome

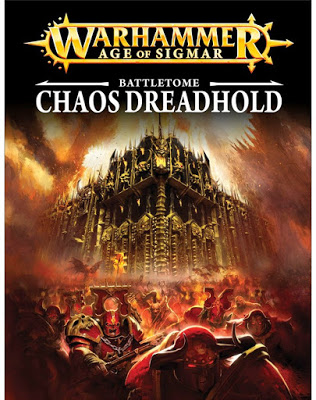
I recently picked up the Chaos Dreadhold Battletome for cheap so of course I had to give it a review. So how does the very first Battletome, and only Battletome not for a specific army, hold up against its younger brothers?
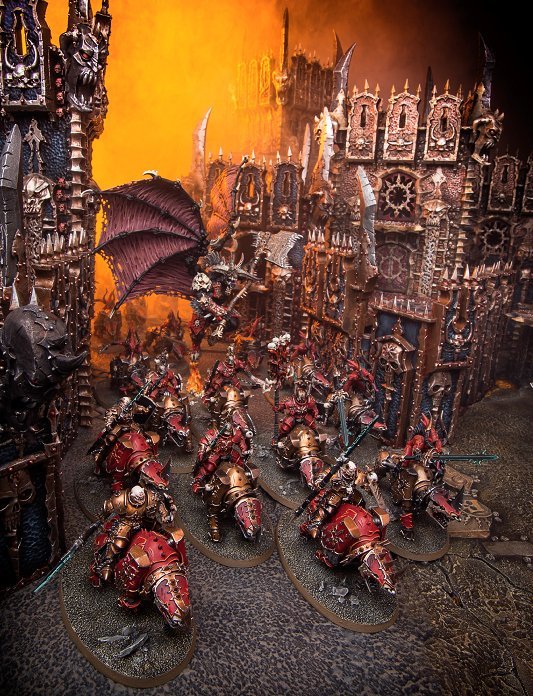
This book of course focuses on the Chaos Dreadhold scenery kits, so it comes in at a much smaller page count and price point. The presentation is what you have all come to expect from Games Workshop. The cover art is pretty cool and it’s a nice sturdy hard cover. All of the artwork inside is great and the majority of it is unique to this book. The photography is evocative as usual, although I kind of wish GW would cool it on the smoke machines a bit, at least just for some variety.

The first section of the Battletome is all about the lore and scenarios. We get four battleplans, each with an accompanying story. The first one is called Fortresses of Death and revolves around the forces of Nurgle in the Realm of Life. They have erected a trio of skull keeps around a life well and poisoned its waters with Nurgle’s blessing. We get a little tie into the main story here with the Chaos lord being the same one from Ghal Maraz. Once Sigmar’s storm starts to break across the realms, the Sylvaneth take the opportunity to rise up and reclaim what was once theirs. This story is Stormcast free and gives the tree spirits a chance to shine and show that they don’t need help from anyone else to kick butt. Sometimes the battleplans in the Battletomes are hit or miss, but I actually really like this one. The defender has to set up in the middle of the table, where the Dreadhold is set up. The attacker then has to either capture or destroy each Dreadhold before the end of the sixth turn or else they lose. There are unique command abilities as well as rules for how to destroy a building and what counts as capturing it. This seems like it would be a tough battle for the attacker, although it is encouraged for them to take a larger force then the defender. Personally I like battleplans like this, it puts the defender on the back foot while also making it hard for the attacker. I definitely want to give this one a try, although I will probably use other buildings besides a Dreadhold.
The second story, Man the Gates, still revolves around the forces of Nurgle in the Realm of Life, but this time pits Gardus and his Stormcast against a Nurgle sorcerer. The wizard has called forth a mighty storm of foul magic which bellows forth from the open gates of the Dreadhold. It’s up to the Stormcast to close the gates and end the magical deluge. The story itself is fairly entertaining and has the Lord-Relictor playing an important role, protecting his own forces while attacking the fortress at the same time. The battleplan has a Malefic Gate set up in one corner of the board with the deployment zone cut down the center diagonally. Just like the previous scenario, the attacker has six turns to complete his objective, which is to close the Malefic Gate. The Gate itself has rules for opening and closing it within its warscroll, and this scenario adds a few additional rules to make it more difficult and cinematic. There are a few rules that encourage the attacker to take a priest just like in the story that are unique to this. Again, this seems pretty fun and unique. I think that’s going to be a big deal going forward, since with so many battleplans coming out you start running the risk of just making slight variations of existing ones.

The third battleplan, Raze to the Ground, to me is the weakest. That’s not to say I dislike it, because I think it actually has some of the coolest set up rules and gameplay ideas. unfortunately the victory condition is just kill everyone and there is no time limit. In my opinion this tends to lead to boring games since they run the risk of just dragging on and on. What happens if someone decides to just run their last unit into the farthest corner? Having said all of that, the story is fairly cool. We have two opposing Chaos lords who both have their own Dreadhold, but one is in the Realm of Fire and the other in the Realm of Metal. Spanning between the two is a bridge with a realmgate in the middle, allowing forces to pass back and forth between the two. In Aqshy the Stormcasts are attacking in full force and have begun laying siege to the fortress. Seeing an opportunity, the opposing lord in Chamon takes advantage of the distraction and leads all of his forces through the realmgate and slaughters the retreating Chaos forces from Aqshy. Now the Stormcast must battle through the new forces, through the realmgate, and raze the fortress in Chamon to the ground. Like I said, it’s a pretty cool idea, with the table split in two, a fortress on each end. The middle four feet of the board are set up so it’s just a two foot by four foot bridge, with a realmgate in the middle. This is of course the only way to pass back and forth between the Realms. It’s a nice setup, and with some small tweaks to the victory conditions I think it could work very well.

The final battleplan, Quest’s End, covers a story you may already be familiar with if you have read The Quest for Ghal Maraz. I won’t go over the story since most AoS fans probably already know it. A massive Dreadhold is set up on two-thirds of the board with the other third being the attackers deployment zone. Before the battle begins the attacker must split their army up into three equal parts, only deploying the part that contains their general to start. The other two parts come in later and get to lightning strike down. Their is a set of rules that helps you determine what turn they come in on, which is random but your chances increase as the game progresses. The defender has several rules that allow them to bring in reinforcements to represent their overwhelming numbers. The relic itself, is placed near the back of the fortress and has some cool rules to represent it being shielded until an attacking unit comes close enough. The relic can only be claimed by the attacking general, or if he dies one other hero who can take up the mantle. You have to have another hero within 12″ of your general when he dies though in order to transfer the ability. The attacker wins if he claims the relic, and the defender wins if the opposing general and his replacement are killed. The command ability for the attacker makes the general a bit more survivable, but even still, it’s a tough battle for the attacker. I love this scenario. It has a ton of character to it, fun objectives, and looks like it will take some real tactical acumen to win as the attacker. All of these battleplans can use whatever armies you want, although they encourage you to use the ones from the story of course.

The rest of the battletome is filled with nice pictures of models battling over the scenery and then the warscrolls for the different parts of the Dreadhold and the battalions to represent larger fortresses. The warscrolls are the same ones free in the App. The main draw of this book are the scenarios and the bits of story. Even though these scenarios are intended to be used with the Dreadholds, it’s easy enough to replace them with any fortress or buildings. In my opinion this is a very strong set of battleplans and look like they will be a ton of fun to play. The stories are more interesting then necessary reading for AoS. If you are a lore nut like me though they are a nice addition and add plenty of inspiration. I prefer reading physical books, but if nothing else I would recommend buying the individual scenarios through the App, they really are great.
Final Score – 4/5
Until next time,
Tyler M.
Tyler is a life long painter and hobbyist and took home his first Golden Demon award at the 2012 Chicago Games Day with a follow up at the 2013 North American Games Day. More of his work can be found at his blog, Mengel Miniatures.