Shadespire: Phases Of The Game

![]()
Shadespire is a tightly-woven arena-style board game with a competitive ruleset. From some fairly simple rules, we get a fairly complex game. Check it out.
Shadespire is coming out soon–we’re pretty excited about this. The game has some well-written rules, probably GW’s tightest ruleset to date, which break down a session of Shadespire into a few easy-to-understand phases. You’ll need to wring every last drop out of each step of the game though; every session of Shadespire has a built in time limit–you’ll only ever have access to a limited number of activations, so you’ve really got to make each turn matter.
Let’s walk through the phases of the game so you can see what a game looks like.
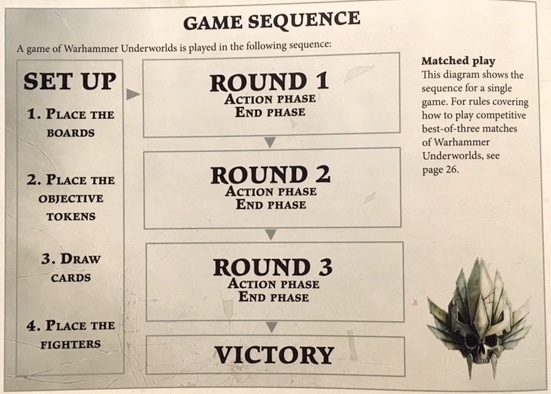
Set up is pretty self-explanatory. You set up the game, draw a hand of cards consisting of objectives to try and complete and bonus actions/upgrades you can take during play to help you score those objectives or kill your opponents. Got it? Good, moving on.
A set of Shadespire takes place over three rounds of play. Each round consists of an action phase and an end phase, during which you activate models, play action/upgrade cards, fight your enemy, and in general score the points you’ll need to win the game. Scoring happens in the end phase, fighting happens in the action phase, and it’s all kept fairly discrete.
Action Phase
The action phase is fairly straightforward in concept, but here’s where you make all of the tactical decisions to try and beat your opponent. Each action phase consists of eight activations (four for each player) which alternate between the players. So player 1 activates a model, then player 2 activates a model, and so on. Although you always have the option to use one of your activations to draw a card–more on that in a moment.
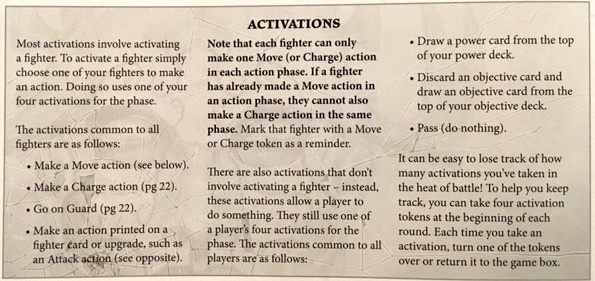
Every fighter can only make one move or charge action in each action phase, and gets a token to show that they’ve done it. Once you’ve gone, you can’t go again. The actions themselves are again, pretty straightforward. There’s the move action, which lets you move a number of hexes equal to your Move characteristic. The attack action lets you make an attack, though there’s no generic attack action, each fighter has an attack that’s specific to them. And charge is basically move and attack combined.
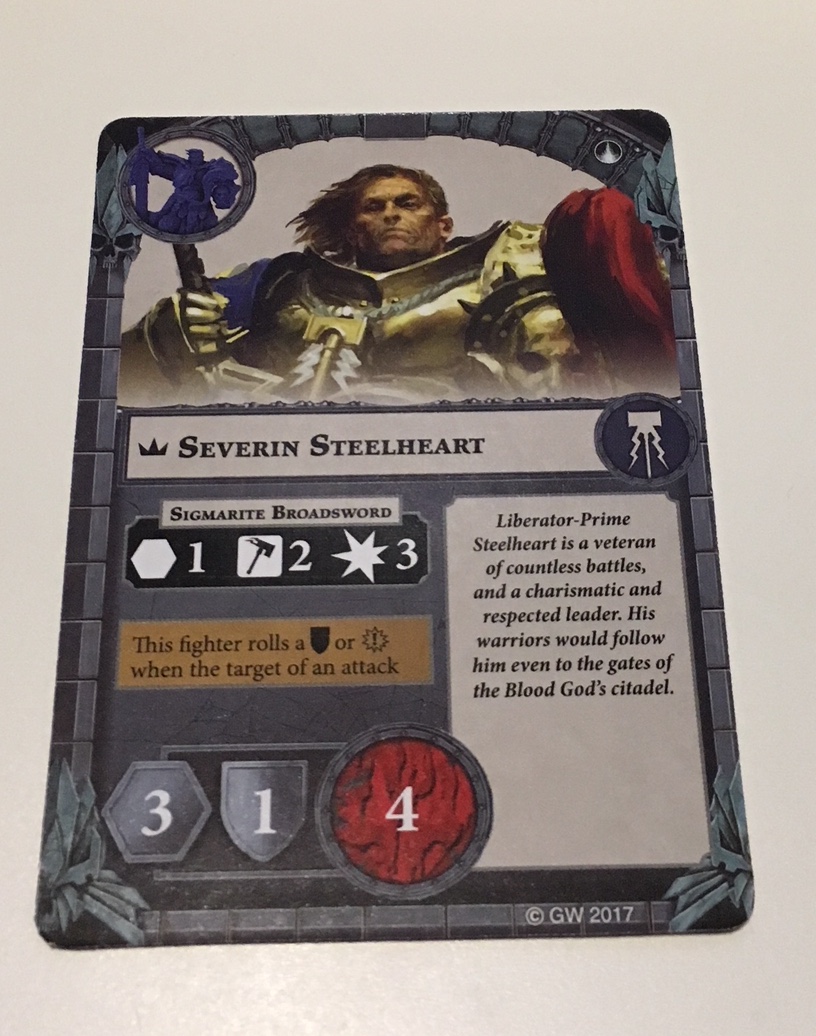
Steelheart, for instance has his Sigmarite Broadsword which is fairly accurate (there are more hammers than not on the attack dice), and does two damage if it hits. Some of the other factions, like Ironskull’s Boyz, have more powerful but much less accurate attacks. And some attacks will let you do other things, like push a fighter backwards when you hit, and so on.
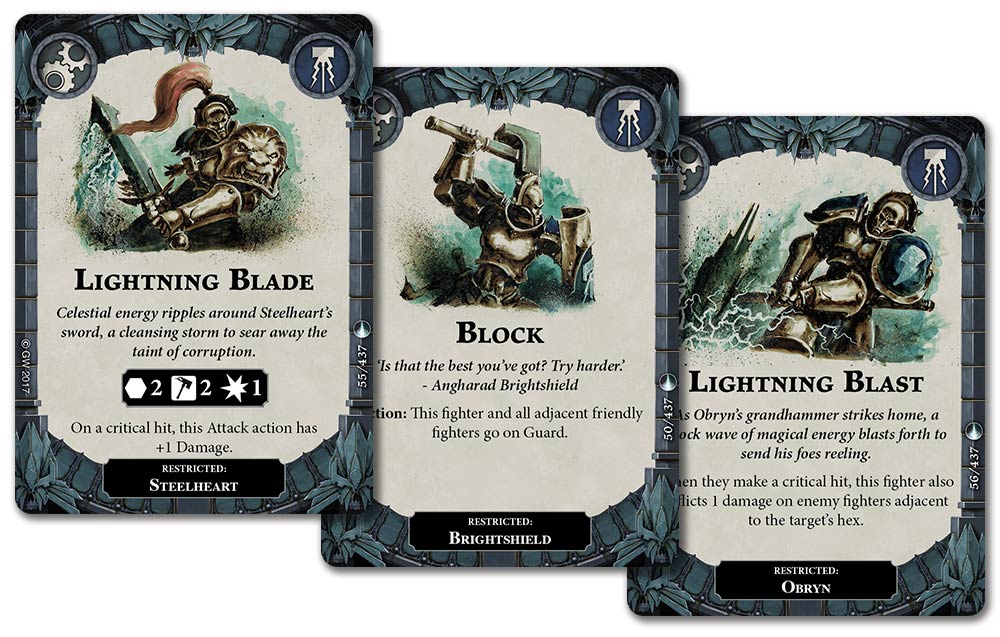
And some upgrades, like the ones shown above, will grant you extra abilities or actions that your fighters can take on their activation. That Block one is a good example of how actions and activations are separate. You can use one activation to affect multiple models, putting them on Guard (which Stormcasts love to do, because it helps power them up). And once you’re in combat, we get into things like, having supporting fighters nearby, driving your opponent back on an attack, making critical hits, and so on.
After each activation comes the Power Step–this is important, because it gives you an opportunity to disrupt the flow of the game. You can play a power card, or apply an upgrade card to a fighter at any point during the power step, so an opponent your fighter was positioning to attack might be suddenly tougher, or hit harder or the like. But even this has a risk–in the power step, you either play a card or pass, and then your opponent gets to do the same thing until both of you pass. So they may have surprises as well.
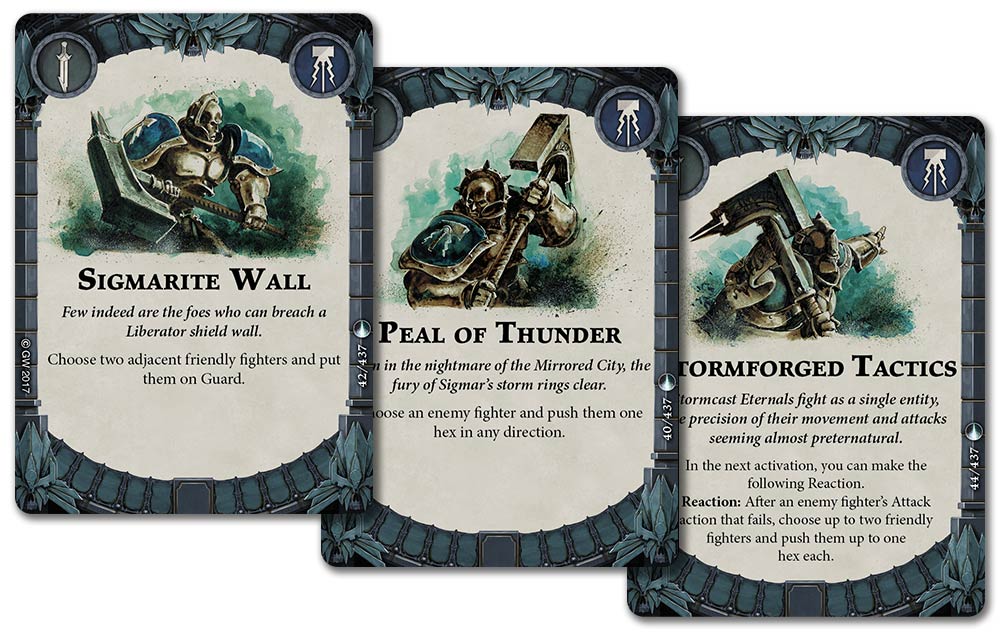
Basically, in between each activation you (and your opponent, the blighter) have a chance to alter the state of the board as you roll into the next activation. Takes some of the sting out of going second. And as you can see above, one of those cards gives you a reaction–these are immediate actions that happen right after the triggering condition. So, if you’ve got Stormforged Tactics in play when your opponent activates one of his blood reavers, and they fail (as is their wont), you can get more of your forces into the fray. Which is good–as we talked about, each player is struggling to get the most out of their four activations.
End Phase
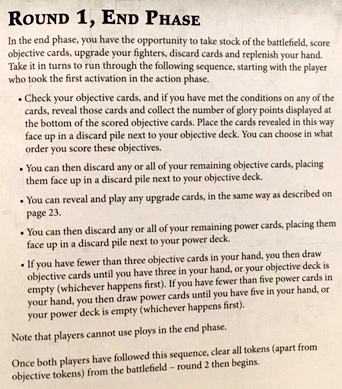
Once all the activations are done, we hit the end phase. This is where you score objectives and do general upkeep–you can swap out your hand of power cards, refresh your objective cards, earn glory points (which you’ll want both to win the game, and also to buy certain upgrades, etc.), apply upgrades to your fighters, and get ready for the next round of the game. Lather, rinse, repeat until you’ve had three rounds of play.
At the end, whoever has the most glory points (spent or not), wins.
All in all, it’s pretty straightforward–we’ve found in general that if you have questions, the answer is usually read the rules again until it makes sense (twice at most). It’s a ton of fun to play, so check it out when it comes out.
And of course, be sure and keep an eye out for more Warbands, we know they’re around the corner as well.