Ork Battlefortress, Part 1

 Every once in a while, the BigMek in me wants to build something. In the past I have gotten by with building killa kans and a fightabomba. But I think it is time for something big. I want to build a Battle fortress. Like any true mekboy, it needs to be built from scratch. Not that the forgeworld ones aren’t good, they are. But it just wouldn’t be proper and orky to buy one.
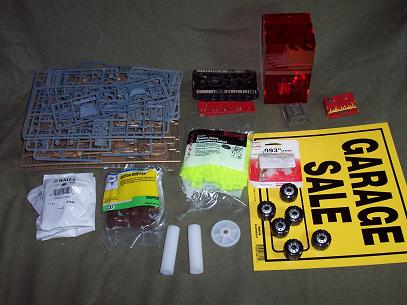
So, I spent the weekend looking at the forgeworld model and contemplating what pieces I would have to gather to make my own. I think I have come down with a design. There seems to be 6 main parts: the hull, the guns, the engine, the tracks, the cab and the krusher (roller).
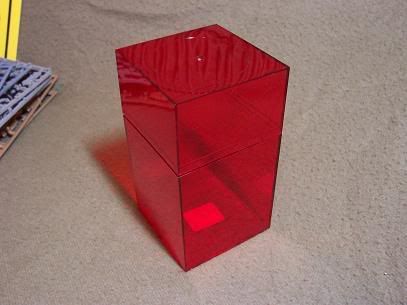
I needed something boxy yet sturdy to support all the other pieces. I figure a 3″x 3″x 7″ box would work. The container store had just the thing. For $2 I picked up a red plastic container that was almost exactly perfect.
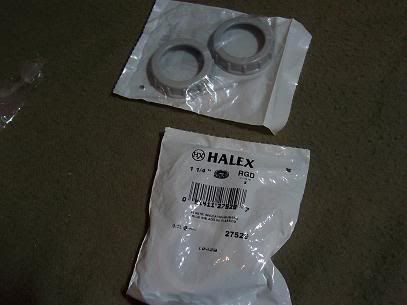
The zzap gun turrets are a hard match. Back when city Fight came out, there was a rule that let you take up to 6 sewer entrances to reserve in from. I used a plumbing part from Home depot called a Plastic Insulating Bushing. It looks like a screw on end cap for a PVC pipe with a large hole in the middle. 2 of these, placed on top of each other, with a left over IG auto cannon should make a good base for the zzapgun turrets.
The engine will be a no-brainer. I had a left over engine from a model car that could be salvaged. Some extra tubing and model gas cans, and the engine was accounted for.
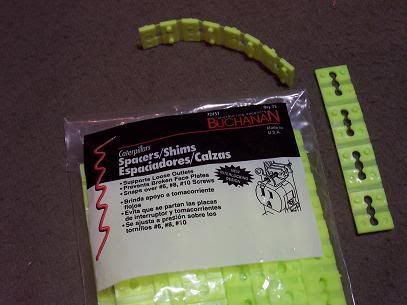
Several years ago I was wandering around Home Depot (do you see a theme here?) and came across something called a Caterpillar Spacer. They are used by electricians to support loose fitting electrical outlets. These 4 inch strips are very bendy and have large plates with knobs on them. They are perfect for a section of ork treads.
The crusher was easy. In the plumbing section, I found a PVC piece that took a 2″ pipe and allowed a 1″ to fit into it. Basically a 2″ cylinder with a large hole on one end and small one on the other. Two of these, placed end to end should give a good basis for the krusher.
Finding the parts for the cab was hard. I’ll have to make most of it out of board and a few spare bits for the lights and grill. This is the part that is most up in the air right now.
For all the miscellaneous plates and decks, I picked up a “For Sale” sign. Not as rigid or easy to works with as polystyrene, but much less expensive when working on a large project. They are pretty flimsy, so I’ll have to make sure they are supported well.
Now that I have all the parts, all I need to do is assemble them. I’ll let you know how that goes.

