Terrain Workshop: Building a Ziggurat


Bigred asked me to write a series on building terrain pieces, so I thought I’d start out with an easy one.
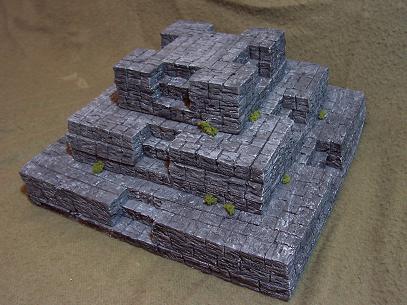
Ziggurats are basically giant stepped pyramids. They make great terrain pieces because they are big enough to hide behind, and the tiers allow you to stand several models on them with good line of sight at the top.
For my ziggurat, I started out with 1/2″ insulation foam (the pink or blue sheets can be bought at Home depot). With a good knife, I cut three squares that are 12″ x 12″. These formed the first tier. For the 2nd tier, I did three 9″ x 9″ and the top one was three 6″ x 6″. If you make your own, the layout is totally up to you. Just remember, the bigger you make it, the harder it will be to transport (and more likely to get knocked around).
For the staircases, I cut a 2″ wide slot the 2nd and 3rd sheets for each tier. the 2nd sheet was 1/2″ deep, and the 3rd was 1″. If you stay consistent on your step locations, your staircase should match all the way up. I then took my knife and cut the stone shapes into the edges and top of the sheets. I found that just a little pressure was enough to get the knife in about 1/16″ deep, then wiggle it back and forth to widen the cut. It didn’t take too many attempts to get it looking right. After the blocks are cut in, I used Elmer’s to glue it all together.
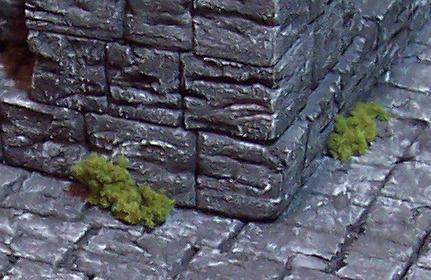
Once the glue had dried overnight, it was time to weather it. To get the appearance of worn and crumbling stones, I made dents in the foam with the rounded end of a paperclip (you’d be surprised how many ordinary objects become great terrain making tools). This took a little practice. Too many dents and it stopped looking like a stone, and too few made it look like someone poked it with the blunt end of a paperclip. This was also the most time consuming part of the whole project. Don’t be afraid if you chip the edge of one of the blocks; it adds realism.
Painting was pretty straight forward. I used a dark gray spray over the entire surface, followed by a black wash and a very light grey dry brushing. I then took old model train foliage and glued it in some nooks to give it a bit of life.
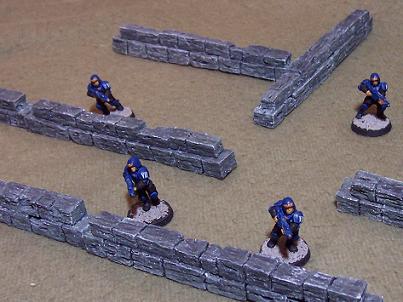
The large ziggurat in the middle of the table looked great, but it needed a little extra to help tie it in with the surrounding terrain. I took some leftover foam scraps and made walls out of them. I took a 1/2″ wide and 6″ long strip, cut the blocks and weathered it the same as the ziggurat. Then took another piece that was about 1/2″ shorter and glued it on top and painted it the same. I then sat it on the table and watched the ceiling fans blow my walls across the board. Crap. It was easy enough to fix though. I cut the piece on the bottom in two, right along the line between 2 blocks. I then stuck a nail into each piece and glued them back together. The nails on the bottom piece added enough weight to keep the walls in place and upright.
One day I’d like to go back and add another large piece to go with the set. Maybe a tower or small platforms. Maybe some Mayan architecture will inspire me.
