EPIC: Death From Above!

A guest article by Global Epic-Evangelist: GR00V3R
In the 41st Millennium, armies do not just fight on the ground. Much like real world modern militaries, the forces in Warhammer’s dark future consist of infantry, armour, aircraft and spacecraft, each doing their part in the battle, contributing to combined-arms actions and generally functioning as a cohesive whole.
My previous Epic posts have focussed on the ground war. In this post, we will look at how aerospace units can contribute to your strategy, and you will see how effective and outright deadly they can be when effective tactics are employed.
Because of its larger physical scale, your typical Warhammer 40k (and even Apocalypse) game showcases a small cross-section of a much larger battle that rages around you, unseen, off table. 40K has difficulty providing for aerospace support for similar reasons–there just isn’t enough room for manoeuvring fighters, bombers and gunships around the board. For this reason, a single Thunderbolt is a rare sight, let alone entire squadrons of them.
The Epic scale, on the other hand, allows you to play out the whole glorious battle, and aerospace units can feature prominently.
Aerospace Units
Epic armies are often supported by aerospace units that operate either in atmosphere or above it in orbit. Particularly when playing a higher points game (say, 6,000 points or more), all the toys come out to play, and you will see the spacecraft, Drop Pods, Death Claws and Roks (which require planetfall operations), and aircraft making their presence known.
This post will not go into spacecraft or planetfall; here, we will instead focus on the use of flyers. For information about spacecraft and planetfall, check out the free PDFs of the Epic:Armageddon rulebook (available from the Games Workshop online store; click: Specialist Games > Epic:Armageddon > Resources).
Aircraft
Aircraft units are organised into formations and can receive blast markers. While flying, they cannot be broken, suppressed, assaulted or used by another formation to set up a cross-fire, and they cannot lend supporting fire. Once landed, however, they are treated as any other land-based unit (although with a Move value of 0), and may be assaulted and so on.
Aircraft formations on kept off-board in reserve rather than set up on the tabletop, and instead set up on the table when they take an action. Aircraft can only take one of the following actions:
Interception: Available to fighters and fighter-bombers only, this action enables the formation to attack enemy aircraft formations on the table.
Ground Attack: This action enables the formation to attack enemy ground formations.
Combat Air Patrol (CAP): Available to fighters and fighter-bombers only, this action enables the formation to carry out an Interception action against an enemy aircraft formation taking a Ground Attack action. This interception is worked out before the ground attack. (A good optional rule is to allow formations on CAP to intercept any aircraft formation’s action, including other interceptions. While this can result is large and complex furballs, it is nevertheless cool to watch such a big stink unfold on the table.)
Landing: Aircraft transporting another formation can land and any units onboard may disembark. Units disembarking must be placed within 5cm of the transport aircraft (or 15cm for skimmers and units with jump packs), in which case the aircraft and the disembarked units are treated as a single formation for the remainder of this action. Once disembarked, the formation may shoot (that is, the aircraft and any disembarked units shoot together as a single formation). Note that the disembarked unit may not take an action later–landing and disembarking is its action for the turn.
Air Assault: An aircraft transporting another formation can land and any units onboard may disembark as above. The aircraft and any disembarked units then fight an assault instead of shooting. Enemy zones of control are ignored for this action, as for an Engage action. The aircraft and its disembarked units are treated as a single formation for the assault. If the aircraft’s formation loses the assault, the aircraft is destroyed because it has a Move value of 0 (unless the aircraft is Fearless).
Stand Down: If the aircraft formation fails its action test, it must take a Stand Down action and do nothing this turn.
As you would expect, aircraft movement differs greatly from ground-based units. Aircraft make an approach move toward their target or destination, and may turn a limited number of degrees per 30cm distance travelled, depending on their class. A fighter, for example, may turn up to 90 degrees per 30cm travelled, whereas a bomber may turn just 45 degrees per 30cm. After making its approach move, your aircraft formation makes its attack.
If the approach move takes your formation within range of enemy anti-aircraft (AA) weaponry, these enemy units can shoot at the approaching aircraft, so how you approach the target can be critical to the sortie’s success.
All aircraft formations that have not landed must disengage at the start of the End phase (before any ground formations attempt to rally), in which case they must exit the table, manoeuvring in the same fashion as they did for their approach moves. Aircraft that have landed may choose whether or not to disengage in this End phase.
Disengaging aircraft may leave from any table edge; however, leaving from any table edge other than your own causes the formation to receive a blast marker.
Speaking of blast markers, while aircraft formations do collect them, they are affected by them in a different way. When taking an action test for an aircraft formation with blast markers, a -1 modifier is applied to the roll for each blast marker upon the formation. If it fails, the formation must take a Stand Down action. Whether it passes or not, all blast markers are removed from the formation immediately following the action test.
Epic Space Marines Tactica: Fun with Thunderhawks
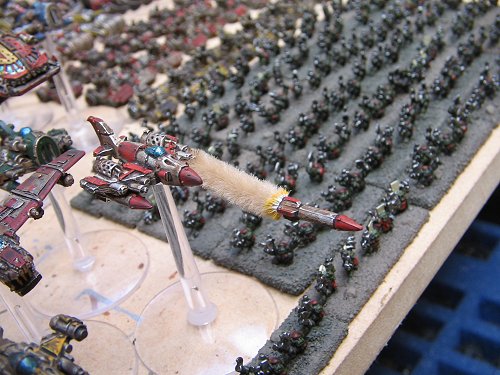
The Space Marines’ Thunderhawk Gunship is a cherished hallmark in their Warhammer 40k fluff. Thunderhawks allow Space Marines players to strike out at enemy formations with surgical precision. These awesome flying machines are capable of deliverying their payload of super-human warriors (and supporting units) anywhere on the battlefield, often directly into the thick of battle, and perform their missions despite taking terrible poundings.
Here’s a treat for the aspiring Marines players out there. It’s a variation of a tactic my mate CAL001 showed me when I was first learning to play Epic:Armageddon. It’s quite simple, but can be deadly when it comes off.
First, a little background. Marines are pretty much always outnumbered, and you rarely have the numbers to just plant a formation at an objective and hope it can hold for the entire game. What I like to do, and I think most Marines players do this, is organise my army into strike groups or task forces that have a specific mission. I usually have at least there strike groups, each with the mission to achieve a certain victory condition.
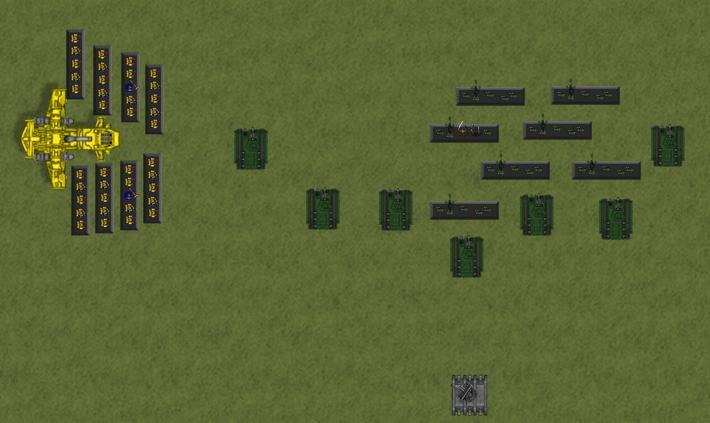
Now, let’s say Turn 2 has just ended and that turn’s End phase is complete. Turn 3 is about to begin. Your Imperial Guard opponent has a standard Mechanised Infantry Company (1 Commander stand, 12 Infantry stands, and 7 Chimera transports, worth 400 points) holding his own Blitz objective, helping him achieve a Defend The Flag victory condition because he holds the other two objectives in his half of the board. This Mechanised Infantry Company has not yet had its activation this turn, and has not come under fire all game (and so has no blast markers). In his previous turn, your opponent moved this formation to where it is now, and so it is not on overwatch. There is nothing nearby that can assail this formation, and so the Imperial Guard player is comfortable that it can hold his Blitz objective.
A diagram, courtesy of VASSAL40K:Epic, appears below.
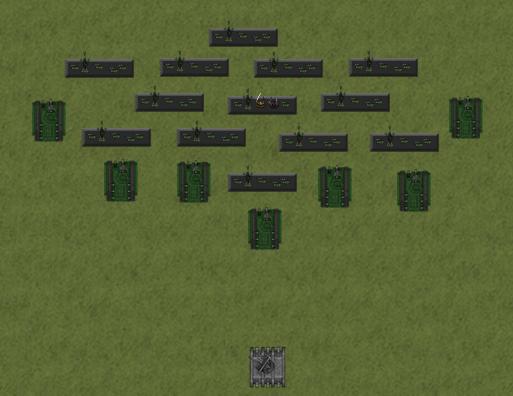
We, on the other hand, have in reserve Task Force Charlie, which consists of two Thunderhawk gunships, two Devastator detachments led by Librarians, and two Assault detachments led by a Captain and a Chaplain respectively. None of these formations have seen action yet, and so none have any blast markers.
That’s 1,450 points worth of Space Marine fury that we’ll pit against 400 points of mechanised Guard–I hate a fair fight, and I avoid them wherever possible.
Let’s see if Task Force Charlie can’t take the Blitzkrieg victory condition—and, in the process, deny our opponent the Defend The Flag victory condition.
First, both players roll against their Strategy rating to see who gets the option to go first or second. The Guard player has a Strategy rating of 2 and rolls a 4 (Strategy score 4 + 2 = 6), while we have a Strategy rating of 5 and roll a 3 (3 + 5 = 8), so we have won the initiative. We choose to go first.
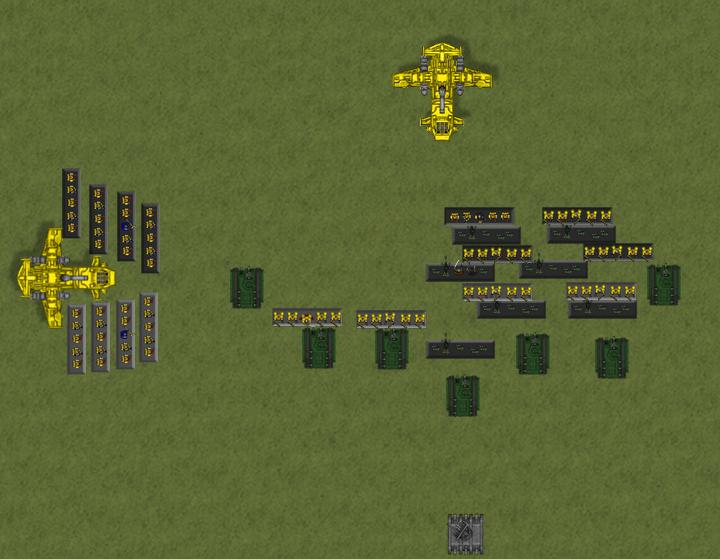
We announce that Thunderhawk 1 with its payload of two Devastator detachments, each led by Librarians, will take a Landing action. Marines have an Initiative rating of 1+, and so we pass the action test automatically. Thunderhawk 1 makes its approach move (avoiding enemy AA) and lands on one side of the target formation, facing the enemy and about 10cm away, and the Devastator detachments disembark to either side of the Thunderhawk, outside the enemy formation’s zone of control (ZOC) but inside the 15cm firefight range.
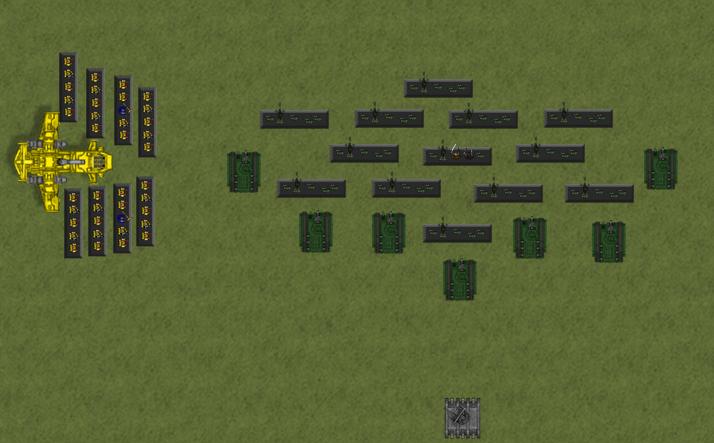
The Devastators and the Thunderhawk now shoot together as a single formation, and score six AP hits in total, wiping out six infantry stands. Seven blast markers are placed upon the enemy formation as a result, though, which is the true goal here. We have now prepared the enemy formation for the assault that is to come.
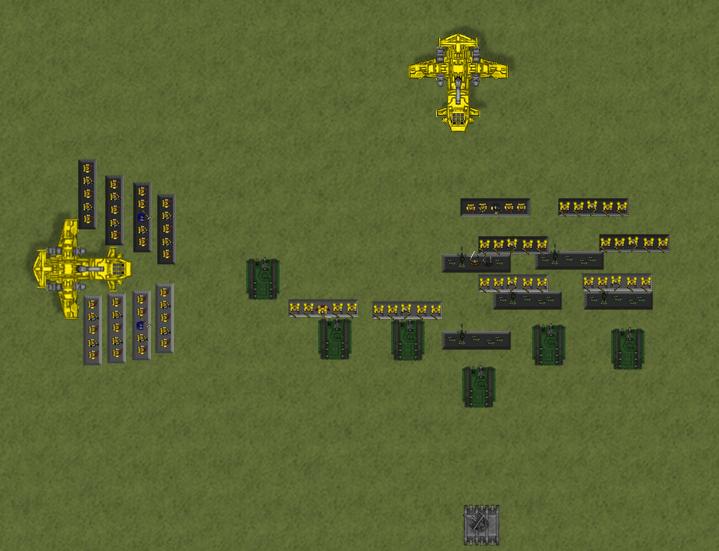
Attempting to retain the initiative, we announce that Thunderhawk 2 with its payload of two Assault detachments, led by a Chaplain and a Captain respectively, will take an Air Assault action. For the action test, we roll a 2–the order is successfully relayed and the action proceeds. Thunderhawk 2 makes its approach move (again avoiding enemy AA) and lands facing the enemy and about 10cm away, and the Assault detachments disembark to enter base-to-base contact with as many enemy units as possible, with the Chaplain and Captain leading the charge. The enemy make their counter-charge moves, and the assault is fought.
Needing 6s, the Guardsmen get lucky and score a hit on our Marines, which saves. Meanwhile, the Marines (despite needing just 3 or better, and despite the presence of two characters and a Thunderhawk) score just six normal hits–weak! To add insult to injury, our opponent gets some lucky Chimera saves, and so just a single enemy Chimera and two infantry stands end up destroyed. We have been very unlucky, but at least we did not lose any marines.
And we can take solace that luck is not a factor here thanks to our awesome tactical skills, as you will see.
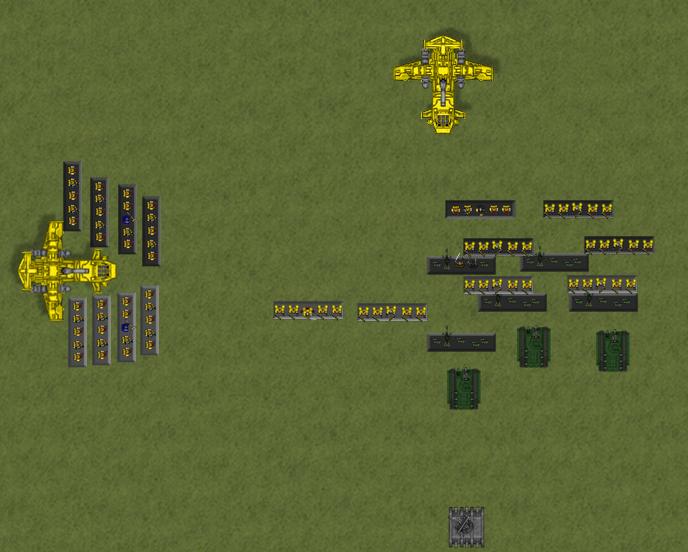
The Guardsmen have done well to this point, but things heat up for the Guardsmen now as we unleash supporting fire from the eight stands of Devastators with Librarians that we positioned so cleverly prior to the assault. Devastators have a Fire Fight (FF) value of 3+, so we roll eight dice for them plus two more dice for the Librarians’ extra psychic attacks. We are somewhat unlucky again and score just six normal hits, but this is not a problem because just three Chimeras remain within the 15cm range anyway. None of the three Chimeras survive the hits, so now just three Chimeras and five infantry stands (including the Company Commander stand) remain.
It’s time to resolve the assault and see who got the upper hand, which could have turned nasty here…if we had not loaded the scales up well and truly in our favour.
The Guard player has just five infantry and three Chimeras remaining in his formation, which makes for a unit count of seven, while we have seven Assault stands and the Thunderhawk (which has a DC of 2), so a unit count of nine.
For the assault resolution, the Guard player rolls a 3 and a 6 (and so takes the 6), while we roll a 1 and a 1 (snake eyes! surprising no one, we take the 1). Let’s see how the results add up:
Guard:
6 (roll) + 8 (units) + 0 (kills) = 14
Marines:
1 (roll) + 10 (units) + 5 (kills) + 1 (inspiring Chaplain) + 1 (no blast markers) + 1 (less blast markers) + 1 (outnumbering) = 20
We have won the assault by a clear margin resolution, and our attacking formation takes no blast markers because we took no losses. Meanwhile, the defending Guard formation is broken and must withdraw–and so no longer contest the Blitz objective.
Also, the difference between the two assault resolution counts (20 – 14 = 6) means that the Guard formation takes an additional six hits with no saving throw allowed, which leaves our opponent with just two Chimeras in the formation. Brutal.
With the enemy’s other forces busy elsewhere, the Blitz objective is now ripe for the plundering, and so we should have the Blitzkrieg victory condition by the end of Turn 4 (if not this turn).
Packing Up
You can probably see that Thunderhawks, with their carrying capacity of eight units, can bring a lot of pain in short order to anywhere on the battlefield.
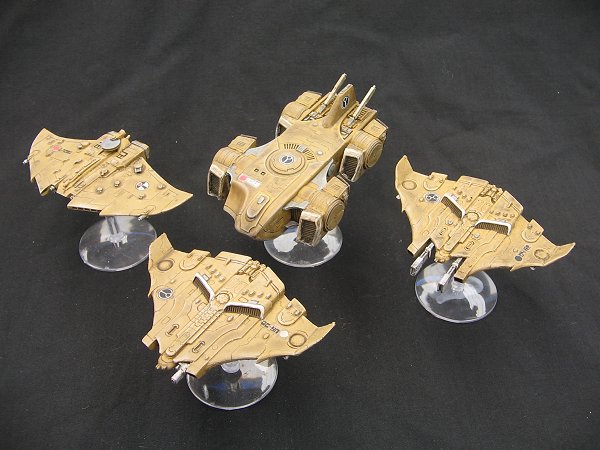
Now take a moment to consider the Space Marines Landing Craft, with its carrying capacity of 12 units and up to six Rhino-class vehicles or four Land Raiders. Or the Ork Landa, which carries up to 10 units of varying flavours. And we haven’t even touched on Drop Pods and planetfall operations from spacecraft. Oh, the possibilities…
~Thanks once again to Onyx for the use of his always-awesome images. And a super-special thanks to Dezartfox for creating VASSAL40K:Epic, which I used to create the diagrams for the tactics described above–dude, you ROCK.
~Bigred here, GR00V3R strikes again. I’m sure he would love to hear what epic topics you are interested in so he can start brewing up some articles for you guys. Word is he might be working on an entirely new take on Epic that a lot of you 40k players might really, really like. More on his secret research soon…
