HOBBY: Working with Resin

A guest article by RedScorpionsGirl
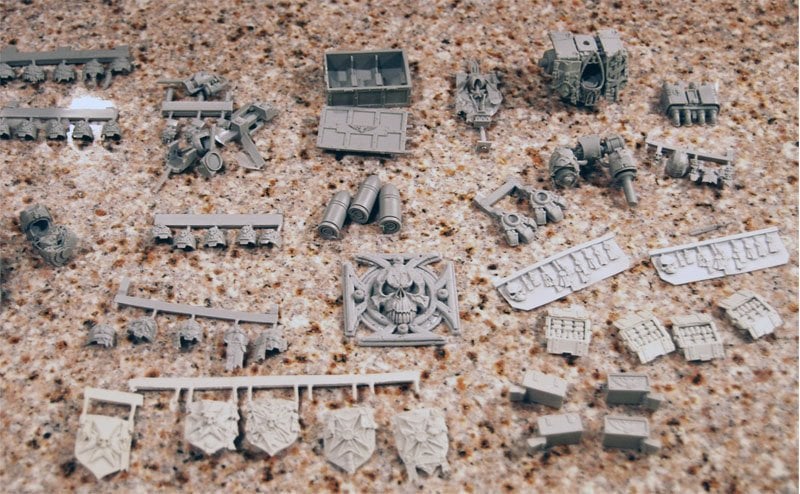
Forgeworld produces some of the best resin pieces for Warhammer, and if you are investing in these pieces, you will want these to be the focal point of your army. If you don’t take the time to prep them correctly, that focal point could end up a disaster. Your model coult be warped, or not fit together well. Paint and primer could go on splotchy, acting as water does on a car surface. Sometimes by not washing your pieces,you can be fooled. The primer and paintjob goes on great, but the first time you touch the finished model the paint rubs right off down to the bare resin leaving you wondering how to repair that damage.
Resin is a tricky medium to work with. If you don’t take the time to prep it properly, all your hard hours of painting work could go to waste. The larger the item is, the longer the prep time to prepare it will be. Resin pieces are usually coated in residual mold release agent which needs to be removed (the brilliant sheen when you look at a piece in the light). Excess resin gates (the large squarish plugs the resin was poured into the mold from) and flash need to be carefully removed, sometimes in multiple steps; trimming with an x-acto knife, filing, ensuring the resin dust is removed (a second washing after filing is recommended) and more, depending on the complexity of the pieces you are working on.
The first thing that should be mentioned is the obvious warning that is on anything that you buy from ForgeWorld at least: Resin dust can be harmful if inhaled. Always wear a dust mask or respirator when sanding or sawing resin parts. This being said, use the appropriate safety equipment if you are sanding/filing resin parts. Resin dust has an oddly sweet smell and can easily be overlooked when working. It is best to throw out excess resin pieces, as unlike removing metal tabs and flash, resin has no weight so it isn’t really useful for anything else like weighting bases and such.
Inventory and Washing
To start off, take what resin pieces you are working with and lay them out. If you are working with a number of different items, I would suggest taking a digital picture of each. That way if you are working with a number of different items that have small components you can separate them after cleaning.
Finding a good spot to do this is always best. A sink that has a drain cover, preferably one that is perforated with holes smaller than the smallest piece of resin you are working with (the last thing you want are your expensive pieces disappearing down the drain). If you don’t have easy access to a sink, use a small bucket or pail.
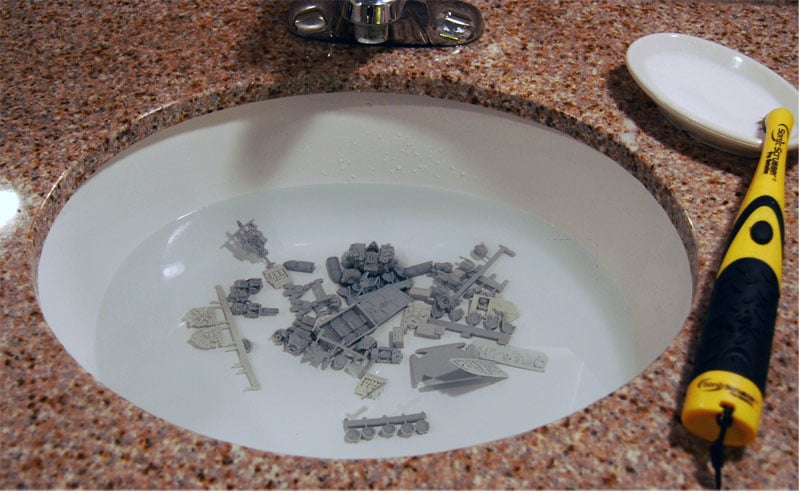
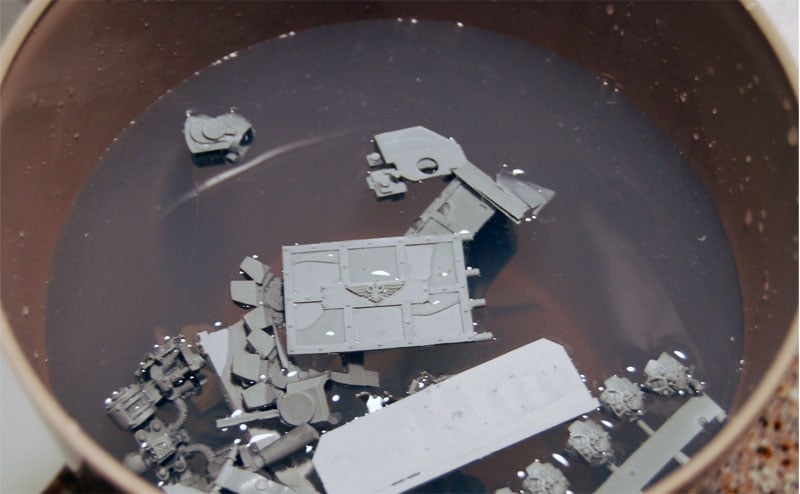
Warm to hot water is best for soaking your pieces. If you have pieces that need to be straightened, it is best to wash them first, and then use the hot water to reshape them. Let the pieces soak for 10-15 minutes in the warm water. Have a separate container with clean warm water to rinse the pieces after they have been washed and scrubbed.

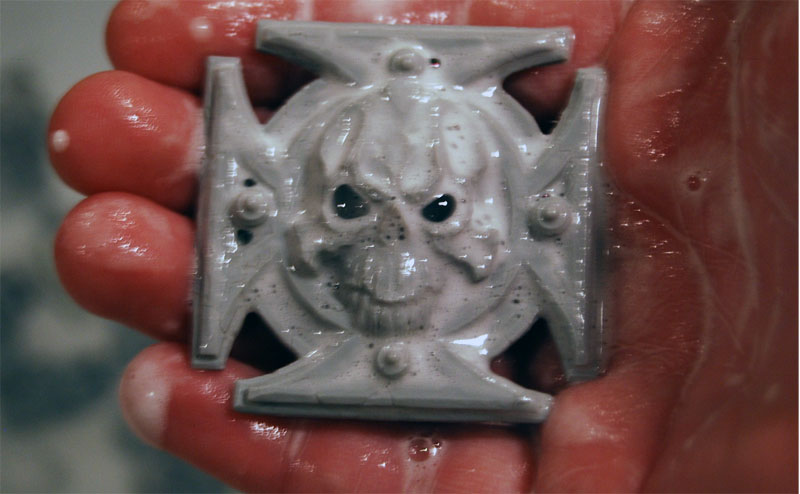
Go through each of the components and wash them thoroughly. I prefer to use a Sonic Scrubber for this (but any type of a scrubber will work as long as it can get into the detailed areas of whatever you are washing), and standard bar soap, or a very mild liquid detergent. I don’t use anything harsh or abrasive by any means, as that would ruin the details in the resin. The Sonic Scrubber is a really interesting item; Wal-Mart carries them for $9.99. Best investment in my opinion if you are stripping models, or needing to wash a lot of resin parts, as it is battery powered and seems to last forever, and there’s a lot of different brush head options as well. It shouldn’t take too long to clean them all and you will end up with something like this as your reward:
At this point you are almost done. Take all of the pieces out and spread them out on a towel to dry, preferably one that is lint free. Let the pieces dry for several hours, and turn them over several times to speed the drying process.
Trimming and Cleanup
At this point, you can go through and determine if you have any seams that need sanding, and the excess resin gates or flash you missed that need to be removed. A good deal of the gates you will find can easily be removed with clippers, however, anything that the clippers can’t easily fit around should be removed with a fine tooth hobby saw. These can be found at most hobby stores.
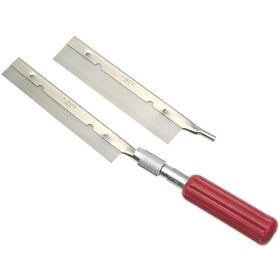
Both Excel and Exacto produce a hobby saw, with interchangeable handles and blades. They have several different styles, with the best one being the aluminum Exacto in my opinion, as it is extremely light, and durable. While the handles come in anywhere from $6-$12 approximately (the Aluminum handle being $12.00 when I recently purchased it and a fine blade coming in at $4) and the blades being anywhere from $4 and up, it is a bit of an investment, but in the long run a solid investment. The handles can also be used for regular blades, and there are several grades of saw blades available. As with any type of saw blade, the closer the teeth the finer the blade, and the smoother the cut will be.
When the excess gates are sawed off, remember to leave approximately 1/8” of the gate on the model piece you are working on. This allows you to trim it down appropriately, rather than trim it too tightly and possibly ruin the part you are working on. Better too remove too little of the gate than too much. Remember that resin dust is dangerous, and it is best to do this outside if at all possible, or if inside, wearing a mask and try to limit where you are doing this.
Then with a fine file, finish cleaning up the spots that have been sawed off, making sure that they are flush with the surface. Once you have finished this, it is best to give the parts a once over again before continuing any farther. After the final check it is time for assembly if need be, or basing and priming.
Dry Fitting
With resin kits, it is extremely important to do a dry fit, and make sure all the parts are the proper shape and not warped. If anything is warped, take some hot water and carefully submerge the part(s) in it. Remember though, you need to get these parts out of hot water as well, so take care to have something that can grab them, or submerge them in a shallow pan for ease of removal. Larger parts can also be reheated and reshaped as well, however it is a bit more time consuming, as the thicker the piece the hotter it needs to get to press it back into shape.
Only literal trial and error will tell what is needed, and in this case it’s best to start out at lower temperatures and not have it work than it is to go too much heat and ruin the pieces. Make sure when reshaping the pieces you also have a bowl of cold water ready to submerse the piece into. It is best to hold it with your hands to make sure it ends up the way you want it to. Just dropping it in the cold water will not fix warped pieces, as they often bend back the same way they were if not held in thier desired final position. Just a quick dip into the cold water while holding it will set the piece. You should also be aware there is a chance if you accidently leave your model in a hot locations like a car on a hot day even after it is painted it could warp again and ruin the model.
Assembly
Super glue works wonderfully on the resin, as it bonds resin parts together faster than plastic pieces. Be wary of this before assembly, as once you touch the pieces together, they are solidly bonded together and there isn’t a chance to reposition in most cases. If you have extremely large parts you are gluing together it is best to leave the edges you are gluing together a bit roughed up. (An example: the wings of a Tau Manta are approximately 2” thick at their widest point. It is best to leave the inside seam rough so that when you attach these to the main fuselage they have better contact, as if both sides are roughed up just before glue, there is more area for the glue to seep into and make a stronger bond) This assists in the bonding process with large pieces, which will result in a stronger finished model.
Priming
Once you have finished your assembly you are ready for priming. Most primers honestly will work well on resin. The only thing to remember is that like any other model, choose your day wisely to prime it. Too hot of a day and you will could end up with a fuzzy model, too cold of a day and the primer may go on caked, or spotted, or worse. Each type of primer has it’s own personality and can have various reactions to weather conditions. It is best to save a couple of the excess resin gates and test your primer on them if at all possible. Resin can be stripped if your priming goes awry with Simple Green, California Awesome, and few other cleaners, but remember you are working on resin, or possibly a combination of resin and plastic when choosing a stripper.
Now you are ready for paint!
~I hope you liked RedScorpionsGirl’s resin primer. Word on the street says that she is the proud owner of a Manta and may be sending us some future articles as she assembles and paints the Tau monster. Who’s up for that?
