40K HOBBY: Plastic Terrain Kits

 About two weeks ago, I was thinking about what I would write about and I thought that it was high time that I wrote an actual terrain making article. With that in mind I headed down to my local Hobby Lobby. I started with the toy train aisle because I use Woodland Scenics terrain products in most of my projects. Nothing tickled my fancy there, but when I was strolling down the plastic model aisle, the Tamiya terrain kits caught my attention. Then I remembered that I had all of these kits at home, so I rushed home to start work.
What I really like about these kits is that they are incredibly affordable, easy to put together, and look generic enough that they can be used for more than what their World War II packaging would suggest. The kits I pulled from were their brick walls, sand bags, and Jerry Cans and barrels. I used the 1/35 scale kits, which for 40K terrain looks just fine. If scale is real important then I would suggest getting your hands on the 1/48 scale kits. Also these Jerry Cans match in size to those that are produced by GW.
I started out by cutting all of the brick wall sections off of the sprue. Once I had them loose, I cleaned off the mold lines, and then cleaned them up with a toothbrush and warm soapy water. After that, I sat around for awhile a played with various combinations of assembling them. Once I got a good idea of how they were going together I started assembly. I will point out that on this project I used plastic glue almost exclusively. The use of super glue is a mistake with plastic kit terrain projects.
As I assembled the pieces I started out by assembling in long sections wall sections. After the glue had set up, I then took the wall sections and assembled my corner pieces. I was able to get them squared up by using the grid lines on my cutting mat. Initially, my plan called for two corners, but with some left over pieces I decided that I would flesh the ruined building out a little more.
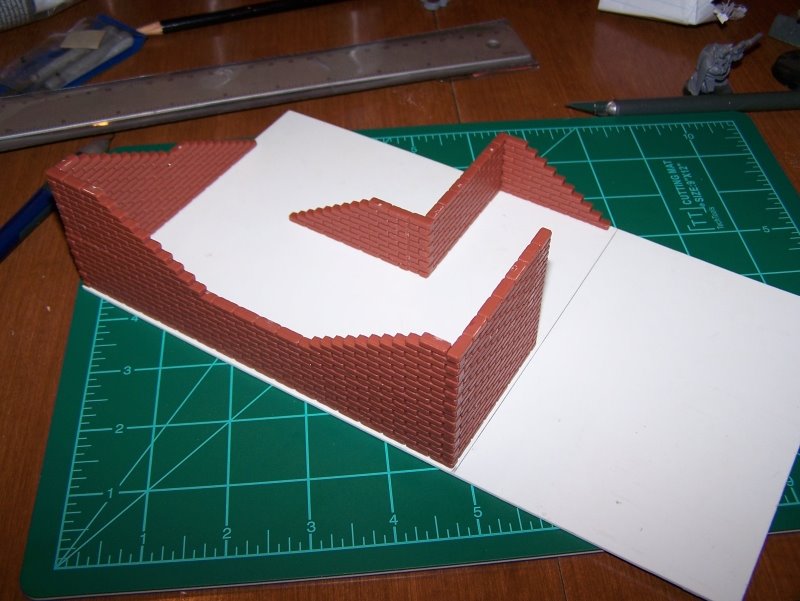 Once the walls were assembled I took a sheet of plastic card, .040” thickness, and started to work out my floor plan geometry. I utilized all three standard 40K base sizes to ensure that most models would be able to use the terrain. Test fitting models to terrain projects is vital to the piece’s overall success. Otherwise, you will end up with terrain that won’t get used after a couple of games because your models don’t work with it.
Once my floor plan was in place I marked my plastic card, removed the 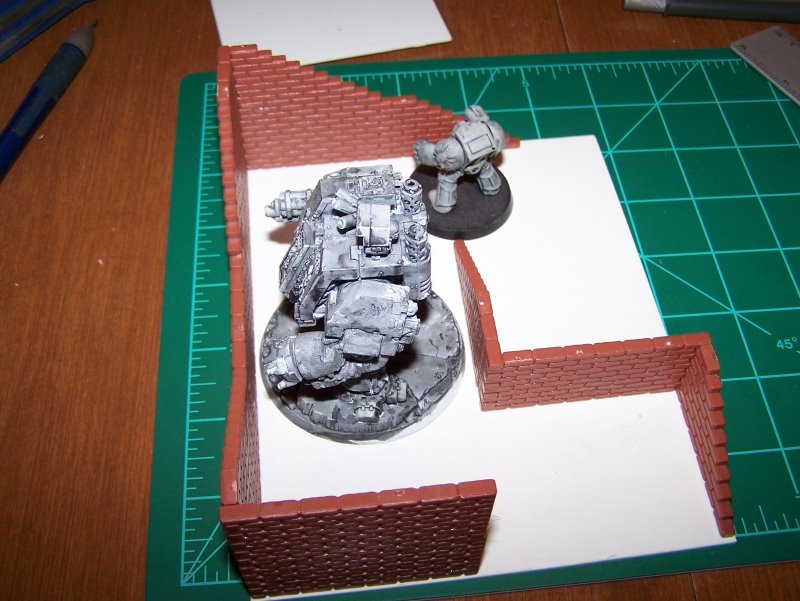 test fit walls, and squared up the markings with a T-square and a pencil. After I had my cutting line I then test fit my walls one last time to make sure that my cutting line was in the correct spot. After the last test fit I cut my plastic card by scoring along the line about a dozen or so times. Once the card was scored, I bent the card along the score until it broke. This is the standard way for cutting plastic card. After that, I fixed the walls into place using plastic cement.
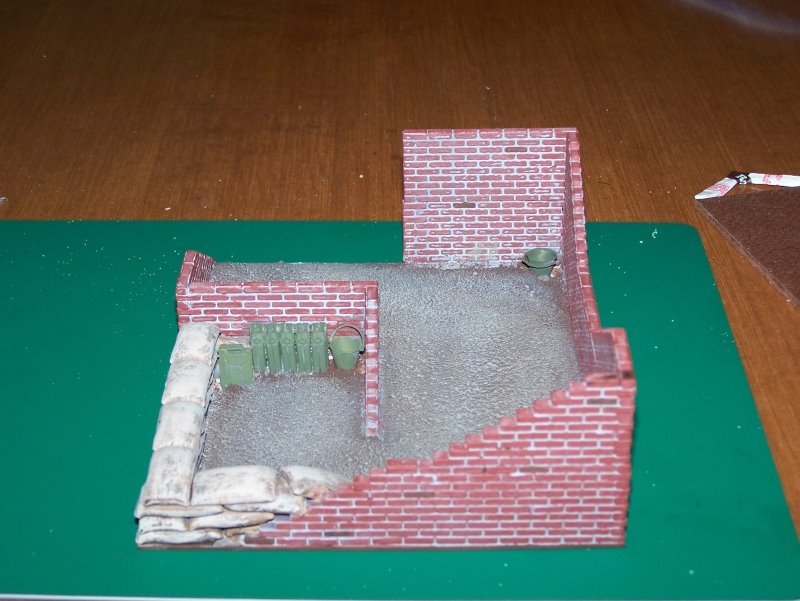
After the walls were in place I noticed that the piece needed a little pizzazz. This is when I decided to use the sand bag kit to build up the back area because it seemed a little weak. Once the sand bag emplacement was built, I then added the Jerry Cans and some pails to give the piece a lived in feel. Once everything was glued into place, I then applied wood glue to the base, so I could apply sand to the base. I covered the entire base with a thick layer of sand and let it sit for about 5 minutes. After that, I poured all of the excess sand off, and then let the glue dry overnight.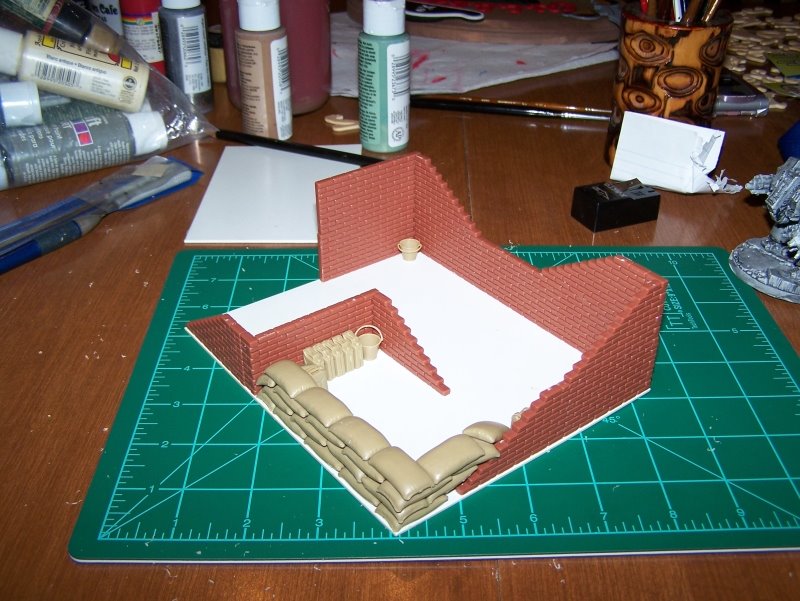
The next morning it was time to paint. When it comes to terrain, I forego the usage of my figure paints and use craft paints. I do this because they usually cost me between $0.50 and $1 (US Dollars) for a 2 ounce bottle. I will put the Citadel equivalent color in parentheses next to the color I used.
The first step was to spray prime the piece. I spray primed it gray. The main reason for this had to do with the mortar on the wall. After the spray primer had dried, I broke my work down into distinct phases. First I would paint the walls, then the sand bags, followed up by painting the floor, and then finally painting the jerry cans and cleaning things up.
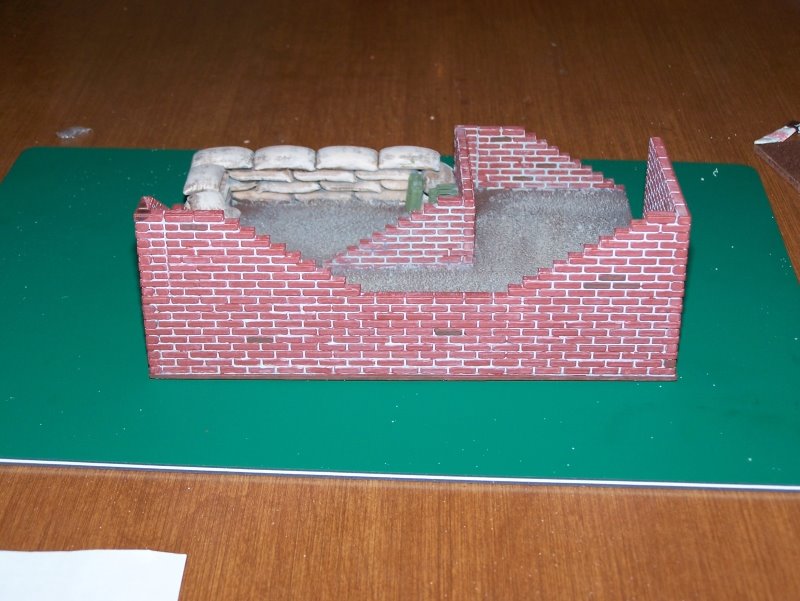 I started painting the walls by applying gray (Fortress Grey) to the entire wall surface. I did this to brighten up the darker grey primer and to ensure complete paint coverage. After this I began the process of dry brushing the walls Brick Red. (Dark Flesh is close) This required multiple applications. On the interior walls I made fewer passes which gave the walls a dustier appearance. After this was done I picked out a few bricks using a darker brown color to help the wall look a bit more realistic because bricks are not uniform in color.
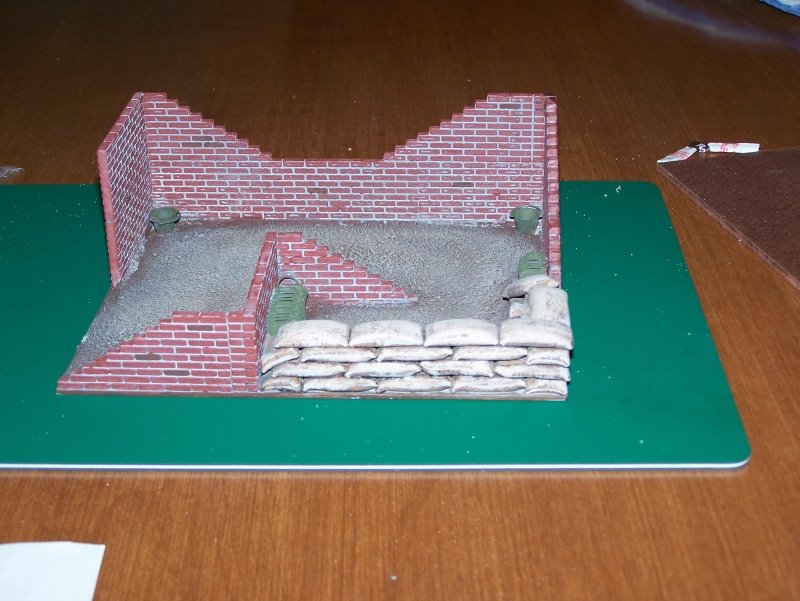
The sand bag emplacement was painted Territorial Beige (Graveyard Earth). I then made a wash using equal parts of Espresso (Scorched Brown) and Black (Chaos Black.) I thinned this mix down to a wash using a ratio of one part paint to 3 parts matte medium and 3 parts water. I achieved the highlights by mixing Territorial Beige with Gray and dry brushing that on.
 The painting of the pails and jerry cans was a breeze. I decided early on during the project that these would be painted in the classic military color Olive Drab. I rarely used a premixed version of this color because Yellow mixed with Black is how this color was achieved in the first place. Once you know the basis of this color mix, highlights and shadows are a breeze.
The final element of the painting process was painting the floor. This is a simple process that starts with painting the floor Espresso. The trick to highlighting the sand on the floor comes from two tricks. First, I dry brush with the brush I am using to mix my highlight color with, and second, I use a filbert brush. The second trick, I have found, gives spectacular results on terrain, and it is what I use almost exclusively on terrain now. The highlights were built by adding Territorial Beige to the Espresso and then adding increasing amounts of Gray to that. I painted the edge of the base with Espresso, and called it done.
Next time: Green Stuff
What other projects can you think of using Tamiya or any other scale model terrain kits? Let us know, and if you have pictures of these projects send them to us.

