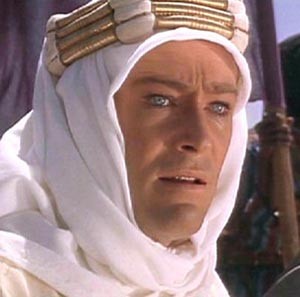
40k: Trying to Use Al’Rahem Effectively

One of my favorite miniatures for the past decade has been Captain Al’Rahem, whom I have generally used to represent the commander of the Tallarn 21st infantry. Fifth Edition came along, and suddenly Al’Rahem was back in the picture, with new and exciting rules. I played around with him and small platoons, and found him to be generally not a good member of a combined team. For the rest of the year, I’m going to try centering my Imperial Guard forces around him, and see how it turns out. NOTE: If you think this is anything like an easy-to-use and highly effective idea, I’ve got a lovely farm 20 miles south of Galveston to sell you.
Building the Platoon
First, using Al’ Rahem means go large or stay home. He needs a Commissar and a Priest in his command, as well as a Medic. We’re talking 7 Guardsmen at 200 points or so, but these guys can actually kill things, even Landraiders with a bit of luck.
Second, Platoon squads need to be a mass of Stubborn swordsmen, so a couple of Power Weapon Sergeants and a Power Weapon Commissar. Again, lots of points, but fighty and Stubborn 9.
Third, I need to be able to kill some other things. An Autocannon HW team will be fun to have coming in, and fairly cheap. A Special Weapons Squad with Demolition Charges makes for some deadly fun as well.
Deployment and Tactics
With all that decided, now I need to get my opponents near the edges so I can actually kill them with Al’ Rahem. How do I get opponents near the edges?
Baiting them with objectives and target units is one way. In Capture and Control, this means putting my objective right on the table edge. In Seize Ground, putting as many objectives near board edges as possible is also a given. For Annihilation, I can make a corner castle, go on both edges, or make a central firebase, depending on what my opponent’s composition and likely tactics will be.
Terrain deployment also helps. If there are nice big LOS blocking pieces, putting one midfield near a board edge and deploying where I can’t shoot the board edge side will encourage my opponent to avoid the cannons and be behind the wall. Clogging the center of the board with forests and craters to make advancing up the middle slower can also encourage edge deployments.
The Rest of the Army
The last part is building a supporting army to help Al’Rahem get his licks in. This means some solid heavy support in the form of tanks and artillery (LRBT, LRD, Medusa) a couple units of Melta Vets in Chimeras and Valkyries, and a Hellhound Chassis or two to keep them honest. I’m getting too expensive quickly, but I’ll rotate different elements through for testing.
~After I run a dozen games or so, I should have a better idea of what works and doesn’t work for me in the list. If you have some Al’Rahem success stories, I’d love to hear them. Similarly, I’m interested in what you’ve tried and failed with. I tried a small force, and that was not good. I tried a Straken / Al’Rahem combination that quickly became the Straken show, so not trying that again, either. I want to avoid Creed, as he has his own dynamics that radically shift the game, just like Straken.


