Hobby: A Quest For the Perfect Varnish


Hey guys, Ive been seeing a lot of varnishing articles on here, I figured I’d throw my hat in the ring here for those looking to take it to the next level.
So many of you maybe thinking, “Why does he have a picture of a fridge as a header for an article dealing with varnish.” I’ll get to that, but first I’d like to take you on a quick history of my varnish experience. When I first started off painting oh so long ago, I used what every starting hobbyist uses, GW paints. Extending this line of thought I used GW’s old school purity seal. Back in the day this stuff was pretty good. It was a satin finish and it left your miniatures looking pretty nice after one coat.
Just starting off I was experimenting with different aspects of varnishing. I had gotten the painting portion down but it always seemed that the varnish would warp or change the way my miniature looked. Sometimes it was for the best, sometimes it ruined the figure. I wanted to know what was going on, or at least figure out a better (more consistent) way to do it. I went online and started looking around. Eventually I came across a wonderful product by Testor’s. It was simply referred to as Dullcote. It seemed that everyone and their mother that knew anything about painting was using this to finish their miniatures. After using it once I found out why. It was simply the best. It left your miniatures matte, yet the colors popped like a gloss. Simply stunning. So the journey would end it seem… but alas all was not well in the world of varnishes.
Skip forward a few years. I’d been using Dullcote like crazy, the stuff was amazing and I couldn’t get enough. I was hooked. Suddenly, almost over night it seemed, you couldn’t find a can of the stuff anywhere. When it suddenly appeared again… something was a miss. They had changed the formula of the spray to make it legal to ship over seas again. Needless to say it was not the same Dullcote. Before you could apply a heaping spray of the stuff and you would get a finish matte and beautiful as could be. Now if you applied too much a shine formed. It also did not matte down any gloss that I put on the miniature to give it a protective shell. Thus I embarked on a new quest to find the perfect formula for finishing off my miniatures.
After seeing some historical painters using airbrushes to finish their models (and paint them) I decided to give it a try. I had wanted an airbrush forever for just simple base coating. I purchased an Iwata airbrush and compressor and a few different matte varnishes. Testor’s had a paint on version I wanted to try, as well as Vallejo’s. Neither were as good as the old formula Dullcote. They both left the model somewhat washed out. At this point in time a big change was going on in the world of war gaming in my area. GW’s popularity was declining and with the recent release of MKII Warmachine metal models suddenly became the standard instead of the odd man out. A simple coat of matte varnish would no longer due. I had to gloss varnish the models with a few coats before I hit them with the matte to protect them from chipping. With plastics this was never an issue.
I did some research and found that many people were using Klear. I had to snoop about but eventually I found the stuff had an American equivalent. Enter: Pledge Future Floor Wax. This stuff was great. It was fairly cheap for a giant bottle and I could put it through my airbrush straight and get a great gloss coat. I loved it. You can see me make good use of it ask a masking agent for oil paints in my weather tutorials. It did have a slight problem however. The shine it left was never completely gone when I sprayed a model down with the new Dullcote. I needed to find a way to cut the shine down before applying dullcote.
Recently I’ve been getting a lot of products from Liquitex. I was extremely impressed with their flow-aids and retardants. I figured I’d give their matte varnish a go. I was pretty impressed. It cut down ALL the shine from the Future Floor Wax, and went easily through my airbrush when I cut it 1:1 with a 9:1 dilution of Liquitex Flow Aid. The colors were a bit distorted but all the shine was gone. I then sprayed the model with a good covering of the new Dullcote. I was extremely happy with the result. For whatever reason the combination of Future Floor Wax, Liquitex Matte Varnish, and Testor’s new Dullcote gave me the effect of the original Dullcote. Now I get to the reason for the fridge. I use a small secret when I’m using spray varnishes and primers. I spray my models and then stick them in the fridge. I’m not sure of the scientific reasons but it makes the primer super smooth, and the colors pop on the new Dullcote formula. I simply spray them and stick them in the fridge. Try it out! That being said here are a few miniatures that I finished off that way, its the beginning of my Retribution of Scyrah force that I’ll be running in Privateer Press’ Blasted Heath campaign.
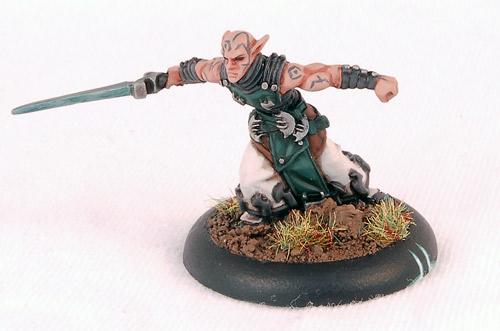
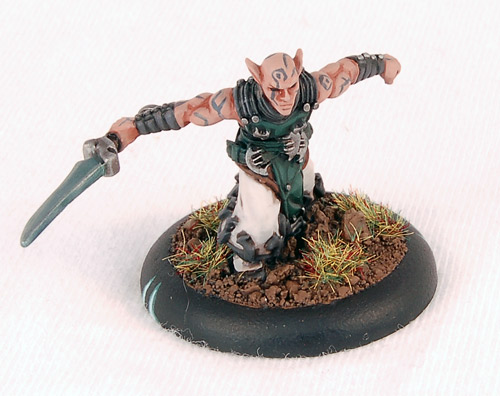

~ So there you have it. My quest for the ultimate matte varnish is complete. Sure it takes a few steps and it’s not cheap, but I always feel that nothing is better than a quality varnish job on a beautiful miniature. Not only will this protect your models while you play, but it will keep display pieces safe for years to come. Be sure to check out my blog First Rank, Second Rank for more hobby tips. If you have requests or questions feel free to drop me a line at [email protected]!

