40K: Dark Eldar Painting Tutorial

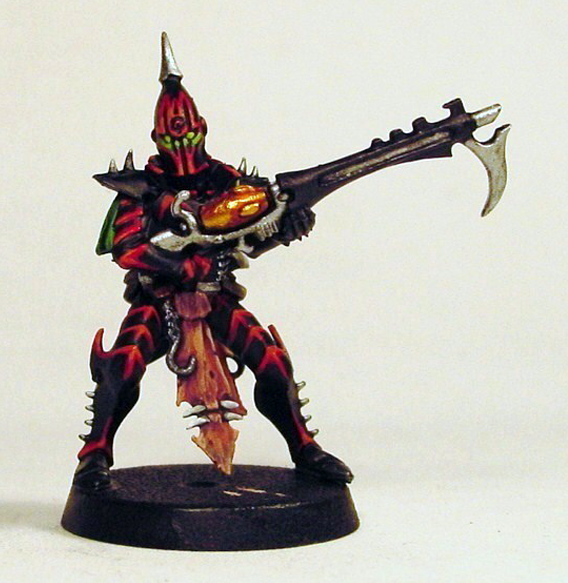
Hello fellow hobbyists, iPaint here with a quick tutorial on how I’m painting my Dark Eldar Kabalite Warriors. With Dark Eldar fever running rampant around my local gaming scene – and I’m sure everywhere else too – I thought it fitting to whip up a quick guide so you guys can get cracking at painting your shiny new minis.
This tutorial is designed to get your miniatures painted up to a solid tabletop standard that will be more than suitable for tournament play and friendly games alike. This tutorial assumes that the model has been assembled neatly and basecoated black. All paints listed below are from Games Workshop’s Citadel Colours range, but feel free to experiment or swap paint brands and colors as you wish. On to the fun stuff!
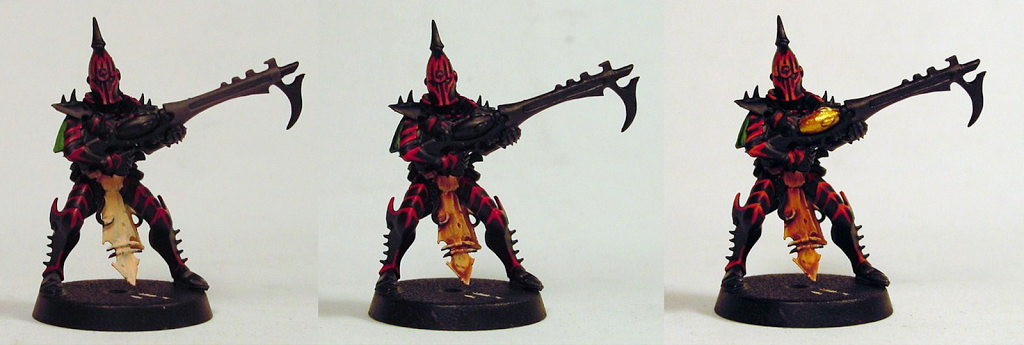 |
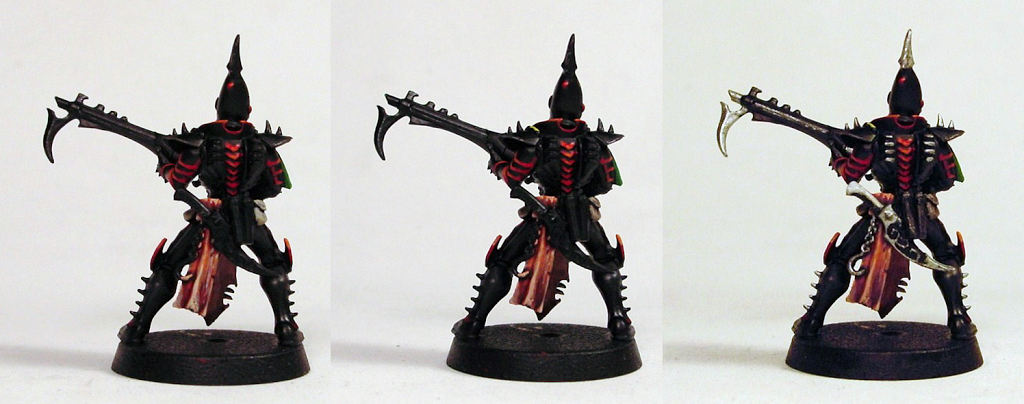
| Steps 1 – 3 Front View |
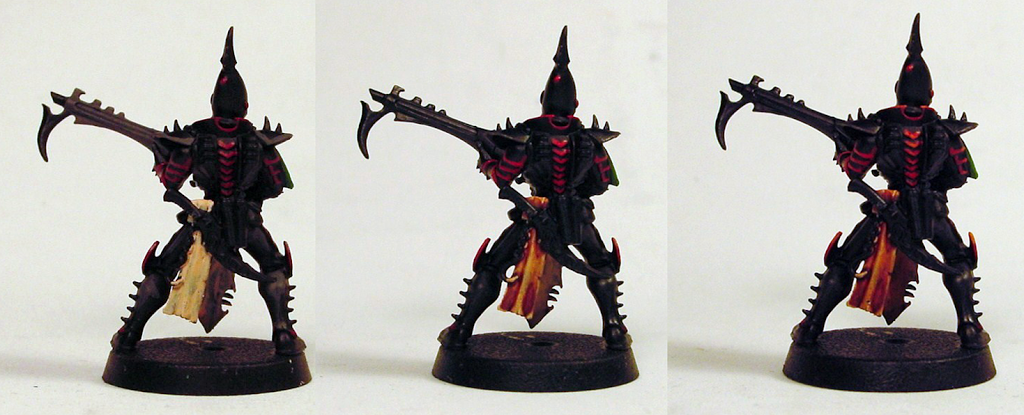 |
| Steps 1 – 3 Rear View |
Step 1: Edge the armor plates in Mechrite Red. Basecoat the skin sash in Elf Flesh. Basecoat the Splinter Rifle casing, highlight the under-armor, and edge highlight the shoulder armor with Codex Grey. Basecoat the arm sash in Goblin Green.
Step 2: Edge highlight the armor plates with Blood Red. Wash the skin sash with Ogryn Flesh. Wash the arm sash, under-armor, and Splinter Rifle casing with Badab Black.
Step 3: Edge highlight the armor plates with Solar Macharius Orange. Wash the skin sash with Gryphonne Sepia. Highlight the arm sash with Goblin Green. Basecoat the Splinter Rifle’s power supply with Shining Gold.
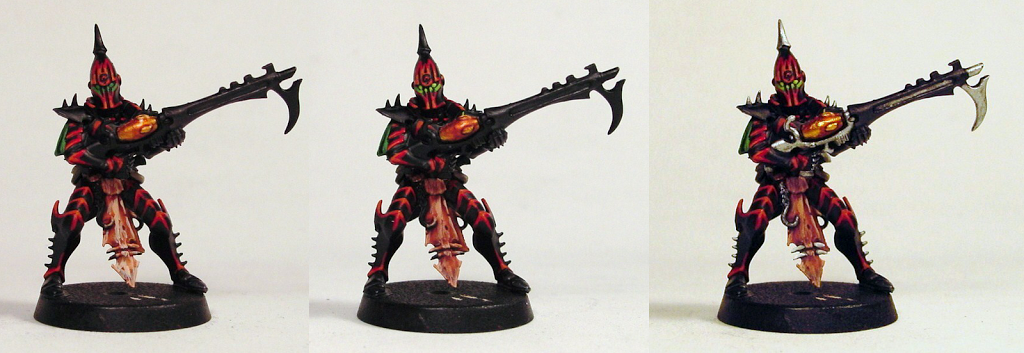 |
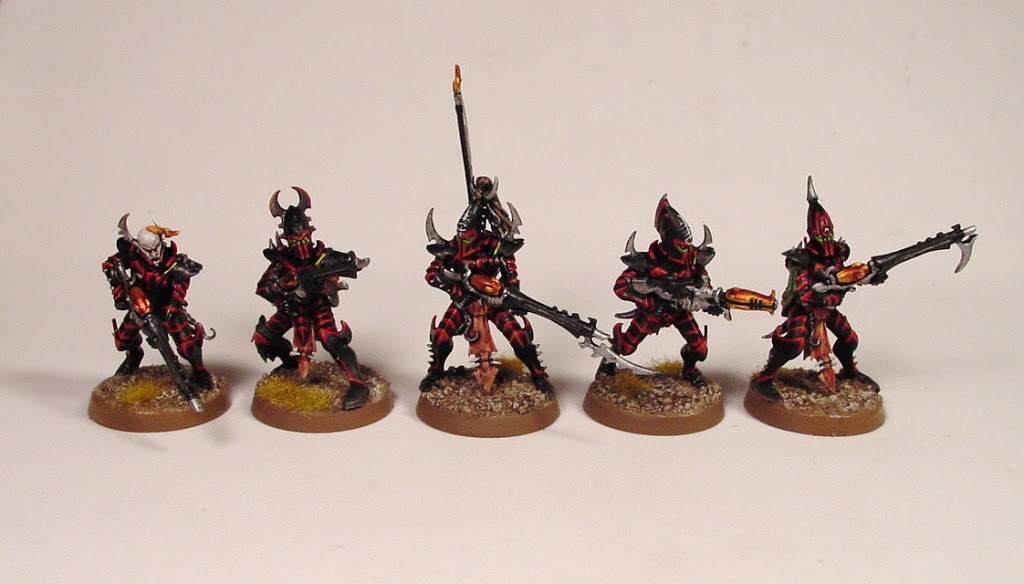
| Steps 4 – 6 Front View |
 |
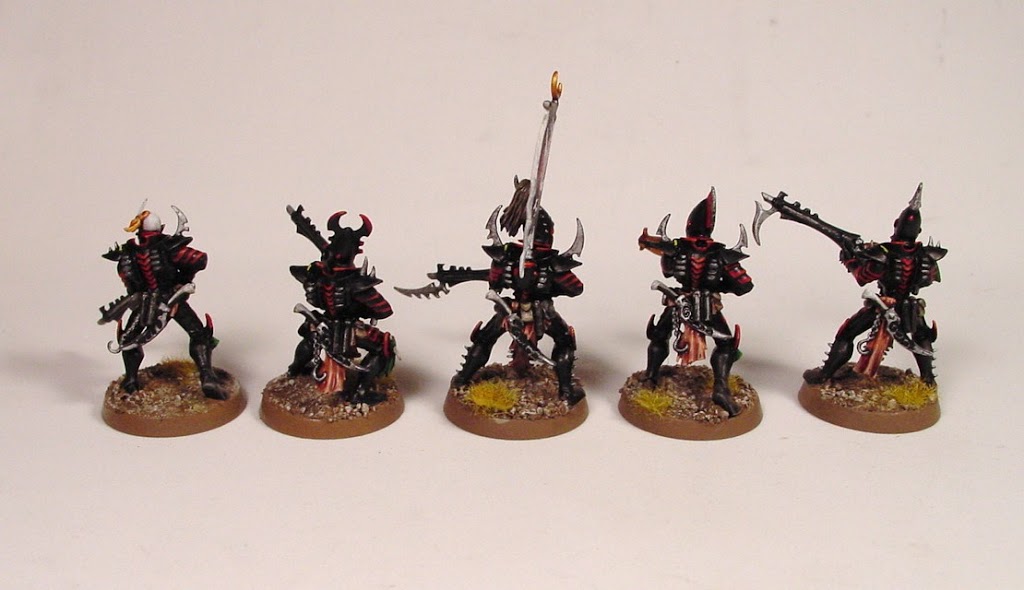
| Steps 4 – 6 Rear View |
Step 4: Highlight the skin sash with elf flesh. Wash the Splinter Rifle’s power supply with Gryphonne Sepia. Paint the eyes and highlight the armor edges just underneath the eyes with Goblin Green. Basecoat the ammo packs with Bleached Bone.
Step 5: Wash the skin sash with Ogryn Flesh. Wash the ammo packs with Devlan Mud. Wash the Splinter Rifle’s power supply with Gryphonne Sepia again. Highlight the eyes and armor edges just underneath the eyes with a 1:1 mix of Goblin Green and Sunburst Yellow. Paint the wire on the model’s left shoulder with Sunburst Yellow.
Step 6: Paint all the metal areas with Chainmail, such as the spiky bits and dagger sheath details. Highlight the Splinter Rifle’s power supply with Shining Gold. Basecoat bone details and dagger handle with Bleached Bone and give it a quick highlight of Skull White. Once the Chainmail has dried, wash the two cylinders on the belt with Badab Black.
Seal and base as desired, and the model is ready to bolster the ranks of your growing Kabal.
~Let me know how this tutorial worked out for you by leaving a comment below. I’m always on the lookout for more minis to make tutorials for, so if you have anything you’d like to see, let me know. Thanks for looking, and happy painting!
