HORDES: Gentleben’s Wrassler Repose

 When I committed myself to starting a Minions army there was no way I was going to limit myself to just one pact. Especially when the new Blindwater Congregation has so thoroughly captured my imagination.
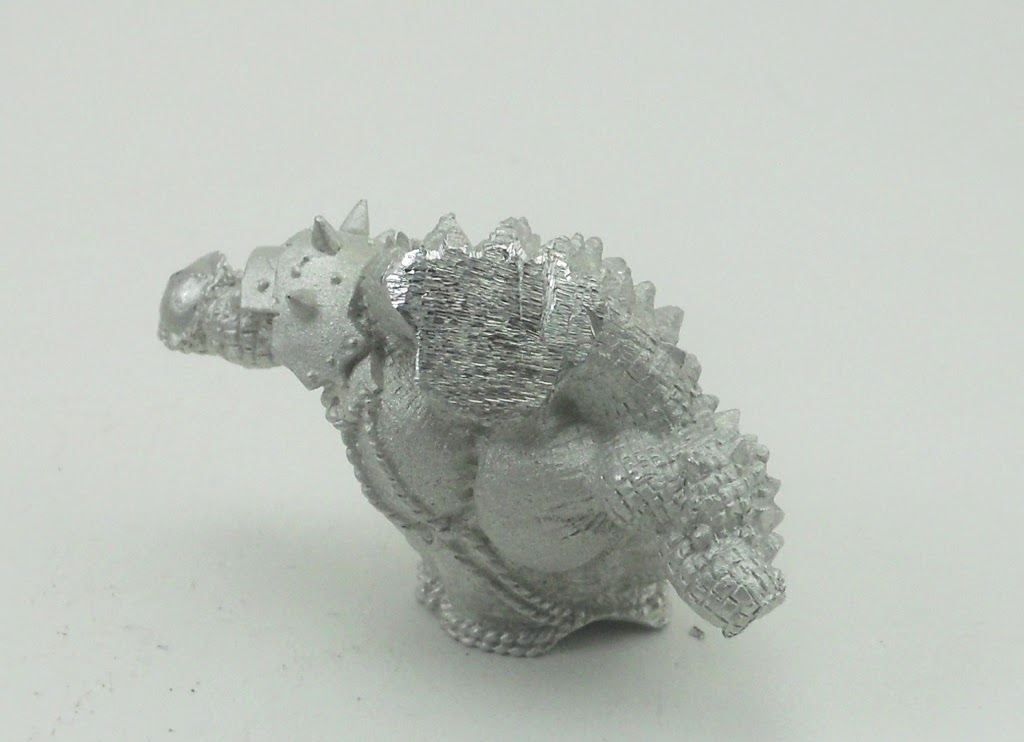
The new Blackhide Wrassler is a truly fantastic looking warbeast covered with detail and scales on every inch of him. I knew I would want at least two for my force, especially given how limited the Covenant’s beast selection is right now. But as anyone who reads these hobby posts of mine knows, I prefer not to double down on poses for my beasts and jacks. With the Wrassler I didn’t really plan on anything as elaborate as I had with my warjacks or custom War Hog. Since these are fully organic creatures I figured a repose would suffice to give my army some variation. Discounting tremendous variations in size, one gator looks more or less like another right? So if you haven’t already figured it out this article will show how I turned this guy: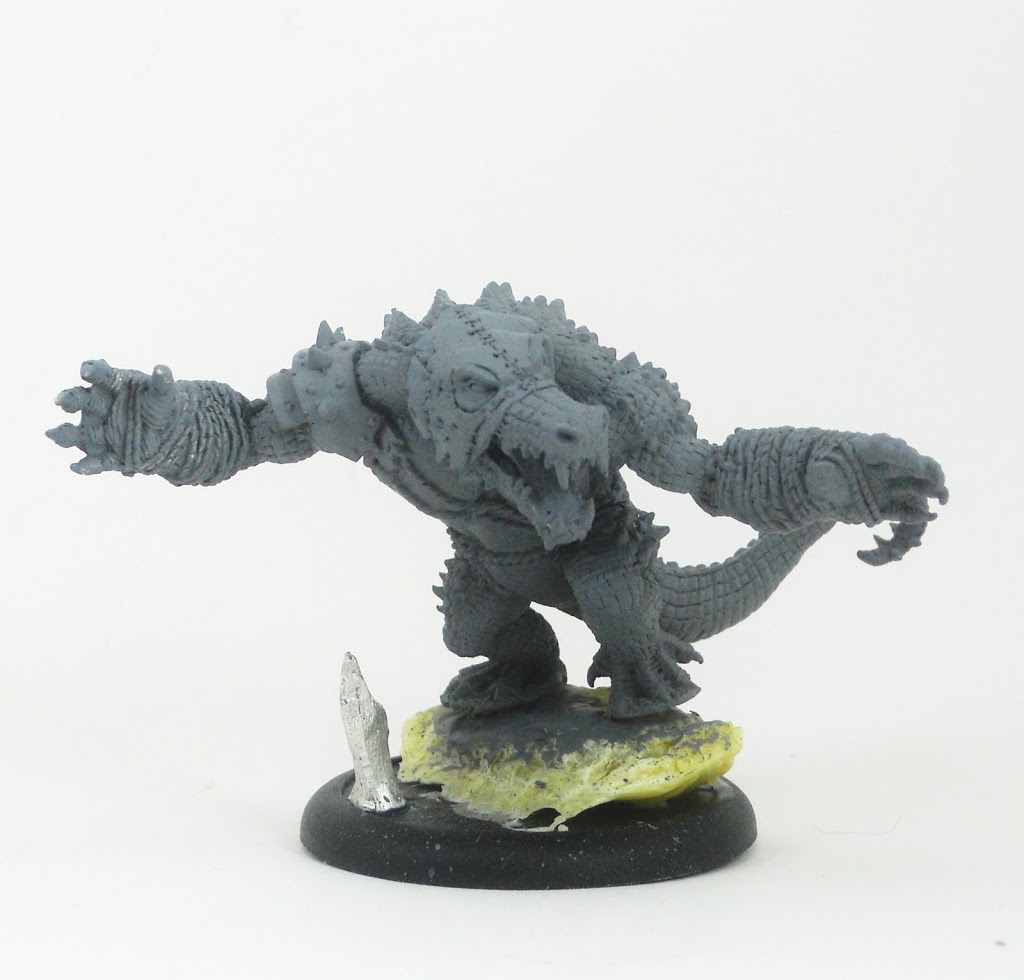 Into this one:Its always intimidating to take a hacksaw to a $42 dollar mini, but Privateer Press was kind enough to send along a promo to Bell of Lost Souls, and I wanted to do something special with it. I’ll admit, it took a lot of effort to achieve what probably appears to be a somewhat minor repose. I spent awhile just taking stock of the mini, trying to figure out how to get the most change without having to resculpt too many major areas of the monster. He has a very distinct profile and his musculature is very well done, so if I changed it up too much he would look unnatural. But of course… it had to be enough of a change to be worth it. Never having having sculpted scales before I was very apprehensive about opening up too many areas of skin that I would need to re-cover. After my first outing with the hacksaw, I’d come up with what you’ll see below. I’d only fully hacked off two bits, his tail and an arm.
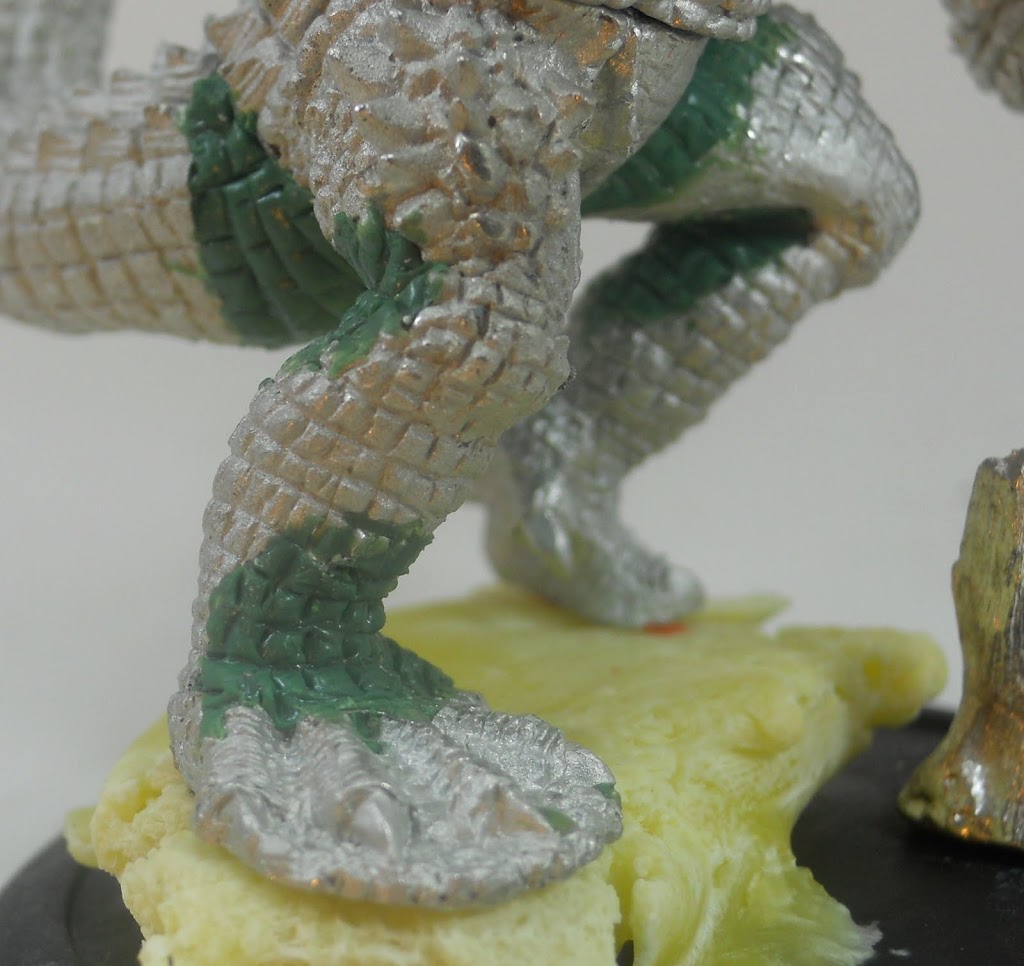
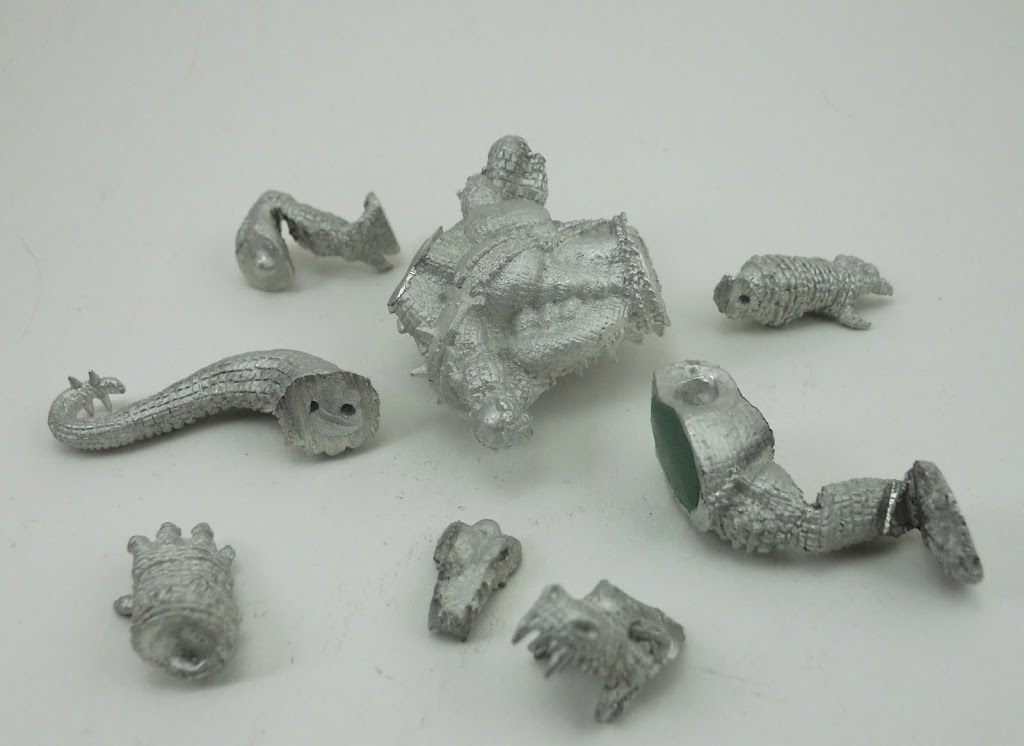 To get his more upright stature, I sawed into his legs behind the knees and on one leg, above the feet. Then, I used a screw driver to pry those joints further apart to get longer taller legs. This meant the scales on his knees got to stay intact.
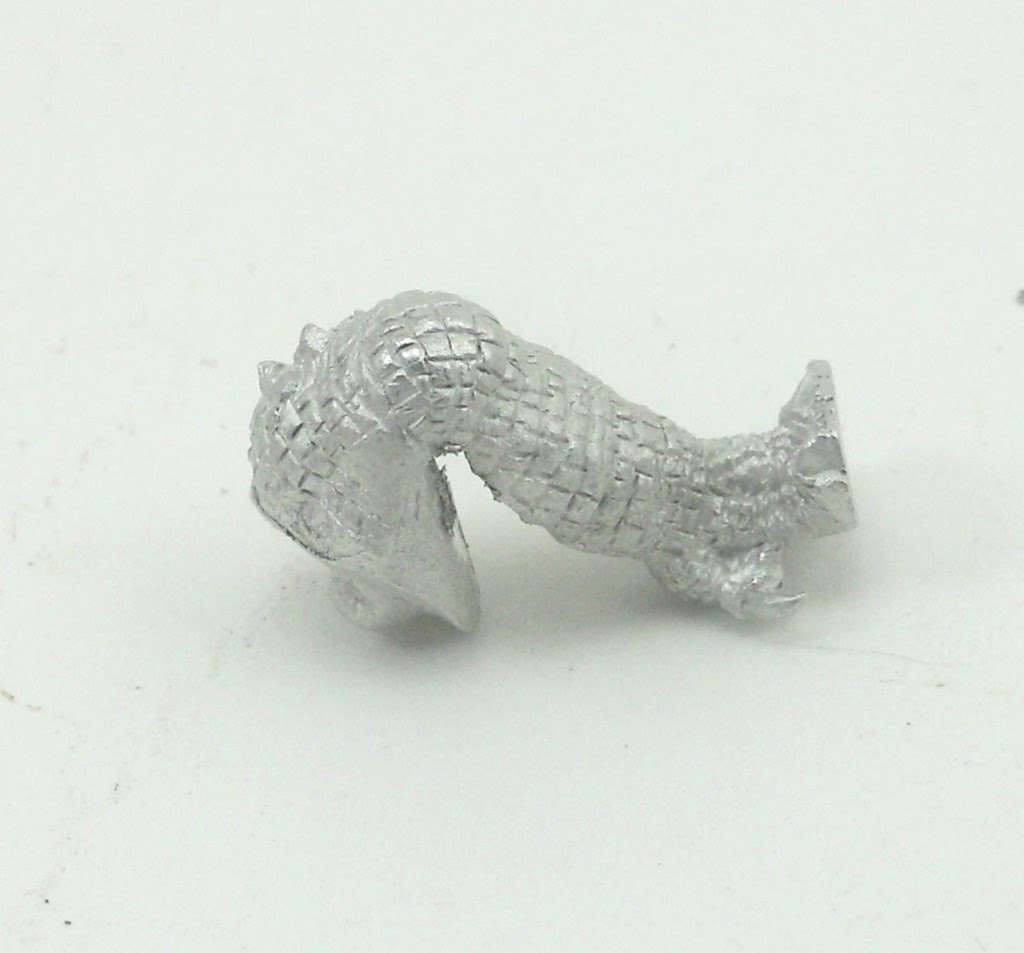 I also filled the cavity in his lower torso with green stuff to create an area to pin the tail to.
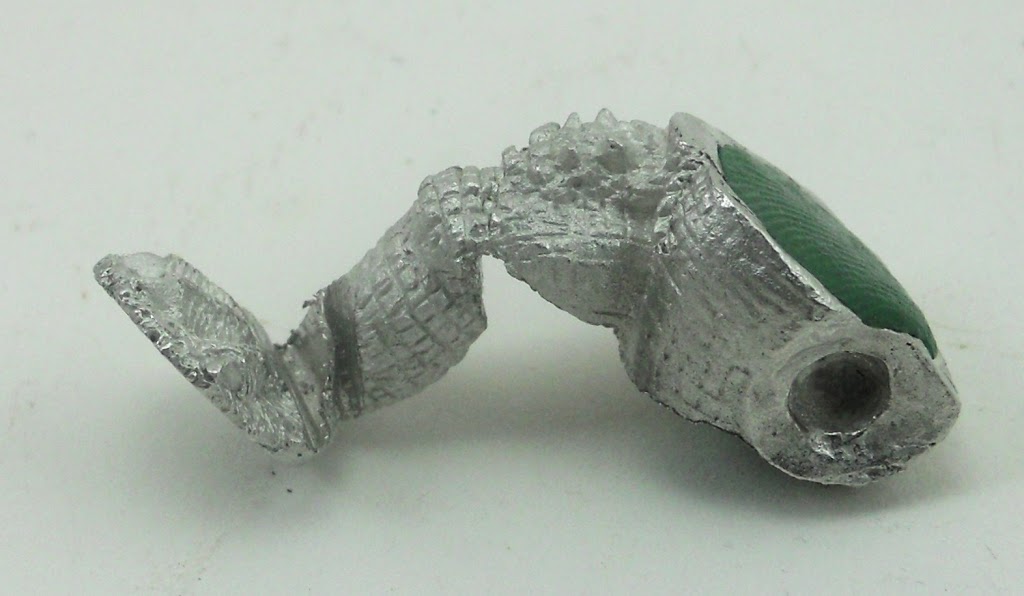
 After pinning his tail in place I got to work on the sculpting of his lower body. I added extra space with the pins lengthening it a bit, and also turning it in the desired direction. This gap, as well as the many I’d created on his legs had to be filled with green stuff. Ideally I think I should have sculpted the musculature first and waited for it to cure, before going back and applying a very thin layer of green stuff to sculpt the scales into. Instead I was too eager to play with my gators and sculpted the scales directly onto the big gummy blob. I’m still pretty pleased with the result, but I think my haste caused the scales I made to be a bit thicker looking and less precise than those on the original sculpt. Patient or not, I think the best way to form the scales is to gently rock a sharp modelling tool (maybe even a hobby knife though the blade might be too long for decent accuracy) in the lines over the curves of the area. Don’t “draw” the lines as you would with a pencil or you will risk pulling up the green stuff.
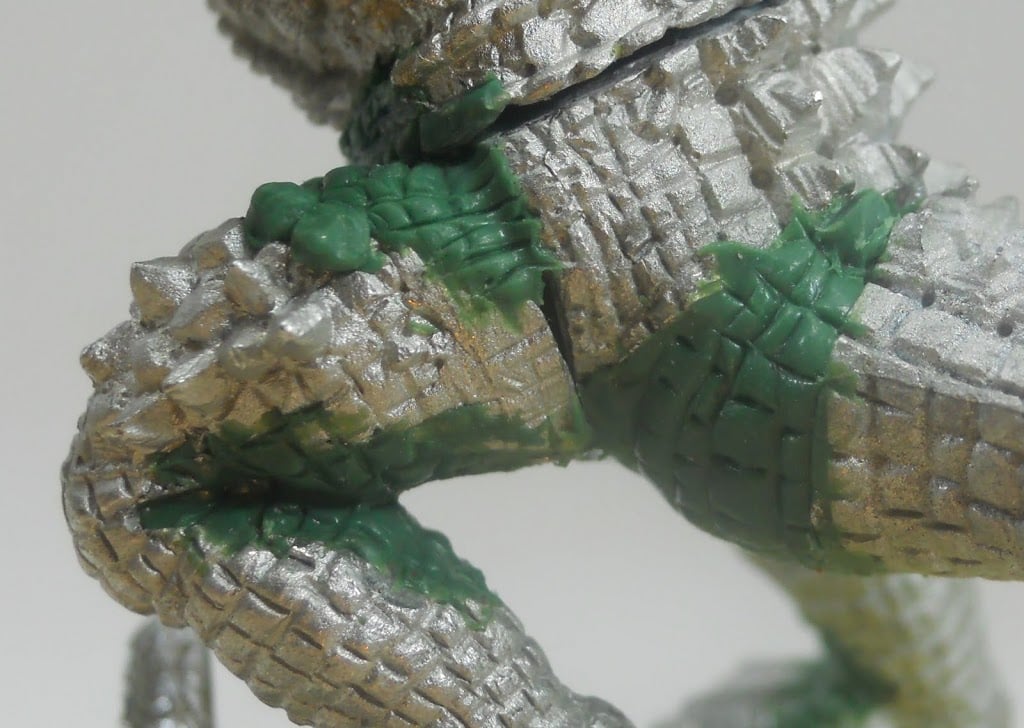
 It was the area along the back of the tail where the creature has his thickest scales that I was most worried about creating a successful join. Its kind of hard to see, but I made little “pyramids” of green stuff to stick in the gaps on each side.
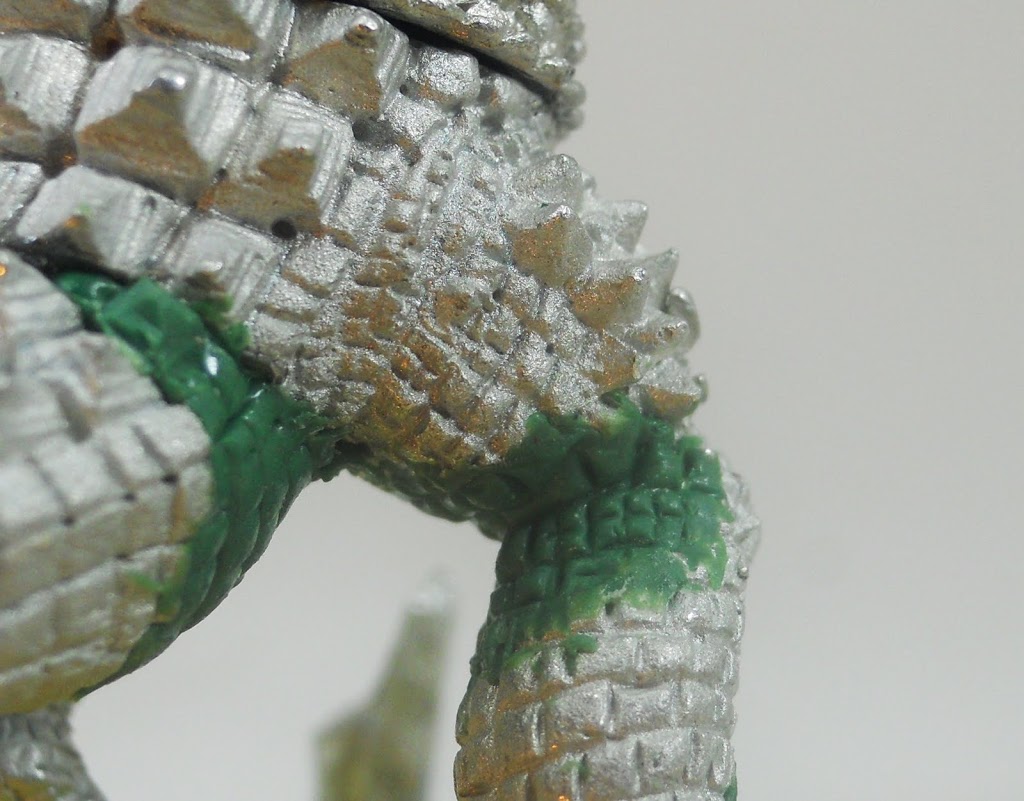
Along the waist I had to resculpt a bit of his rope belt to replace the area where the old one had been sculpted to curve along a now repositioned leg. After this attempt I’m pretty in awe of any sculptor’s ability to create rope. Long cords of perfectly even thickness cut with diagonal lines at precisely spaced intervals provide a unique challenge. I’m guessing there’s a trick to it, but I just did it the hard way. They don’t look as good as the originals, but are in an out of the way place I don’t think anyone will notice.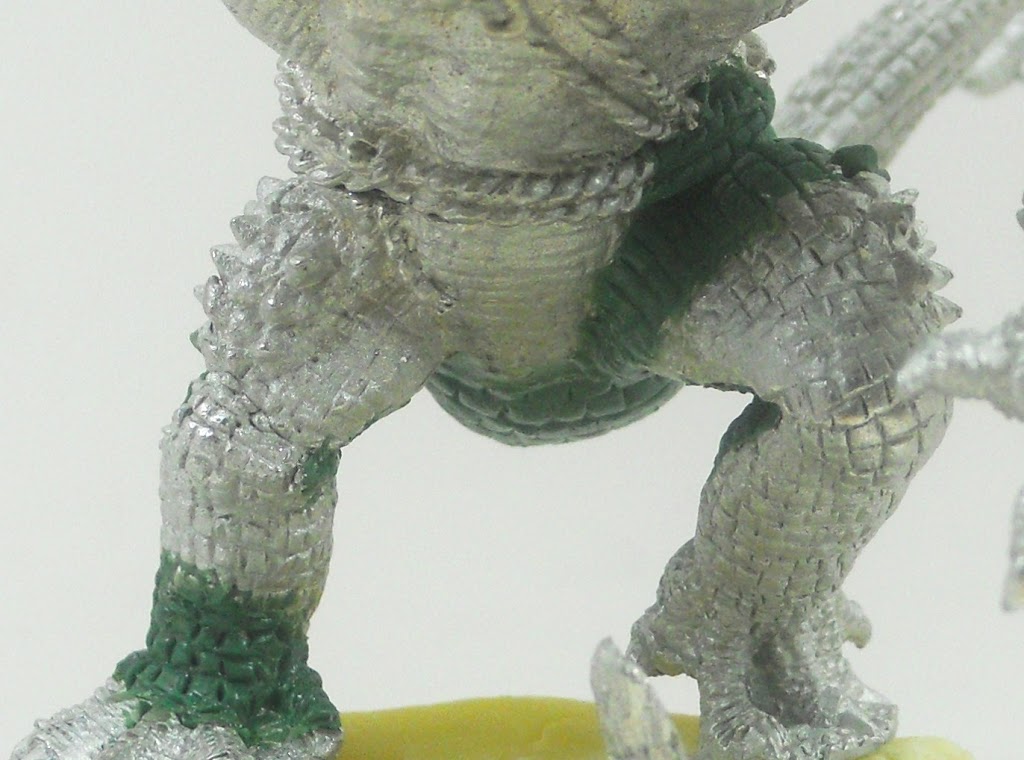
The elbows are a similar story to the legs. I had taken care when cutting off the left arm to create a V shape that left as much of the biceps intact as possible, to minimize any necessary resculpting. To create a natural looking join, I still had to recreate some of the muscle though.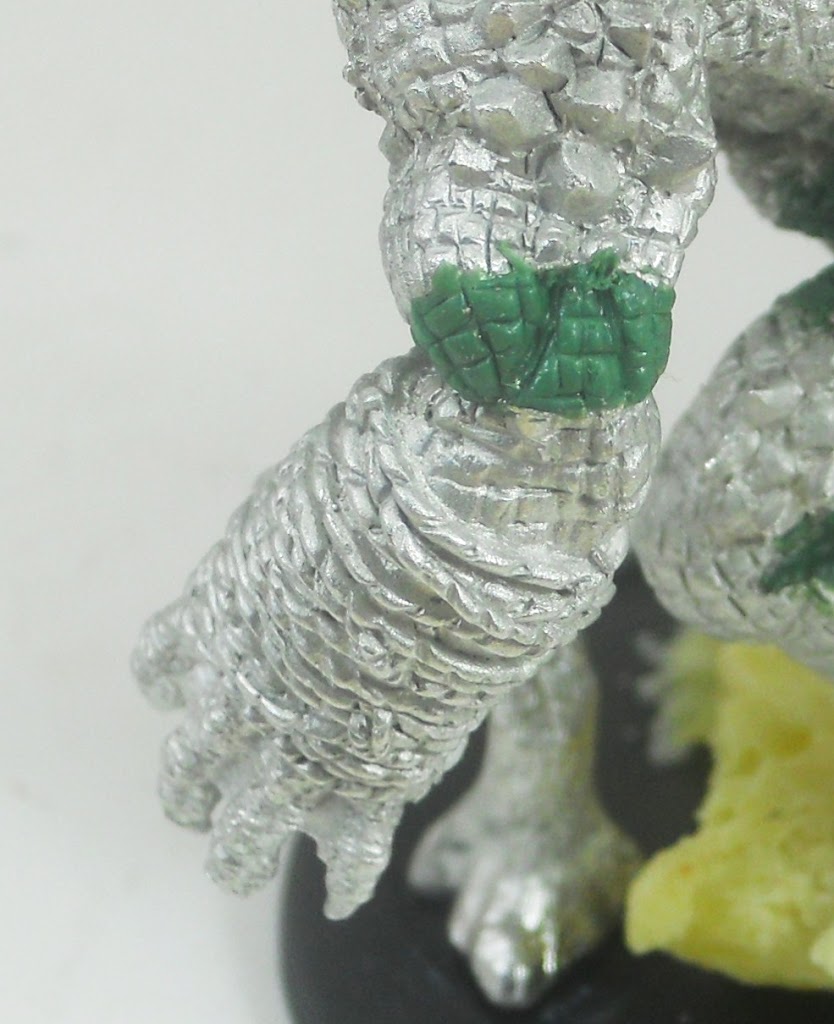 I ground off a lot of area on the upper right arm so I could resculpt the muscles after I pinned the lower arm on in its new pose.
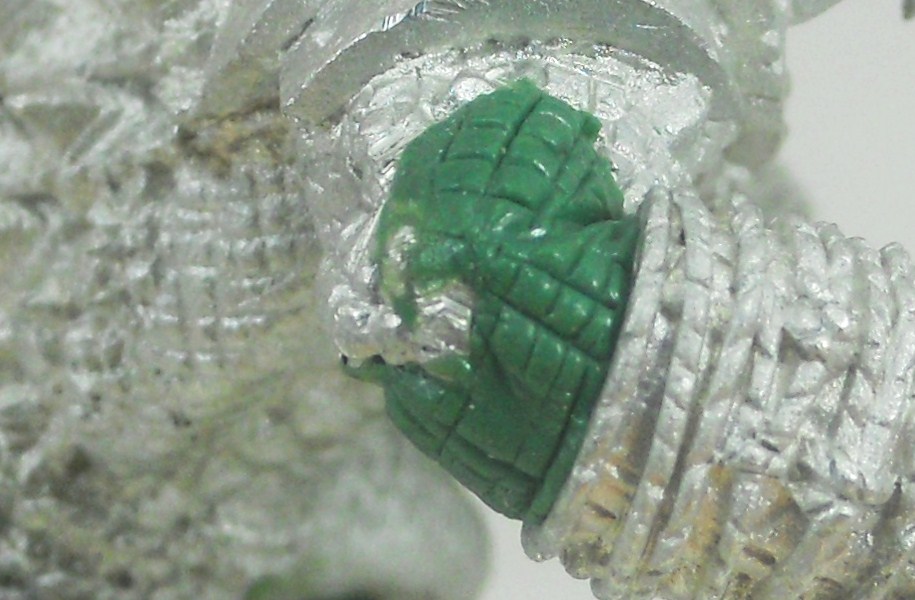
The head created some different challenges. I’d had to lose a lot of area from the curved neck in order to make the head more forward facing. Now it would all have to be resculpted.
This could have meant having to remake a lot of those very tricky looking back scales, but before I had ever committed to grinding down the neck, I’d thought of a better plan. I had a lot of trouble resculpting even the lower part of the neck; all those thick muscles were very complicated. But my plan from the start had been to cover the whole area by extending the Wrassler’s mask backward. Sculpting cloth is still a huge challenge for me, but this rather formless area, especially with all its torn edges, wasn’t too hard. I think it was a much better solution than trying to do all those scales by hand. I stand by this as a general rule of converting: if you can’t sculpt the thing you need, find a way to cover up the area if you can. This advice actually comes from John Blanche (I think) in a very old GW hobby book full of inspiring conversions.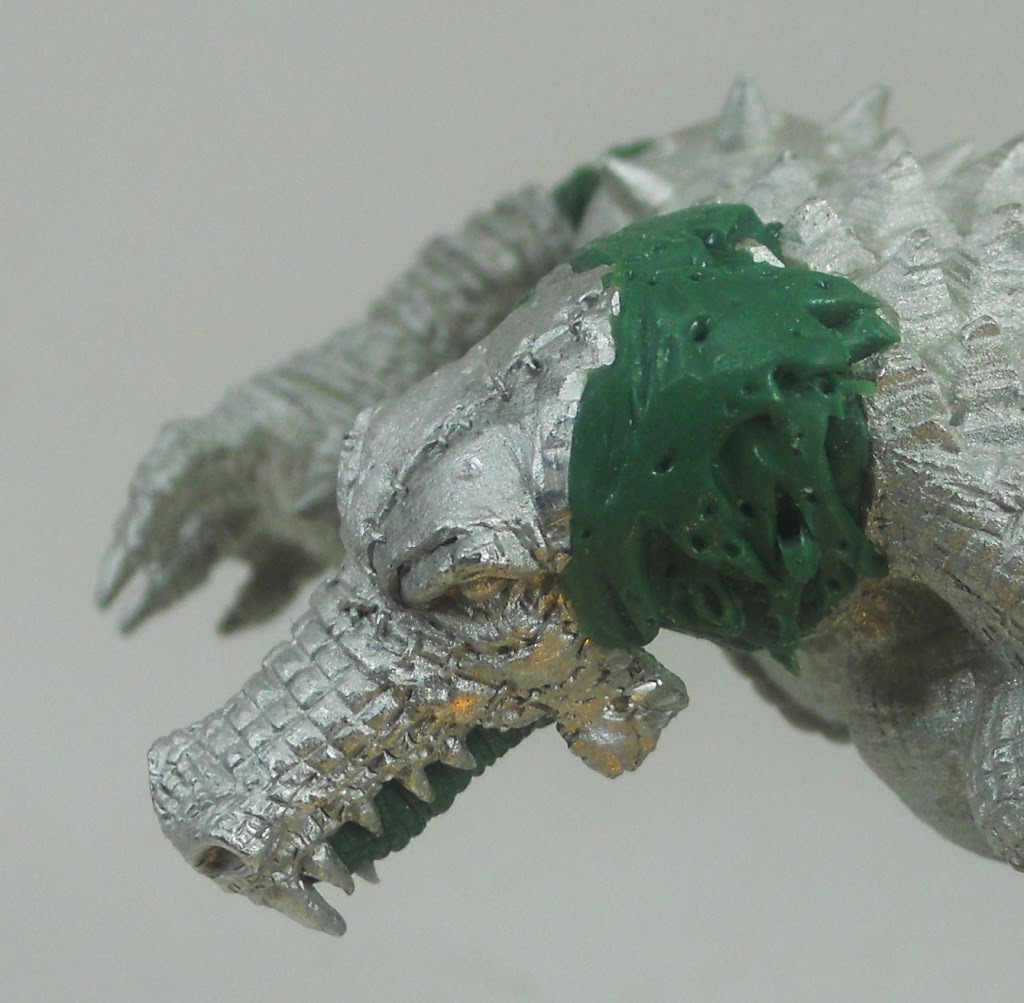
Finally, I didn’t want to resculpt this guy’s whole head so to change it up a bit I gave him a new lower jaw. After making a proper shape to fill the gap, I just rocked my sculpting tool across the contours of the jaw to form the scales as I had done with all the other areas.
~ So now I have two distinct looking Wrasslers for my Blindwater Covenant. Come back soon and check out my techniques for painting scales.

