40K Spacecurves’ Battle Report: ETC match vs. Denmark!

Hello Everyone,
In the wake of the ETC I’ve gotten a lot of requests for battle reports, so I’ll do my best to oblige.
The hard part about writing ETC battle reports, is that I have very little time to take pictures during the games! So I apologize in advance for the low amount of pictures. I was desperately fending off my excellent opponent and could only snap a few quick pictures with my phone.
In the third round of the ETC we played Denmark. We had just lost to Germany the round before, and we needed to finish day 1 with a win to keep us in the medal hunt.
The pairing process went evenly overall. I was one of the players we put forward on defense, and the Danes got to pick the matchup. They astutely chose Space Wolves (grey hunters >> tactical marines). I got to pick the table though, and after careful consideration chose one with a bunch of impassible terrain that would limit the movement of his Land Raiders.
It turns out this would be a showdown between team captains! I would be playing the Denmark Captain Patrick Glikmann.
I was once again playing my trusty vanilla marines. My army list was:
PLAYER: Ben Mohlie
ARMY DESCRIPTION: Space MarinesAdvertisementHQ 1: Librarian: Null Zone, Gate of Infinity
Elite 1: 5 Assault Terminators with thunder hammer storm shield
Elite 2: Dreadnought: twin linked auto-cannon(10), twin linked auto-cannon(10)
Elite 3: Dreadnought: Multimelta (free), storm bolter (free)Troop 1: Tactical Squad
7 marines with bolters, 1 marine with meltagun (5), 1 marine with missile launcher(free), 1 Sgt. with Power fist (25), combi-melta(10) (has transport 1)Troop 2: Tactical Squad
7 Marines with bolters, 1 marine flamer(free), 1 marine with missile launcher (free) 1 sgt with bolter (has transport 2)Troop 3: Tactical Squad
7 Marines with bolters, 1 marine flamer(free), 1 marine with missile launcher (free) 1 sgt with bolter (has transport 3)AdvertisementFast Attack 1: Land Speeder: (50) heavy bolter (free), typhoon missile launcher (40)
Fast Attack 2: Land Speeder: (50) heavy bolter (free), typhoon missile launcher (40)Heavy Support 1: Land Raider: extra armor (15), Multi-Melta (10)
Heavy Support 2:Thunderfire CannonTransport 1: Rhino
Transport 2: Razorback twin heavy bolters
Transport 3: Razorback twin heavy boltersTotal: 1750
Subscribe to our newsletter!Get Tabletop, RPG & Pop Culture news delivered directly to your inbox.By subscribing you agree to our Terms of Use and Privacy Policy.
Patrick’s Army list was:
PLAYER 8: Patrick “El Generalissimo” Glikmann (CAPTAIN)
ARMY DESCRIPTION : Codex Space WolvesHQ1 : Runepriest (100 pts). Psychic powers: Living Lightning (0 pts), Murderous Hurricane (0 pts)
AdvertisementElite1 : Ironpriest (50 pts), Bolt Pistol (0), Saga of the Ironwolf (15), 3 Thrall Servitors with Servoarm (30 pts), 4 Cyberwolves (60 pts)
Elite2 : 3 Wolf Guard (54), 3 Power Fist (60), 3 Combi Melta (15) [in transport 1]Troop 1 : 7 Grey Hunters Pack (105), Melta Gun (5), Wolf Standard (10) [in transport 2]
Troop 2 : 7 Grey Hunters Pack (105), Melta Gun (5), Wolf Standard (10) [in transport 3]
Troop 3 : 7 Grey Hunters Pack (105), Melta Gun (5), Wolf Standard (10)
Troop 4 : 5 Grey Hunters Pack (105), Melta Gun (5) [in transport 4]HS1: 6 Long Fangs (90 pts), 5 Missile Launchers (50 pts)
HS2: 6 Long Fangs (90 pts), 5 Missile Launchers (50 pts)
HS3: Land Raider Redeemer (240), Extra Armour (15), Multi Melta (10)Transport1 : Land Raider Redeemer (240), Extra Armour (15), Multi Melta (10)
Transport2 : Rhino (35 pts), Dozer Blade (5 pts)
Transport3 : Rhino (35 pts), Dozer Blade (5 pts)
Transport4 : Rhino (35 pts)TOTAL [ 1749 pts]
The Mission was:
Deployment: Pitched Battle
Primary Objective: 8 Points, Seize Ground (5 counters)
Secondary Objective: 4 Points, Annihilation
Victory Points: 8 PointsAdvertisement
The objectives ended up scattered evenly around the board. Two were roughly 15 inches apart in the center, the others in different quarters.
I won the roll off and gave Patrick the first turn. I knew I could hide from the Long Fangs behind the stone walls that dominated the center of the battlefield, and I wanted the final movement to grab objectives. He deployed with the Iron Priest Land Raider on my left flank, the other Land Raider on my right. The Long Fangs were in the woods on his side of the board, and the three Rhinos sandwiching the Land Raiders.
I carefully consider my deployment. The hard part is, if he comes straight at me with both Land Raiders he can just run me over. My vanilla marines just don’t have the muscle to stop that many Grey Hunters and Land Raiders. I might get one squad with my Assault Terminators, but that’s my only assault unit so I’d be overwhelmed quickly after that. I don’t want to encourage a rush, and its a five objective game, so spreading out seems like the best idea. I deploy one speeder in the far right corner, my two heavy bolter Razorbacks with 5 marines in each, my Land Raider with my Terminators and Librarian, and a missile combat squad.
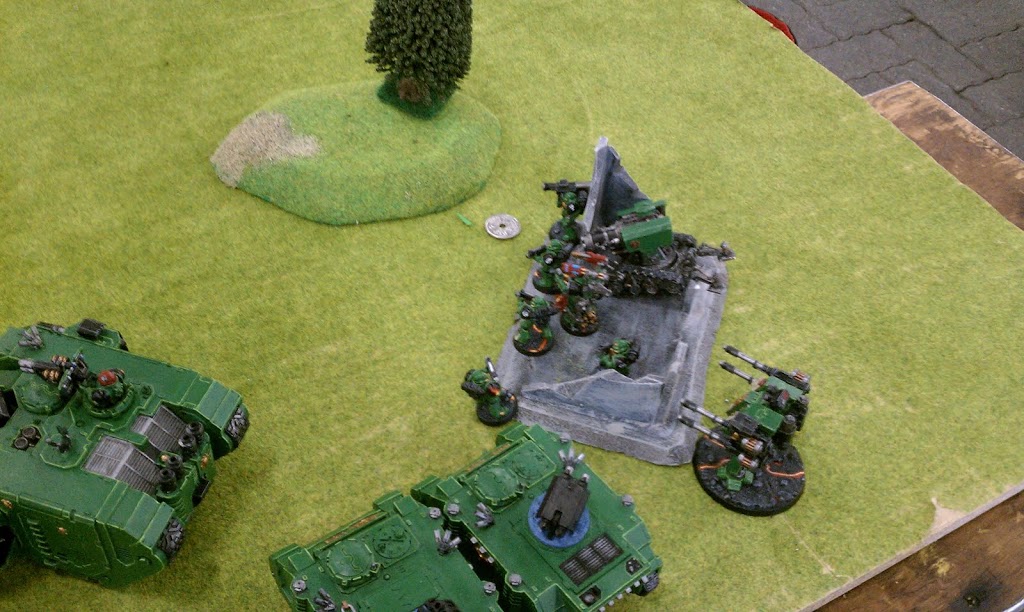 |
| Picture 1: Right flank of my deployment |
On my left flank I put the melta tactical squad in their Rhino, the melta Dreadnought, one combat squad with a missile launcher, and one Land Speeder.
So I’ve got more stuff on the right flank, but hopefully just enough on the left to make Patrick take it seriously. What I hope happens is he sends one Land Raider left, one right, and spreads out his Grey Hunters to take objectives. If it looks like the left flank can’t handle what is coming at it, I’m prepared to just run away and focus on taking 3 objectives on the right flank. I was basing this strategy partly on my experience with playing in Europe. Namely, that players over there tend to play very carefully and not as aggressively as is common in the states. I think the right strategy for my opponent here is just to send everything at the right flank and crush it, because I’d have a hard time in a straight fight.
TURN 1:
Patrick begins his turn and I’m cheering in my head as the Iron Priest Land Raider shuffles left a little bit, while the other one goes right. One Grey Hunter squad moves over to the objective in the far right quarter. The other two move up the middle, one popping smoke and moving in front of the other. Shooting isn’t too bad since I’ve gotten out of LOS of almost all the Long Fangs. He does get LOS to my left speeder with two Long Fangs, and immobalizes it and blows off the missiles.
On my turn 1 I’m very happy to not have to do much. I can outshoot him, and he isn’t threatening a rush anywhere yet. I move up my Rhino and Dreadnought behind the lefthand impassible wall so they can threaten to counter attack if the central Grey Hunters come closer. In shooting my thunderfire blows apart some Long Fangs, and my heavy bolter Razorback claim some more, leaving only two standing in the right-hand squad. My Land Raider throws everything at the central Grey Hunter Rhinos, but the smoke is too thick and nothing gets through. My insult missiles bounce off the Land Raiders. So after turn 1 I’m feeling pretty good. He’s splitting his forces like I hoped, and hasn’t committed anywhere yet. I’m happy to prolong the shootout as long as possible!
TURN 2
Patrick keeps his left flank Land Raider pretty much where it is, and moves one of his Grey Hunters Rhinos left to answer my tactical squad. On the right flank his other Land Raider crashes forward through a forest. Next turn he will be in charge range of my firebase! In shooting he surprises me by having line of sight to my Dreadnought over the big wall. Damn those tall Land Raiders! Thankfully he only gets a shaken result. The righthand Land Raider throws assault cannon shots at my speeder in the corner, and he blows off the missiles and shakes it.
With that it is my turn, and its time to engage. I have a perfect block opportunity with my shaken speeder, and he zooms up in front of the right-hand raider to stop the charge next turn.
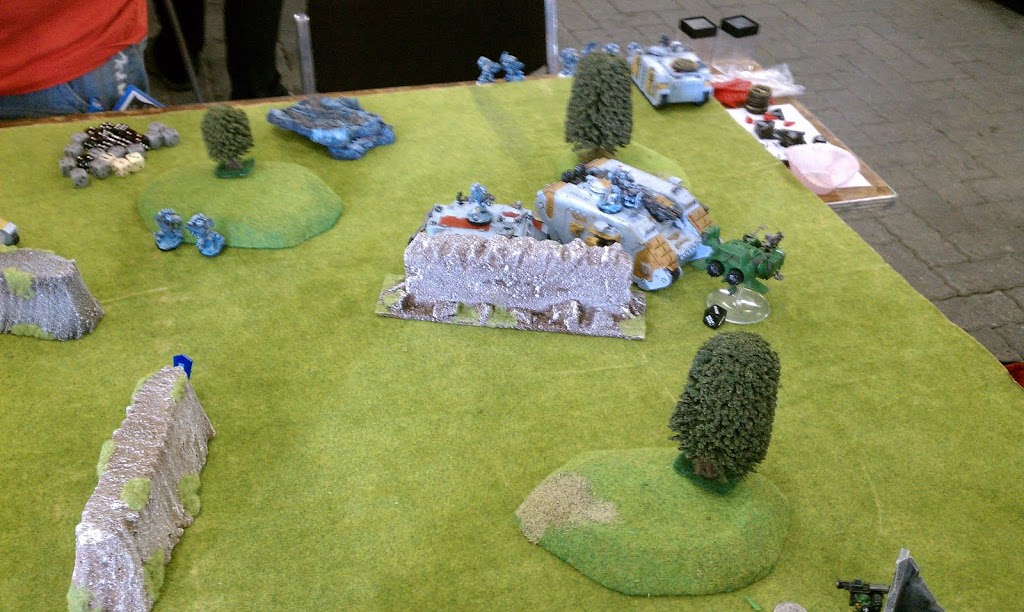 |
| Picture 2: My land speeder blocks the right-hand land raider |
I think long and hard about sending in my Land Raider, but I conclude I can’t commit it yet. I don’t know if his Iron Priest Raider is going left or center, and I’m not sure how he will respond to the block on the right-hand side. My boys on the left flank are on their own!
Speaking of the left flank, I move up my Dreadnought right to the wall, hoping he is now hidden from the Raider. My tacticals move up in their Rhino and pop smoke. I’m not feeling good about the coming showdown between ten Grey Hunters and ten Tactical Marines…. But then in the shooting phase the combat squad on the left flank comes through big time for their brothers with their single missile launcher, and blows up the Grey Hunter Rhino! That will help a lot. I also finish of the right-hand Long Fangs with my deadly heavy bolter Razorbacks. All in all an awesome turn for me.
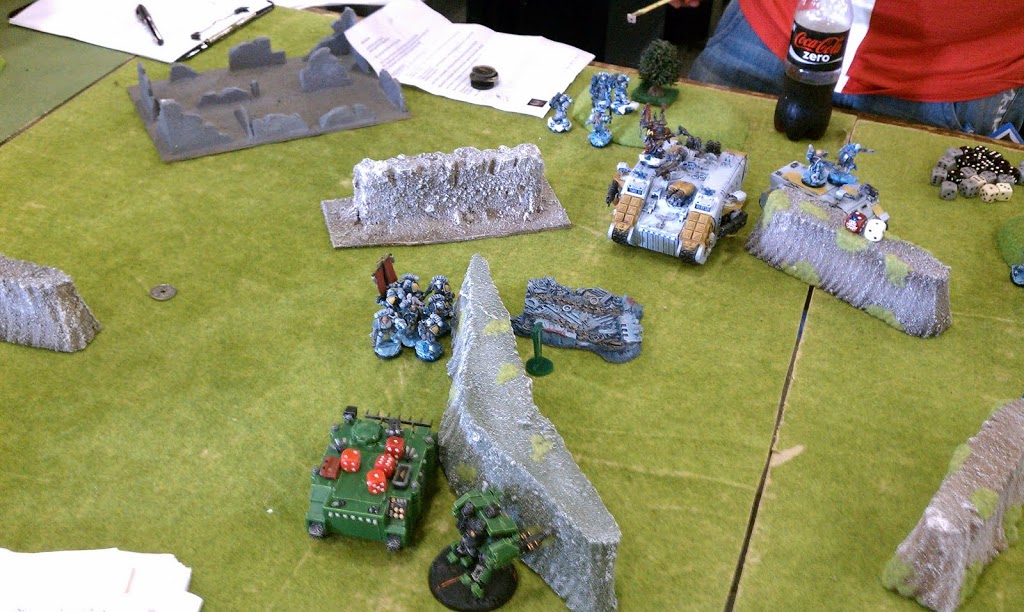 |
| Picture 3: End of turn 2, the battle for left flank is joined |
TURN 3
Patrick shifts his right hand Land Raider through the woods moving laterally away from my blocking Land Speeder. On the left he drives his Iron Priest Raider forward….and gets immobilized on the crater from his Rhino! It is now wedged between the two walls over there, basically completely cutting the battlefield in half. The left Grey Hunters rushed my Rhino but their meltas got stopped by my smoke launchers. Whew! On the right flank, the Land Raider executed my annoying Land Speeder blowing it sky high. The Grey Hunters then charged my Rhino, but the speeding vehicle survived the hail of grenades.
Ok it’s my turn 3. I’ve got a great chance to wipe out the left-hand Grey Hunters by shooting them up and then charging with my Tactical Squad and Dreadnought. On the right side my firebase is in big trouble. The Land Raider is out of the forest and in charge range of my combat squad and thunderfire cannon. I don’t want him to kill both units with one charge, but I would love him to commit the last hammer early. I move the combat squad back to safety, and leave the Thunderfire Cannon in charge range. I’m hoping he will take the bait and charge the Thunderfire, letting me counter charge the Grey Hunters with my Terminators.
My Land Raider finds the range to the other central Rhino, and blows it up with lascannons, better yet the occupants, including the Runepriest get pinned! My Thunderfire showers the approaching Land Raider with tremor rounds, hoping to make it immobilize itself.
On the left flank my tacticals disembark from their Rhino and move around the vehicle blasting the Grey Hunters. My Rhino backs up, and the Dreadnought moves into the gap, with a clear charge lane. Every unit over there opens up on the Grey Hunters but they just refuse to die, and the only kills I get are from two melta guns. With a wince I charge my Tactical Marines into combat, hopefully their large armored brother can even the odds. Grey hunters pop their banner, and continue to make all their armor saves. (damn you re-rolling ones!) I get two of them with the sgt. power fist and Dreadnought, but he kills 3 of mine. I pass morale and remain stuck in combat. I have widdled down the grey hunters to only 3 models, so I’ll win through attrition at this rate, but that stuck Land Raider is still full of pain…
TURN 4
Start of turn 4:
Objectives: Patrick 2 Ben 1
Kill Points: Patrick 1 Ben 3
Patrick disembarks his Iron Priest unit from the stuck Land Raider and they come howling forward to help their outnumbered Grey Hunters fighting my Tactical Marines. On the right Patrick thinks long and hard before side stepping his Land Raider, not taking the bait of my Thunderfire Cannon. This is the advantage of the cautious European play style, in two years I have never once baited someone over there. He also passes the tremor round induced difficult terrain roll.
The right-hand Land Raider opens up with assault cannons and multi-melta, but only shakes a Razorback after some good cover saves on my part. The left Land Raider does better, and blows my Rhino sky high washing the combat in flames and debris. As the flames cleared the Iron Priest crashed into the combat to decide the left flank. He could only reach the Dreadnought with most of the models, leaving only a couple dogs to hit the Tactical Marines. I continued to put all my attacks on the Grey Hunters, I had to kill that troop and get that killpoint. I got two of them, leaving one stubborn hunter still standing. My Dreadnought was facing down a ton of powerfist attacks. He dodged like a champion though, and only got his legs broken, and shaken like crazy. The Grey Hunters killed a couple Tactical Marines, to tie the combat. The battle continued, with one Grey Hunter, my battered Dreadnought, the mostly intact Iron Priest squad, and about half a Tactical Squad.
On the left my combat squad packs up their missile launcher and starts sprinting towards the melee to help their brothers! It will take them another turn to make it though, I hope it won’t be too late.
Next turn could be the last one, so Patrick is going to have to make a move for the objective near my ruin soon. I want to keep him from easily contesting it with his Raider, so I drive both my Razorbacks up 12 inches to park on top of it, and pop smoke on both. I move up my Land Raider so that I can make a run for the center if I need to. I’ve got a good lead in killpoints, but objectives are still up in the air. Patrick has two, I have one. If I can carry the left flank then I’m golden, if I lose that combat then I have to try and take the center with my Land Raider. My shooting on the right flank bounces off his Land Raider, and I cover it in tremor rounds again.
With that it is time for the left flank melee. I’m in trouble, because all the servitors are now touching my Tactical Marines, and he can sweep my entire squad easily this round. I decide that I have to trust my Dreadnought to kill the last Grey Hunter, and use my tacticals to try and kill some servitors before they swing. I roll my Dreadnought first and he crushes his target. Whew! Now Patrick has no troops on the left flank, and at worst the objective over there will go unclaimed. My Tactical Marines do three wounds to the servitors, and he fails all three saves! In return every power fist attack misses, I make all the armor saves I have to, and I’ve won this round! Patrick fails morale but I catch him with sweeping advance, killing the last dogs. Something else interesting happens, Patrick has no one in base contact with my immobilized Dreadnought, so he gets left behind the swirling melee. There is now one servitor, and the Iron Priest in combat with 6 Tactical Marines. The combat could still go either way, I can’t expect to roll that well again next turn!
TURN 5
Start of turn 5:
Objectives: Patrick 2 Ben 1
Kill Points: Patrick 2 Ben 4
Patrick considers his options really carefully. He uses the central Grey Hunter squad plus Rune Priest to spread out between the two central objectives. He still only has 1, but if it goes to turn 6 he can get both. I’m surprised when he still doesn’t commit the right Land Raider, instead moving a little closer, so he can get around my Razorbacks next turn. He has clearly decided to bank on a 6th turn. I start to get worried, because if it does go to turn 6 he will be in a good position to claim the two central objectives, and the one on his side of the board. He won’t even need to commit the Land Raider if I don’t threaten the center, since I’ve only got 1 objective at the moment. His Land Raider fire mostly gets stopped by smoke launchers, and my Razorbacks escape with only a lost heavy bolter.
On the left flank he starts running his surviving Long Fangs toward the objective over there, closing with my missile combat squad. Thankfully everything I have is either in combat or out of range of the immobilized Land Raider.
With that it is time for the melee. The wolf jumps on a marine and tears him apart, before the rest of the squad blows it away with point blank bolter fire. Then it is time for the power fists, and we both cheer at our dice as we resolve the attacks. My tactical sergeant hits and wounds, and slays the Iron Priest! In return both the servo arms miss, leaving my Tactical Marines standing victorious surrounded by piles of bodies, two burning Rhinos, and a busted up Dreadnought!
It is now my turn 5. I’m comfortably ahead on kill points, but objectives are a real problem. I’ve won the combat on the left, but the gutsy charge of the Long Fangs means I haven’t secured that objective yet. As sad as it is, the Long Fangs can kick my combat squad’s butt. Also complicating things, is the fact that to get the objective, I have to move into range of the angry Land Raider. I move up the Tactical Squad into melta range of the Land Raider, and the combat squad moves up to rapid fire the approaching Long Fangs, and into claiming range of the objective there. In the center I drive one Razorback up 12 to contest the objective he has. Now I have 2 objectives and he has 1, hopefully it ends this turn! I pop smoke on my Land Raider, because I know a rush is coming if the game doesn’t end. My shooting phase begins, and everything on the right side unleashes on the central Grey Hunter squad. I need to reduce their model count so they can’t string out between the two objectives. I only kill one Grey Hunter, but I get a wound on the Rune Priest.
On the left my Dreadnought raises its multi-melta arm and draws a bead on the corner of the immobilized Land Raider it can see. It hits, gets through cover, and blows it up! Hurray! Inspired by the clutch shot, my Tactical Marines all open up on the Long Fangs, killing two. Suddenly the left flank looks secure!
We both hold our breath as we roll to end the game…..and it continues to turn 6! Patrick’s gambit might just work!
TURN 6
Start of turn 6:
Objectives: Patrick 1 Ben 2
Kill Points: Patrick 2 Ben 5
Patrick charges his Long Fangs into my combat squad to contest that objective. He strings his central Grey Hunters out, successfully claiming both objectives. His Land Raider finally crashes forward disembarking the Grey Hunters in front of my Land Raider. My smoke screen saves me and all the melta shots bounce off! He doesn’t bother charging the Raider because his Hunters can’t really hurt it. He is contesting my objective though, which puts him in the lead for the primary objective.
Start of the bottom of turn 6:
Objectives: Patrick 2 Ben 0
Kill Points: Patrick 2 Ben 5
I know this is the last round because we only have a couple minutes left. I have to swing three objectives in order to win. I disembark the combat squad from the Razorback that is contesting one of the central objectives and charge them into the strung out Grey Hunter squad. This pulls them off the other objective, so they are only near the one I’m contesting. I disembark my Terminators and move them up to reclaim the objective near my ruin. They crush the Grey Hunters there, giving me one objective claimed.
My battered Tactical Squad charges the Long Fangs, and my sergeant punches out the last of the squad to claim the left objective!
End of Game
Objectives: Patrick 1 Ben 2
Kill Points: Patrick 2 Ben 7
So after an incredible game I won both primary and secondary, and had a healthy lead in victory points. I ended up getting 17 game points, with Patrick getting 3. The final score doesn’t reflect how close the game was. I was thinking as hard as I could the entire time. The fact that Patrick waited so long to commit his units meant I had to constantly be shifting around trying to guess where he would attack. The battle for the left flank was awesome. Every turn it swung back and forth, with us cheering at our dice and hanging on every armor save. Patrick was an excellent sport too, even when my Tactical Marines somehow beat the Iron Priest in combat and won the day. I loved every minute of this game, thanks Patrick!
I hope you enjoyed this report! As always feel free to contact me with comments or feedback at [email protected].
-Spacecurves

