40K: Descent of the Tendril – Tyranids vs. Grey Knights (batrep)

Every theory eventually meets the tabletop. Here’s how my Dark Tendril concept fared versus the Grey Knights…
I had the opportunity this afternoon to get in a match versus Grey Knights with my tendril. I was using almost the exact same list as in my recent game versus Space Pups. Grey Knights are a tougher matchup due to their many inherent advantages versus Tyranids but I was focused on exploiting their inherent weaknesses. Deployment was Pitched Battle. The mission used the BeakyCon 40k format – three objectives all equally weighted – killpoints, Seize Ground plus Capture and Control. Whichever player takes the most objectives wins the game. If there is a draw on the three objectives then victory points are used as the tie breaker.
Tyranid Reserve Army List (2000 points)
Here is my abbreviated army list:
Alpha Warrior – pair of bone swords, adrenal glands & scything talons
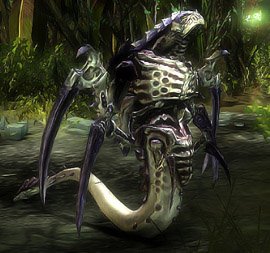
Trygon Prime – adrenal glands
Trygon Prime – adrenal glands
10x Yrmgal genestealer
2x Zoanthropes – mycetic spore
Doom of Malanti (DoM) – mycetic spore
20x termagant w. Devourers (devilgants)- mycetic spore
10x genestealer w. toxin sacs & scything talons incl. Broodlord
10x genestealer w. toxin sacs & scything talons incl. Broodlord
3x Warrior – adrenal glands, 2x deathspitter, barbed strangler, pair of bone swords – mycetic spore
10x Hormogaunt – adrenal glands & toxin sacs
Before I go into the detail of the actual batrep here is the background for my army:
A splinter of the Gehuibius fleet has come upon the fringes of the easternmost Imperial system. Psychic gestalt is powerful in the area for some unknown reason and the Tyranids are feeding upon it in droves. While this area is not of any particular importance to the Imperium it has been chosen as a training ground certain chapters of the Astartes. At first victories seemed almost easily assured but now losses are starting to mount and there is a concern as the splinter has drawn back the attention of it’s parent tendril. A huge number of Hive ships are reported returning to the area en masse. What once almost considered a farce is now a steadily growing concern. More resources are being committed to staunch the ever increasing rapid xenos growth.
Pre Game Analysis
As I said Grey Knights have a lot of inherent advantages versus Tyranids (e.g., psykout grenades, psychic hood, Warp Quake, etc.). Grey Knights can easily pull a victory but it seems that Tyranids have to work it really hard for a win. The mission featured three equally weighted objectives – kill points, Seize Ground plus Capture and Control. My army has lots of scoring units so I have to focus on taking the objective markers. I am playing a pure reserve army and have switched out my Hive Guard for Zoanthropes. Small elite armies such as Grey Knights need to castle so using Null Deployment tactics can take away some of their inherent strengths. Tyranids have some psychic defense so I would need to exploit that facet of my army. My opponent only had three scoring units (two Strike squads and the Paladins via the Grand Strategy) so I concentrated on taking out the weak ones (i.e., Strike squads). Strike squads have the psychic power Warp Quake to nerf deep striking units but fortunately Tyranids have ample other methods of entering the battlefield via reserve while still coming in close to the enemy. My game plan was to win on Capture and Control plus Seize Ground. This strategy meant I would have to take some risks and saturate the area on the battlefield holding the most objectives.
One of my strategies versus small elite armies is to place objective markers close to a short table edge where I think my opponent will castle so my outflanking genestealers can quickly hit any enemy units deployed to guard those. I also try to avoid combat with the more resilient Grey Knight units such as Paladins… They will just chew you up and spit you back out so there is no reason to engage them in my opinion.
Abbreviated Grey Knight Army
Grand Master – psychotropic grenades, rad grenades, warding stave
Librarian – Might of Titans, Quicksilver, Sanctuary, Shrouding, Warp Rift, warding stave
5x Paladin – Brotherhood banner, psycannon, 2x daemonhammer
Vindicare assassin
Dreadnaught – 2x twin linked autocannon, psybolt ammo
Dreadnaught – 2x twin linked autocannon, psybolt ammo
Landraider Crusader – extra armor, multi-melta
5x Grey Knight (Strike squad) – psycannon, daemonhammer – razorback w. twin linked lascannon
5x Grey Knight (Strike squad) – psycannon, daemonhammer – razorback w. twin linked lascannon

Deployment
The Grey Knights were deployed in a castle with the Vindicare assassin and one psyfleman placed on top of a tower. The Landraider was placed in the center of the castle with one Razorback on either side. The castle was situated over in one table quarter of my opponent’s deployment zone.
I held my entire army in reserve and chose a large building in the middle of the table to infest with my Ymgarl Genestealers. The other two Genestealer broods would outflank. The Alpha Warrior with his Hormagaunts would come in off of my long table edge. The rest of my units would deep strike.
There were two Seize Ground markers in my opponent’s side of the table along with his Capture and Control marker. I had one Seize Ground marker on my side of the table along with my Capture and Control marker placed in the far corner table of my deployment zone. The large building in the center of the table provided ample LOS blocking which I could use as a big screen when my units came in from reserve.
My immediate plan was to pop the Razorbacks and get at the small Strike squads early to shutdown Warp Quake. Note that I have four Mycetic spores which are really easy kill points for the Grey Knights.
Turn One – Grey Knights
Everything sits still.
Turn One – Tyranids
* Crickets chirp *
Kill Points: GK-0 Nidz-0
Turn Two – Grey Knights
The Strike squads pop Warp Quake and fire their smoke launchers. All vehicles move just a bit.
Turn Two – Tyranids
Here is what came in from reserve:
• Trygon Prime
• Yrmgal genestealers
• Genestealers
• Warriors
• Termagants
• Doom of Malanti
So over half of my army arrives and I do not have to worry about being piecemealed to death. I bring the Trygon in behind the central building along with the Ymgarl genestealers and Doom. The Genestealer brood arrives on the short table close to the Grey Knight castle and will assault one of the razorbacks. The Warriors and Termagants drop in back over by my Capture and Control marker safely tucked away for now. The Genestealers fleet over towards the Razorback, assault it and destroy it. One Grey Knight dies in the explosion. The Broodlord had successfully cast Aura of Despair at the beginning of the assault phase – the Grey Knights then fail their pinning check. Warp Quake has been shut down on one side of the GK castle!
Kill Points: GK-0 Nidz-1
Turn Three – Grey Knights
The Grey Knights train most all their guns on the brood of Genestealers and Trygon Prime. All that is left of the Genestealers after the smoke has cleared is the Broodlord with one wound and one Genestealer. The Trygon Prime is down to three wounds. The Grey Knights also pop the two spores as well.
Turn Three – Tyranids
Here is what came in from reserve:
• Alpha Warrior with Hormagaunts
• Zoanthropes
• Genestealers
The Alpha Warrior and it’s posse come in using the central building for cover and fleet towards it. The second brood of Genestealers also come in on the short side of the table over by the GK castle and will be able to lend support to the first brood. The Zoies drop down right beside the Landraider. The Ymgarl Genestealers come out from behind the central building to assault the remaining Razorback. Shooting sees the Zoies’ spore drop a wound on the assassin while the Trygon kills two more of the Grey Knights in the first strike squad. Both of the Zoanthropes are blocked by the Librarian’s psychic hood unfortunately. Assault sees the first Strike squad destroyed and the Ymgarl genestealers destroy the second Razorback. The Genestealers consolidate into a crater and the second Strike squad pass their leadership tests. At this point I’m actually ahead on kill points… Pretty crazy !! We are tied on both Seize Ground plus Capture and Control so I’m ahead by one kill point.
Kill Points: GK-2 Nidz-3
Turn Four – Grey Knights
It’s time for the Grey Knights to go to work now. They’ve still got lots of firepower to dish out plus the deathstar is fully intact and very mobile thanks to both of the Zoies whiffing.
The Paladins along with the Grand Master and Librarian disembark to line up shots on the Genestealers while the Landraider and one psyfleman target the Trygon Prime. The Genestealers go to ground – one Broodlord and a couple of Genstealers manage to survive. The Trygon goes down after failing two cover saves and an armor save. The assassin takes a shot at one of the Broodlords and misses. The other psyfleman pops the Warriors’ spore. The lone Strike squad shoots the Ymgarl Genestealers but only manage to kill two then charge them and are cut down by the brood. Both the Zoies and their spore are left intact amazingly.
Turn Four – Tyranids
The Grey Knights have surged back but I’ve still got plenty of units left. I need to shut down the Landraider this turn to make sure the Deathstar cannot reach around the central building. In comes the last Trygon popping in behind the central building – it’s getting a bit crowded back there now. Heh . The Ymgarl Genestealers head over to assault a psyfleman while the Termagants start to slog forward into synapse range of the second Trygon. The Zoies line up a second salvo on the Landraider and manage to immobilize it. Their spore fires on the assassin again and drops him! W00T !!! Assault sees the Ymgarl Genestealers rip both arms off of the psyfleman.
We are now tied on all three objectives but I know I’m going to give up a good number of kill points the following turn. In turn the Grey Knights only have a few kill points left to give up and they are all highly resilient. I need to start focusing on contesting my opponent’s objectives… I’ve still got lots of units left with a healthy amount of synapse so I’ll have to try to flood his area with more units than he can kill. Immobilizing the Landraider was pretty huge this turn.
Kill Points: GK-5 Nidz-5
Turn Five – Grey Knights
The deathstar has to make some hard choices now. The only target they can see are what’s left of the second Genestealer brood which can also be targeted by the Landraider. The psyfleman in the tower can’t see much either. The deathstar opts to focus on the Zoies as they are too far away to reach the Ymgarl Genestealers this turn. The Landraider destroys the last of the Genestealer brood while the deathstar aces the Zoies. The psyfleman in the tower destroys the last spore. The Ymgarl Genestealers manage to immobilize the psyfleman.
Turn Five – Tyranids
I bring forward the brood of 20 Devilgants using the Trygon as their primary synapse anchor. The Alpha Warrior along with it’s posse come around the far side of the building using it for cover. The next turn these units can swarm the Grey Knights. This turn the Ymgarl Genestealers finally manage to destroy the psyfleman.
The deathstar is left holding two of the Seize Ground markers and their Capture and Control Marker as well plus the Grey Knights are now up by two kill points (which as I’ve said will be next to impossible to overtake).
Kill Points: GK-8 Nidz-6
Turn Six – Grey Knights
Again the deathstar has some tough decisions. If they go after the Ymgarl Genestealers they will move off of their objective markers… Nothing else is in their range and the Landraider is facing in the wrong direction to shoot anything. The psyfleman in the tower targets the Warrior brood and kills two but the third is safe behind cover holding my Capture and Control objective. The deathstar shoots at the Ymgarls who have cover but only manage to kill a couple and they pass their leadership test.
Turn Six – Tyranids
The Alpha Warrior and his posse hop back to hold my Seize Ground marker behind the central building while the Devilgants anchored by the Trygon surge forward again careful to remain outside of the deathstar’s assault arc. The Ymgarls move and then fleet to contest the Grey Knight’s Seize Ground and Capture and Control markers. The lone Warrior is sitting safely on my Capture and Control marker. We roll the dice to see if there is a turn seven and the game ends. I end up winning two objectives to one.
Post Game Analysis
If the game had gone onto a final seventh turn the deathstar would have killed the Ymgarls then I would have moved up the Termagants to contest the Grey Knight objectives again. I think this was a good example of how to use Null Zone Deployment tactics to counter Grey Knights. I was able to neutralize the amount of damage the GK deathstar could generate while systemically removing other units over the course of the game. The last turn I was in a good position to contest for the win.
Have at it everybody!

