40k: Battle Report – Dark Eldar vs Tau – 2,000 points

Me again, Mercer, from Imperius Dominatus I am back with another battle report. Lets head into this my latest battle report.
A heads up as well to spam haters. My Dark Eldar list is Venom and Ravager heavy, it’s nothing out the ordinary. If you don’t like this type of list then you perhaps may not want to read on. However, if you don’t read on you will be missing a very, very awesome game!
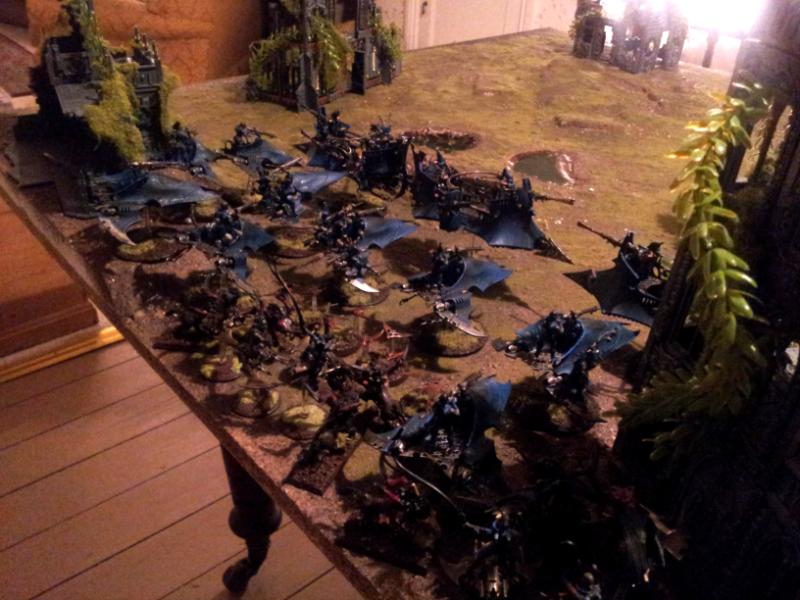
Dark Eldar “Kabal of a Thousand Cuts” – 2,000 points
HQ
Baron Sathonyx
Elite
4 x Kabalite Trueborn w/ Venom – 4 x blasters – Venom w/ splinter cannon
4 x Kabalite Trueborn w/ Venom – 4 x blasters – Venom w/ splinter cannon
3 x Kabalite Trueborn w/ Venom – 3 x blasters – Venom w/ splinter cannonTroops
Advertisement5 x Kabalite Warriors w/ Venom – blaster – Venom w/ splinter cannon
5 x Kabalite Warriors w/ Venom – blaster – Venom w/ splinter cannon
5 x Kabalite Warriors w/ Venom – blaster – Venom w/ splinter cannon
5 x Kabalite Warriors w/ Venom – blaster – Venom w/ splinter cannon
5 x Kabalite Warriors w/ Venom – blaster – Venom w/ splinter cannon
5 x Kabalite Warriors w/ Venom – blaster – Venom w/ splinter cannonFast Attack
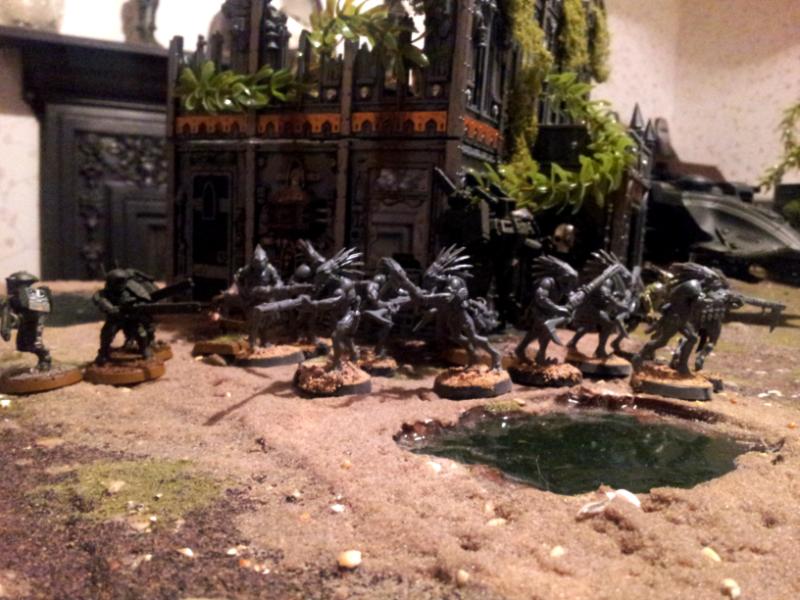
Beastmasters – 3 x beastmasters, 5 x khymerae & 4 x razorwing flocks
Beastmasters – 3 x beastmasters, 5 x khymerae & 4 x razorwing flocksHeavy Support
Ravager – flickerfield
Ravager – flickerfield
Ravager – flickerfieldAdvertisement
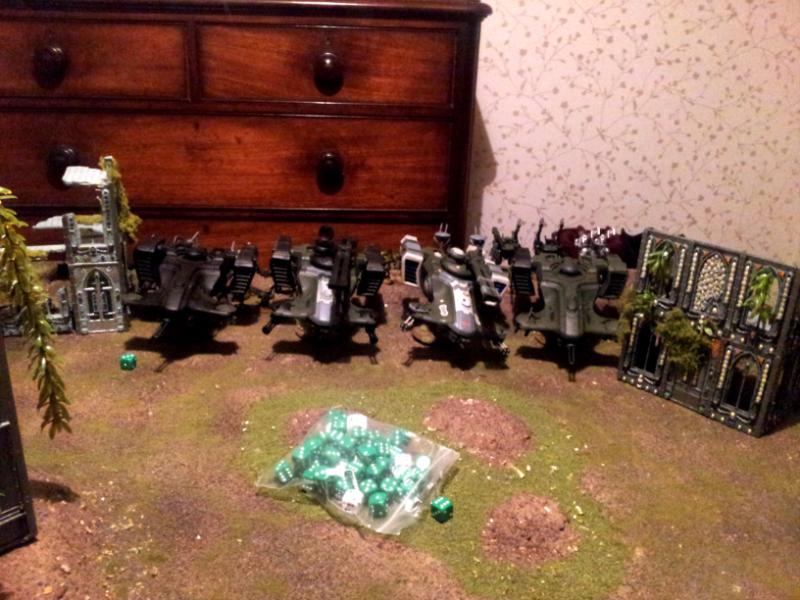
Tau – 2,000 points
HQ
Shas’El – plasma rifle, missile pod & multi tracker
Crisis Battlesuit Bodyguard – plasma rifle, missile pod & multi tracker
Shas’El – plasma rifle, missile pod & multi trackerCrisis Battlesuit Bodyguard – plasma rifle, missile pod & multi tracker
Elite
Subscribe to our newsletter!Get Tabletop, RPG & Pop Culture news delivered directly to your inbox.By subscribing you agree to our Terms of Use and Privacy Policy.2 x Crisis Battlesuits – plasma rifle, missile pod & multi tracker
2 x Crisis Battlesuits – plasma rifle, missile pod & multi tracker
2 x Crisis Battlesuits – plasma rifle, missile pod & multi trackerTroops
6 x Fire Warriors
6 x Fire Warriors
10 x Kroot – 2 x kroot hounds
10 x Kroot – 2 x kroot houndsAdvertisementFast Attack
Piranha – fusion blaster, target array & disruption pod
6 x Path Finders w/ Devilfish – Devilfish w/ disruption pod
6 x Path Finders w/ Devilfish – Devilfish w/ disruption podHeavy Support
3 x Broadside Battlesuits – team leader w/ target lock & 2 x shield drones
Hammerhead – 2 x burst cannons
Hammerhead – 2 x burst cannons
Pre-Game Analysis
I don’t like Tau. I don’t like them as an army (just not into the manga fish thing) or like them as a opposing army when I am playing Dark Eldar, due to all their guns have chances of popping my light skimmers. Now, Poddy should be clued up as I sent him a essay on how to beat my Dark Eldar and he has read my basic deployment guide (see here), I wonder if he has been paying attention?
As normal, the railguns are my targets as these auto pen my Venoms. If I can stop the Hammerheads from shooting and knock out some Broadsides early on, then I will be happy. The missile pods aren’t much of a threat as at least they need 3+ to glance. I am really more concerned with Pathfinders, as they can increase ballistic skill and take away my cover. If I can kill those units early on then the Tau won’t hit so much as I can survive that little bit better.
Game: Annihilation + Pitched Battle
Deployment
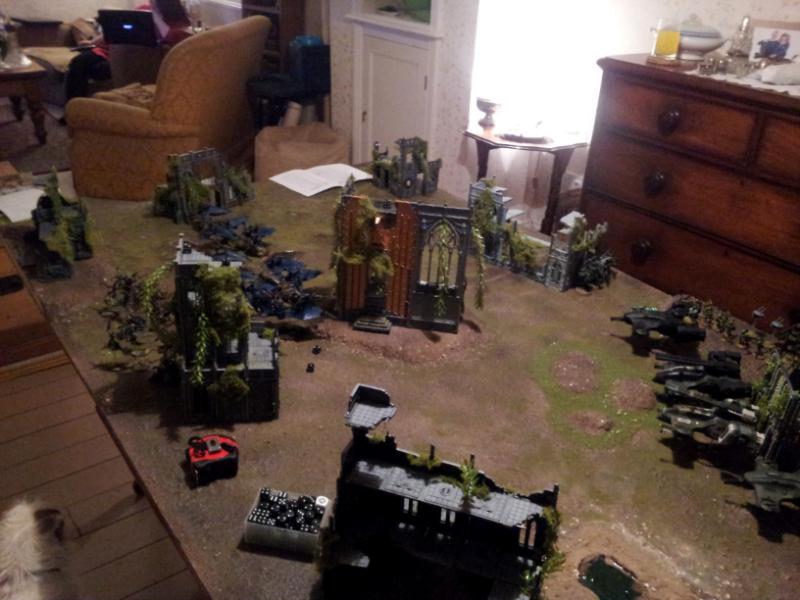
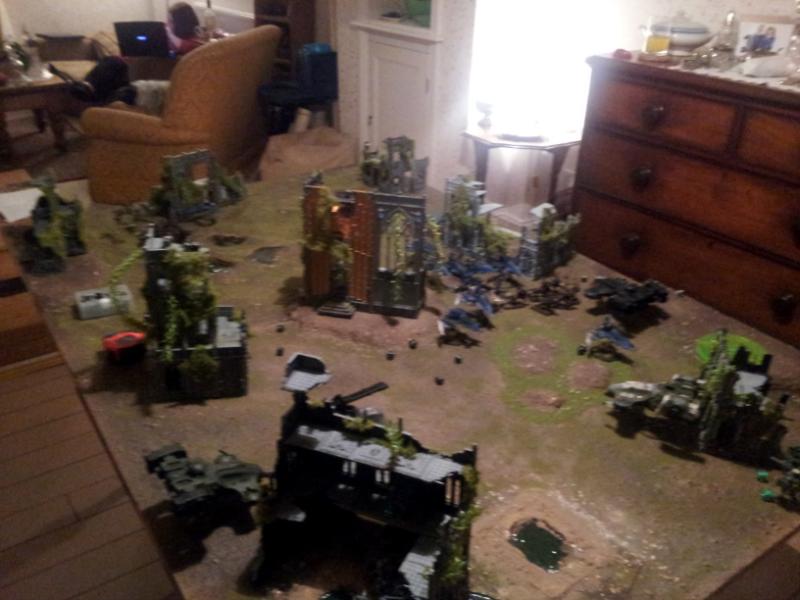
I won the roll off thanks to Baron. It was a toughie where to deploy as the board was setup as a mirror image with two open areas on either side of the board and a large ruin in the middle. Mainly due to room, I deploy on the left side of the board. Ravagers at the front lengthwise on to give cover to Venoms and Beastmasters while the Beastmaster unit with Baron hides behind a tower ruin.
Poddy deploys the bulk of his army on the top right corner of the board. He makes a nice castle with his vehicles and places all his infantry behind them, and Broadsides right at the back. He does deploy a unit of Pathfinders in a ruin directly opposite and a Crisis Suit unit in a ruin far left corner.
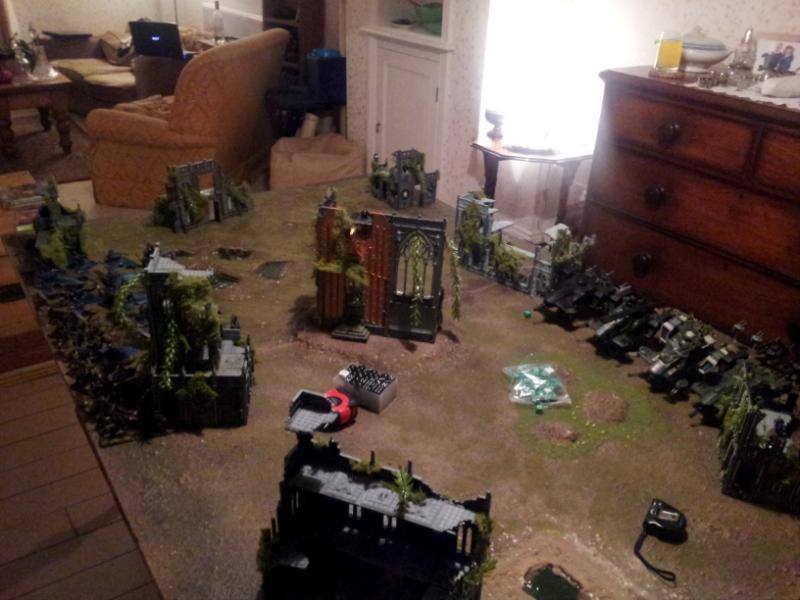
* Tactical Notes
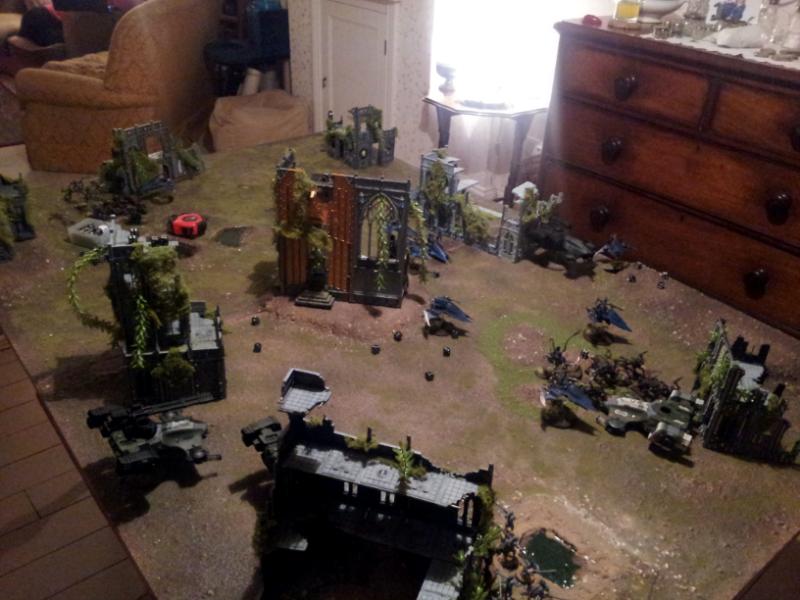
Poddy has got his deployment almost spot on, almost. He has hung the Pathfinders and Crisis Battlesuits out to dry and I will capitialise on that. I will move my Venom fleet up the left side of the board and use the large shrine ruin in the centre to block LOS and also keep myself out of range from the missile pods and plasma rifles at least.
Due to deployment, two Ravagers are easy targets for railguns and are living on borrowed time. I’ll just get them to blast the two Hammerheads and then write them off.
Turn 1
Poddy infiltrates the Kroot along the right table edge over 18″ away from me – taunting the Baron and the Beastmasters! Pathfinders scout and climb up a ruin in the top right corner. Poddy then tries to seize the intiative, he gets a 5 and fails.
My first turn then; I move my force up 12″ and spreading out while using the shrine ruin for cover. The two Ravagers move together around the other side of the shrine while Beastmaster units just muck about.
Shooting; splinter cannons open up and blast the Pathfinders to death and wipe them out along with the Crisis Battlesuits. I get some shots off on a Fire Warrior squad behind a Devilfish and kill two of those – they pass morale. All Ravagers fire dark lances at the two Hammerheads, I do nothing and Poddy saves all damage thanks to disruption pods.
Poddy’s first turn; he moves the bulk of his army down the the right table, both Fire Warriors jump into Devilfish while two units of Battlesuits, one of those a Shas’El unit moves to blast some D.E Venoms. The Kroot move closer to my Beastmasters, taunting them.
Shooting; missile pods and railguns blast one Ravager and I get extremely lucky with flickerfield saves and only taken a weapon destroyed. The supporting Ravager goes down without much of a fight, while the remaining Ravager with the Venom fleet asborbs some damage thanks to flickerfield, though it eventually explodes.
In assault the Battlesuits jump away and hide.

* Tactical Notes
Ok, not a bad turn, though could have gone better. I was hoping with all the Ravager shots that at least a single Hammerhead would have taken some damage. The unit of now dead Pathfinders also absorbed too much damage, I wanted to put more shots into the now depleted Fire Warrior unit. I guess beggars cannot be choosers and I have two kill points at least.
Poddy has made a mistake with two units of Crisis Suits. He has brought them closer to my force instead of moving them away with the rest of the army, these Battlesuits are now unsupported and easy kills. I just need to line my Venoms up to get LOS and I’ll blow them away. If I have got any shots left I’ll put them into the remaining unit of Pathfinders and probably the Kroot which has deployed in front of the Broadsides.
Turn 2
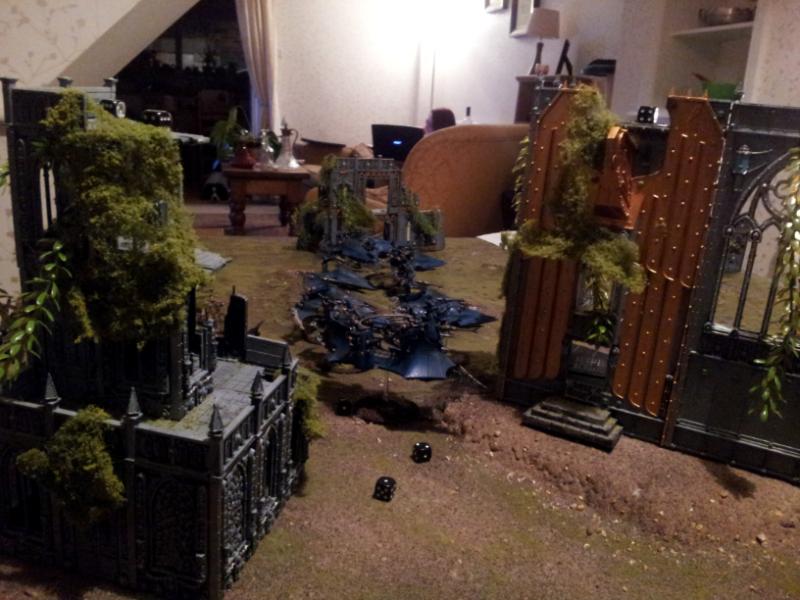
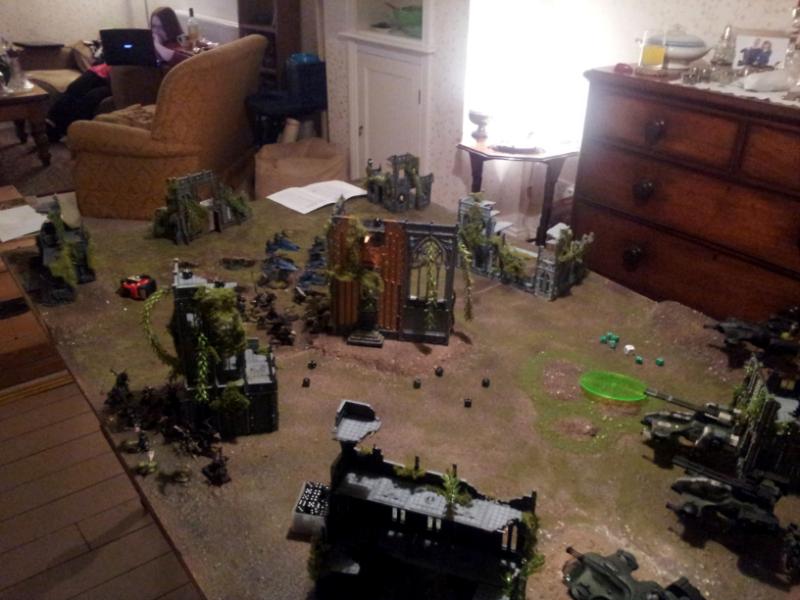
I suicide my last Ravager and move it forward towards a Hammerhead so the Tau vehicle will at least not get the disruption pod saves. Baron and his Beastmasters move towards the infilitrated Kroot, though won’t be in assault range while the other unit of Beastmasters moves behind the shrine ruin after getting poor cover movement and run rolls. Venoms move around the shrine, keeping their distance and on standby ready to blast some Battlesuits.
Shooting; The solo Ravager blasts a Hammerhead and scores an immobilised. Splinter cannons blast both Battlesuit units, both units go down without much of a fight and give me three kill points. I fire the remaining splinter cannons into the Kroot by the Broadsides, four of them survive and they pass morale.
Poddy moves his battered Kroot behind the ruin the Pathfinders have deployed in, his vehicles shift further down the right board side in attempt to get away from the Venoms, though they are only moving closer to my Beastmaster units! :).
Shooting; railguns blast my Venoms, I get lucky on flickerfield saves and Poddy does poor damage rolls, he immobilised a Trueborn Venom and breaks a splinter cannon off another. The last Ravager is finally slagged by missile pods while a blast from a Hammerhead kills a single Khymerae, but the others pass cover saves thanks to the Baron.
In assault the remaining Battlesuits jetpack away.
* Tactical Notes
I’ve managed to take a lead with a few kill points here, I must say thanks to Poddy for that as he really handed me two Battlesuit units on a silver platter – thanks mate! :D. Poddy though has managed to get a kill point taking out the last Ravager, I knew it was going to go, so moving it up into his face has served as a nice distraction.
Next turn I will split the Baron and send him to assault the Kroot while the Beastmasters should be able to assault a Devilfish which has moved down the right flank – I don’t want to really assault it, but this will ‘leap’ them up to board to assault more interesting units. Venoms will fire at the Pathfinders and Broadsides, this should take away the Tau’s anti tank and buffing units, and any blasters will fire into the immobilised Hammerhead.
Turn 3
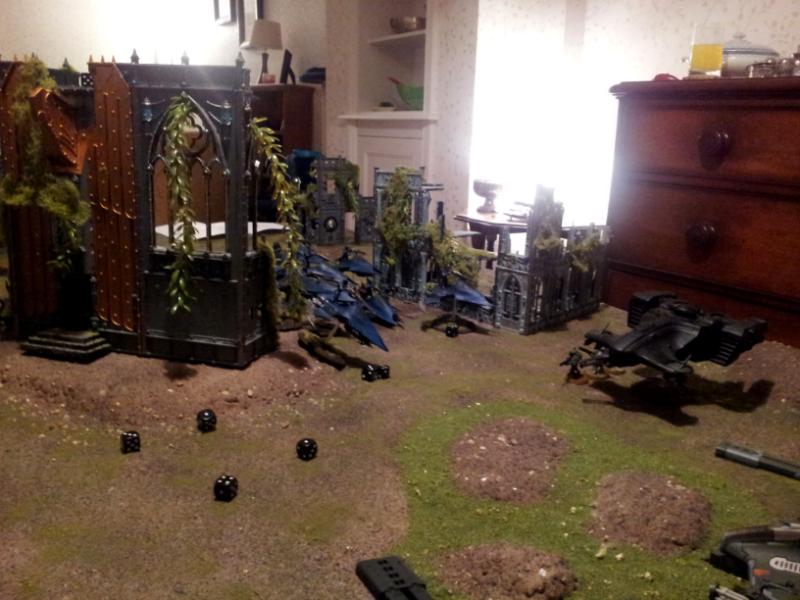
The Baron splits from the Beastmasters and moves and runs towards the Kroot, though they will be out of assault range so he runs into area terrain. Beastmasters move up to assault the Devilfish while the other Beastmaster units moves into the shrine ruin – they should assault something next turn! Venoms start flanking around the shrine ruin to get the splinter cannons and blasters into range of Tau armour and infantry.
Shooting; splinter cannons fire at the depleted Kroot unit and wipe them out. More splinter cannons fire Broadsides and kill both shield drones and put some wounds on the unit – they pass morale. Some splinter cannons fire at the Pathfinders – one is left and passes morale. My blasters fire at the immobilised Hammerhead, my blasters are crap and fail to hit.
In assault the Beastmasters charge the Devilfish and do nothing.
Tau’s third turn; Broadsides move away from the oncoming Dark Eldar and use the ruin where the single Pathfinder is to get cover saves from possible blasters next turn. A single Devilfish moves up to the oncoming Dark Eldar skimmers and the depleted Fire Warriors bail out ready to suicide and unleash rapid fire death. Unit of Battlesuits moves to support the Kroot against the Beastmasters while the other Devilfish moves 12″ so it is now in the bottom right corner and the Fire Warriors bail out ready to blow holes in Baron Sathonyx.
Shooting; depleted Pathfinders fire at a Venom and score weapon destroyed. Broadsides fire at two Venoms (target lock) a Trueborn Venom is wrecked – squad passes pinning test but then he blasted by the immobilised Hammerhead, all but one Trueborn are killed – the survivor passes his morale test. Remaining Hammerhead blasts the weapon destroyed Venom and scores another weapon destroyed. Fire Warriors blast Baron, though his shadowfield is too strong. Two Battlesuit units and Kroot blast into the Beastmasters – a single Khymerae and Beastmaster remains – they pass morale.
In assault the Battlesuits run and hide.


* Tactical Notes
I’m keeping my lead on Poddy, which is nice, though I think he will catch up soon. I’ve got two Venoms which have taken damage results, they cannot take much more of a pounding. I know the depleted unit of Beastmasters will be killed next turn as well.
Next turn I will use the Beastmasters in the shrine ruin to assault the depleted Fire Warriors while the Venoms move up and blast the final Pathfinder, torrent the Broadsides and also blast the immobilised Hammerhead. Baron will assault the Fire Warriors in front of him while the depleted Beastmasters will go out in a blaze of glory and charge the Kroot in front of them.
Turn 4
Venoms move forward while leaving a gap for the Beastmasters. They move up and get ready to assault the depleted Fire Warriors. Baron moves to charge the Fire Warriors as does the depleted Beastmasters to the Kroot. The double weapon destroyed Venom moves up and the Warriors inside go on a suicide run.
Shooting; Baron fires at the Fire Warriors and does nothing, Beastmaster kills a Kroot though. Venoms blast the Broadsides, leaving only two left and both are wounded. I can’t draw LOS on the single Pathfinder, Poddy has hidden him well! Blasters fire at the immobilised Hammerhead and stun it. Warriors on foot blast the Broadsides, I hope to gib one with the lance, though Poddy makes the save.
Assault; Baron charges the Fire Warriors and issues a beat down, though the plucky fish-people hold in assault. Beastmaster unit charges and kills a single Kroot, the Kroot batter them, and eat them all up. Full strength Beastmaster charges and rips to pieces the depleted Fire Warrior unit.
Finally the Piranha arrives, it comes in behind my Venom fleet.
Tau’s turn; Kroot move to assist the Fire Warriors against Baron while Tau skimmers continue to move about.
Shooting; Devilfish fires burst cannon at the single Trueborn and gibs him – kill point for Tau. Broadsides blast a Venom and only stun it, though the target lock team leader does better and makes one explode – squad is depleted thanks to shrapel in the face, they pass morale but are pinned. Hammerhead drops a blast on the Warriors and wipes them out. Piranha immobilised a Warrior Venom.
In assault the Kroot charge Baron and kick his ginger butt all the way back to Commoragh.
* Tactical Notes
So Poddy has now taken the lead in kill points. If I can get some kill points next turn I should be able to take the lead, though this is going to be a close lead. I am a bit gutted that Baron didn’t kill those Fire Warriors – the idiot rolled two 1’s and a 2 to hit, plus add my noobish in as when writing this I just remembered about his phantasm grenade launcher – total noob! I did expect the single Trueborn and depleted Beastmasters to die, though another noobish mistake was I forgot to fire the single Trueborn – he was hiding in a ruin!
Next turn I’ll move the single weapon destroyed Venom up to get the single Pathfinder, I’ll also bail out the unit in the stunned Venom into terrain so they can fire at some Tau vehicle. Beastmasters will move up and assault the immobilised Hammerhead.
Turn 5
The double weapon destroyed Venom I move flat out back to the other side of the shrine so LOS cannot be drawn to it. I bail out the Warriors from the stunned Venom and they move into the shrine ruin for cover while I send another unit on a suicide run to blast a unit of Battlesuits. I send the operational Venom carrying Trueborn towards the Broadsides, they bail out ready to blast the Broadsides.
Shooting; I shoot the Piranha with four blasters from the unit of three Trueborn and the Warriors in the immobilised Venoms, I score weapon destroyed and stunned. Venom blasts and kills the single Pathfinder. Trueborn open up with quad blasters and gib the Broadsides. Warriors on foot blast the last Shas’El unit, blaster gibs the Crisis Suit while the Shas’El falls to mass poison. Venom which the Warriors just bailed out fires into the last Battlesuit unit and leaves one left – Crisis suit passes morale.
In assault the Beastmasters charge the immobilised Hammerhead and cause mass damage, though it is still hanging on.
Tau’s fifth turn; Kroot move to rapid fire the exposed Warriors with the single Crisis Suit support, while the Hammerhead and Devilfish float about. The other Devilfish turns to blast the pinned Warriors.
Shooting; Devilfish blasts and kills the pinned Warriors. Hammerhead blasts the Trueborn and kills them all. Kroot blast the Warriors and wipe them out while the last Crisis Battlesuit fires at the closest Venom, though the shots bounce off thanks to flickerfield.
In assault the Beastmasters wreck the Hammerhead.
Summary
That was a really enjoyable game, perhaps the best game I’ve had with Poddy. I really wanted him to win, though my Beastmasters put a stop to that, the spoil sports! ;).
I made a quite a few mistakes this game. I think tactically everything was sound, though bailing out of Venoms is questionable, the outcome when firing worked 2/3 times. I forgot to fire two units on foot, I guess this was because they was hiding in ruins, though I should pay more attention. I also forgot that Baron had the phantasm grenade launcher, I am not sure if this would have affected the out come in assault (Baron had to take 7 armour saves) but it would have made a difference.
Poddy played well. His deployed was almost spot on, though he did hang a unit of Pathfinders and Battlesuits out to dry and with me taking these units out first turn put my fleet on a path which put most of his missile pods out of range and blocked LOS. His other mistake was moving those two Battlesuit units closer to me in his first turn instead of moving them away, they went down pretty easily (which is down to bad dice rolls on Poddy’s half) though they gave up 3 kill points, which Poddy could have done without.
~Have at it folks!
