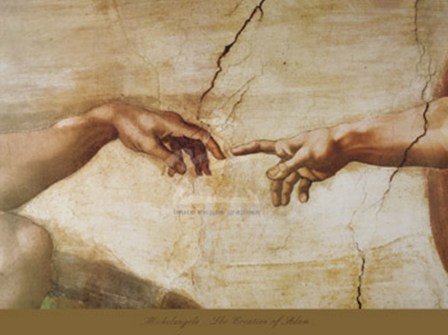
40k Hobby: Free-handing the Creation of Adam
5 Minute Read
Mar 29 2012

Advertisement
Hey everyone! Duke here from Dukes Inferno. Today I am bringing you something I haven’t done in a while on BOLS…Hobby stuff!
As some of you may know I really enjoy doing freehand on my vehicles, and often I start an army based on how much of the stuff I can do on the tanks. I sincerely hope 6th ed doesn’t nerf vehicles cause I love painting the crap out of them, free-hand-style. Well, right now I bring my latest creation to show you all. Come along for a quick tutorial on Free-hand.
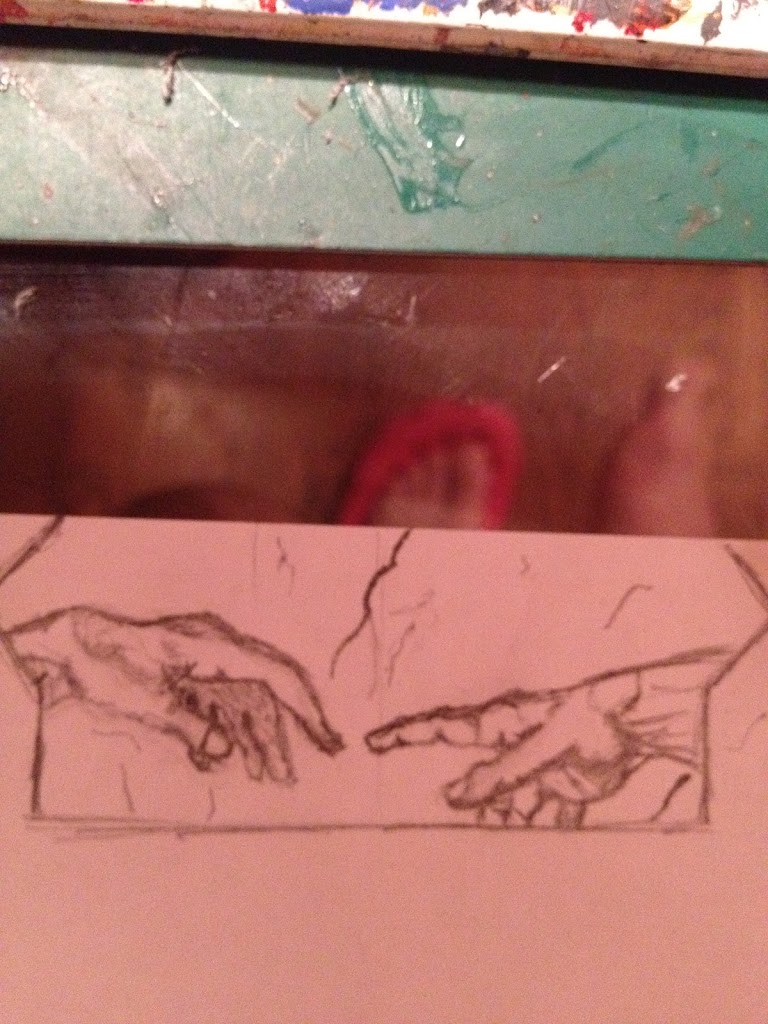
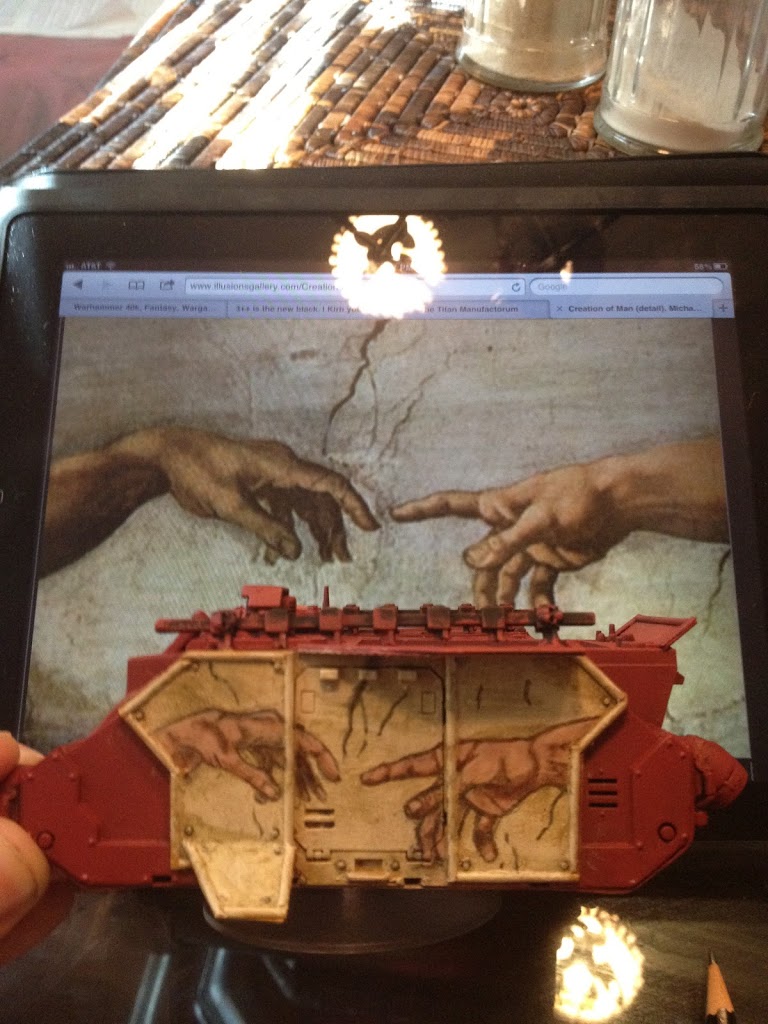
Stage 1: Before getting out your tank and ruining it (always fun!) you should get out a pencil and draw it a few times. I suck at drawing unless it is something that already exists and I can visually reference it (Copy???). Anyhow, the idea of this stage is to get the strokes down and to get a feeling for ‘where things go.’ Proportion is also important here (especially with hands!).
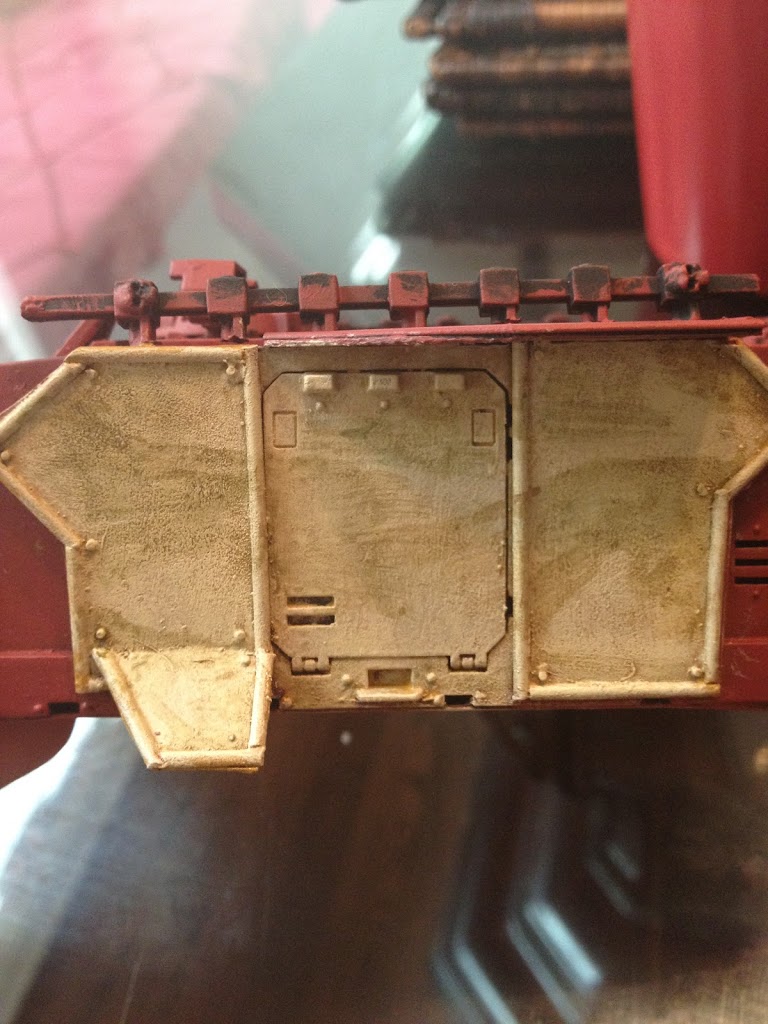
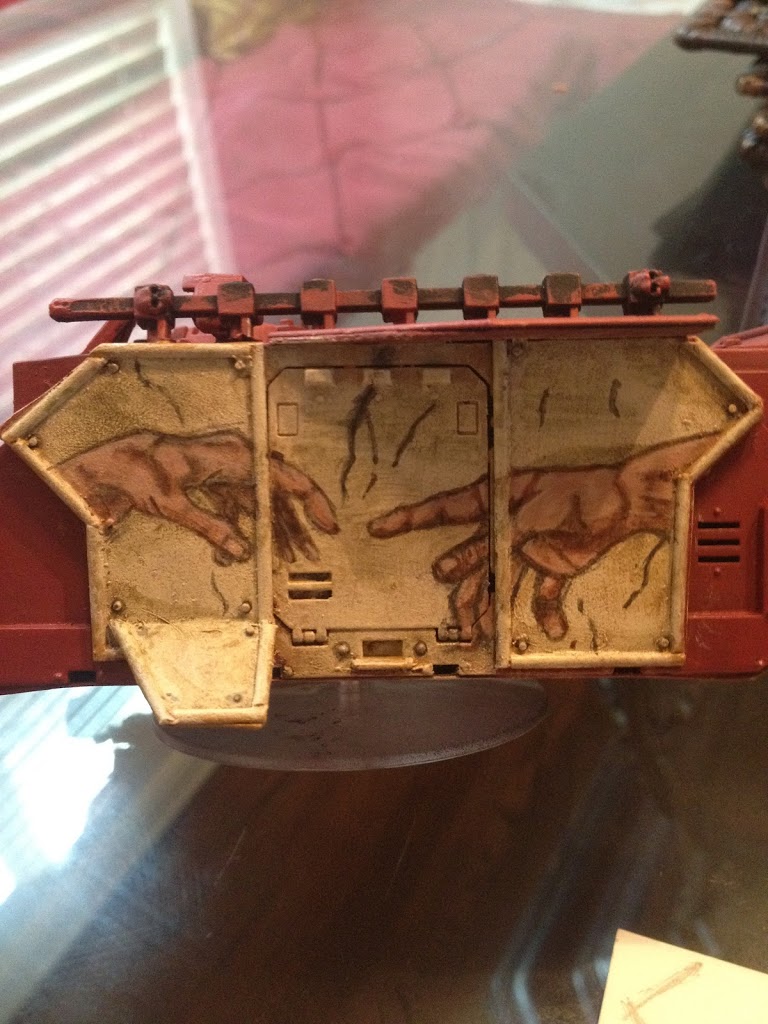
Stage 2: Get a large, flat surface. I custom built the side of this razorback out of Green Stuff and plasticard. The sole purpose of the side was to create as large a (flat) painting surface as possible and since these are Razorbacks and not Rhinos, that meant it was on the side.

Stage 3: Basecoat- Remember that painting always starts from the background… Don’t paint the ‘happy little trees,’ and then try to fit the sky in later! For ideas on this watch those old PBS painting shows…seriously.
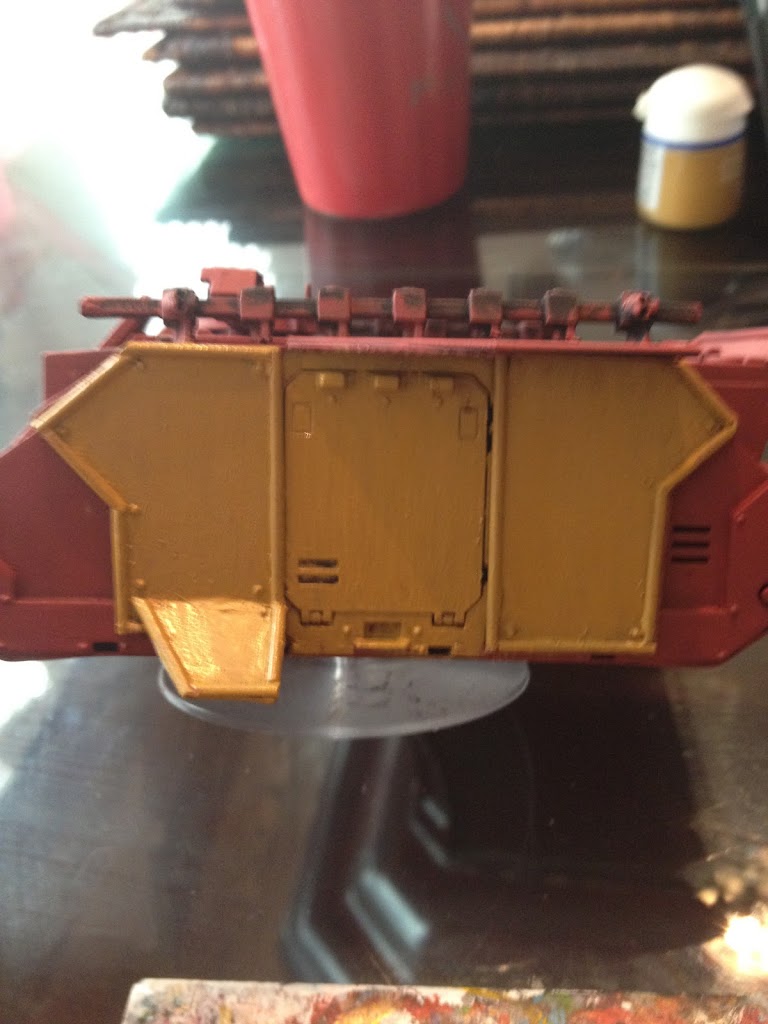
Stage 4: main background color – In the original painting the canvas (roof) was a Bleached Bone color. I stippled the area with a decent brush full of paint and then dry brushed the area to give it an ‘old canvas,’ feel. Some of the base coat is still showing through. Don’t forget to get in the nooks and crannies it will pay dividends later!
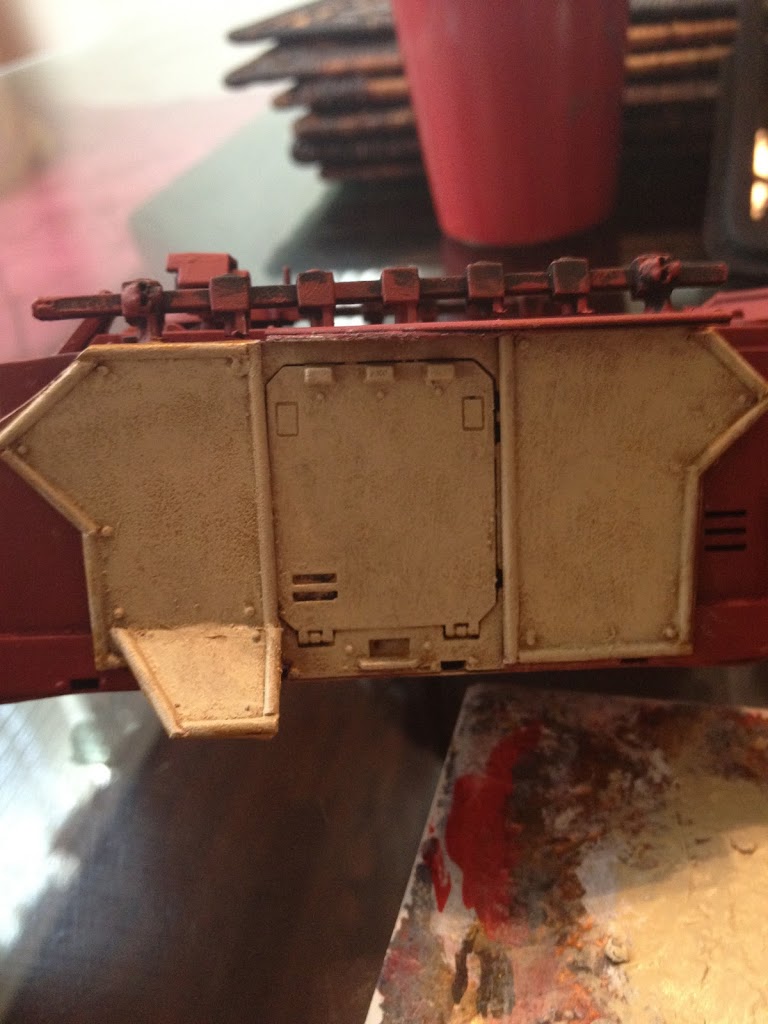
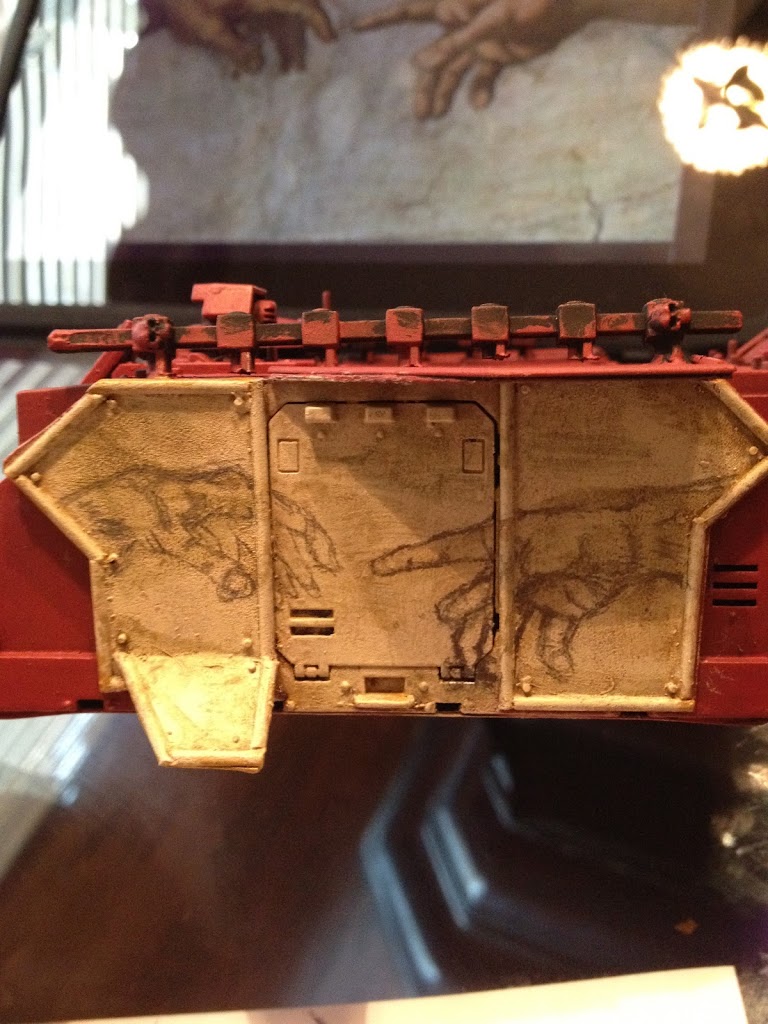
Stage 5: Washes! This stage of the painting makes it look like the canvas has turned a green-mud color in some spots. To achieve this I mixed Thraka Green, Devlan Mud and water in 1:1:1 (approx). Then I brushed it on (intentionally trying to show some brush strokes). I also used this stage to give me a rough idea of where the hands were going to be. I used the original art as my guide for how much is ‘too much,’
Stage 6: Shaping – This is perhaps the most important stage!!! I went in with a soft pencil that was sharpened and drew directly on the surface. If you do this properly then the rest of the painting is essentially a paint-by-number. Don’t be afraid to use the eraser! but wait for the paint to dry first.
Stage 7: Detail base-coat – I used Tallarn Flesh (iirc) for this stage and colored the whole hand in this color. At first I was debating between a dark base color and ‘building up,’ or a light base color and ‘shading down.’ I then texted my buddy Goatboy who gave me the perfect answer…”Do a mid-tone, then shade and build up.” PERFECT!
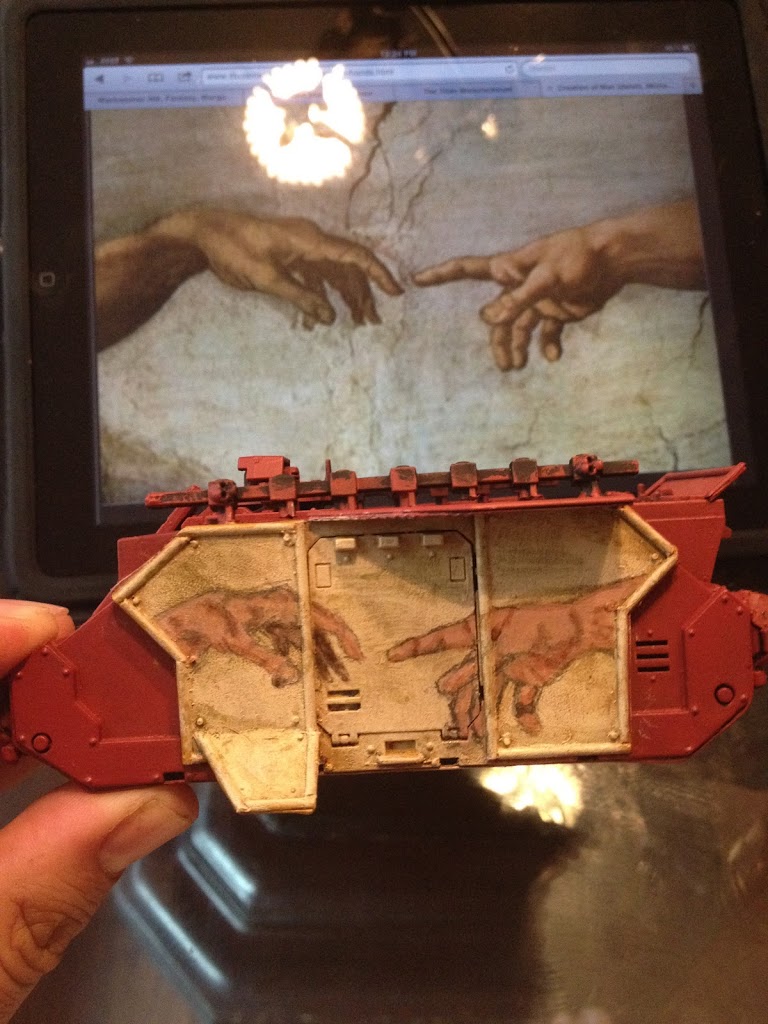
Stage 8: Shading- I used Badab Black, Devlan Mud, Gryphon Sepia and Ogryn Flesh to shade the crevasses of the hands, progressively getting darker to show the depth of the structures. I used the picture a lot at this stage to show me where the bones and joints would create shading (see the thumb on the right side).

Stage ??? (9): Highlighting – During this stage I used Elf Flesh to give a more lighted effect on areas that would be in the direct sunlight. I should take this opportunity to state the the 100% best tip for shading/ feathering is to water down your paints so they blend well! I would rather paint 5 layers thin on something like this than one gloppy thick layer. I later went back in and put in an extreme highlight edging of bleached bone to create a sky/earth effect on some of the more pronounced ridges in the hand (See the wrist tendons of right hand)
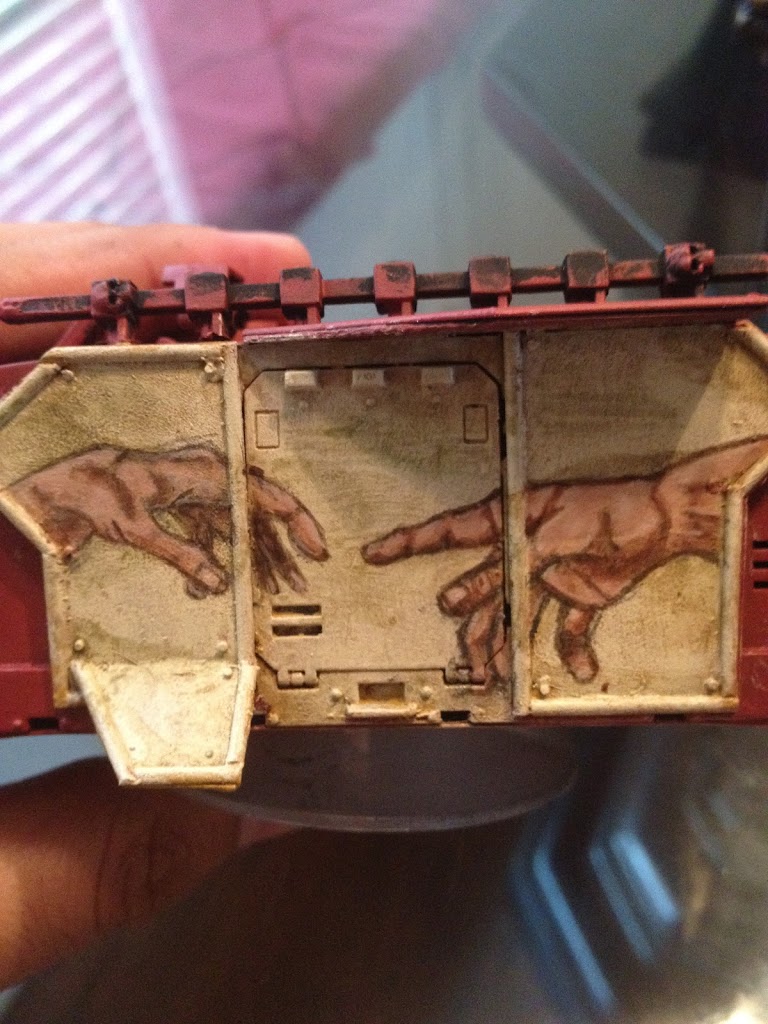
Stage 10: Finishing details – at this point I went in with straight Badab Black to paint in the ‘cracked,’ effect on the canvas. Easy stuff here, just be careful not to get too much wash on the brush or it will leak all over!
PROJECT COMPLETE!!!
The sisters of silence and their ride! (Now to paint the tank Gold!!!)
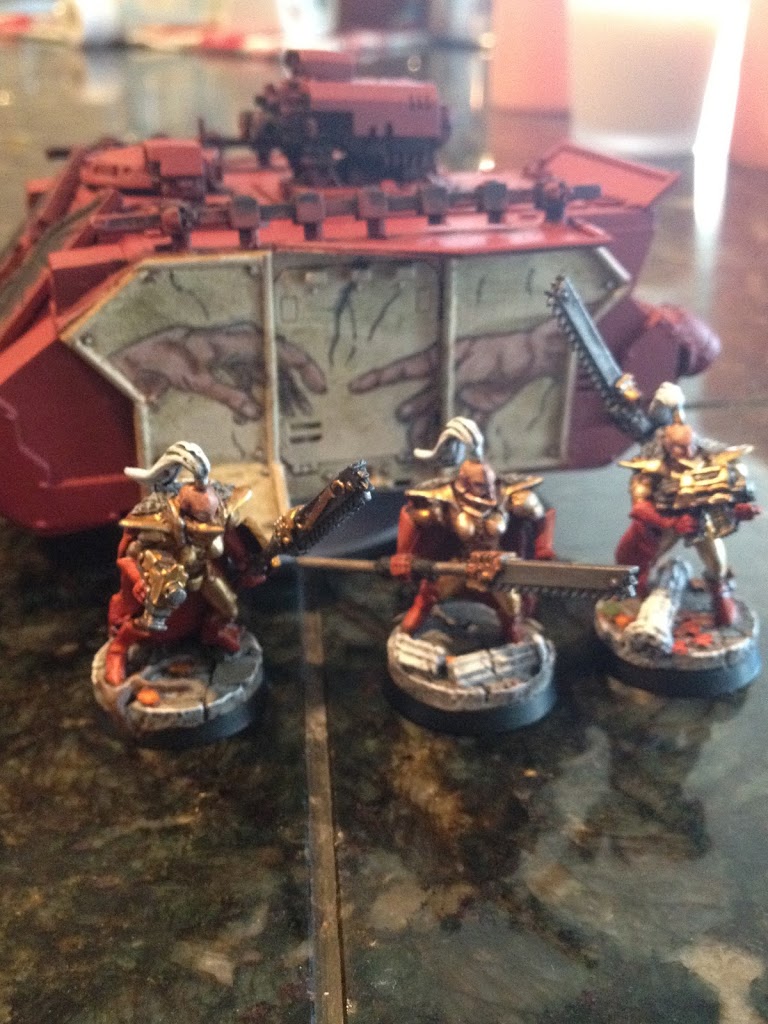
All in all I had a great time doing this little project, each of my razorbacks for my Custodes/ Sisters of Silence will have a piece of art on it like this, so I am looking forward to this project and I hope it will be done for Wargamescon this year!
In all honesty the best part of this project was the fact that this was the first painting project my wife took serious interest in! We were up until all hours tweaking the hand of Adam until she was satisfied… It was awesome (but her’s was still better, lol).
As a special note. I have never taken an art class of any sort. YOU DON’T NEED TO BE AN ARTIST to try things like this. My first one was a Blood Angel drop and I went from there! Get out and try something new, ruin a tank or two! I was originally inspired by the great Jawaballs and hopefully you can get the bravery from this article to do what I did and push the boundaries by trying something new!
~DUKE
Step 11:
Now that you worked so hard have some Kebobs!

Author: Guest Columnist
Advertisement

