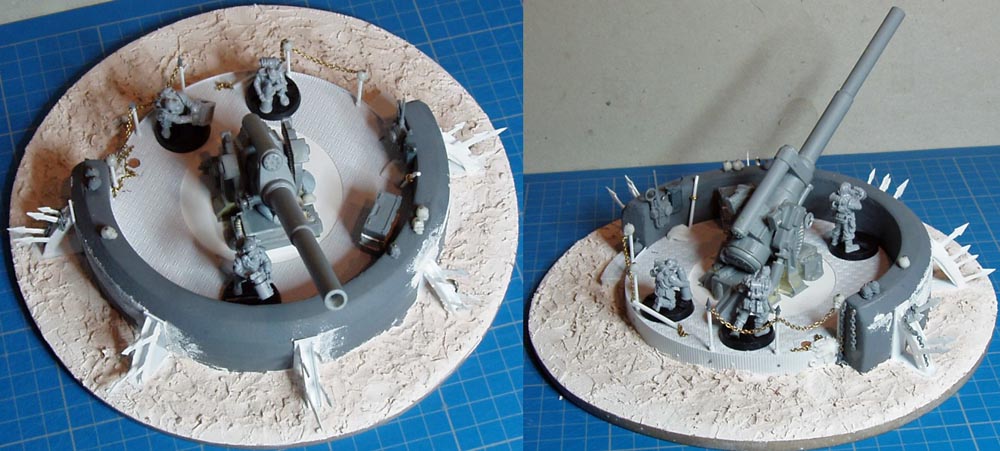
Lets take a look at the world of 3D Printing as I use the process for the first time. The article will show the process from the initial 3D model, to 3D print, to cast pieces. A number of years ago I built an Earthshaker gun emplacement. I quite liked how it turned out but alas (as with so many projects) it got shelved. The model was later broken up and any plans for a battery was put on permanent hold. The prospect of making so many curved walls was one factor which saw the projects demise.
However not long ago I did a blog post about the emplacement and the itch began anew. Since the initial emplacement I have been doing some casting (including Gun Turrets) and I thought this would be a good solution to solving the problems of building all those curved walls – make one, then cast. While reducing the work it would still mean building one curved wall. I didn’t want to cast the wall in one large piece so I would have to make a wall section then build the emplacement up from cast pieces. While reducing the amount I would have to build it would increase the need for accuracy while making the wall section.
To get an idea of what the finished emplacement would look like I produced a quick 2D CAD drawing, I then realised what was staring me in the face – why not have the masters for the moulding process made for me? I had heard of 3D printing and that the cost had come down enough to allow anyone to get pieces printed.
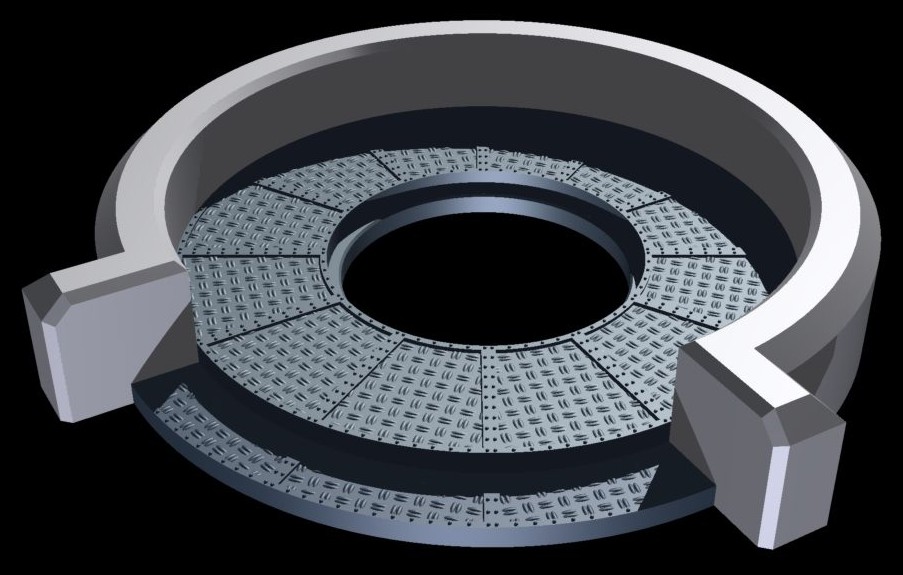
A 3D model of the emplacement was knocked up so I could work out the design of the wall and floor pieces.
The central hole is where the weapon mounting plate would eventually slot into. At this point I left it alone but the final design would either mount an artillery piece or a Forge World turret (such as a Hydra or Manticore). The wall was split into 30 degree sections and two 15 degree end pieces. Both the floor and steps were split into 30 degree sections as well.
I priced up how much the pieces would cost to get printed and while not a huge amount the fact was it was too much for what was to be an ‘experiment’ to try out the process.
My interest however was unabated so I turned to something else which I could experiment with.
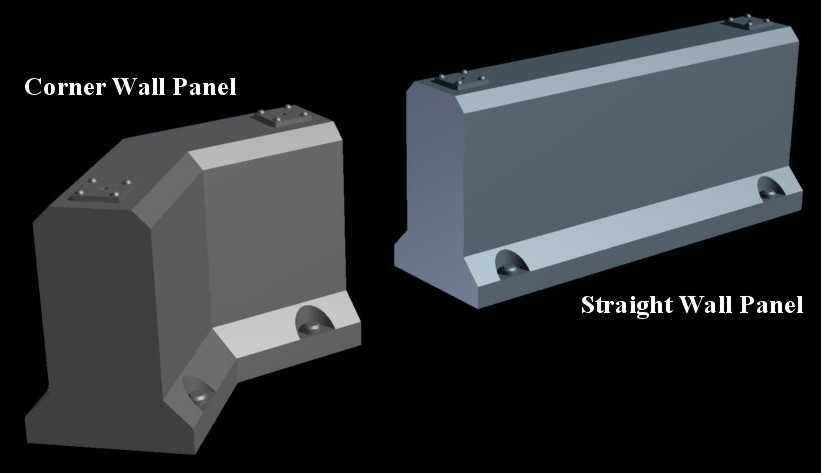
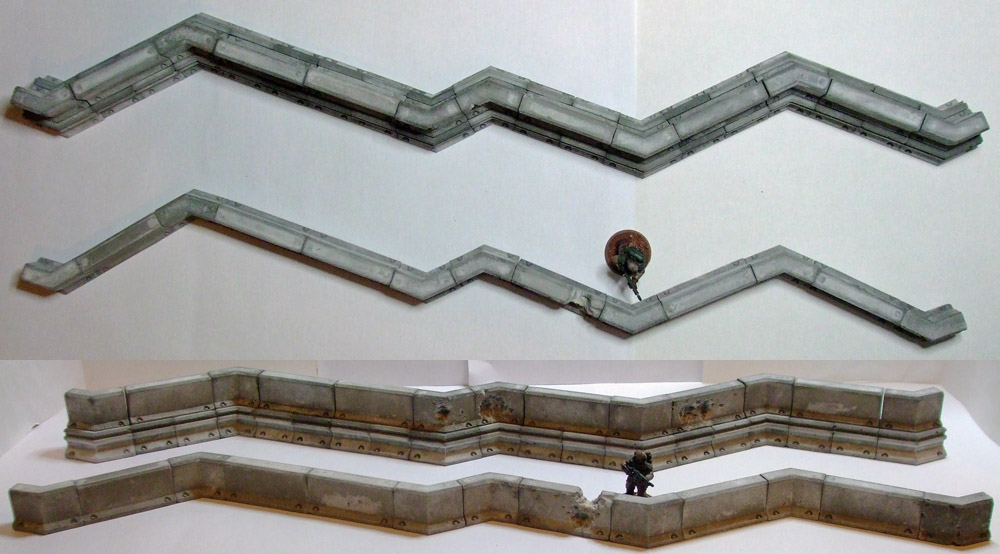
Not being a fan of the GW Aegis line I designed something which seemed more fitting for my Chaos Renegade Militia. Low tech, concrete cast panels which could either be transported in or cast on site.
After a mock up or two I settled on a height of 22mm. The aim was to need as few prints as possible so the corner piece had to work either way round – so there is no ‘inside’ or ‘outside’ face and the corner piece can be used as an outside on inside corner.
After looking at a couple of companies I went for Shapeways, based in the Netherlands (I am UK based and they seemed to be the best of the closest companies). I decided to use two different materials for the prints so I could see which was more suitable to the application I had in mind. The cheaper material (White Strong Flexible) was stated as ‘not being suitable for casting’ but after reading some posts on their customer forum I thought it was worth a punt. The second material (alumide) is the same as WSF except for containing aluminium dust mixed in. The cost was noticeable so if WSF did turn out to be useable it would mean big savings later on.
Advertisement
The prints were ordered and arrived within two weeks.
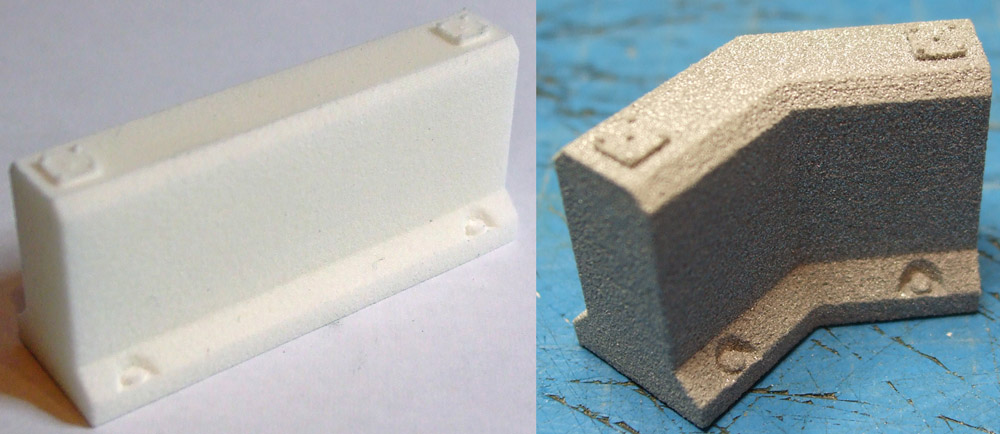
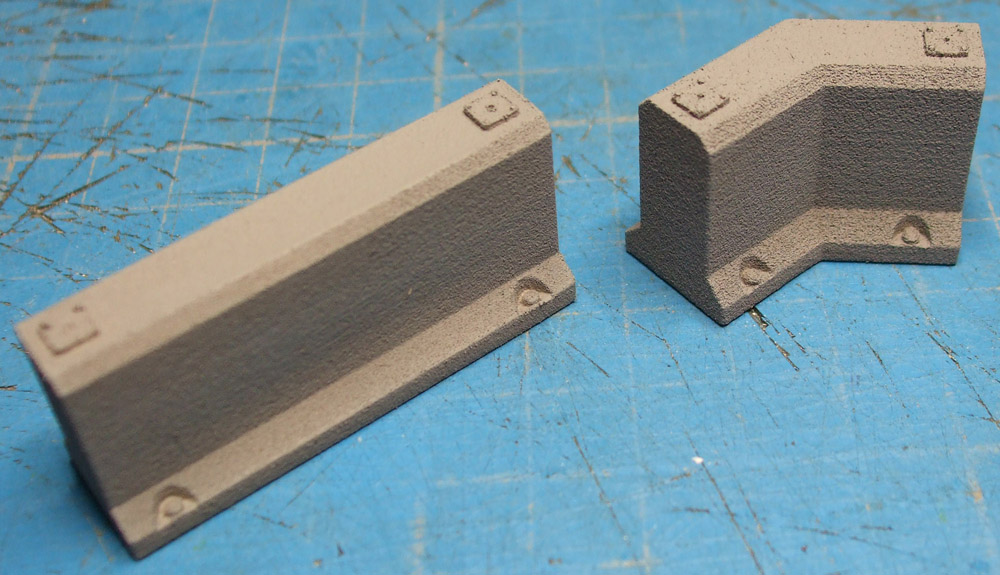
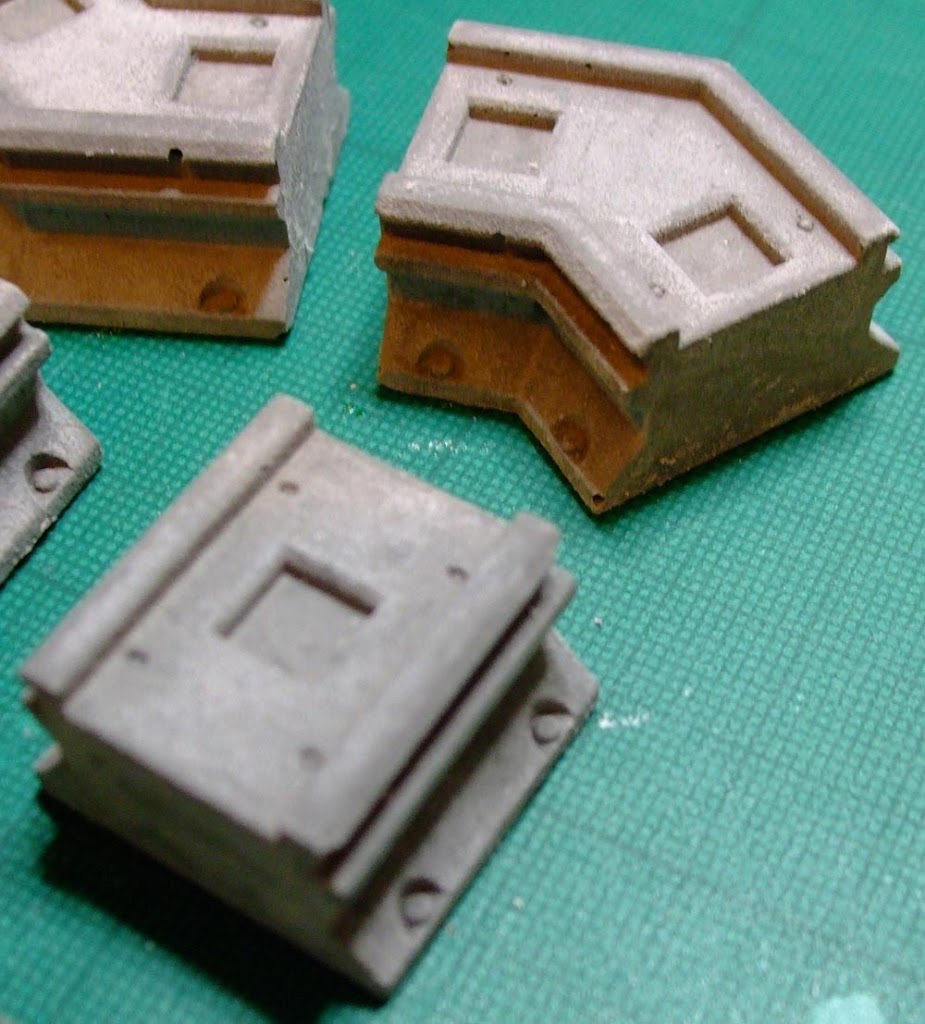
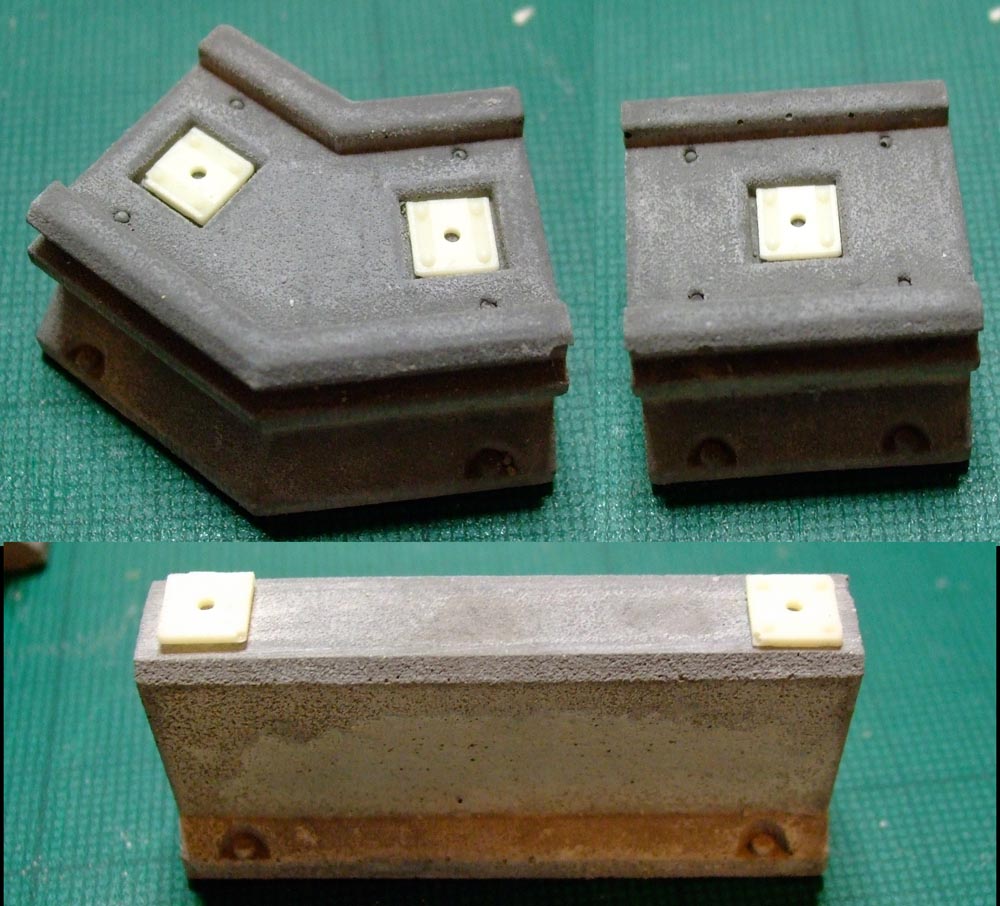
The difference between the two materials was not noticeable when the parts arrived other than in the colour. I gave them a coat of grey primer to help show up the detail and more importantly to seal the WSF piece ready for doing the mould. Once undercoated you could see the top mounting plates on the Alumide was sharper (though still not great). The surface texture on both pieces looked equally rough; similar to a coat of GW Roughcoat.
Once undercoated you couldn’t really tell the two materials apart.
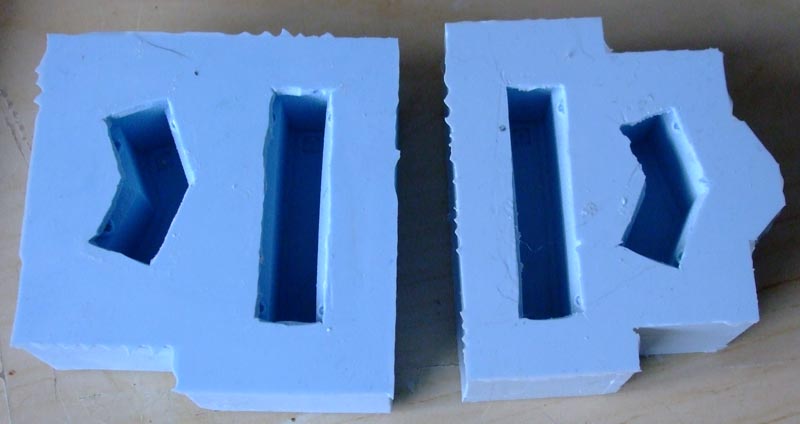
24 hours after pouring the rubber I started casting the walls in a casting plaster. While being a lot cheaper than resin the main reason I went for plaster was the ability to easily carve battle damage and symbols into the walls. I also had plans to cast rebar into the walls to be exposed later with battle damage, not something easily done with resin casts.
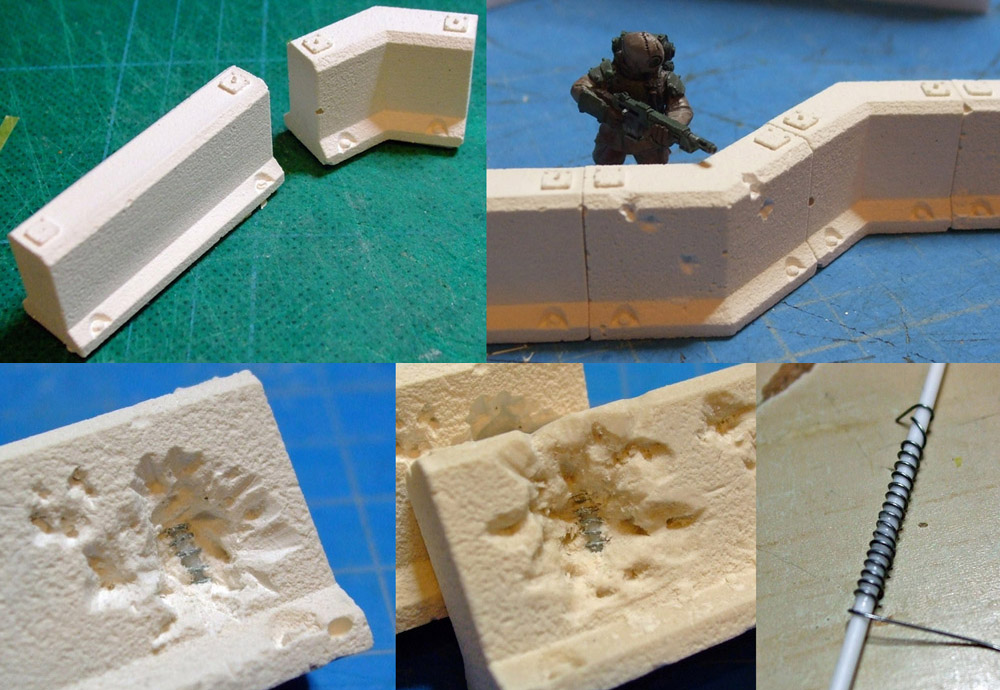
The test pieces came out well, except for the mounting plates. The detail was just a bit too ill defined on the masters to come through. I experimented with adding rebar, made from styrene rod with wire wrapped round, and was quite pleased with the results.
Advertisement
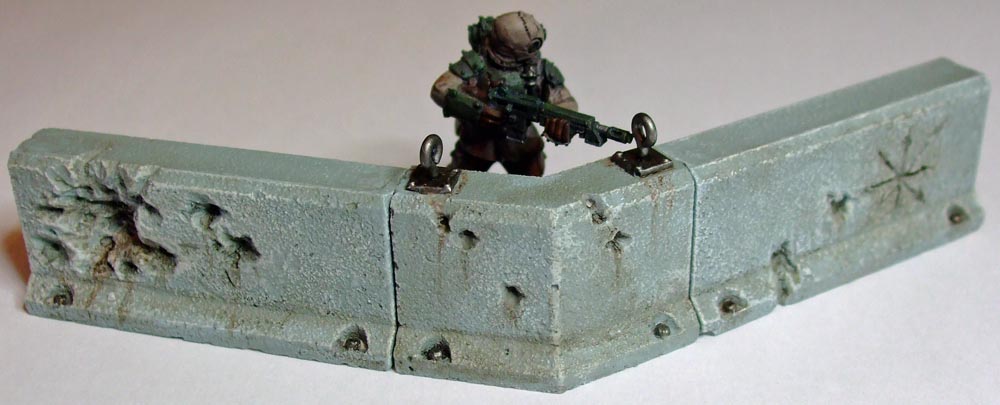
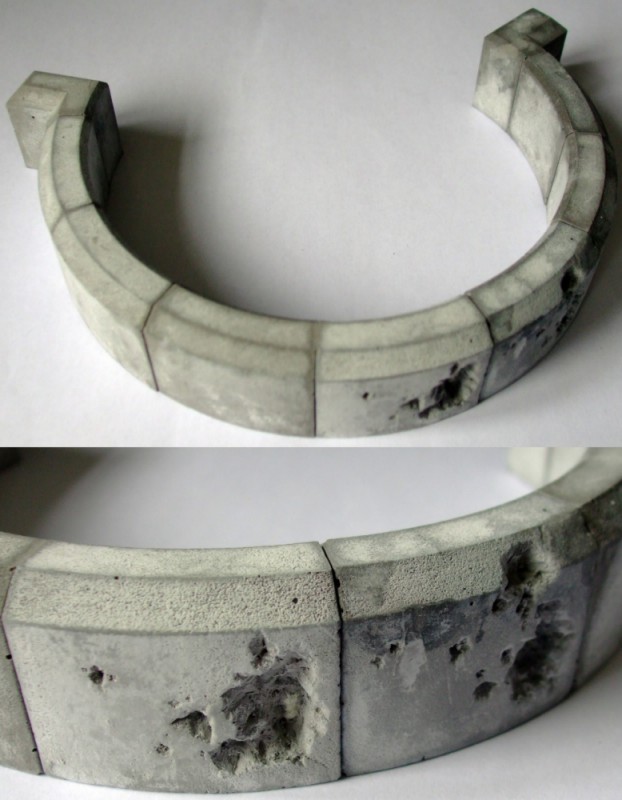
I carved in some damage and did a test paint scheme to see how they would look finished.
I was very please how they turned out; they were quick and easy to paint yet still looked good. While the damage was very easy to do the plaster seemed strong enough to take day to day gaming. As you can see I removed the mounting plates and make some new ones. I did a master in styrene and cast it in resin. The lifting eyes will only be added to a few panels. The idea is they would only be fitted to panels when they are lifted into place then removed before being used again elsewhere.
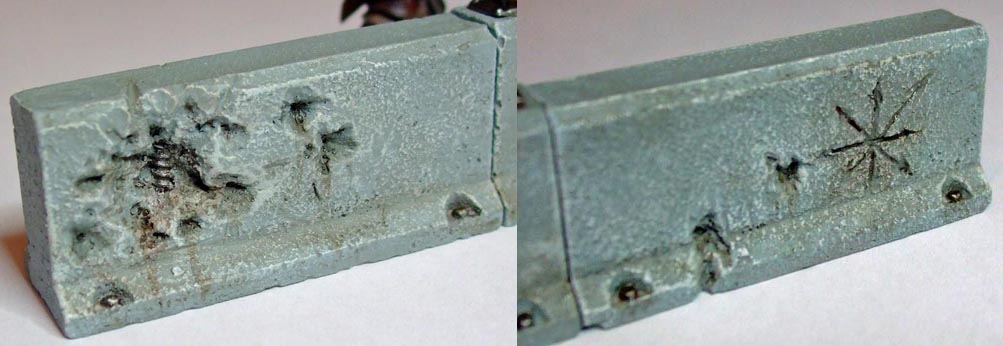
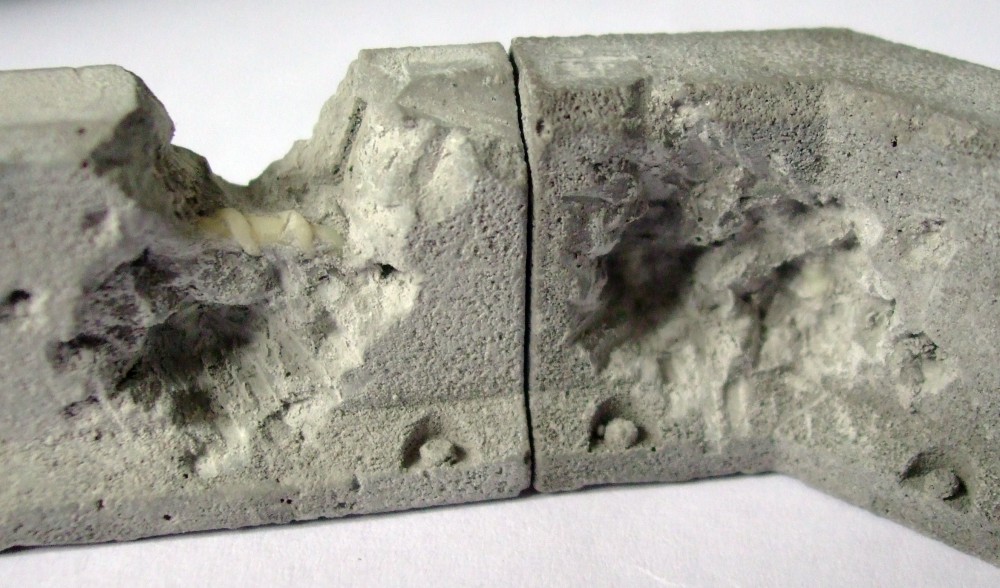
Detail showing the rebar and a Chaos star carved into the plaster
It was at this point I had to tackle the issue of the walls being too short to give vehicles any protection. I looked into a number of possibilities including a taller wall panel and raising the original wall panels in some way.
Some of the ideas I looked at doing.
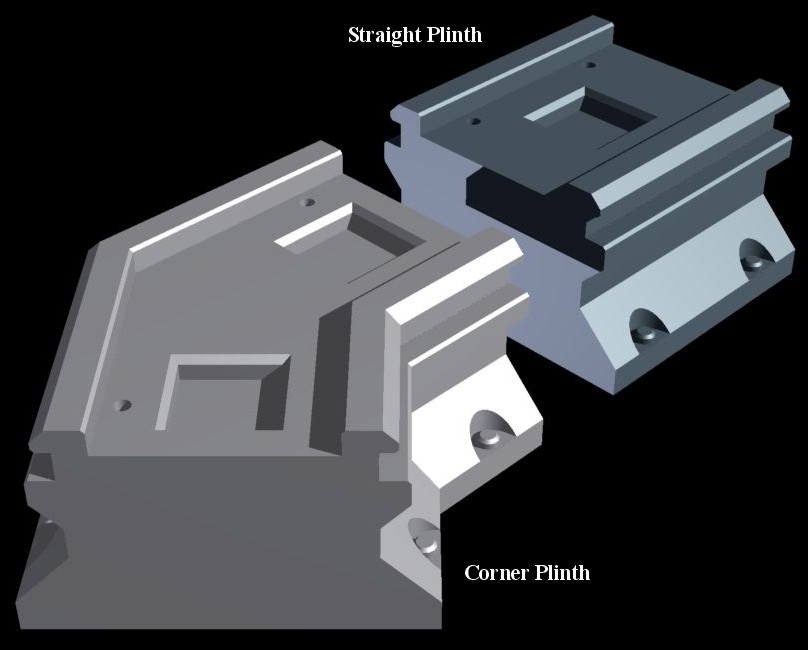
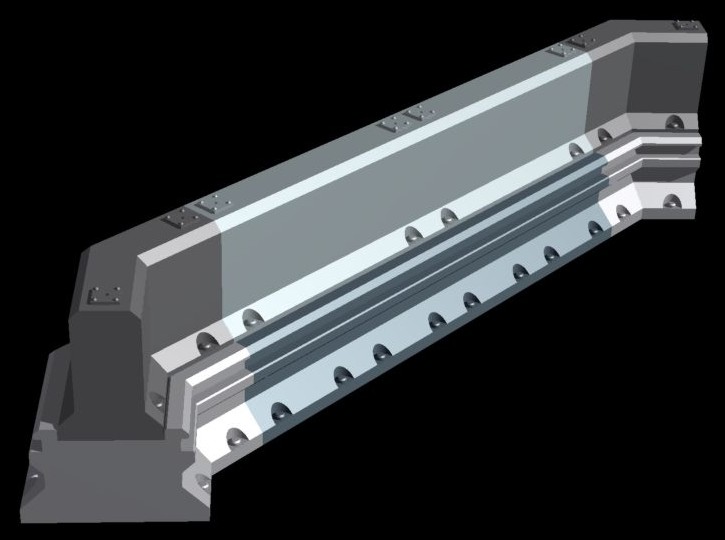
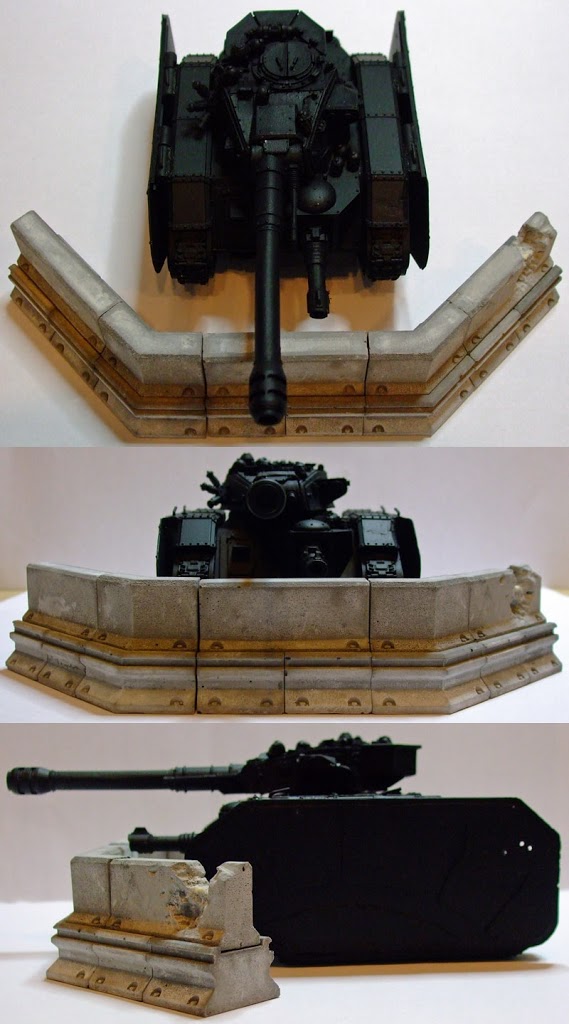
In the end I went for a simple solution. Sticking with the design ethos that I used for the initial pieces I went with a plinth design which raised the normal walls up to a height where vehicles could get some protection yet still fire over them. A firing step could be added to allow troops to still fire over the walls.
Subscribe to our newsletter!
Get Tabletop, RPG & Pop Culture news delivered directly to your inbox.
The plinths were kept small enough so that troops could still cast them on site and have an Atlas or Trojan lift them into place. I decided to remove the mounting plates completely and instead added recesses where plates could be fitted. In the majority of cases these would be left off as the recess would have a wall piece fitted above it, but I wanted the option for dioramas etc.
I created a model of the mounting plates so I could get them printed in a material which allows much finer detail (Fine Ultra Detail). The plates would be cast in resin and added to the wall panels as required.
Advertisement
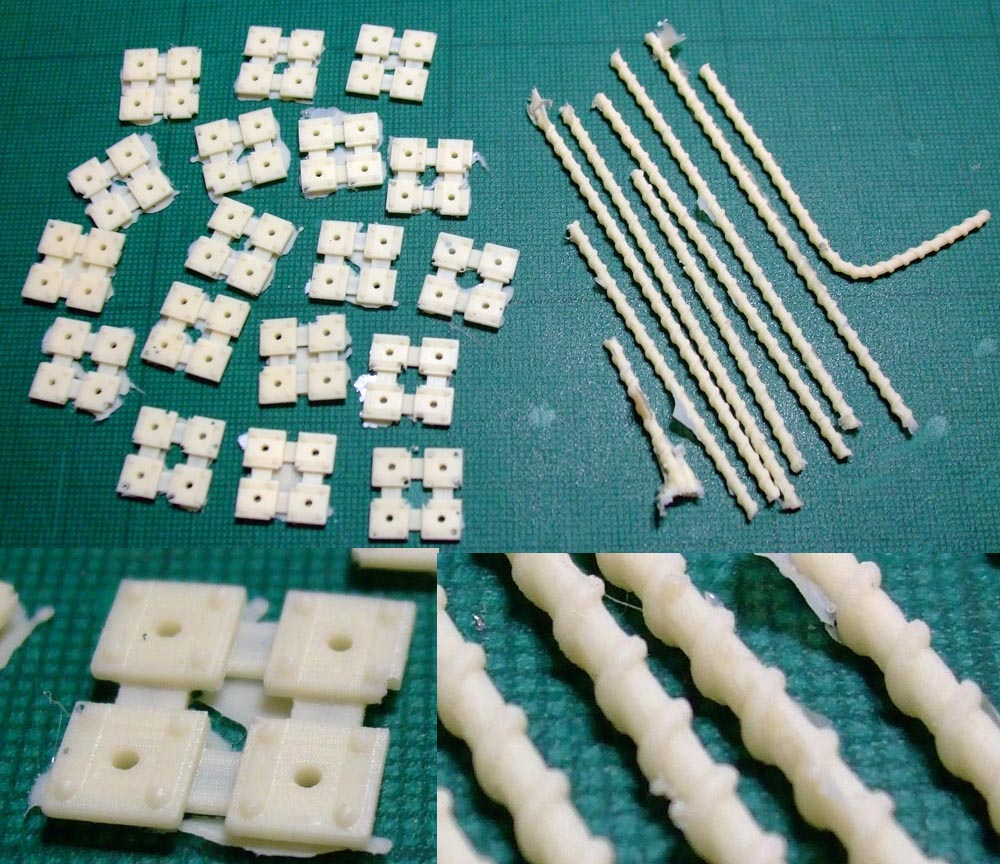
My next task was rebar. I searched for ages trying to find someone who made scale model rebar but only found one place in Japan. In the end I decided to get this printed as well so I could cast them in resin.
Making the pieces hollow reduced the cost.
The rebar I had printed in two materials – alumide and white detail. The white detail seemed to be the better of the two prints.
All the parts got a coat of Halfords Grey before the moulds were done, the casting then began in earnest…
The plinths were done in plaster…
…while the plates and rebar were done in resin.
The rebar cast nicely, a very fine mould line which is more than acceptable. On average probably 1 in every 4 mounting plates will be recycled as they were ruined with small air bubbles and they aren’t worth the time in filling.
A wall panel with the new cast rebar inside.
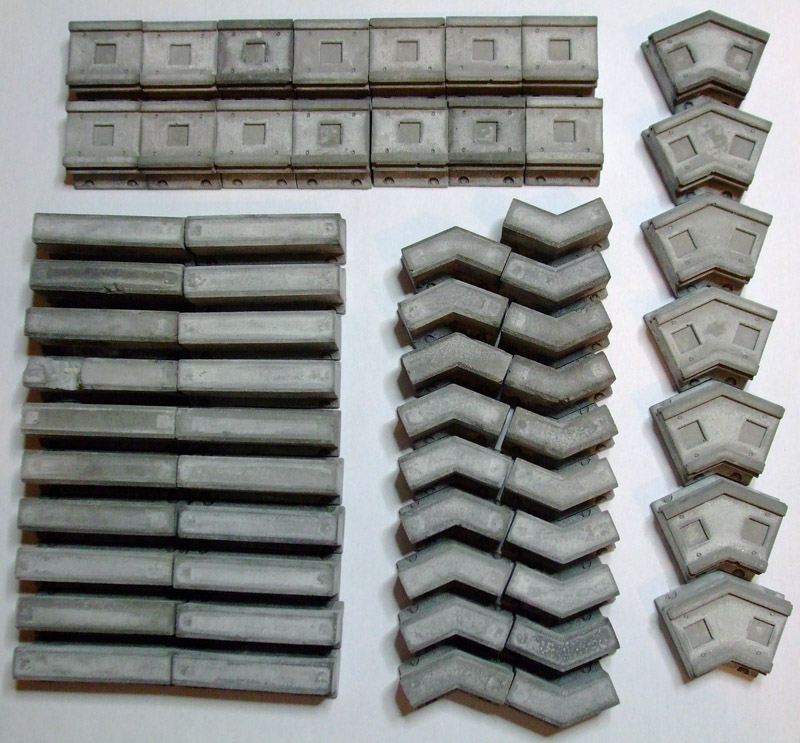
Soon I had a nice collection, though I will need plenty more for the size of games I tend to play.
Advertisement
Some cast mounting plates placed in position on the wall and plinths.
At this point I will draw the article to a close. I have a lot more casting to do for this project and of course the inevitable drudgery of painting them all.
In conclusion:
The process for this application worked perfectly. The surface texture of the prints fitted in exactly with what I wanted. This was pure coincidence, I simply didn’t know at the beginning how smooth a finish the prints would have.
The materials and resolution did not suit the initial idea of having the mounting plates incorporated into the panels, but in hindsight I prefer the way it has gone with having the separate mounting plates.
The downside is I won’t be doing the gun emplacement floor panels in either WSF or Alumide, the surface finish just isn’t good enough. Likewise my ideas for other terrain and vehicle parts are on hold for now. However the White Detail material I used on the rebar turned out better than expected so I may do a further couple of prints in this material to see what can be achieved.
There are other services which produce prints at a much higher resolution (those used by commercial companies such as Max Mini for example). This is an option, but a much costlier one. It is something I will be considering as once the cost is divided by the number of casts I would be doing will not seen quite so prohibitive.
Overall I have enjoyed and been impressed by the process and I will be looking to use it further in the future.
Advertisement
PS: I couldn’t resist getting the gun emplacement walls printed even though I won’t be getting the floor panels for a while…
Rictus is a veteran tabletop & miniatures hobbyist with over 10 years of experience. His specialty is miniatures painting and conversions. He began writing for BoLS in 2011.