Howdy readers, my name is OldHat and have recently caught the Dust Warfare fever. Today lets do a battle report.
When I first saw Dust Tactics, I admittedly didn’t care much about it beyond the interesting aesthetics, but then the buzz started about it going to the tabletop and here we are. My local gaming group has been giving the rules a go, feeling it out to see if we were willing to invest in another system. As it stands, we regularly play 40k and Warmahordes, as well as all the other big name games, so I went in with a good grasp of gaming and zero expectations.
For the first few games, it was the typical learning experience. Crunching a new ruleset is always a blast, but labor intensive, even for a system as straight-forward as Dust Warfare wound up being. So, once we figured out the timing and the various orders of operation, we set in to record a game and get a battle report up.
Now, I lack good video equipment and didn’t want to expose the world the vagaries of myself and my gaming group – so instead I am opting for a typed one with a few pictures to show positions, etc.
When Dust Warfare was released, I ran out and bought the out-of-print Dust Tactics box set from my LGS, dividing it up for demo games with the hopes that the game would be a good investment. That being said, I chose the Allies and my buddy went with the Axis – each of us using the contents of that box set.
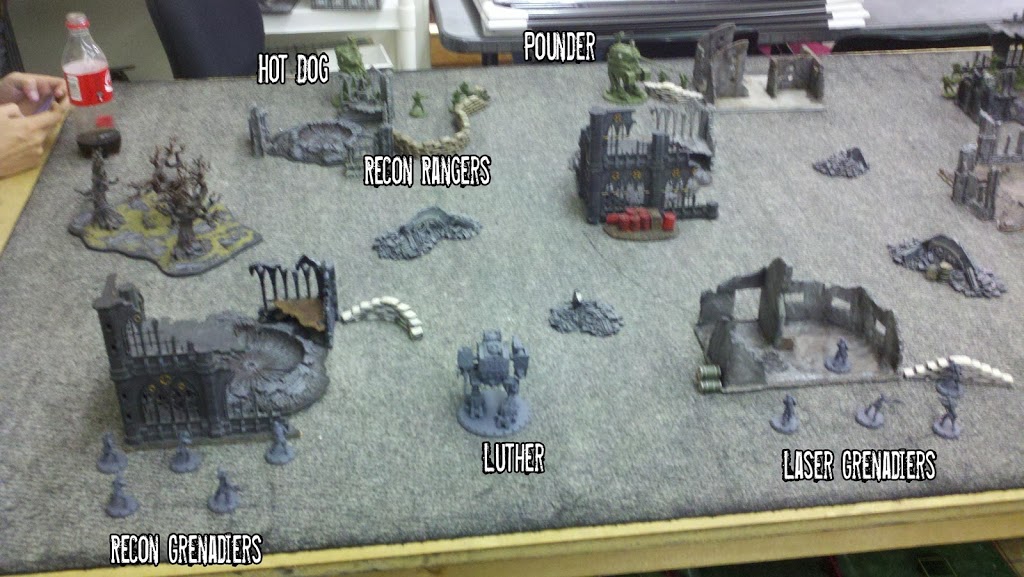
Army Rosters:
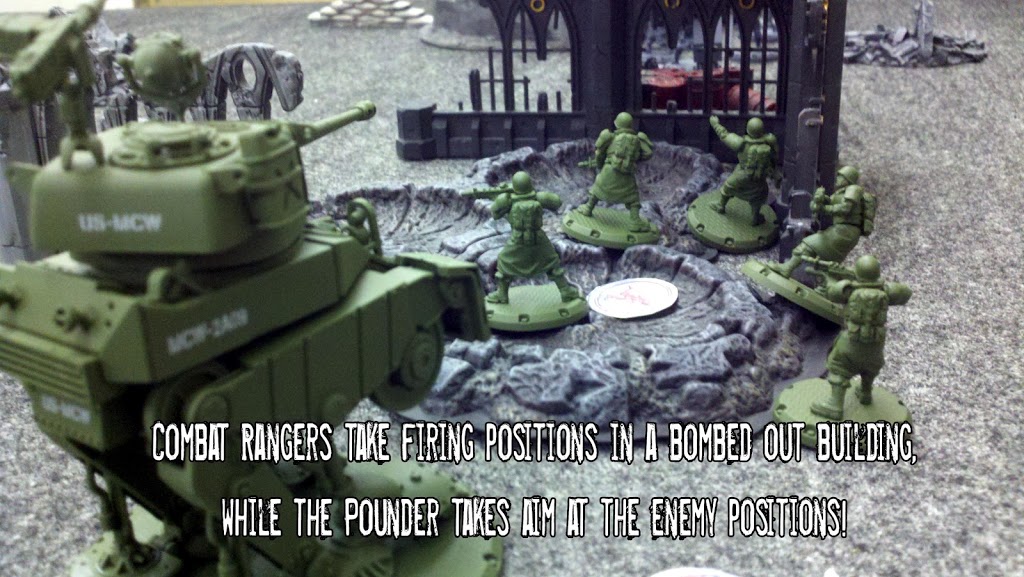
Allied Combat Platoon (139AP) Command Section – Bazooka Joe Section 1 – Assault Ranger Squad Section 2 – Combat Ranger Squad Section 3 – Recon Ranger Squad Support – M2 Medium Assault Walker “Pounder” Support – M2 Medium Assault Walker “Hot Dog”
Axis Sturmgenadiere Platoon (145AP)
Command Section – Sigrid Section 1 – Laser Grenadiers Section 2 – Battle Grenadiers Section 3 – Recon Grenadiers Support – Medium Panzer II “Ludwig” Support – Medium Panzer II “Luther”
For all the demo games, I opted out of the tournament Battle Builder for simplicity of teaching my friend how to play. This means, I went for Eliminate the Enemy for the Objective, Advancing Lines for the Deployment, and Conditions were None. Each player was to deploy 9” from the table edge and destroy enemy units for Superiority Points.
In normal games, players spend points influencing any of those three aspects, meaning a wide variation of games possible. Since I went with a basic scenario, we just rolled off to see who picked the table side and deployed the first unit. We alternated until each of us had deployed our five units to the table. Sigrid went with his Laser Grenadiers, while Bazooka Joe was with my “BBQ” Assault Squad.
TURN ONE
On the roll-off, the Allies rolled a pair of “Hits”, while the Axis rolled a single “Hit”, meaning that the big risk I took putting my Pounder out in the open didn’t pay off and instead, gave the Axis a nice, clear shot on my walker. The first thing the Axis did was issue a Blitzkrieg Order, which is ostensibly a free move. Then, the Allies moved further into cover with a few Move Orders. At this point, the Reaction markers didn’t seem a liability, as it was unlikely anyone would be activating close enough to trigger a reaction.
Out of the gate, the Ludwig I had hoped to knock out early puts its 8.8cm guns down field via a Sustained Attack (allowing him to re-roll his misses!) at my Pounder. He scored two “Hits”, which I failed to save. After a roll on the Vehicle Damage Table, I would up Blinded! This meant no Sustained Attack actions for my Pounder for the rest of the game! The rest of his movement closes the gap, especially the Luther that has a nasty Charge attack with its Kampfzange (Battle Claw).
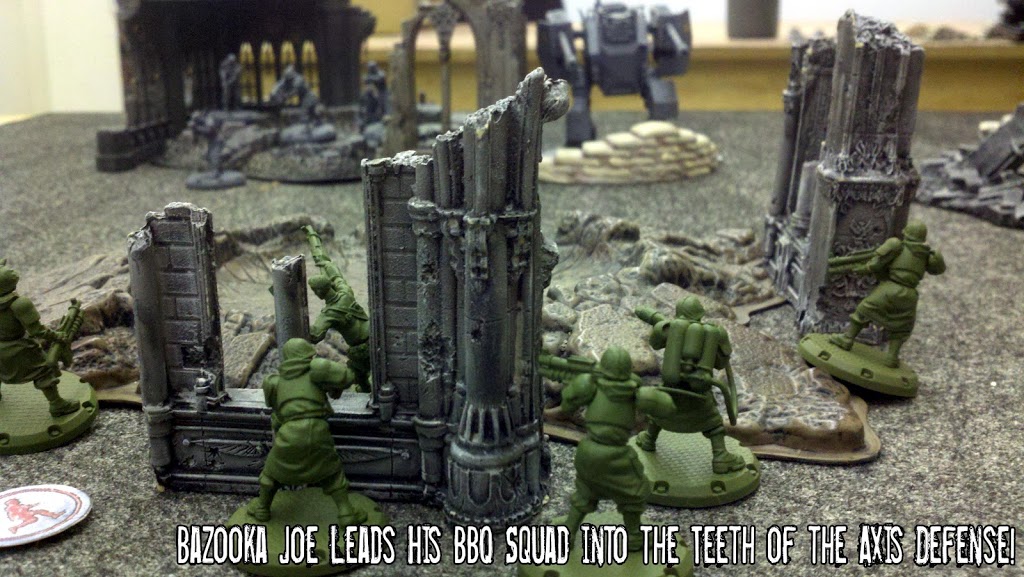
On the Allied Unit Phase, Joe and his BBQ Squad attempted to close the gap and get their Demolition Charges up to toss at the Ludwig, with hopes of knocking it out before it took out my walkers. The Pounder opened fire and rolled four “Hits”, with the Axis player saving only one! After rolling on the Vehicle Damage Table, I scored a Blinded! as well, which was a disappointment. The rest of my unit activations were just me closing the gap.
TURN TWO
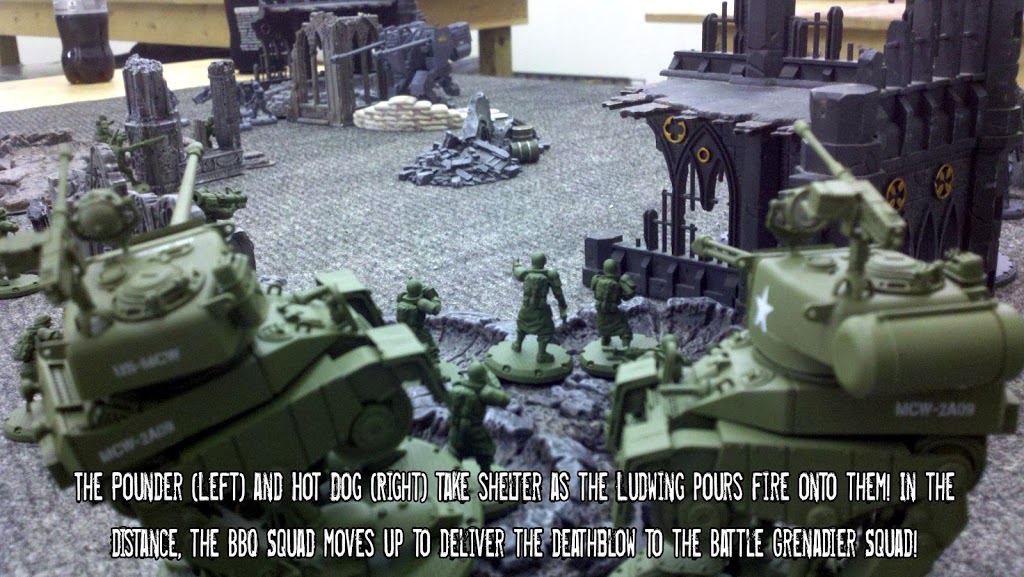
Second Initiative Phase saw the Axis roll no “Hits!” and the Allies roll one. The Axis was initiating – again. So, he opted to issue a Blitzkrieg Order, while I moved up my BBQ Squad a bit. During the Unit Phase, he continued to bring the Recon Grenadiers around the Allied right flank, while his Battle Grenadiers moved up the left flank to engage my BBQ Squad. The Luther activated, triggering a reaction from my Hot Dog, which missed! Then he shot up my Recon Rangers, which passed their saves. The Ludwig puts all his firepower on Bazooka Joe and his squad, costing the Allies two casualties and giving them a Suppression marker. During my Unit Phase, I advanced across the board, while my Pounder shot at the Ludwig doing nothing.
TURN THREE
We move onto another turn with the Initiative going to the Axis again! A Blitzkrieg Order sees the Luther move up further, while the Allies move the Combat Rangers up with a Move Order. In the Unit Phase, the Luther went to shoot, which was met with a Move Reaction that put my Hot Dog out of his line-of-sight. The Ludwig unloads on the Pounder, but it only mustered two “Hits” and both were saved.
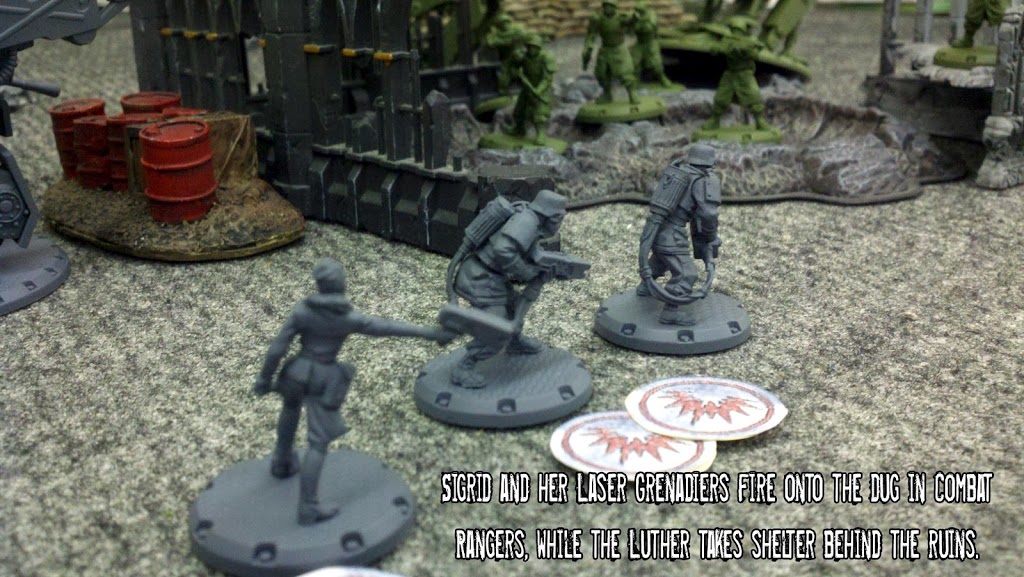
When the Laser Grenadiers activated, the Pounder chose an Attack Reaction, causing a wound on Sigrid and inflicting two casualties and a Suppression marker. Now, we play that Suppression only takes hold after the unit fully activates – so he used Sigrid’s once-per-game Berserk ability to allow him to re-roll to-hit rolls as though he used a Sustained Attack without using the extra action. This could be a huge turn, as Laser weapons can get disgusting when re-rolling to-hit. Thankfully, the Axis only managed two hits total, both of which the Recon Rangers saved.
During the Allied Unit Phase, the BBQ Squad and Joe rush up and trigger a Reaction from the Battle Grenadiers, who inflict no damage! The Flamethrower and a pair of shotguns unload on the Battle Grenadiers, inflicting six “Hits”, of which he saves only two. The Recon Rangers fire on Sigrid’s Laser Grenadier squad, putting a wound on her and killing another soldier. With the Ludwig sitting at only one point of Damage Capacity (DC), the Pounder shoots and thanks to the Hard Cover (+2 success to rolls), the Allies failed to bring it down.
TURN FOUR
Another Initiative Phase and yet another turn for the Axis to initiate with one “Hit” to the Allied three. Another Blitzkrieg puts him into position, while a bold move by the Allies sees a few Demolition Charges thrown at the sandbag emplacement in an effort to help alleviate the cover issue the Pounder is facing, but fails to do anything. The second Allied order goes to the Combat Rangers who inflict another wound on Sigrid and cause another casualty to her squad.
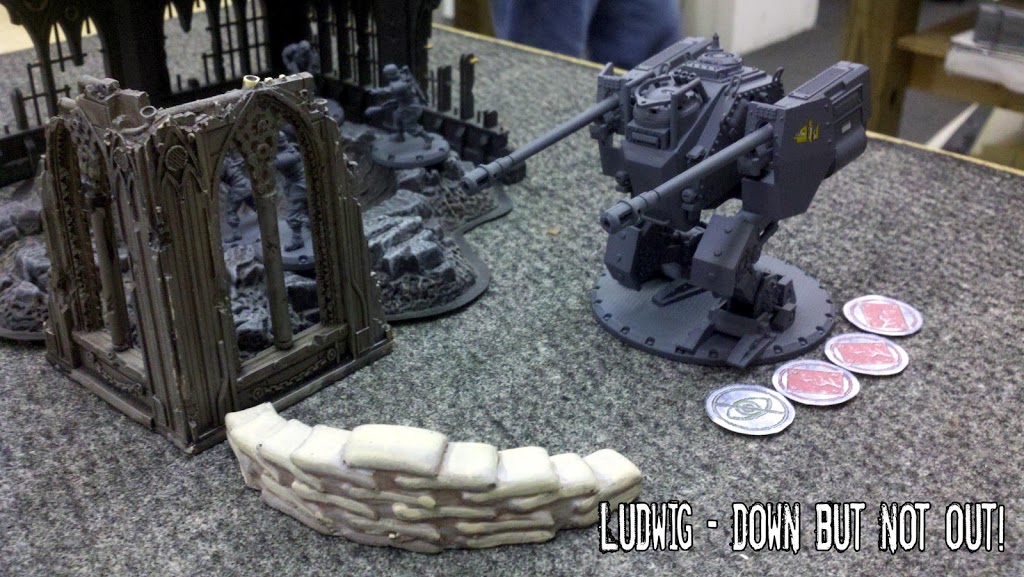
In the Axis Unit Phase, the Luther charges in and the Hot Dog moves out of range, while the Pounder reacts and shoots the Luther for a point of damage. The Ludwig lights up the Pounder, doing more than enough points of damage to kill it, which proved a major blow to the Allies. The Recon Grenadiers open up on the Hot Dog with Panzerfausts, landing a hit – which are promptly saved with an armor roll of three “Hits” out of the four dice.
During the Allied Unit Phase, the BBQ Squad wipes out the Battle Grenadiers with massed shotgun fire. In an effort to mitigate the Luther, the Recon Rangers try to put quadruple UGLs into it, but this requires them to move out a bit from the ruins. Big mistake! The Luther opens up on them with all of its firepower and scores a whopping seven “Hits”, meaning the Recon Rangers are blown to paste by a few machine guns and a flak cannon. Ouch.
By this point, the Allies are on the ropes. Losing the Pounder really hurt!
TURN FIVE
The Allies roll three “Hits” to the Axis two. Yet again, the Axis initiates! The Luther moves up behind the Hot Dog and rips it up, causing damage and an External Fire, which inflicts a single point of damage after each time it activates. In other words, it has a three turn lifespan barring further damage. Thankfully, this was the last turn of the game. The Recon Grenadiers shoot their re-loaded Panzerfausts and miss the poor Hot Dog entirely, though not before triggering a Reaction from the walker. The Hot Dog shoots its napalm thrower – which hits everyone in the opposing unit – and does only a single “Hit”, which is then saved.
Sigrid and her Laser Grenadiers unload on the Combat Rangers, which does nothing except gives them a Suppression marker. The Ludwig fires on the BBQ Squad, which saves all three “Hits” thanks to the Soft Cover and a lucky armor roll. The BBQ retaliates in the Allied Unit Phase, but can’t land a hit on that stubborn Ludwig.
At the end of the game the Allies has lost their Pounder and the Recon Ranger Squad, surrendering two Superiority Points to the Axis. The only Axis unit dead was the Battle Grenadiers, surrendering only a single Superiority Point and giving the win to the Axis. Had that Ludwig taken just one more point of damage, it would have been a tie, so it was really a rather close game.
There you have it. Not the most depth and I swear I will try to invest in a real camera (instead of my phone) and/or try to do a video in the future. The pictures, I hope, illustrated the battle at least somewhat and I hope the write-up showed the fun interplay between players in each turn. Reactions seem to be essential, leading to serious game-changers – such as the total obliteration of my Recon Ranger Squad.
In my opinion, Dust Warfare has the means to be a major contender if the community gets behind it. The rules are simple, but not at the expense of complexity in gameplay. It isn’t too labor-intensive to learn or play, nor is it prohibitively expensive to invest in. As long as Fantasy Flight Games keeps up the support, this game should thrive.
Also, if you are interested in more original Dust Warfare content, visit my website dust-war.com!
So, what’s your take on DUST after reading this first battle report?


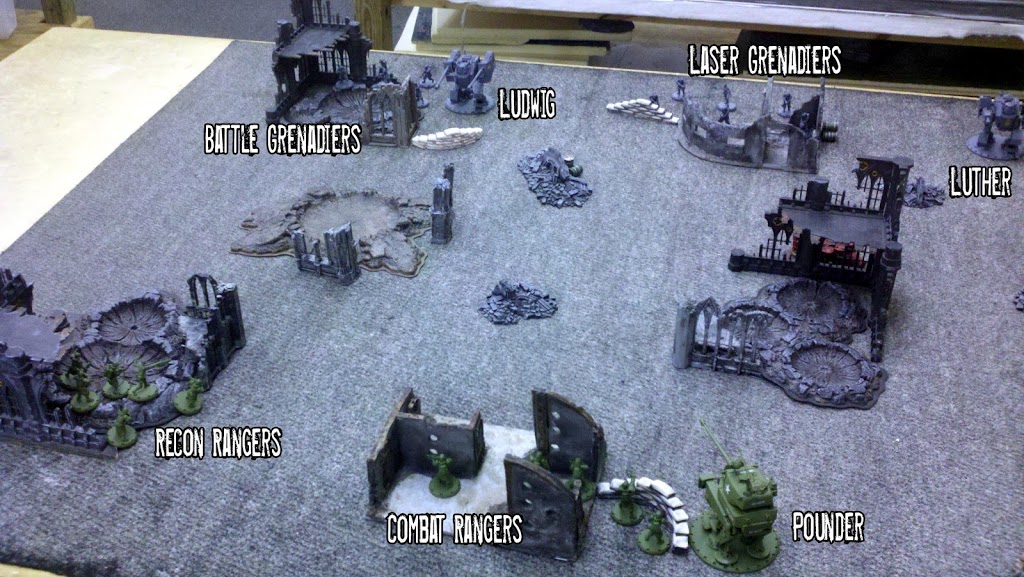
 TURN TWO