HOBBY: Further Steps into 3D Printing
6 Minute Read
Jun 7 2012
Advertisement
A follow up to my earlier article where I took my first steps into the world of 3D printing. Here I continue that journey with a more involved project. The article will show the process from the initial 3D model, to 3D print, to cast pieces assembled into the final model.
Some may remember my first article regarding my journey into the world of 3D printing in March. In that first article I showed the steps I took in producing some defensive lines. The article can be found here.
In the introduction to that article I mentioned that I originally decided to investigate 3D printing as I wanted to replicate a model I once built, namely a gun emplacement with a curved wall. I wanted the new model to be better and easily duplicated through casting.
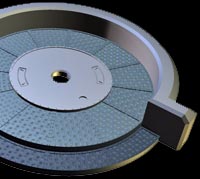
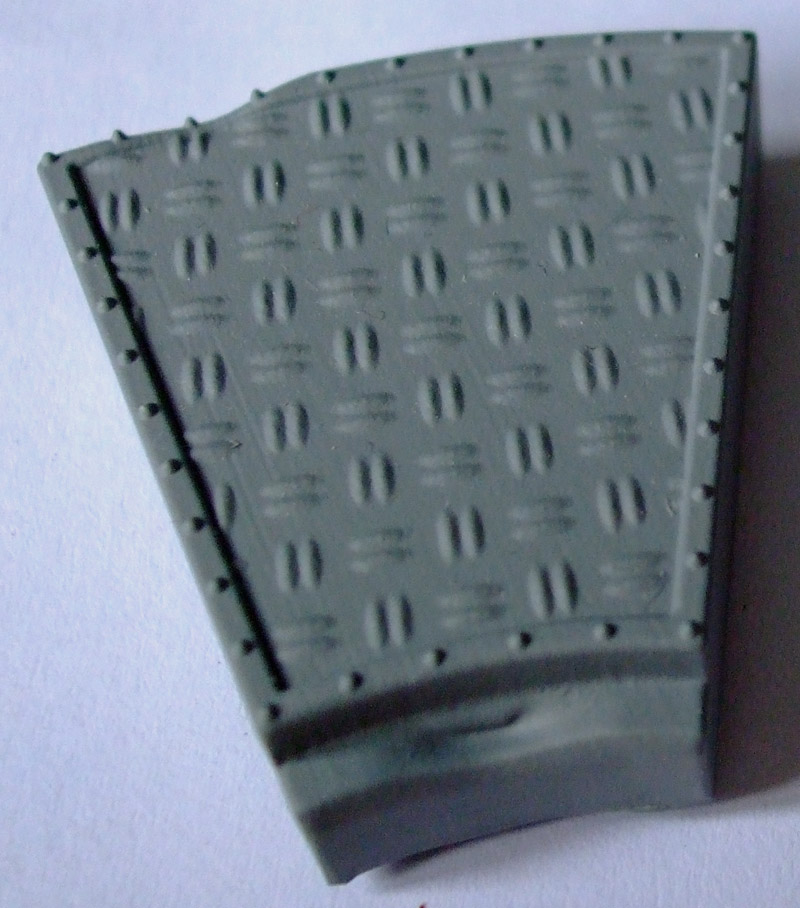
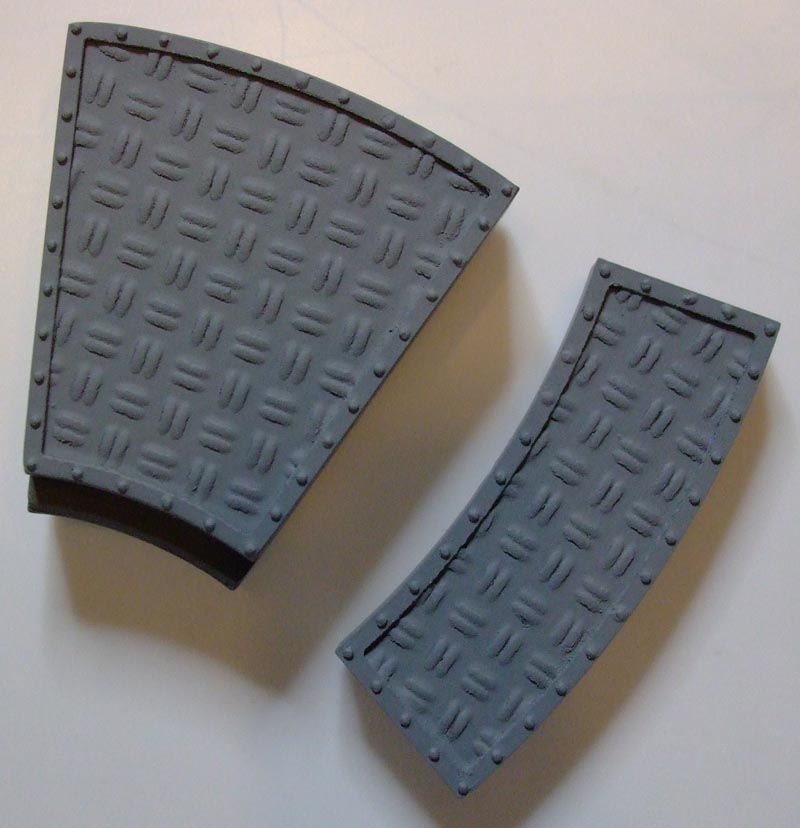
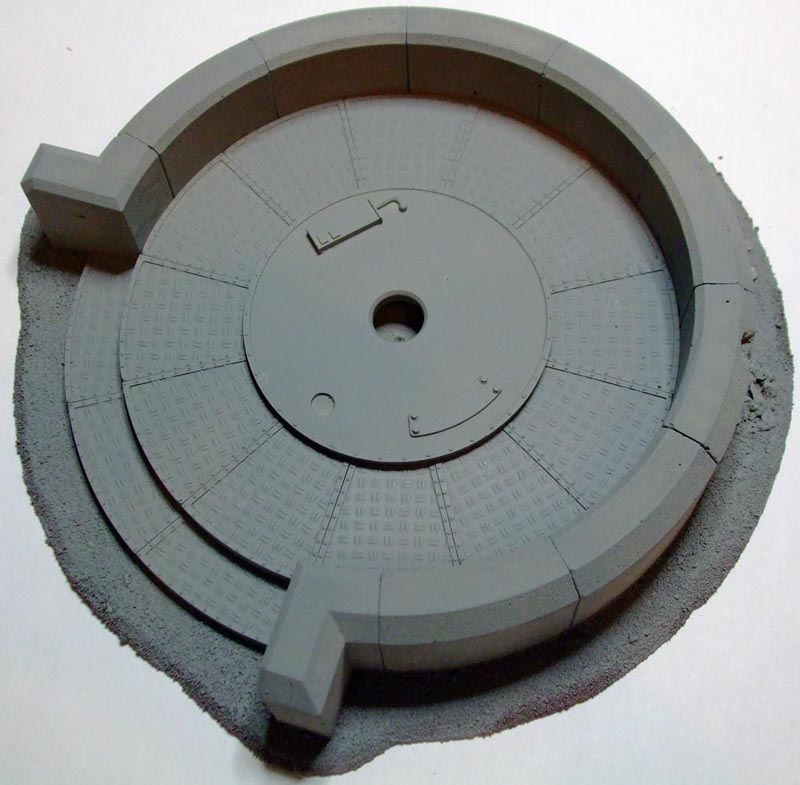
Above you can see the original model I built. For the Mk. II I decided to break the wall down into 30 degree sections, allowing easier casting. 3D printing should allow a master to be produced which was accurate so when the casts are assembled a nice, curved wall should be the result.
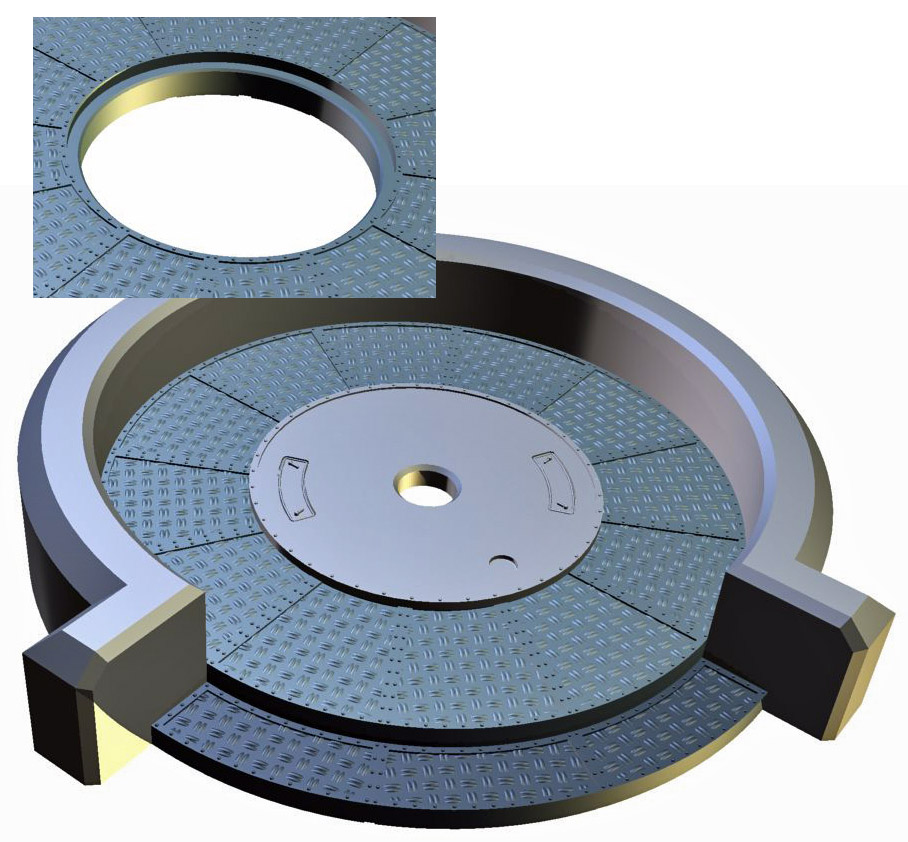
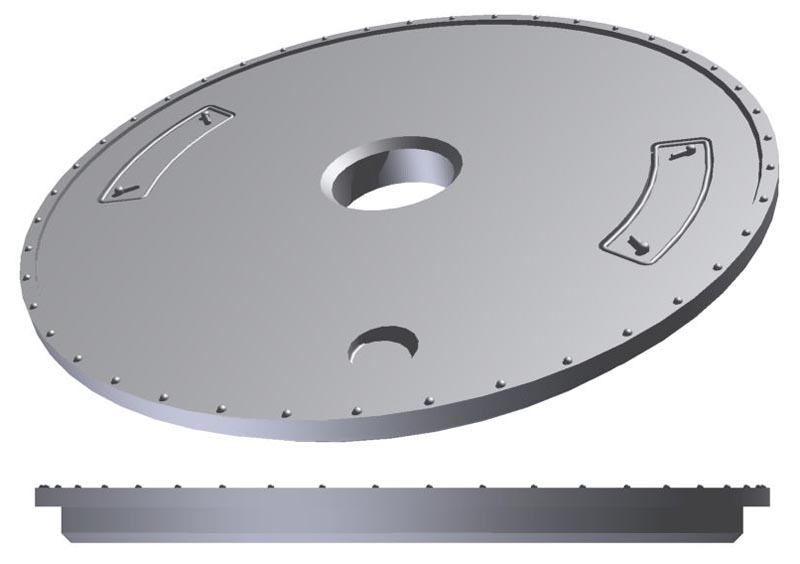
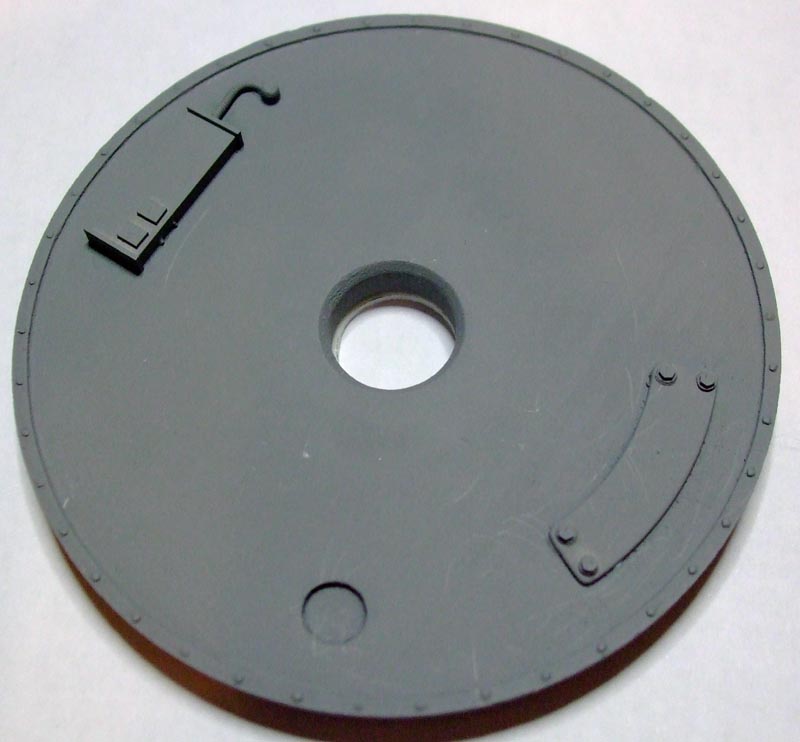
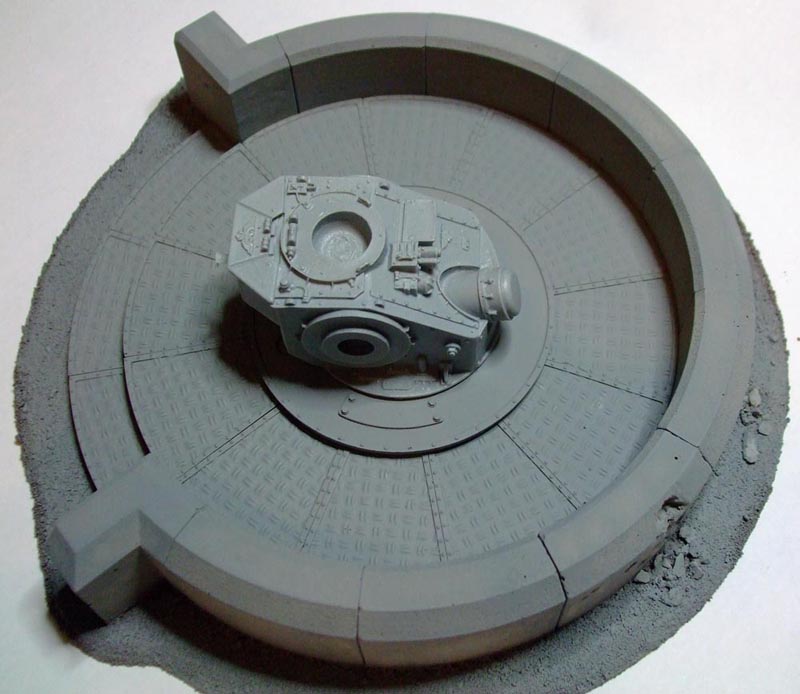
I also broke the base down into 30 degree sections and added a step. The gun mounting plate drops into the central hole and rests on a ledge built into the base pieces (see detail in the picture above) allowing it to easily rotate. The cast gun plates will either mount a FW turret (i.e. Hydra or Manticore) or a plastic Earthshaker with a modified base piece.
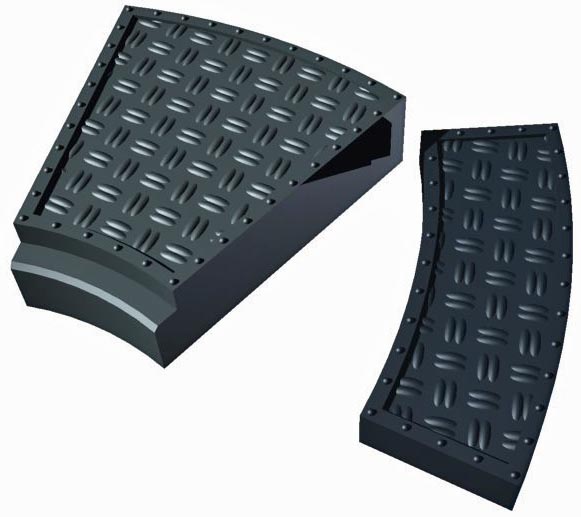
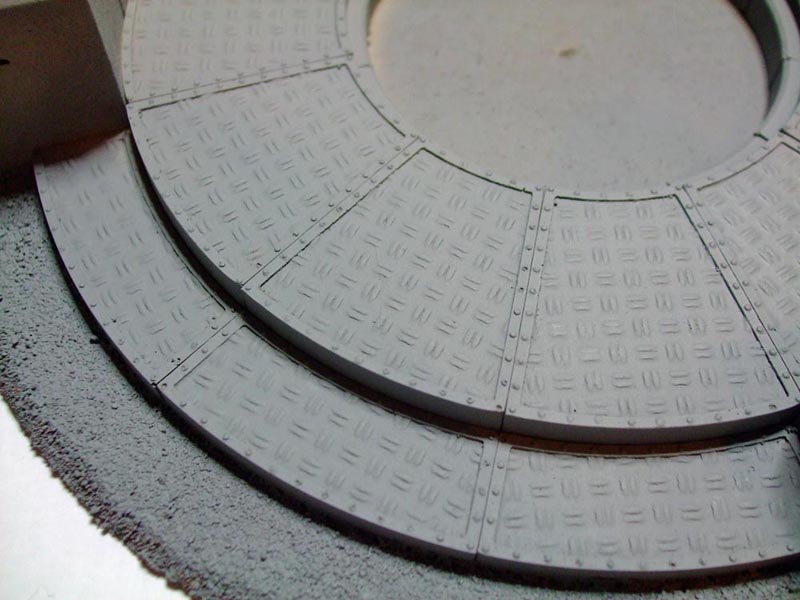
I modelled treadplate onto the base and step pieces to match the scale model styrene sheet I have allowing the gun emplacement to happily fit in with my other conversions and terrain.
 |
| Base and Step pieces. |
 |
| Gun mounting plate. |
 |
| Wall and Wall End pieces |
At this point I ordered the base, step and gun mounting plate prints – I had earlier picked up the wall prints along with some prints for my defensive walls.
I ordered them in a material I hadn’t used before called ‘White Detail’. I was hoping for a nicer surface finish with this as unlike the wall pieces I did not want a concrete like texture.
Advertisement
When they arrived I had two problems.
The first was that both the base and step pieces had an area which looked like it had been ‘squashed’. Almost like a plastic which had been softened before having a thumb stuck lightly pressed into it.
 |
| Top left you can see the problem area, the step had the same thing, though less noticeable |
This was simply solved by getting in contact with Shapeways and letting them know the pieces were wrong. They were happy to replace the pieces with new prints which duly arrived within a fortnight.
Advertisement
The second problem was the print resolution and material couldn’t handle the detail on the gun mounting plate very well.
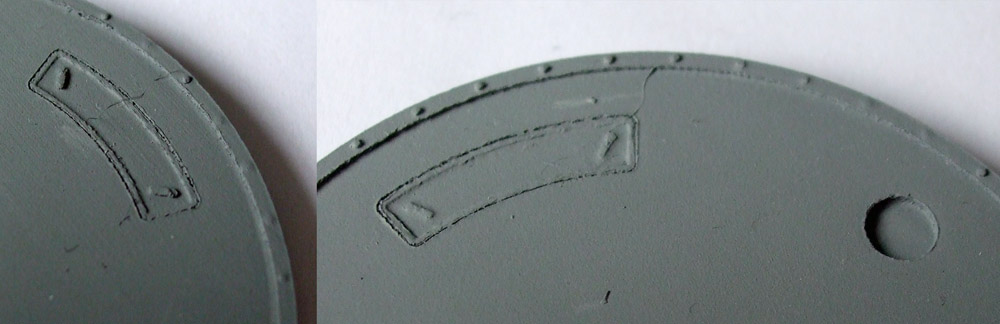
A bit of work was required to clean up the two hatches and replace them with new detail.
The only other issue I had with all three pieces was that some rivets were quite shallow, the majority were sharp and crisp but I had to add to a handful using PVA glue to build them up to match. You can see an example of this in the gun plate picture above.
Once I had these issues sorted I was able to produce the moulds and begin casting.
Subscribe to our newsletter!
Get Tabletop, RPG & Pop Culture news delivered directly to your inbox.
By subscribing you agree to our Terms of Use and Privacy Policy.
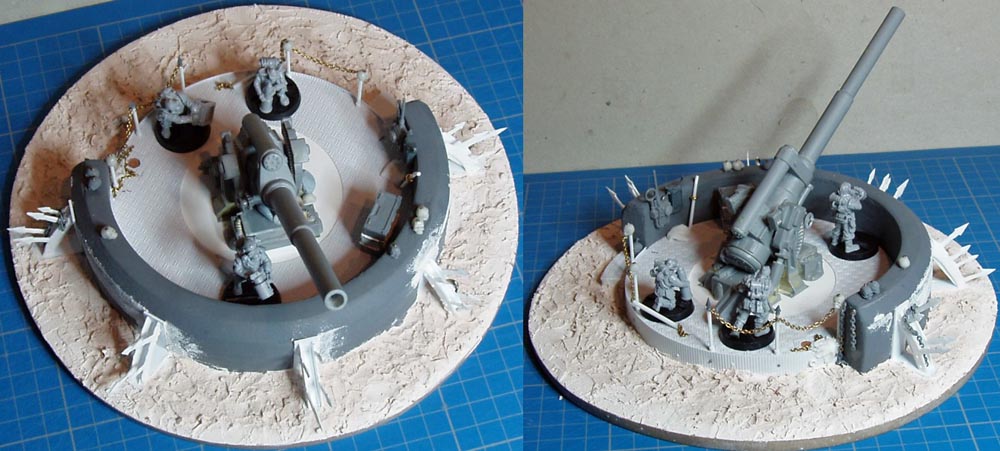
After casting and cleaning up twelve base pieces, three steps, one gun plate, eight wall panels & two wall ends I did a test assembly before gluing them down to a finnboard base.
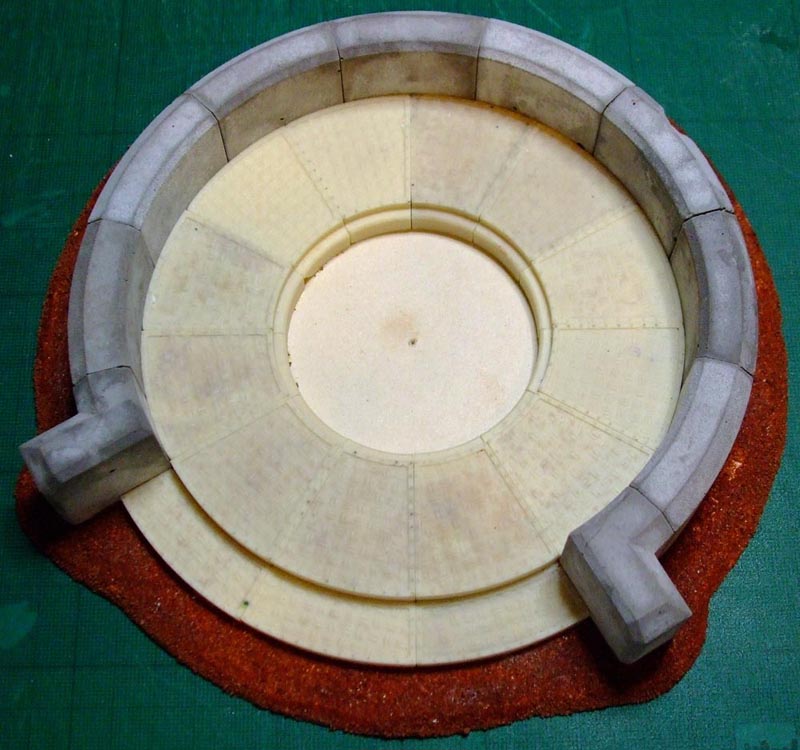 |
| The first assembled gun emplacement after sand was added to the base |
 |
| A quick undercoat of primer to bring everything together |
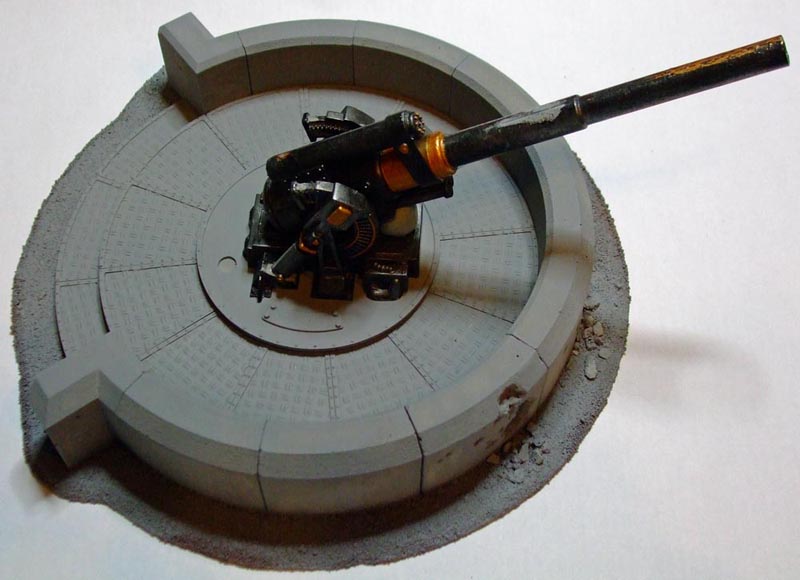
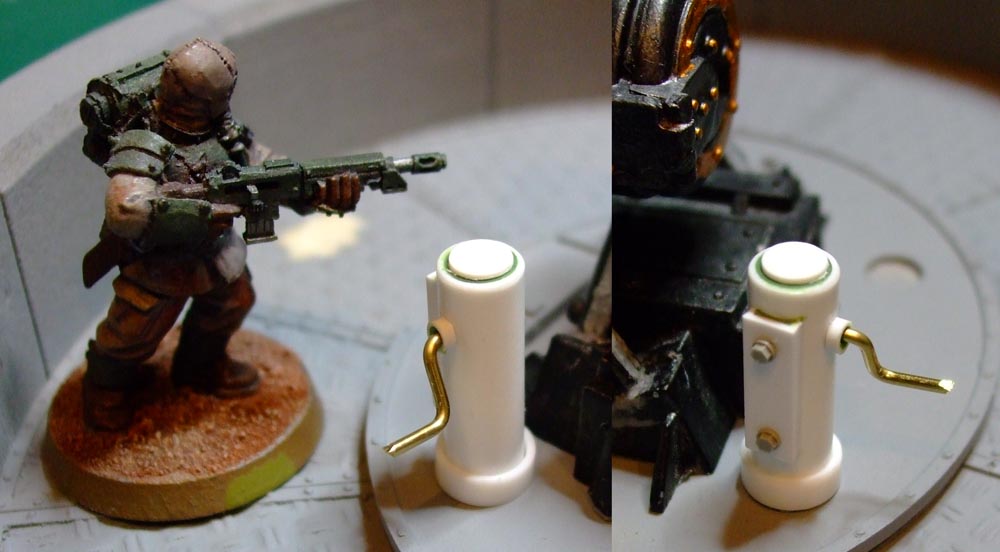
Using a FW Hydra turret and a second hand Earthshaker off eBay I did a test fit…
Advertisement
 |
| The turret fitted nicely between the new detail I added which was a relief |
While I await some Earthshakers to arrive I have started to add details such as the crank handle to turn the gun and some shell cases as well as beginning to cast the next two gun emplacements. I am now also considering scratch building my own Hydra/Manticore turret to save having to buy multiple kits from Forgeworld.
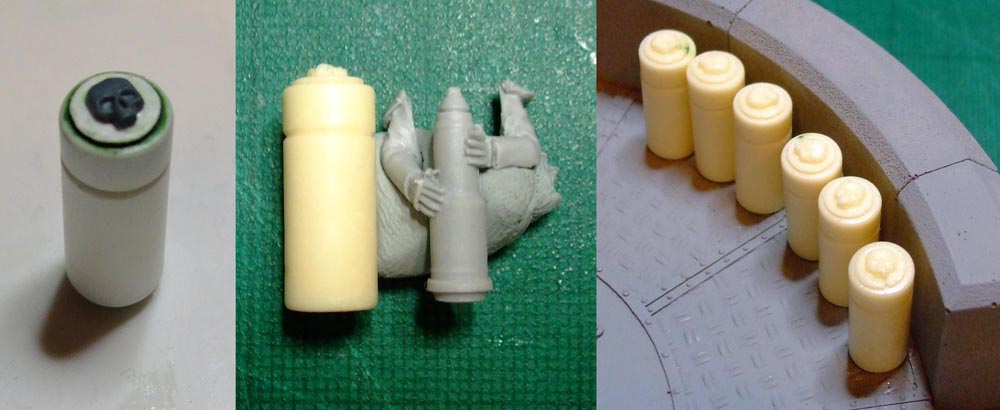
 |
| WIP shots of the shell cases and crank handle. I may redo these as 3D models as well |
Overall I am very happy how the gun emplacement has turned out. The White Detail material which I tried here for the first time (except for doing some rebar previously) was a success. The material combined with the resolution Shapeways prints out could not cope with very finely detailed models, such as on the gun plate, but overall I was happy with what I got for the money spent.
Any problems I did have were easily resolved, partly due to good customer service and partly due to simple conversion work carried out on the prints.
I am now looking at producing a range of other pieces using 3D printing and using the White Detail material. As before these pieces are terrain based, such as drums, crates, pallets, dragon’s teeth, bunker/bastion doors and generators.
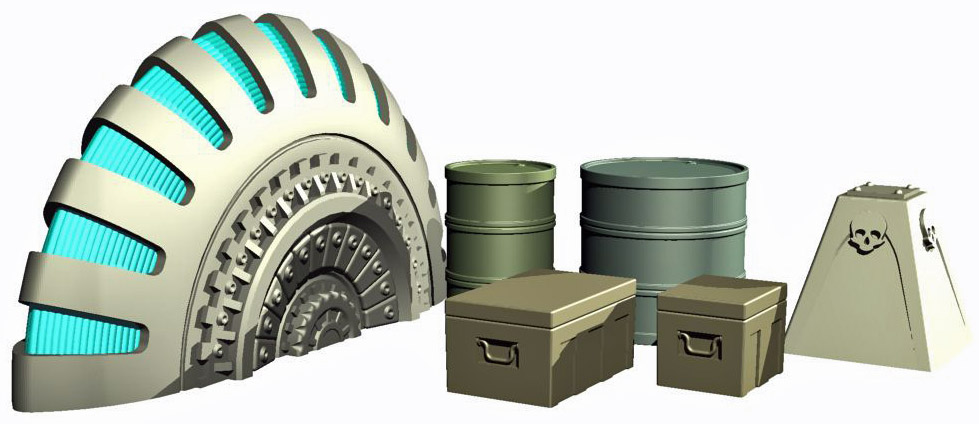 |
| Plasma generator, drums & crates and a dragons tooth ready for 3D printing |
As always I have too many ideas but not enough time. In the long term I want to be able to produce my own bunkers, trenches, Cities of Death pieces etc as well as pieces for my vehicles and even infantry. However for many of these projects I would need to print the masters out at a much higher resolution which would dramatically increase the costs involved.
Advertisement
I hope this has been of interest of people. Please feel free to ask any questions or make any suggestion below. Also pop along to Recalcitrant Daze for more of the above. To raise funds for more prints I am selling kits of the emplacement, if you are interested in purchasing a gun emplacement visit this page here for details.
Author: Rictus
Advertisement

