Warmachine: Stormwall – Fabrication and Painting

On Wednesday evening, Stormwall arrived on my door step. Cygnar was on-the-shelf for six months due to a bit of a lack of interest in how the faction was playing in addition to my at-the-time love affair with Circle Orboros. Suffice it to say that come that evening, the lapse ended, and Cygnar was going to hit the table again.
Opening up the box, I knew almost immediately that building and painting this model was going to be an undertaking, especially if I planned on marching proudly into my local game store 48 hours later during normal game time. I won’t get into “what’s-in-the-box” since there is a cavalcade of un-boxing videos to be found on the internet. Instead, I’m going to get the meat about what you can expect from building and painting a Stormwall.
 |
| 2′ x 2′ sofa cushion |
Cleaning the model took about three hours and turned my sofa into a mess, much to the displeasure of my wife. Mold lines were a-plenty, but most of them were dealt with easily enough with an Exacto Knife. A few of them went into recessed areas that were hard to get at, but when you’re working with a $135 model, you take your time to do these things right.
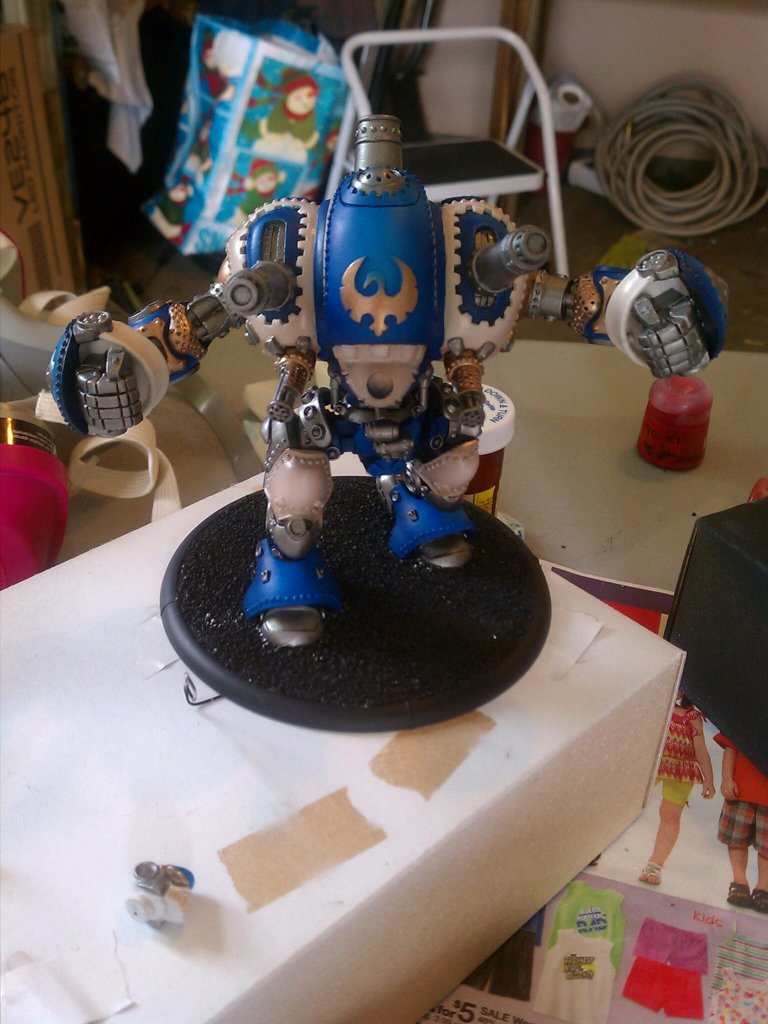
I’ve seen a lot of pictures of people at Lock and Load or who are part of various miniatures enthusiast e-zines who have assembled their Colossals before painting them, including some Privateer Staff painters, like the intrepet Meg Maples. Painting this way is a real pain (as you could probably guess by looking at how Meg has to hold the model), since you’ll often have difficulty supporting your wrists to keep the model steady and your arm from getting tired. While I wouldn’t ever question her talent or ability, this is something I would not suggest. Certain portions of the model, like the pistons that connect the waist piece to the torso, wouldn’t be bad to put together before painting begins, but I would advise against going much further than that. These are big models, which are difficult to hold and paint at the same time. If you want to do a good job, you’re going to spend a lot of time holding the model, so, in my opinion, it’s best to do it in pieces so that you have an easier time with it as a whole. Below you can see the legs and waist have been assembled and glued to the base for priming. There isn’t a lot of detail work to be done there, as my airbrush and generous use of metallics would do pretty much all the work for that part of the model. The rest of it, as you can see, is pretty much unassembled.
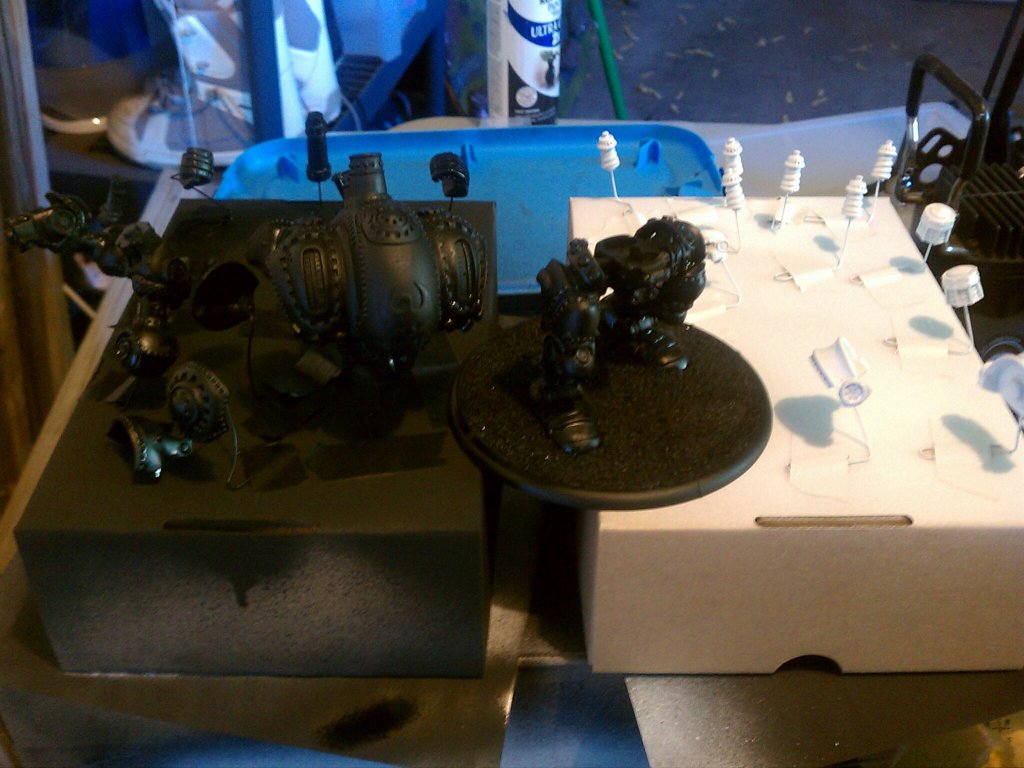 |
| primed in pieces |
I primed most of the model black, but a few parts were done in white. Parts in white (voltaic coils, head, inside of the wrists) were chosen since they were going to be painted in near-white colors, and priming them white would simply save work for me later.
I decided that I wanted to duplicate the studio paint job as best I could, save the battle damage. This meant a lot of airbrush work and a lot of taping sections off. I started with giving the whole torso and sections of the legs a base coat in Createx Opaque Blue. Usually I use P3 or Citadel paint that is watered down for airbrush work, but the Createx Opaque Blue is a pretty darned close match to P3 Cygnar Blue Base. Since it’s designed for airbrushes, I don’t need to worry about watering it down or straining the paint through pantyhose so that clumps don’t clog up the works of my nice Iwata Eclipse HP-CS.
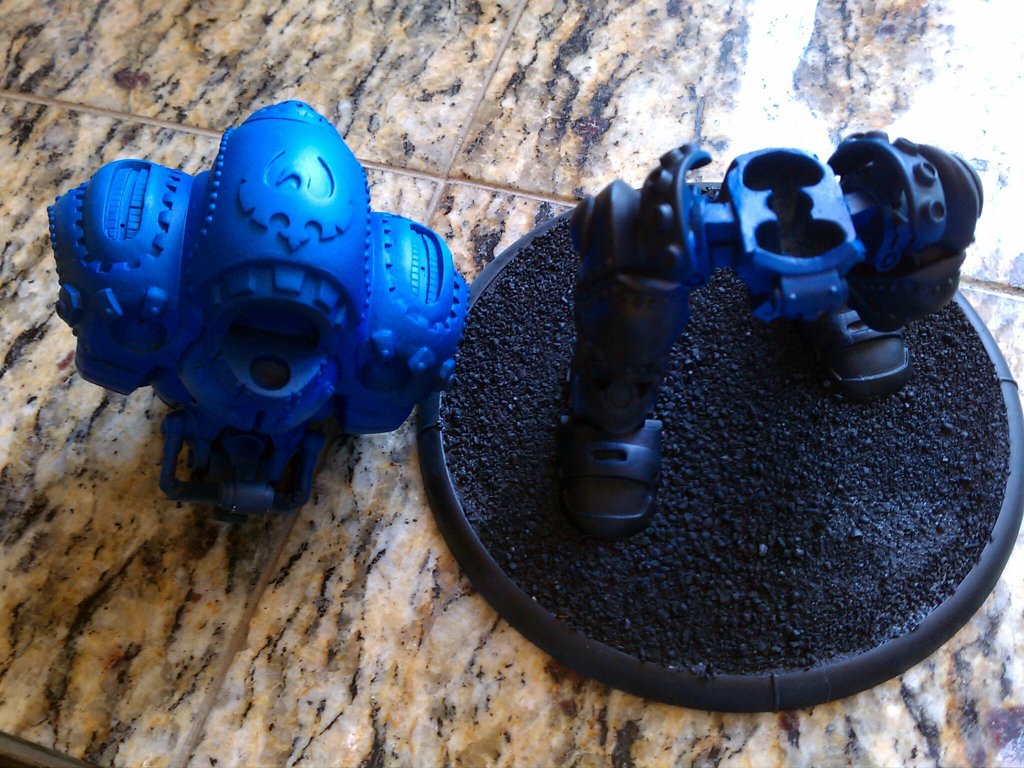
I applied a single highlight to the blues by adding a bit of white to my Opaque Blue, and that’s it. Models this large don’t need a ton of highlighting since they catch light a bit better than an 30mm infantryman, so I didn’t really have to go any further there.
Next came the arduous task of applying the whites. I base-coated the whites using just a touch of Createx Opaque White in Createx Transparent Sand. Since the white I was using was opaque, it easily overpowered the Sand, so just a little was needed to get something resembling khaki. Then a highlight was applied with Createx Opaque White with a little bit of Transparent Sand in it. This toned my brightest white down a little so that there wasn’t too much contrast between the two dominant colors. Pure white also doesn’t look “right” to me unless it’s applied extremely sparingly, like a tiny dot of it as the glimmer of a gemstone.
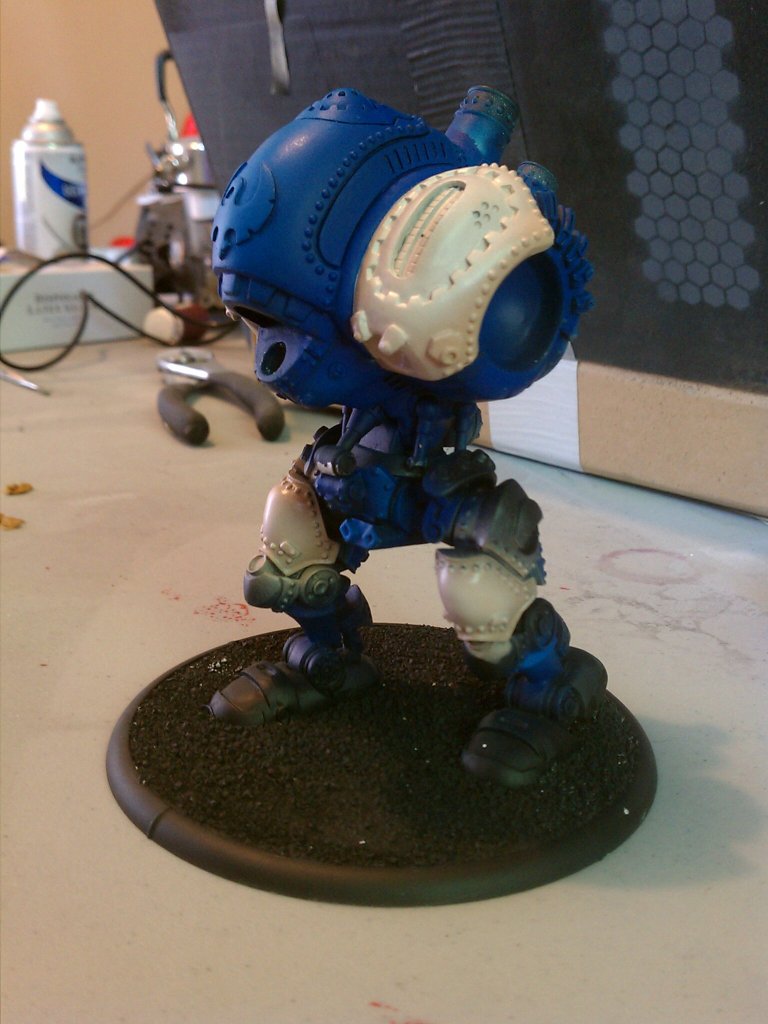
This part was rough since taping off sections that I wanted to remain blue was going to be difficult due to the curvature of the model. I found that I wasn’t able to just tape off all the sections that I wanted to remain blue since some of the areas of separation were only about half of an inch between color changes. This implied taping off one section, painting it white, pulling the tape, and repeating with the next white section. Above you can see a single step in the process (I’ll add that the torso is not glued on at this point, merely placed on the waist of the model for “a good look”). There were some places where over-spray couldn’t be avoided, so clean-up did have to happen on occasion. Thankfully, this usually happened at the darkest edges of the imposed color, so some quick brush work with the base color did the trick just fine.
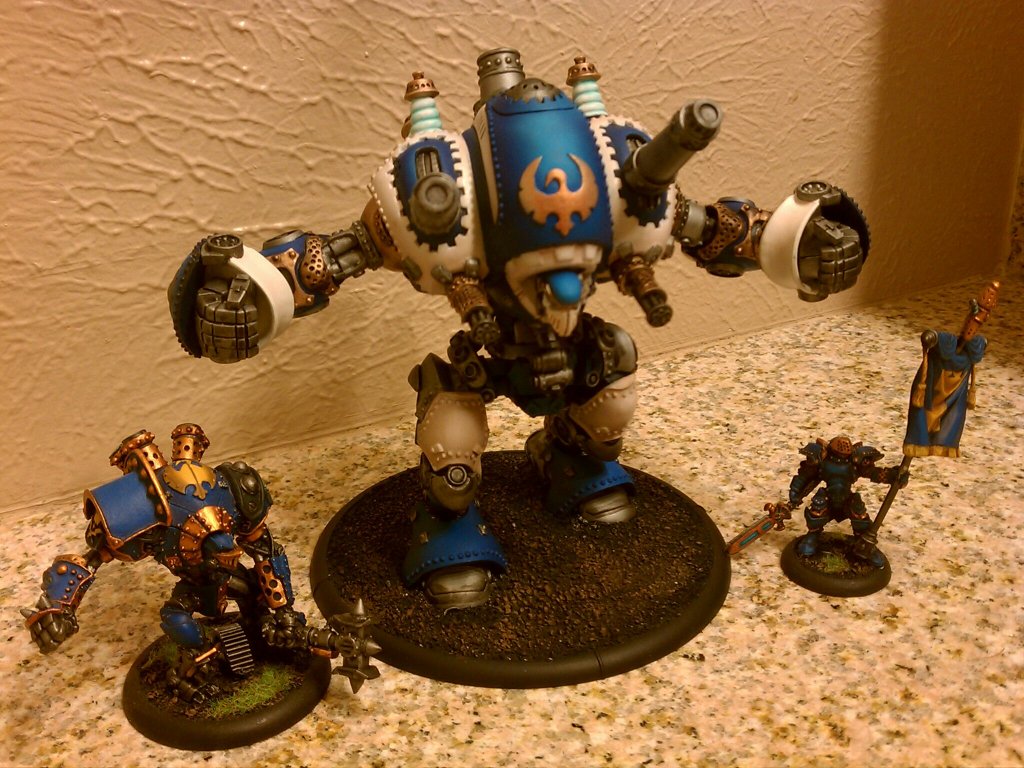
Once the whites and blues were done, next came painting the metallics with an actual brush. I used P3 Pig Iron for my silver and Citadel Sycorax Bronze for the golds. Pig Iron covers like a champ, and replaced what was once Citadel Boltgun Metal for me months ago. The Sycorax Bronze took two or three coats, but it looks great, so it was worth it. Washes of Citadel Badab Black were applied locally to the Pig Iron and Devlan Mud to the Bronze. The Cygnus was highlighted from Sycorax Bronze up to Citadel Balthazar Gold. After this was done, I built the model into what you can see above, which pretty much is everything save the head and voltaic coils.
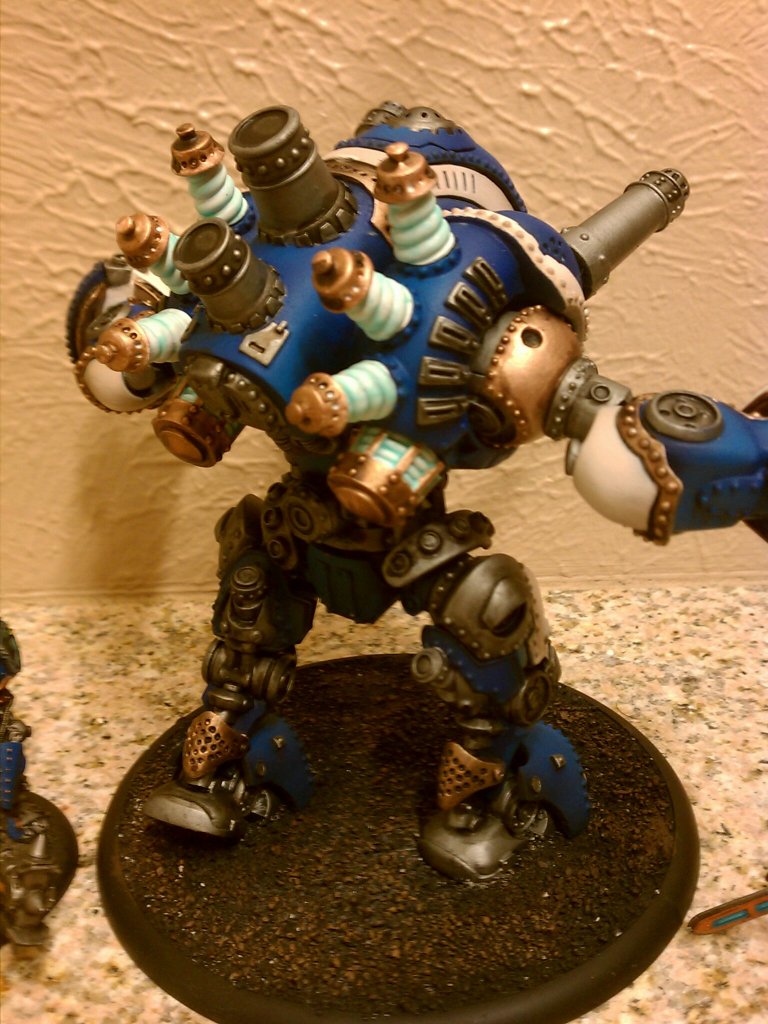
Next came the coils. To get the job done here, I mixed up about a 10:1 mixture of Liquitex Matte Medium with P3 Arcane Blue and just a tad of water, then applied it liberally to the white-primed coils, making sure it didn’t collect too much in any one spot. A few coats of that, and I had a nice little glow effect since the mixture goes on clear. Once that was done, I painted and washed the metals that were a part of the coils, then glued them on.
A few touch-ups later, a blast of dull coat, and it was ready to hit the table about 40 hours since it arrived on my doorstep.

I got three games in with Stormwall that night. More on that later.

