Warmachine All Stars – Heavy Warjack Pt. 2

Today we continue our look at some of the most commonly-used warjack by faction: the Deathjack, Phoenix, and Rocinante!
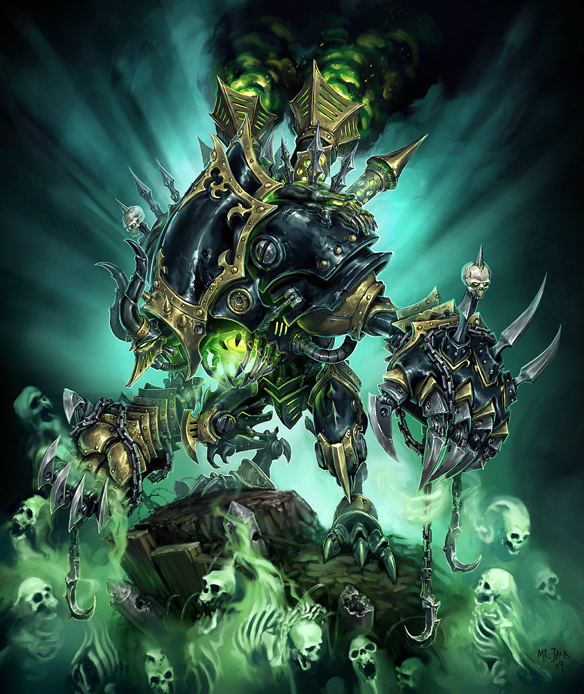
Deathjack –
Cryx’s Deathjack is a fantastic toolbox that can fit well with pretty much any Cryxian warcaster. It has a lot of strong features that make it an extremely attractive option, specifically starting with its insane level of focus efficiency due to high, natural accuracy at MAT 8, damage output with its three base attacks, and the Cull Soul and Skulls of Hate rules.
Cull Soul allows the Deathjack to gain a soul token for every living enemy model destroyed within 2″ of it. These soul tokens can be replaced with focus during its next Control Phase. Alternatively, if the Deathjack has taken damage, it can immediately use gained soul tokens to remove d6 damage points via the Rendering rule.
The Skulls of Hate rule grants the Deathjack a single focus point for each of its arm systems that are not crippled during the Control Phase but after focus allocation, meaning that a Deathjack can be loaded up with up to five focus at the cost of only three from your warcaster. It can even receive those two focus if the Deathjack is suffering from Disruption.
In terms of pure damage potential, it boasts a pair of P+S 18 attacks with its Necroclaws and a single P+S 15 attack with its Horns. Stack this on top of the Deathjack’s high MAT value, the fact that it can receive five focus, and Cryx’s cavalcade of ARM debuffs from things like a Bane Thrall’s Dark Shroud, Parasite, Crippling Grasp, or Curse of Shadows, and the Deathjack can take down pretty much anything in the game short of the most hardened and ARM-buffed targets. If, for example, a Bane Thrall were to run up next to an Arcane-Shielded Stormwall that was also hit with Parasite, the Deathjack will be striking against an ARM 17 target. With being able to purchase five additional Necroclaw attacks, the Deathjack will be able to tear down that Stormwall with even below-average rolling.
Next is the Necromancy rule, which lets the Deathjack spend its focus to cast its controlling warcaster’s spells, save those with RNG Self or CTRL. This gives the Deathjack some offensive applicability at range in addition to allowing it to also serve as a support piece.
To top it off, the Deathjack also has Advance Deployment, allowing for optimal placement at the game’s start.
Taking down the Deathjack can take some planning. It has a lot of damage boxes and a solid ARM stat for a Cryxian heavy, is DEF 13, and can heal itself with Rendering. If you’re going to send infantry into it, you’d better be sure that the infantry will kill it, since the Deathjack can convert those bodies into repair rolls or souls to terrorize you with later. Also be mindful that the Deathjack also has Abomination, meaning that non-Fearless troops will find themselves vulnerable to having to make a Terror check against it. The most important thing to remember about the Deathjack is that it is a single model worth 12 points; if you can keep it out of the game for a turn, it will be pretty helpful. Spells or abilities like Stranglehold that will keep the Deathjack from getting into the thick of combat or allow models to walk away from the Deathjack, like Enliven or Admonition, will also be quite helpful in reducing the Deathjack’s overall damage output. Since the Deathjack is a 12-point model, piece trades should usually be very possible to negotiate. If your 4-point light warjack or warbeast can keep the Deathjack tied down long enough to deliver your hard-hitting melee troops, warjacks, or warbeasts, you typically will be able to come out ahead.
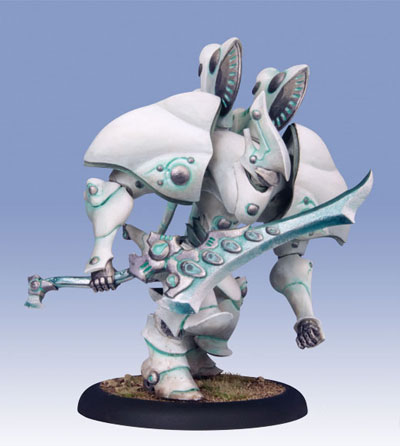
Phoenix –
The Retribution of Scyrah’s Phoenix warjack is another warjack that brings a lot to the table. With natural SPD 6 and Reach on its magical Thermal Blade, it boasts an 11″ threat range on the charge, and while under the effect of the ubiquitous Arcane Mechanik’s Concentrated Power is striking at P+S 19, hard enough to contend with all but the most hardened heavy targets. Where the Thermal Blade makes the Phoenix a strong piece for going after individual targets, the Combustion Special Attack allows it to be effective against throngs of infantry, automatically hitting them with a POW 12 fire damage roll while also inflicting the Fire continuous effect.
Before the Phoenix closes in, it can also provide support at range via its Arc Node for spell-slingers like Adeptis Rahn and its RNG 10, AOE 3, POW 14 Halo Cannon that also boasts the Critical Fire and Magical Weapon benefits.
When playing against the Phoenix, and Retribution in general, be mindful of effects that will get the Phoenix moving even faster, as the faction is flush with effective movement buffs like Vyros1’s Mobility, Ossyan’s Quicken, Rahn’s Telekinesis, Garryth’s Mirage, Ravyn’s Locomotion, or Lanyssa’s Hunters Mark.
Fighting against a Phoenix shouldn’t be terribly difficult provided that the player also understands its weaknesses, namely its low ARM and MAT stats. Any type of ARM debuff will make a Phoenix incredibly vulnerable since it sits at base ARM 18. At a lowly MAT 6, the Phoenix can and will occasionally struggle against higher-DEF heavies like Warpwolves, Angelii, or Molik Karn, especially if further DEF buffs are involved. Do, however, be aware of its Phoenix Field ability, which allows it to regenerate d6 points to its Force Field per-turn. Meaning that you shouldn’t really try to whittle it down from range over a period of several turns, as you’ll most likely end up having to chew through its Force Field several times, especially if the dice are in your opponent’s favor.
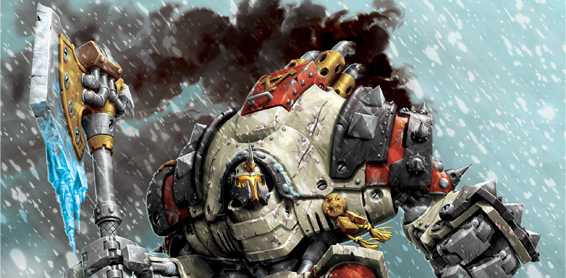
Rocinante –
Rocinante is effectively a Nomad with a decent ranged weapon, a nice stat boost, and some nice extra rules for keeping his controlling warcaster alive. This generalist feel makes Rocinante fit well into most any Mercenary list since you’ll be getting all those bonuses for a just three more points than the cost of a normal Nomad.
In terms of normal, melee damage output, one need only compare it to a normal Nomad. It has a P+S 17 Battle Blade with Reach and MAT 7, making it fairly accurate, but somewhat middling in terms of overall damage capacity, which isn’t at all uncommon for Mercenaries. Fortunately, you aren’t without options for improving this since Mercenaries are inundated with abilities that either increase damage rolls (Lady Aiyanna’s Kiss of Lylyss, Magnus2’s Calamity) or reduce enemy ARM (Ragman’s Death Field, Gorman’s Rust Bomb). At SPD 5 with Reach, Rocinante has a solid, 10″ threat range on the charge, allowing him to avoid receiving initial charges.
Rocinante’s Cannon is a pretty solid ranged weapon. At RNG 14, AOE 3, and POW 14 with his RAT 6, it has the hitting power to put damage into most things, the spread to potentially clip more than a single enemy, and the RNG to do it from relative safety. While RAT 6 isn’t anything to write home about, Mercenaries have support here in the form of boosting, various caster-specific buffs, or Dougal MacNaile’s Artillerist ability for +2 to the attack roll and a reroll on deviations.
This character ‘jack also comes with several special abilities that make it pretty useful on the field. First is Guard Dog, which grants immunity to free strikes and a +2 DEF bonus to the controlling warcaster if it is within 3″ and Rocinante is not stationary. This can be a solid tool for making your warcasters that much more difficult to pick off. For example, if around Rocinante, Ashlynn jumps up to a horrifying DEF 19 against melee attacks (ranged and magic as well if she has Quicken up), a scary thought when added to her Riposte ability that allows her to make a melee attack against models that missed her with one. You can reach similar heights with Damiano by putting Sure Foot on him while keeping him nearby Rocinante. Getting around Guard Dog requires that the model either be made stationary (i.e. Knocked Down) or moved away from the warcaster (slams, place effects, etc.).
Rocinante also provides more protection via his Defensive Strike, allowing him to, once per-turn, make a melee attack against an enemy model that advances and ends its movement in his melee range. It’s a nice little bonus for when warjacks or warbeasts come charging in, occasionally leading to a lost aspect or crippled critical system. Like Guard Dog, getting around Defensive Strike can be done making sure that Rocinante cannot attack, like by knocking him down. You can also negate it by sending in a less-critical model to bait your opponent into triggering it early in the turn before you send in the real heavy-hitters.
Lastly, Rocinante has an Affinity ability with Captain Damiano: Quick Work, which lets him make a ranged attack if he destroyed a model with a melee attack during his combat action. Since Rocinante doesn’t have Gunfighter, he’ll only be able to take advantage of it once per activation unless you can combine it cleverly with Damiano’s Warpath spell by having Rocinante move up, kill a model with a melee attack, destroy another with the Quick Work ranged attack, Warpath into more models, kill them to become disengaged again, then get a second Quick Work shot.
Next we’ll be looking at warbeasts, starting with the Dire Troll Bomber, and Warpwolf Stalker!

