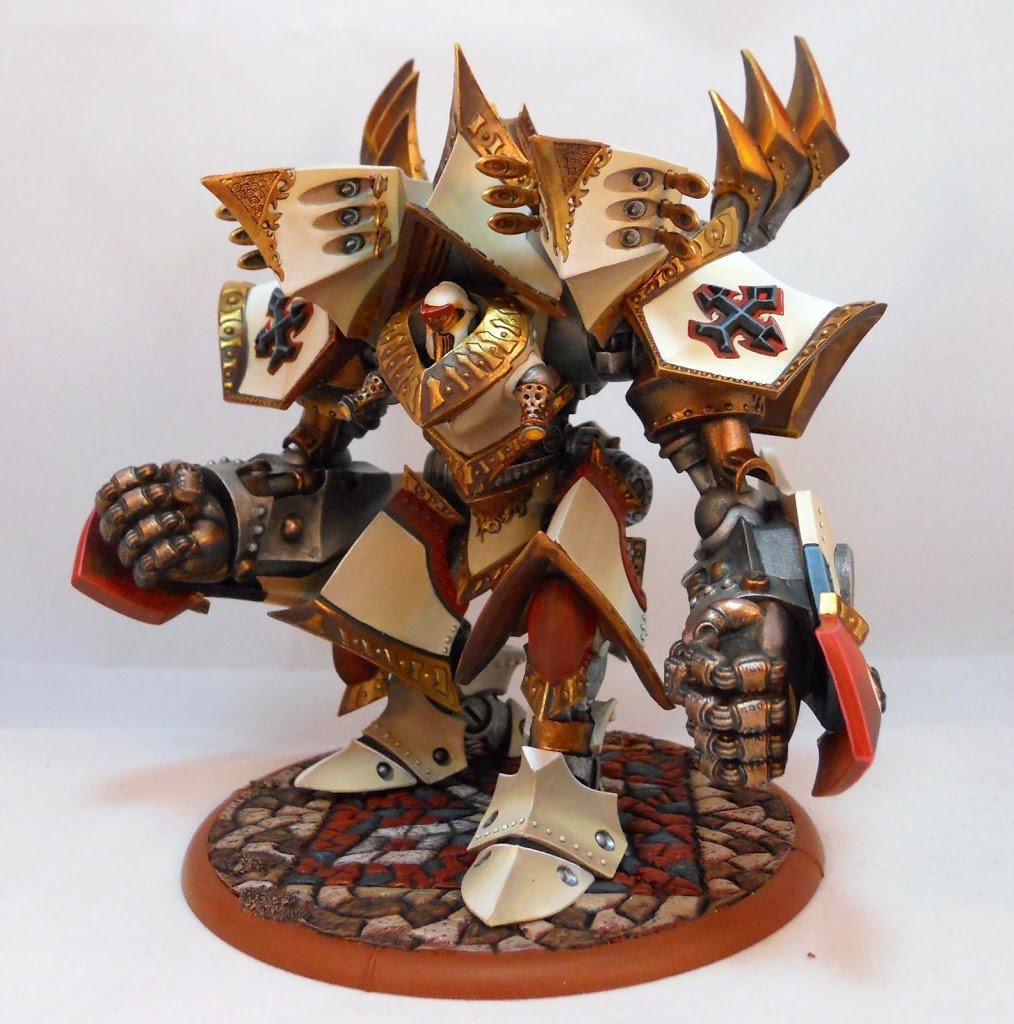
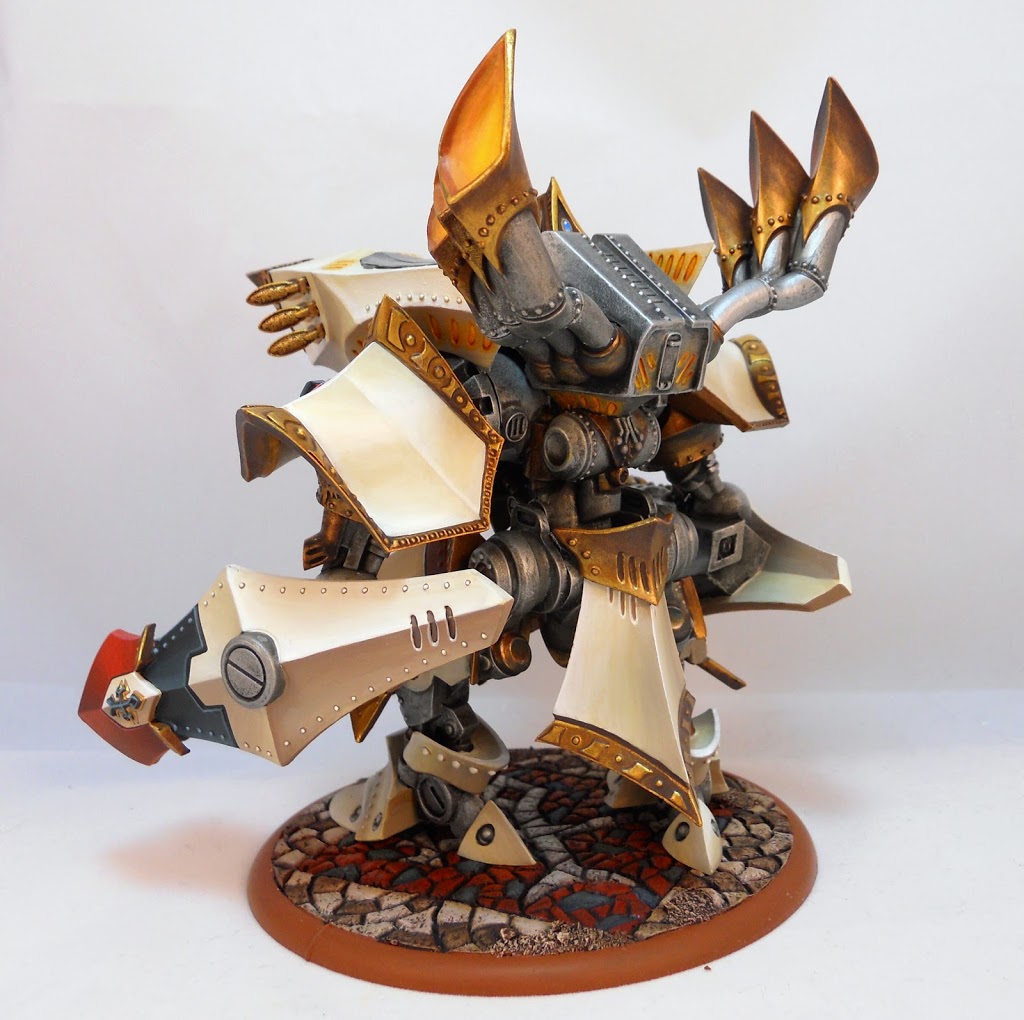
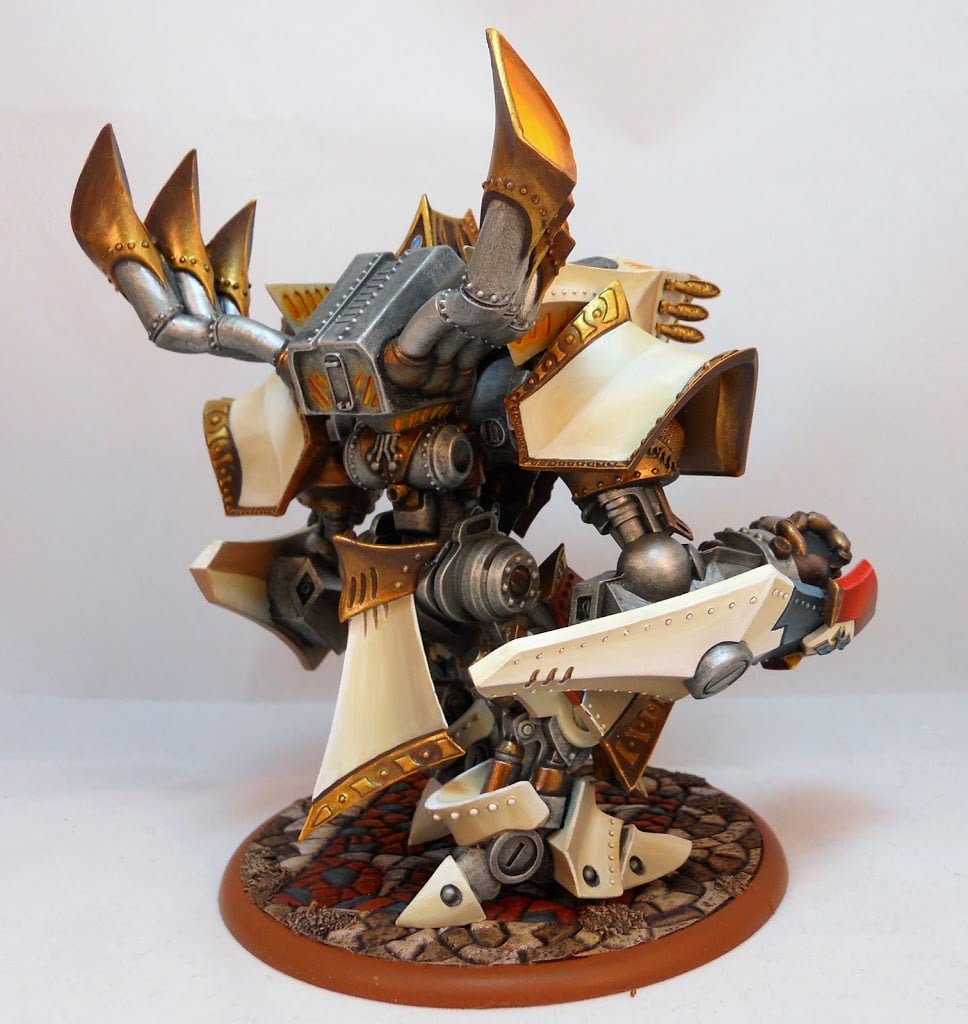
Hobby: Painting the Judicator

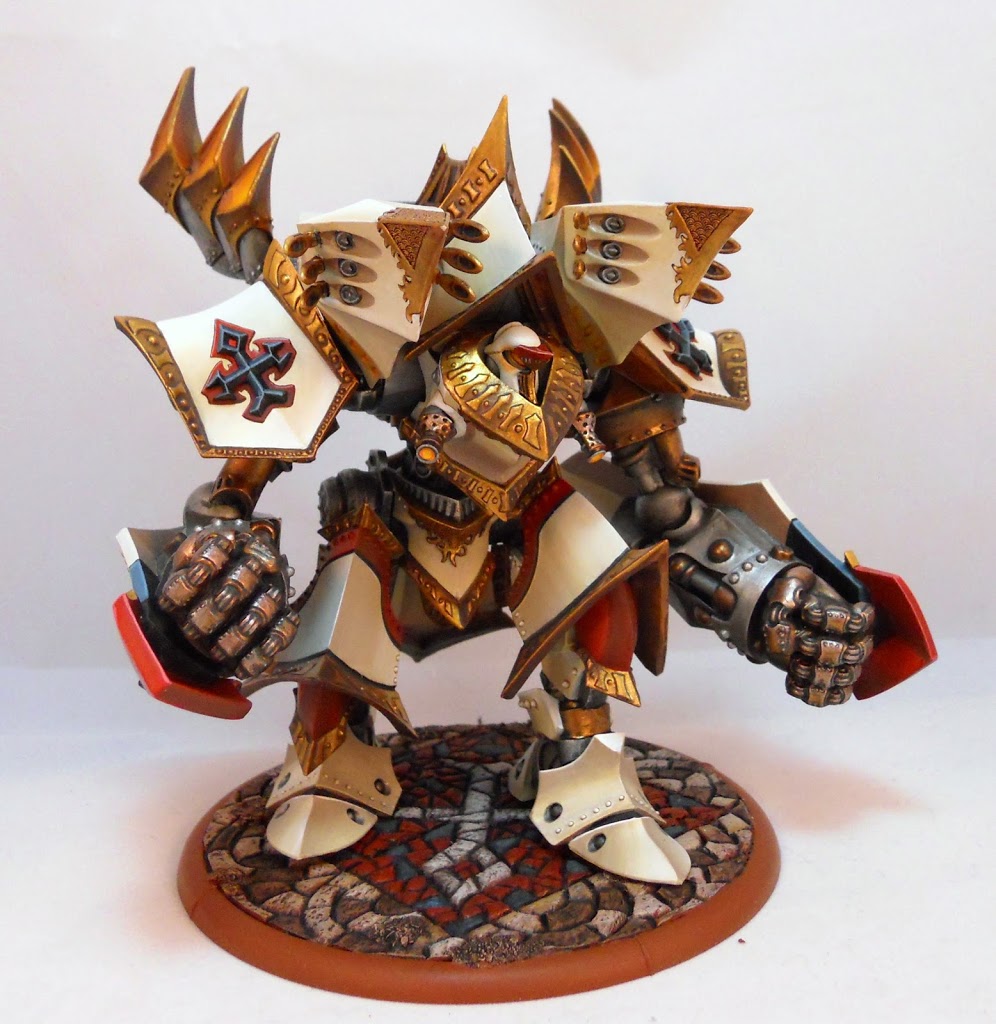
My Menites have lain idle these past few months while I focused all my attention on my Trollbloods and their Mountain King – but no longer! What better way to make up all those missed heretic-burning opportunities than to paint up the Protectorate’s new Colossal?
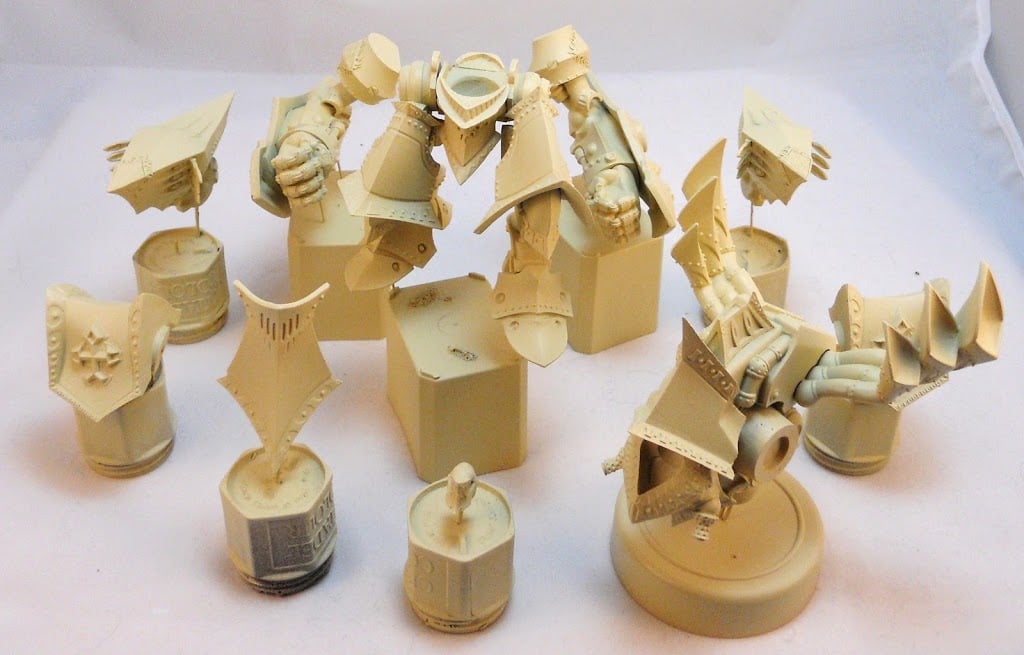
As always, the first priority is to separate out all the pieces into reasonably paintable chunks. My aim is to avoid any assembly that would create deep crevasses where my brush would have difficulty reaching, and also to have pieces small enough that I can easily manipulate. The Judicator is a big dude, and the thought of having to hold and rotate his entire body while I paint is not something I’m really looking forward to. As you can see I ended up keeping him in quite a few pieces. After pinning everything to something I can hold onto, I spray it all with a coat of Model Master Modern Desert Sand. To be honest, I ended up having some kind of mixed feelings about the spray. I felt like it never really dried, and it always had an ever so slightly sticky feeling to the touch. I was kind of apprehensive about painting on it, and put off starting this project for an extra couple of days in the hopes that it would dry further. Nonetheless, when I did finally bite the bullet and get started, the surface took quite well to paint. I guess it worked out ok in the end, but I might try a different spray in the future.
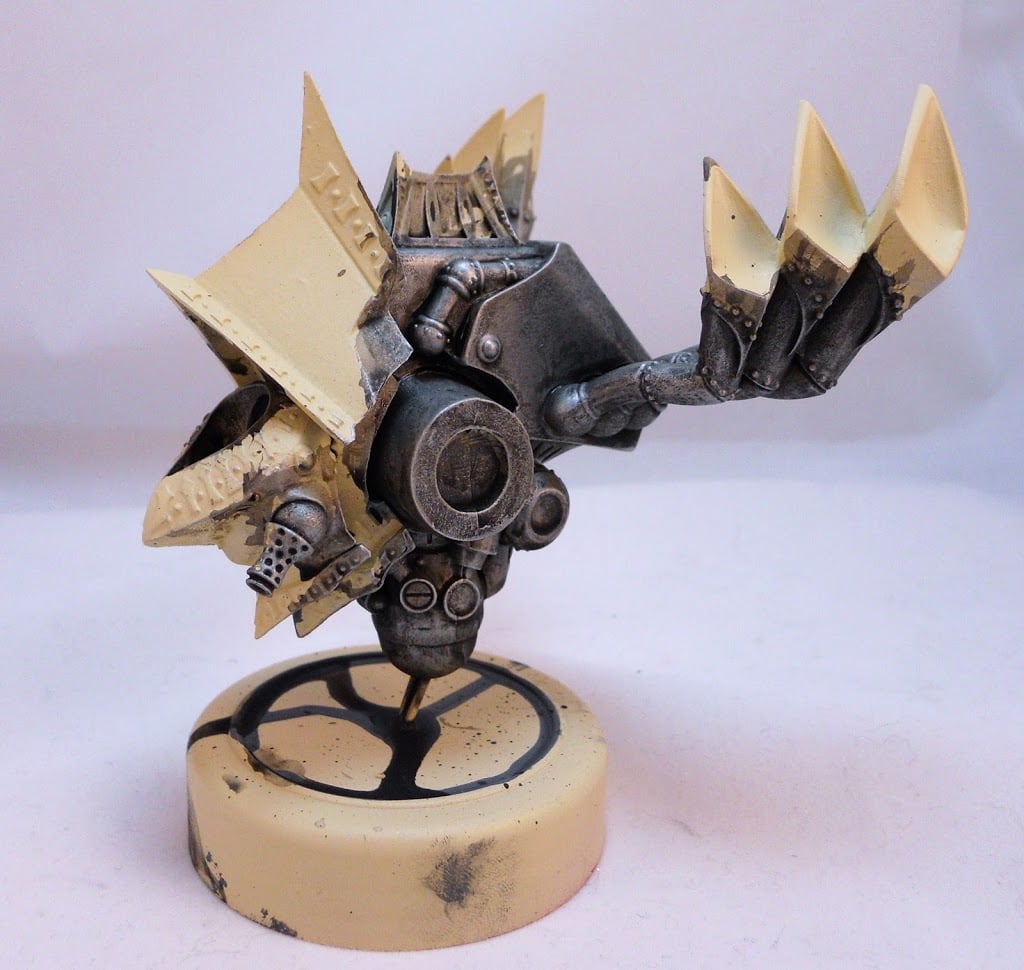
The first thing I start painting are the Steel areas. As with all of my Protectorate warjacks these days, I begin by painting the areas with P3’s Ironhull Gray then drybrush them with radiant Platinum. Then the areas get a wash from my custom metal wash which consists of roughly 2 parts nuln oil, 2 parts Agrax Earth, 1 part Asurmen Blue, and 1 part water. I think its very important to make sure that even something as plain as base metals has a bit of color to it. The blue ink also adds just a bit of a cool feel which contrasts nicely against the warm whites that will be used on most of the rest of the piece. Since I use so much of this wash I make it in whole pots at a time, and I always make sure to add a couple of drops of matte medium to make sure it can still bind properly after being diluted with a little bit of water. After all the areas have been washed, they are drybrushed a second time with the Radiant Platinum.
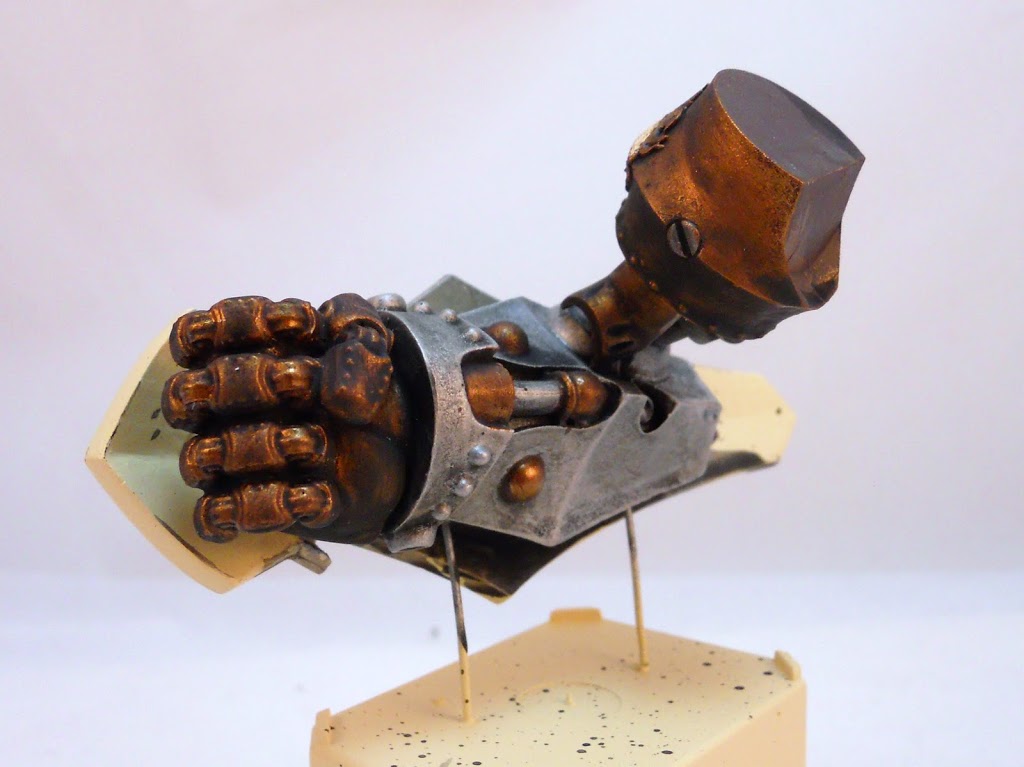
I always like to have some of the mechanical parts of my warjacks in a bronze tone, and that’s what I do for the next step. I start all the Bronze areas with a coat of Umbral Umber, then drybrush them with Molten Bronze. Then they get a wash with the same ink I use on the steel areas.
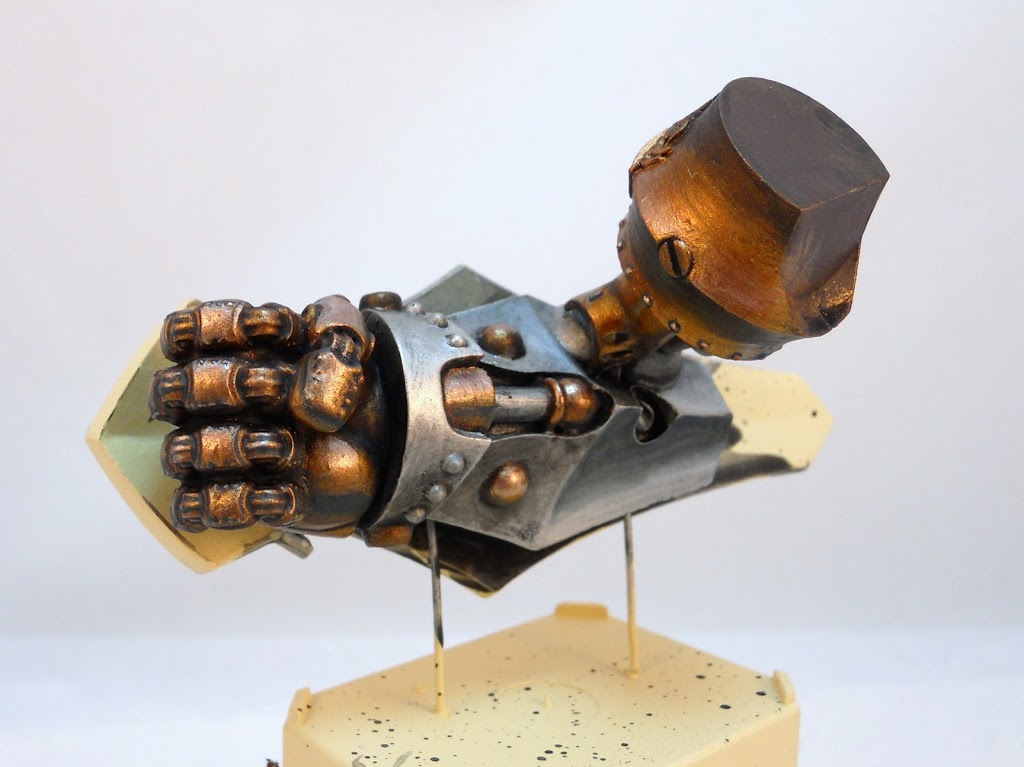
Next I drybrush them again with the Molten Bronze before giving them another light drybrushing with a mix of Molten Bronze and Radiant Platinum. To add more definition, I picked out some of the rivets on the fist with Coal Black, and used the same color to shade parts of the arm socket and palm. You may notice I also added some more definition to the steel by adding some of that Coal Black to my metal wash to make a thin glaze for shading.
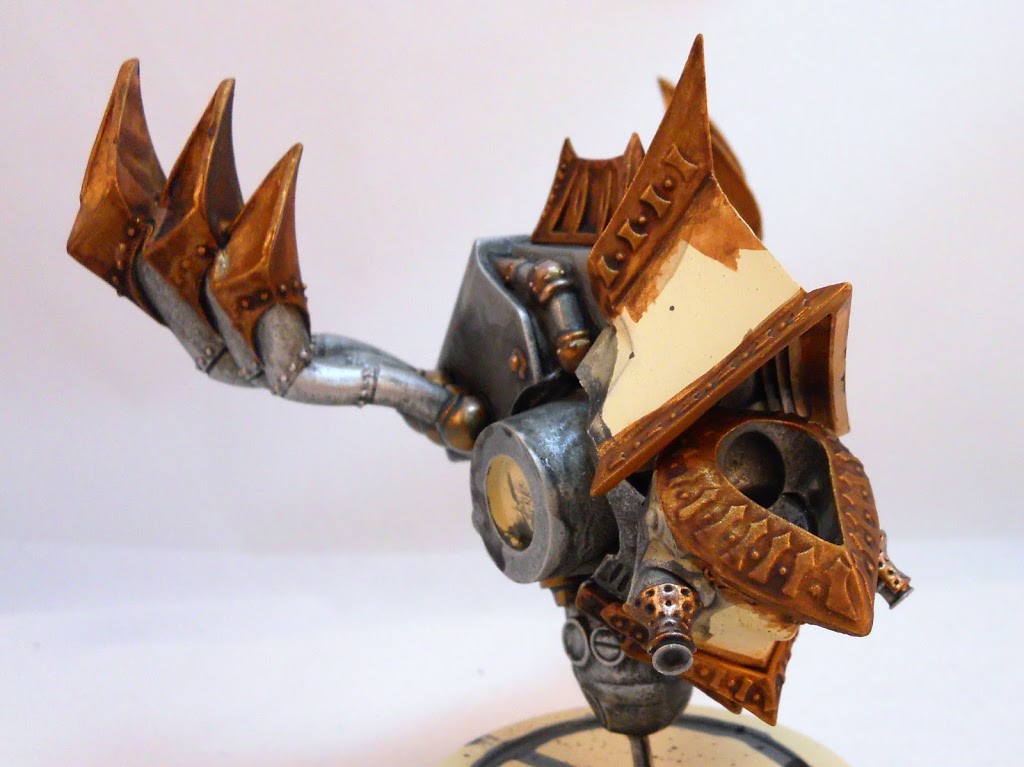
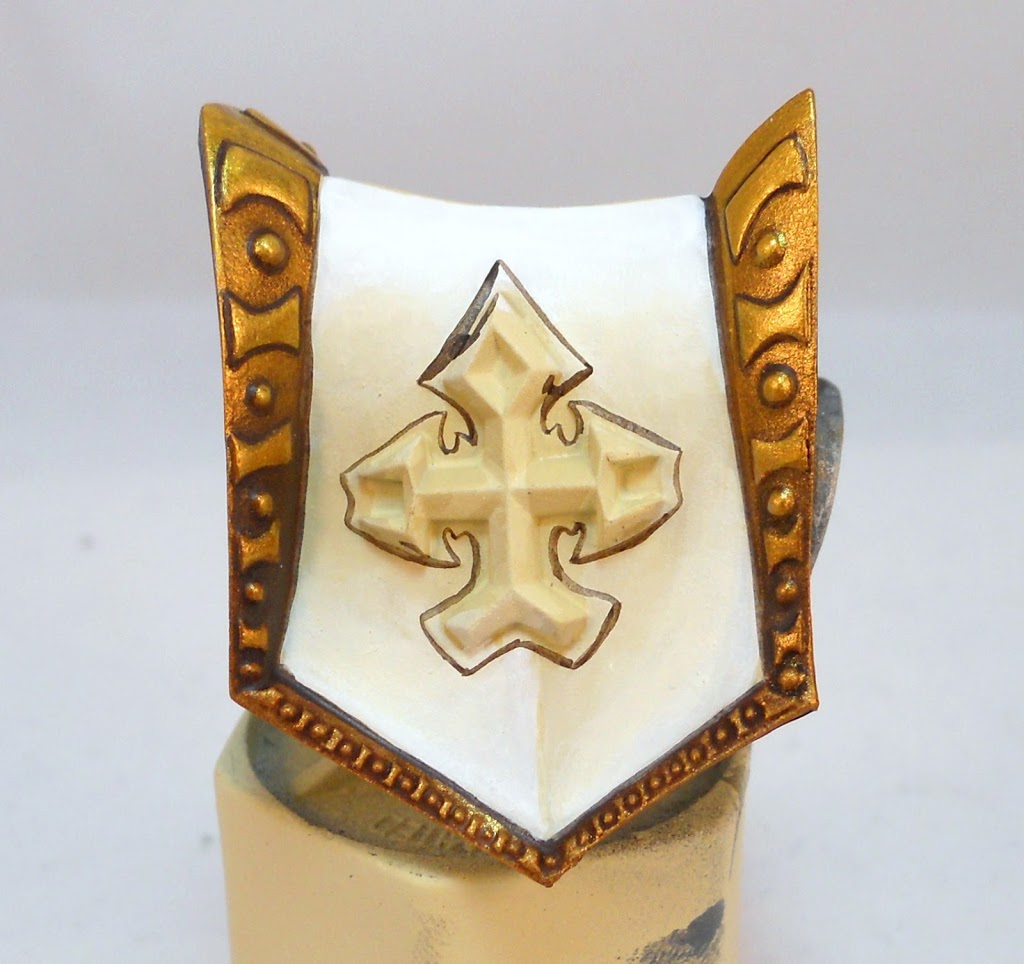
Up next it’s time for golds. This guy has a lot of them. For the golds, I begin with a basecoat of Bloodtracker Brown. This receives a highlight of GW’s now defunct Shining gold which I still have multiple pots of lying around for some reason. Then everything is washed with pure Agrax Earth.
I begin redefining the highlights by manually adding Shining Gold. I also add a little depth to the shadows with Umbral Umber. Note that no more Drybrushing is happening in these areas. A lot of the Gold components are flat surfaces with flat panels on them. I just didn’t think drybrushing would work so I’m doing it the hard way: with blending and patience.
I finish it off with some more Umbral Umber in places to shade it even deeper and add some final highlights with GW’s old Burnished Gold. I have a lot of that too it turns out.
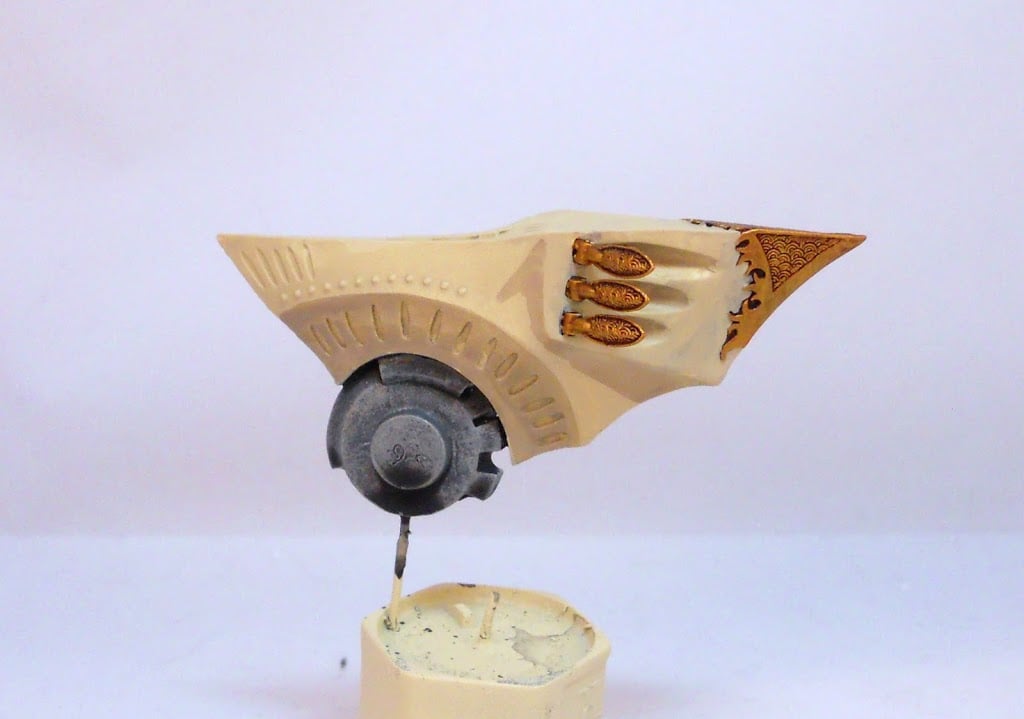
It’s time for whites. The white areas get a basecoat of Menoth White Base. How appropriate. Then I start to add a little shading with Hammerfall Khaki. The Judicator is covered with peculiar shapes like these rocket pods. Figuring out exactly how to shade them was a little tricky at times.
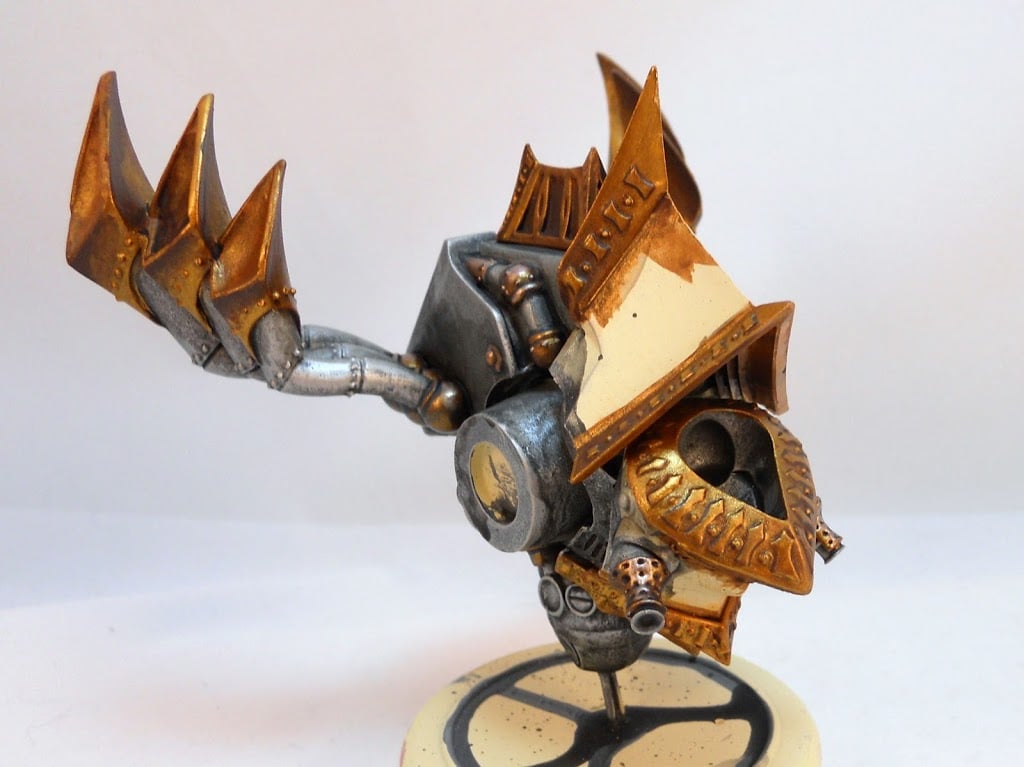
I’m also going to take one step back briefly to to point out that those little bits in the picture above were some of the few places I used drybrushing to paint the golds. These and any other textured areas or those with very fine detail ended up being perfect for this technique.

After blending some of the Hammerfall Khaki areas in a little better, I darken the shadows in some areas by adding a little Beast Hide. I also begin highlighting certain parts with Menoth White Highlight.

A little more Beast Hide is added in some places for more shadow while a bit of Morrow White brings out the highlights even more.
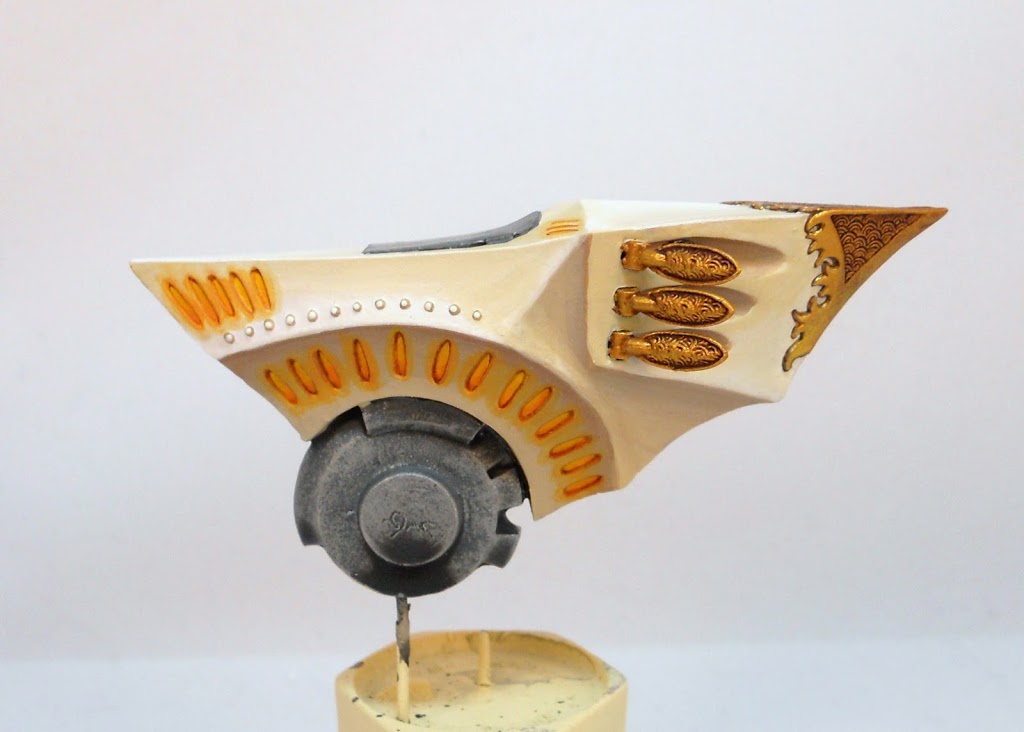
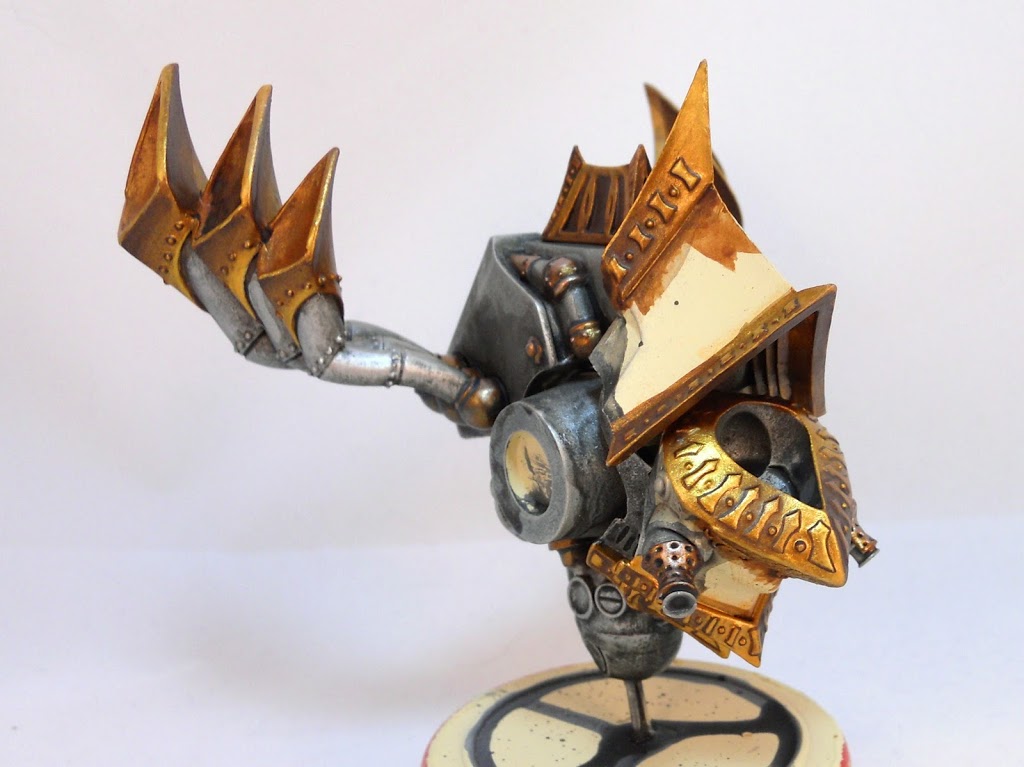
Finally its time to do the details. I paint all the rivets with Beast Hide then give them each a dot of Menoth White Highlight on top. For the glowing areas I begin with Iyanden Darksun (another old GW color) to serve as a strong base for the yellows to follow. Then each one is painted with Cygnus Yellow blended to Heartfire as it reaches the outer edges. A strong defining line of Bloodstone is added around the edges, and a thin glaze of Heartfire is painted around the exterior of the recesses to show a glow. I decided to opt out of the cool smoke residue effects I’ve seen on a lot of other people’s Judicators. My Protectorate has always done a good job of keeping themselves clean, and I just thought it would feel wrong to have one dirty model. If anyone asks I’ll just say he hasn’t fired any rockets yet.
Now it’s time to move on to the reds. First I outline all of the red areas with Umbral Umber to help provide extra contrast anywhere they meet up with a white background.
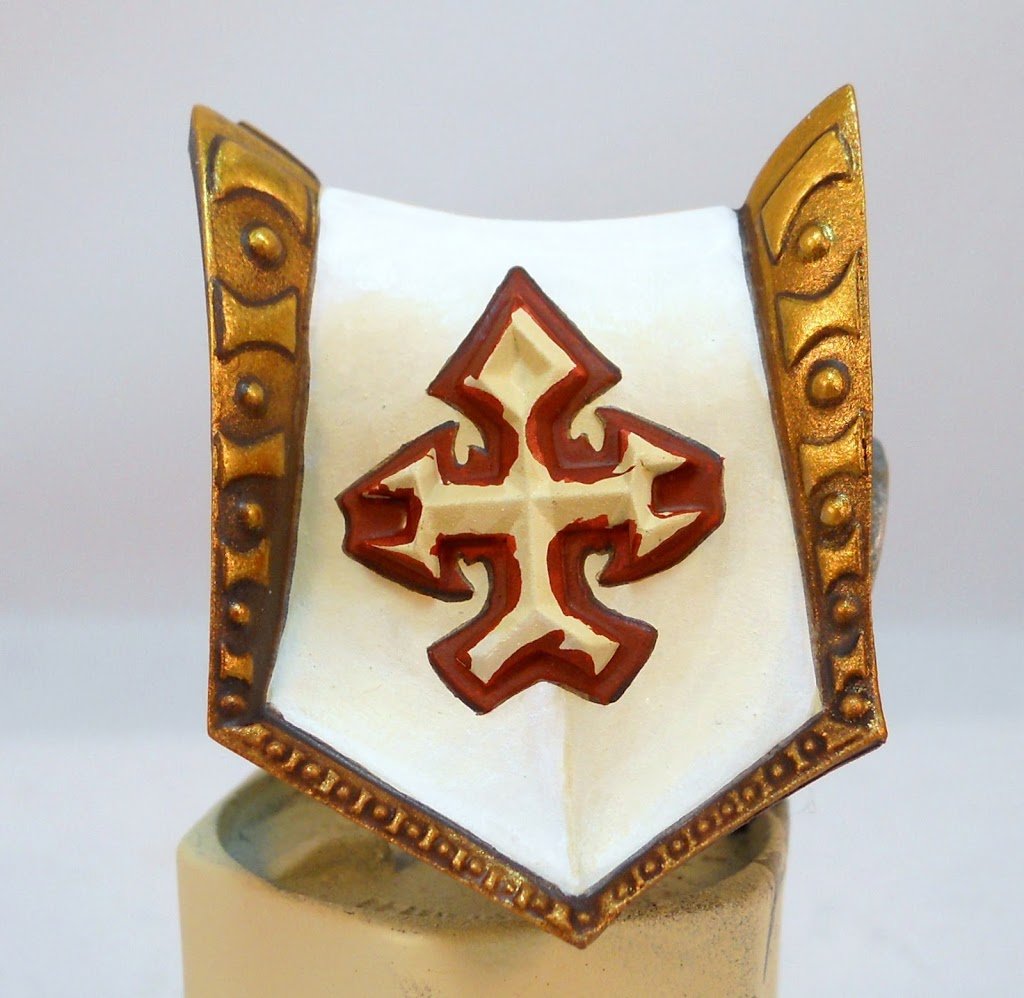
I basecoat all the red areas with a mix of Vallejo’s Dark Sienna and GW’s Blood Red.
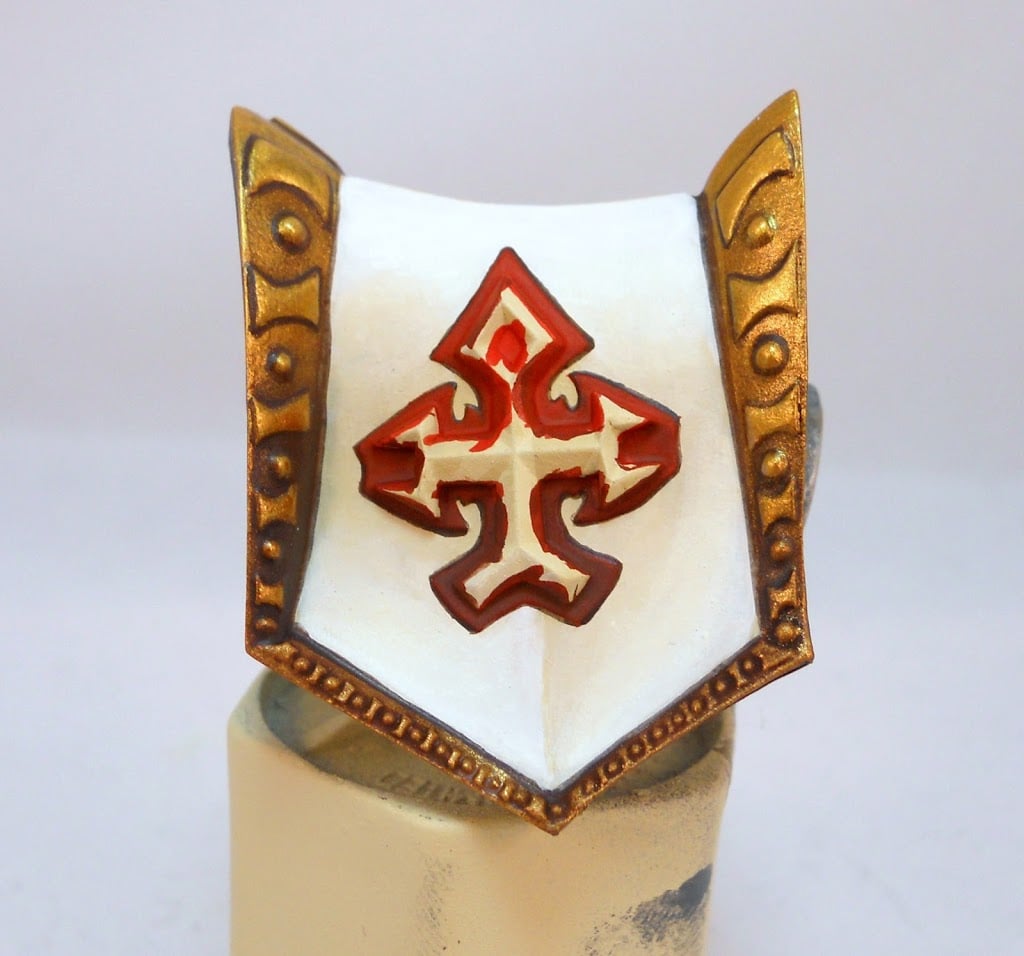
I blend up to pure Blood Red at the apex, and down to pure Dark Sienna at the base.
The last step is to add a very thin stark highlight of Rynn Flesh along the ridge at the top of the red area to really define it. Then I move on to the black.
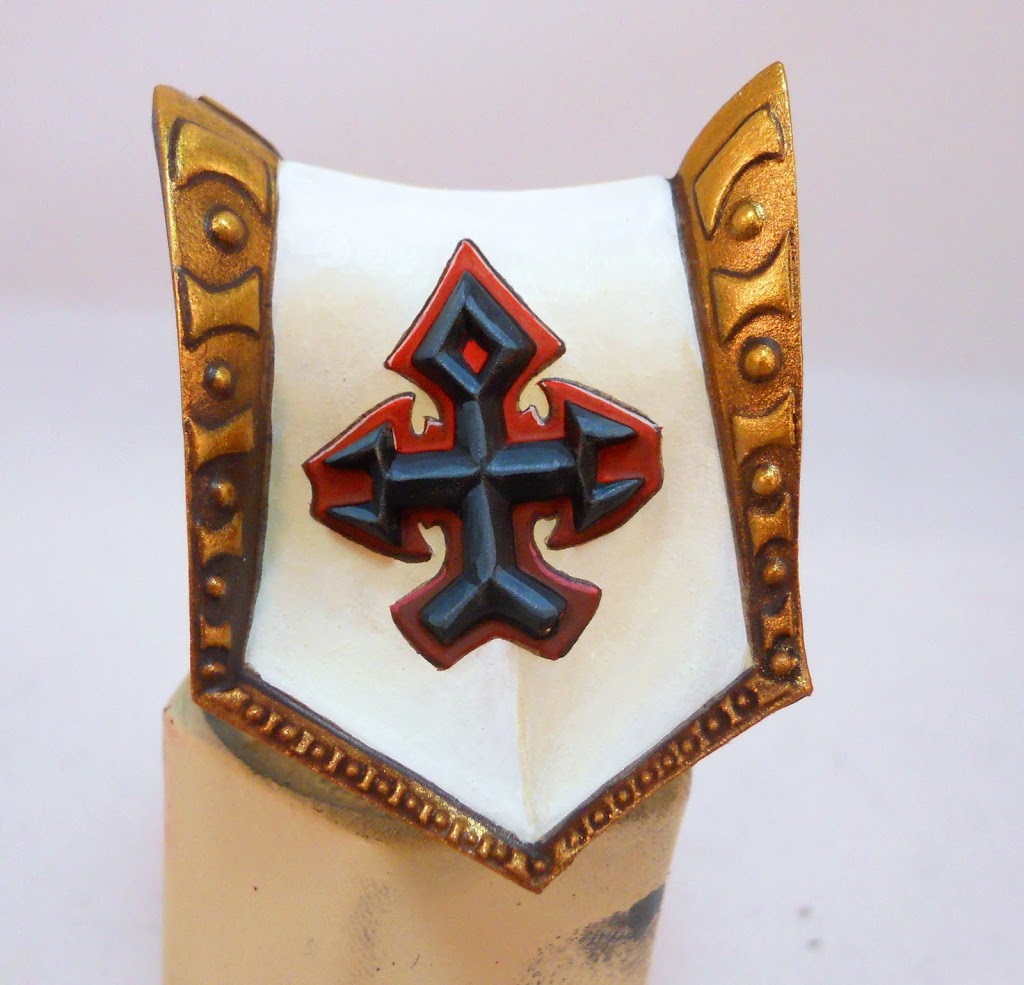
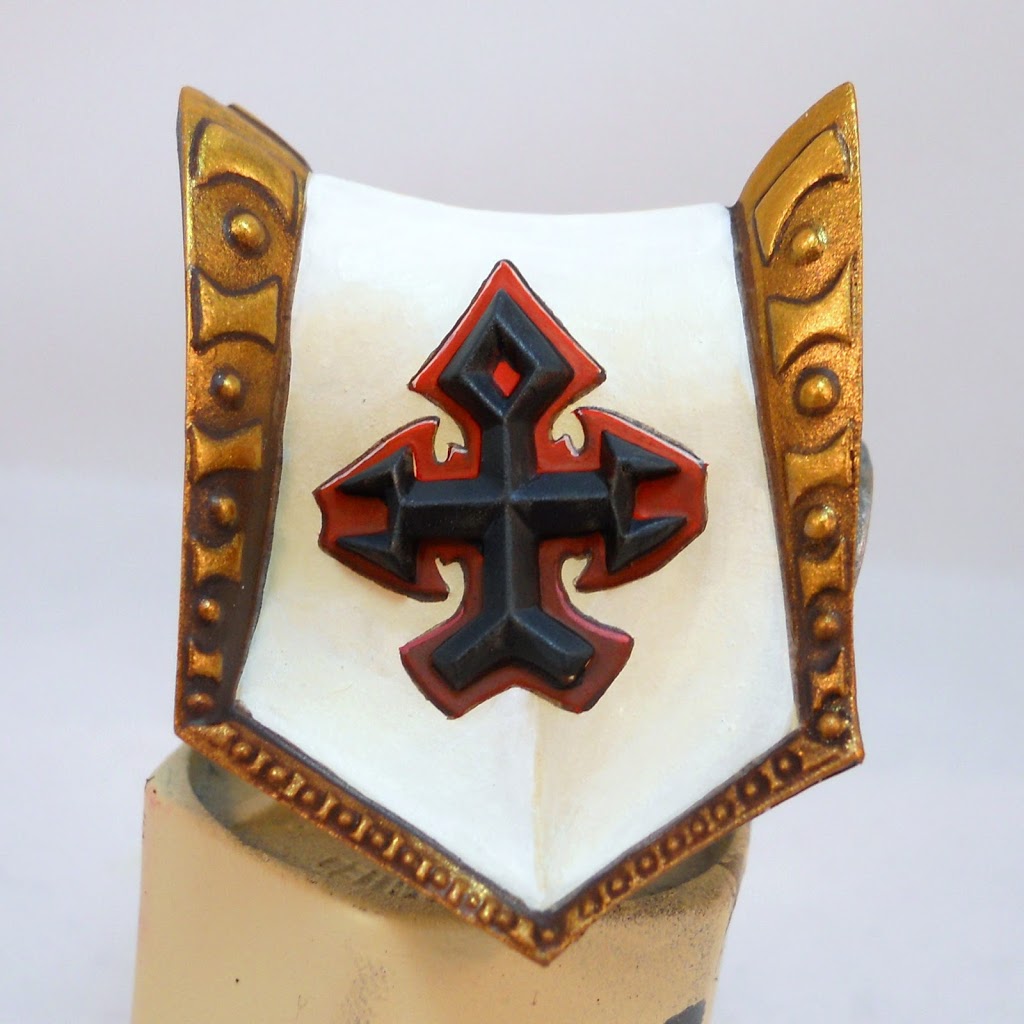
I begin highlighting the black with P3’s Coal Black, which gets blended up into Trollblood base.
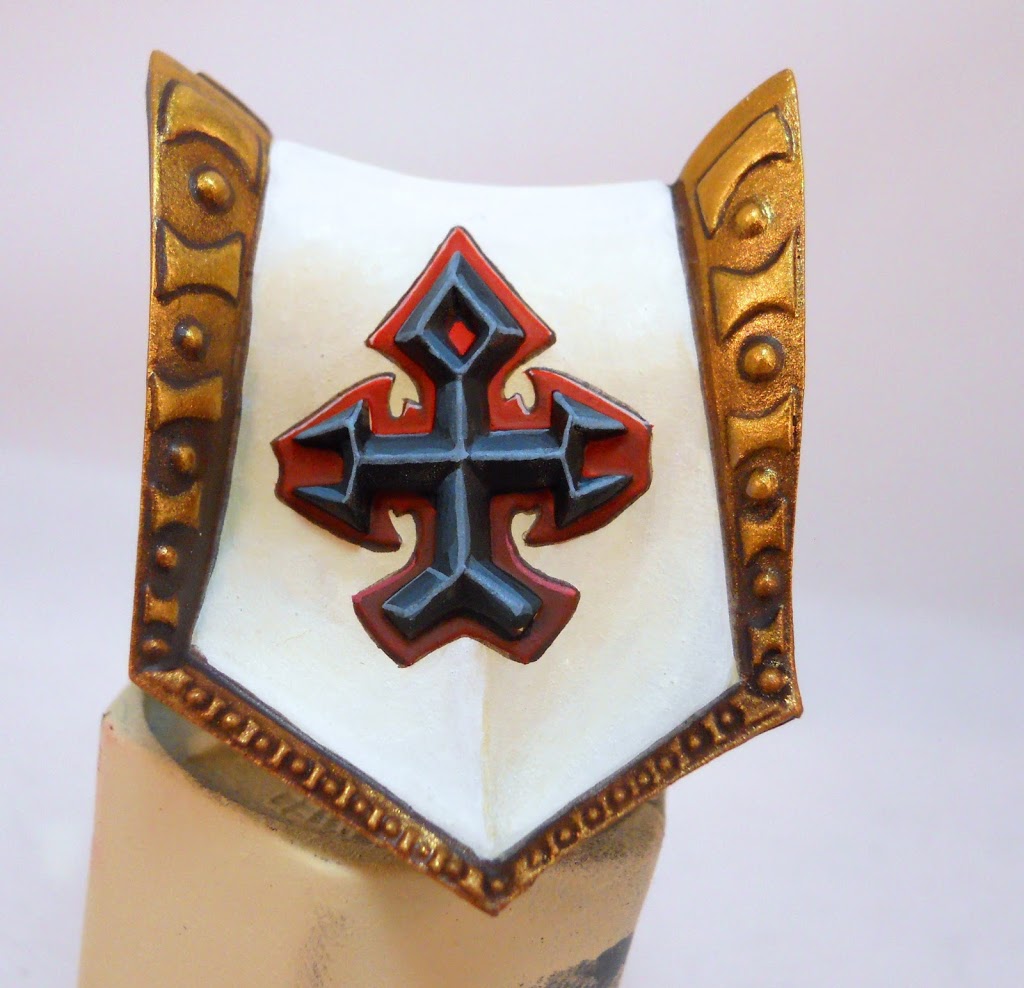
A little bit of Frostbite is then added to Trollblood base to serve as a final highlight.
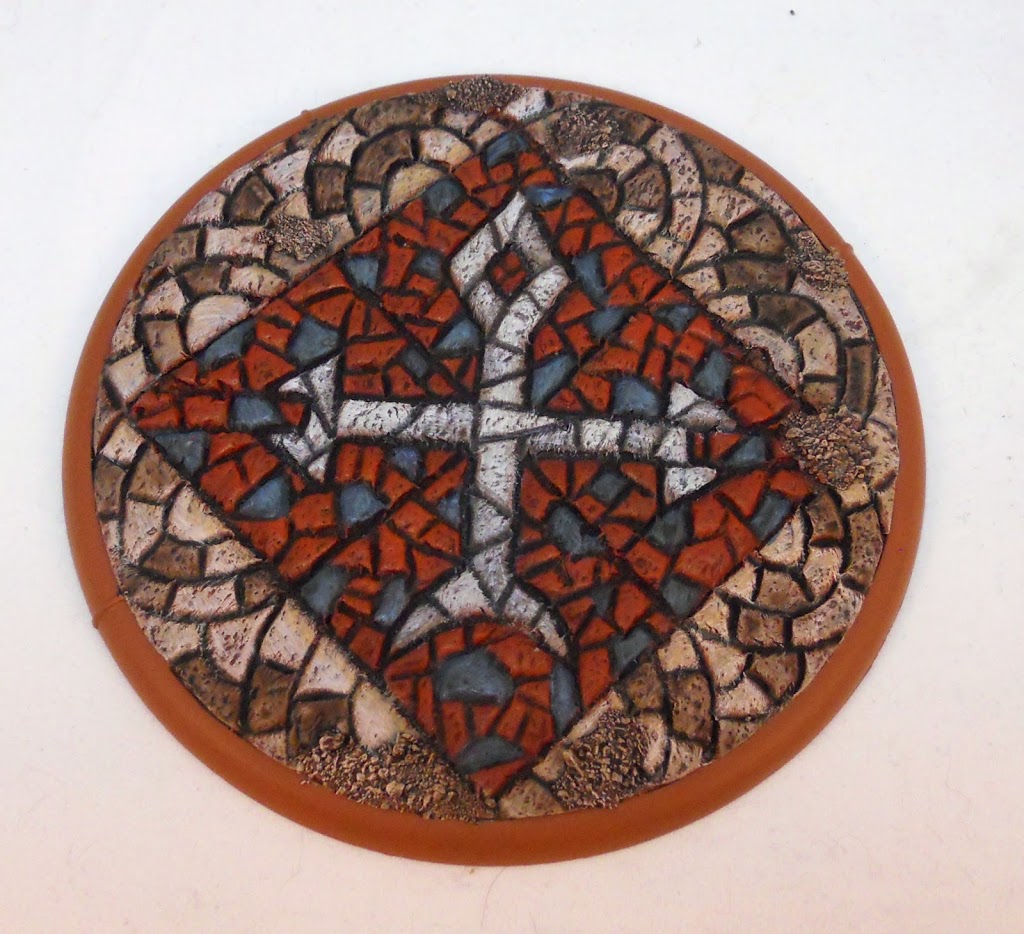
And of course to finish it off I needed sweet base. And I don’t even need to do a how-to article for it since it’s done with the same method I used here three years ago. I’m going to add some grass tufts eventually, but I like to spray seal my models before adding those and the weather here simply hasn’t been permitting lately.

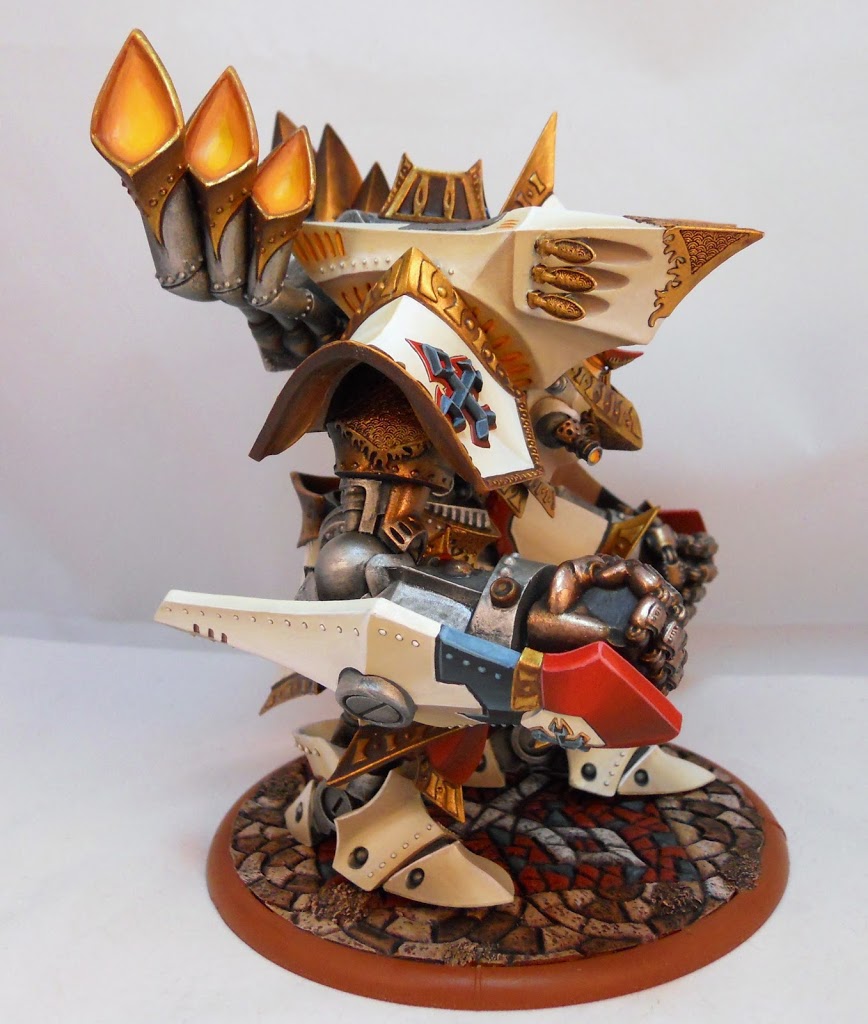
~ This is my second finished “Gargossal” after the Mountain King. How many of your own have you guys painted?
