40k Batrep – BikeStar vs. ScreamerStar – Battle of the 6th Edition Deathstars

The two scary Deathstars of 6th Edition face off in 7th. Let’s get ready to rumble!
A NOTE:
Different people have different expectations when reading a batrep and I appreciate the more common desires. The pictures that appear here were taken with my mobile device and the lighting wasn’t all that great. Also Marker Drones were proxied for the Screamers. The emphasis of the report is to shed some insight how the two featured Deathstars have transitioned into the new edition and how they matchup against each other. If you’re looking for awesome pictures of beautifully painted armies then there’s a good chance you might be a bit disappointed… That’s not say there wasn’t any nice looking eye candy on the table but the pictures won’t convey that aspect well. It was a very exciting game though so if you like detailed written battle reports with in-depth analysis of the strategic and tactical acumen then you just might like this one.
Army Lists

BikeStar
White Scars (Combined Arms Detachment):
Khan – Moondrakken /Warlord
Chapter Master – Bike – Artificer Armor – Thunderhammer – Shield Eternal (often referred to as Bikexander dubbed by my good friend Andrew Standiferd)
Command Squad – 4x Grav Gun – 4x Stormshield – Thunderhammer – 4x Meltabombs
Apothecary
Bike Squadron #1
5x Biker – 2x grav gun
Attack Bike – Multi-Melta
Sergeant – Combi-Grav – Meltabombs
Bike Squadron #2
5x Biker – 2x grav gun
Attack Bike – Multi-Melta
Sergeant – Combi-Grav – Meltabombs
Space Wolves (Allied Detachment)
Wolf Lord – Bike – Runic Armor – Thunderhammer – Stormshield – Wolf Tooth Necklace – Saga of the Bear (Wulfen MacWulfstron)
Rune Priest – Bike – Runic Armor – Meltabombs (Runic McRunes)
Level 2 Psyker (Telepathy) – Dominate – Invisibility – Psychic Shriek
10x Grey Hunter – 2x Plasmagun – Plasma Pistol – Power Axe – Wolf Standard – Mark of the Wulfen (Loaded for Bear)
Drop Pod
ScreamerStar
Chaos Daemons (Combined Arms Detachment):
Fateweaver /Warlord
Level 4 Psyker
Herald of Tzeentch – Disc of Tzeentch
Level 2 Psyker
Herald of Tzeentch – Disc of Tzeentch
Level 2 Psyker
Herald of Tzeentch – Disc of Tzeentch
Level 2 Psyker
Tzeentch Daemon Prince – Power Armor – Wings – Greater Gift (Grimoire of True Names) – Lesser Gift
Level 3 Psyker
Tzneetch Daemon Prince – Power Armor – Wings – Greater Gift (Grimoire of True Names – Lesser Gift
Level 3 Psyker
11x Horror
11x Horror
9x Screamer
Notes on the Army Lists
Daemons
Unfortunately I didn’t record all the various psychic powers generated by the Daemons… However I don’t think that will have a negative impact on the overall report – I’ll cover the important ones as they occurred over the course of the game. Obviously they had a deep pool of Warp Charge so it was interesting to see if I would be able to ever successfully cast any powers with my Rune Priest and you might be surprised. There was a mix between the Malefic and Tzeentchian lores for the daemonic psykers. The Daemons had Cursed Earth in several of their units (including the ScreamerStar) which can combine with the Grimoire of True Names (GoTN) for the 2++ re rollable invulnerable save for one unit. Cursed Earth has a little twist versus Forewarning from the Divination lore as it’s an area of effect psychic power.
I was very interested to see if the Fateweaver is still a major player and if the Tzeentch Daemon Princes could still pull their weight as well. The ScreamerStar clocks in between 800-900 points… That’s a lot of points for one combined unit.
BikeStar
My army list is based upon my experience having played the army in both sixth and seventh editions. It was a long hard road developing what I feel is a fairly balanced competitive list presented here. We don’t really know for sure yet what will be the new top tiered lists so there is that not so warm fuzzy aspect.
This list is more commonly referred to as the Super Friends and I’ve developed several others over the course of sixth edition via the advent of the Allies matrix. Allies have actually been around for a long time – for example my fourth edition Ard Boyz Blood Angels army I took to the finals had both Grey Knights and Sisters of Battle as allies. BikeStar has transitioned well as it lost nothing – most importantly how Battle Brothers still work and are intact from sixth edition.
I prefer a small number of hard hitting units as opposed to an MSU approach. I have learned that in general it’s better to deploy everything at the start of the game with an exception to the Grey Hunters (obviously since they are mounted in a drop pod). Also my army is not all that highly dependent upon psychic powers as the BikeStar is highly resilient due it’s inherent T5 across the entire unit, speed, two 2+/3++ multi-wound characters with Eternal Warrior, stormshields throughout the majority of the unit and Feel No Pain.
There are a lot of special rules to remember and often I forget to use Hammer of Wrath (HoW) attacks. I forgot to roll for FNP whenever my Rune Priest periled too.
Mission Goals and Points
This Mission has 3 Primary GOALS worth 8 Mission Points Each and 3 Secondary GOALS worth 2 Mission Points each for a possible total of 30 Mission points per game. Drawn Primary GOALS are worth 4 Mission Points. Drawn Secondary GOALS are worth 0 Mission Points.
Primary GOAL #1 – Crusade
An Automatic total of 4 “Crusade” Objectives will be used for this Goal. At the end of the game the player who controls the most “Crusade” objectives wins this GOAL. If players control the same number of “Crusade” objectives, this GOAL is a draw. “Crusade” Objectives cannot be placed within 6” of any LONG table edge or within 3” of any SHORT table edge or within 6” of another “Crusade” Objective.
Primary GOAL #2 – The Emperors Will
“Emperors Will” Objectives cannot be placed within 6” of any table edge or within 3” of another Objective.
Primary GOAL #3 – Purge the Alien
Warlords grant an additional Victory Point for a Total of 2 Victory Points if they are slain. Heavy Support Choices are worth 1 additional Victory Point each when determining the winner of the “Purge The Alien” GOAL.
At the end of the game the player with the most Victory Points wins each GOAL respectively. If both players have the same number of Victory Points then the GOAL is a Draw.
Secondary GOAL #1 – Slay the Warlord
Secondary GOAL #2 – Linebreaker
Secondary GOAL #3 – First Blood
Deployment
Vanguard Strike
Controlling Objectives
A single eligible unit may control / deny up to one Each of “The Crusade” and “The Emperors Will” objectives.
Game Sequence
1 – Place Objectives for “Crusade”.
2 – Determine Deployment Zones. Players roll off to determine who chooses their deployment zone. Winner of the roll off chooses their deployment zone first.
3 – Players now place any Fortifications. Taking it in turn starting with the player who chose deployment zones from step 2. With the exception of Aegis Defense Lines, Fortifications will replace ONE piece of terrain that is already on the table. Aegis Defense lines Do Not replace a piece of terrain. If a piece of terrain containing an objective is replaced by a Fortification then that objective MUST be placed EXACTLY 3 inches AWAY from the Fortification on the side of the Fortification facing the center of the table, following all the rules for proximity from other objectives and table edges.
4 – Place Objectives for “The Emperor’s Will”.
5 – Roll for Warlord Traits.
6 – Roll for Psychic Powers.
7 – Roll off to see which player deploys first. Winner of the roll off chooses to deploy first or second.
8 – The Player who deployed first will have the first turn.
9 – Seize the Initiative may be attempted if desired.
10 – Variable Game Length is in effect.
Pre Game Analysis
My goals are both few in number and simple:
— Lock the ScreamerStar in melee with my BikeStar ASAP then Hit and Run (H&R) when appropriate – rinse and repeat. This will eliminate their threat while containing their potentially massive foot print… This leads right into my second goal too.
— Strike as hard as possible versus the ScreamerStar should they ever flub their 2++ re rollable invulnerable save…For example cast all my warp charge against Cursed Earth for them in that regard. Believe me when I say it can and does happen from time to time.
— Eliminate all Objective Secured enemy units.
— Win on Purge the Alien, Draw on Emperor’s Will and score two out of three secondary goals.
— My opponent has much more warp charge so I will have to use mine wisely when casting and denying… I will throw all the dice to cast Invisibility on my BikeStar and to deny Cursed Earth on the ScreamerStar.
Hopefully everything will go like well oiled clockwork.
Roll Off for Deployment and First Turn
I won the roll off for both, electing to go first – that’s a huge advantage assuming your opponent doesn’t seize the initiative !
Army Deployment and Scout Moves
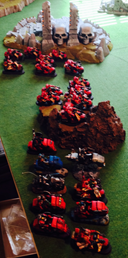
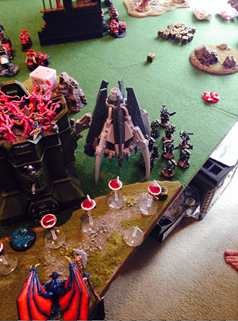
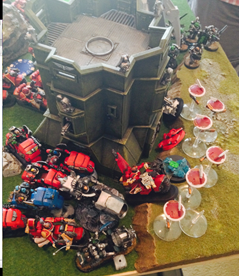
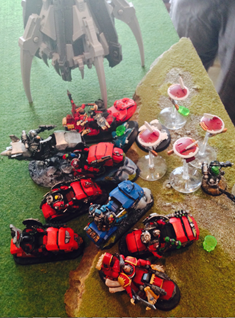
I was very glad for the Vanguard Strike deployment – Hammer and Anvil can be rough. The pictures below show the table setup and how we both deployed.
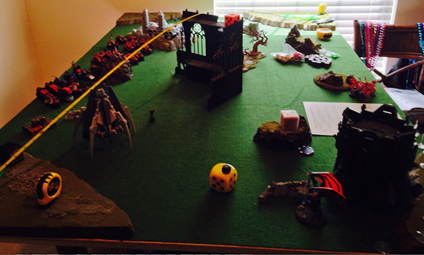
As I said above I think it’s better to start everything on the table when fielding a relatively low number of concentrated units. I have also recently switched over to just one full Grey Hunter pack (Loaded for Bear) as it tends to dish out more damage and is harder for the enemy to remove. The objective secured drop pod can be quite a challenge for the enemy to remove when they’ve got all the other units up in their grill shooting and assaulting. My advice is to place it right on top of an objective if possible.

I scouted all three biker squads straight towards my opponent’s Bastion (forgot to list his fortification in the first post) with a squad of Horrors on top, the three Heralds embarked inside and the Screamers directly behind it. My opponent held one of his Daemon Princes in reserve along with the other squad of Horrors. I staggered my deployment so that the three biker squads would not form a bottle neck during the initial surge, which worked out well. The one biker squad to my left could react to my opponent’s first moves… He couldn’t really afford to concentrate on them with the BikeStar, other bike squad and Grey Hunters all up close and personal.

The Game Begins
1st Turn – BikeStar
The Grey Hunters’ drop pod lands just to my left of the Bastion and does not scatter. The Grey Hunters disembark surrounding one side of the Bastion while all guns have unobstructed line of sight to the Screamers. Note I made a mental blunder by not placing the drop podclose enough to my opponent’s Emperor’s Will objective… I chalk it up to be being overly excited. The BikeStar and one one biker squad moved up and trained all their armor piercing weapons on the Bastion. The other biker squad moved up as well, remaining to my left in anticipation of enemy reserves next turn.
The Rune Priest successfully casts Invisibility and suffered one wound from Perils of the Warp – the Daemons were unable to deny it.
Shooting then commences. My opponent made a bit of a mistake going to ground with the Screamers to avoid wounds from plasma and he still lost one Screamer and took another wound in the process… Really nice to get in one shooting phase before the 2++ re rollable invulnerable save comes online! My bikes were unable to glance or penetrate the Bastion. Note that I opted not to drop the Chapter Master’s Orbital Strike this turn.
No First Blood but I’m feeling okay at this point. Barring really bad luck I should be able to shoot the Screamers again and assault them next turn. Looking back I might have had a decent chance to drop Fateweaver for First Blood and Slay the Warlord but the goal was to establish positional dominance, much like how jy2 often discusses his Maximum Threat Overdrive (MTO) tactics.
1st Turn – ScreamerStar
The three Heralds exit the Bastion and join the grounded Screamers (apparently this is legit now). Fateweaver swooped over the closest biker squad along with the first Daemon Prince for the vector strikes but only manage to kill one biker.
Onto the psychic phase – this took awhile to complete since there were so many spells to cast but the end result was not much significant damage taken on my end… The Runic Staff came in quite handy versus some of the maledictions cast on my BikeStar. I used all my warp charge in an attempt to cancel Cursed Earth for the ScreamerStar but it still went off along with GoTN. Fateweaver, the first Daemon Prince and one Herald all suffered a wound apiece due to Perils of the Warp… That’s what happens when you’re rolling that many dice all in one go.
No assaults this turn… If it had been me I might have charged one of my two biker squads with the Daemon Prince rather than swoop.
2nd Turn – BikeStar
This was my turn to pull off the Beta Strike ! The left most biker squad moved up a bit to lend their grav guns versus the Bastion while the BikeStar and other biker squad circled around the right side of the Bastion to shoot it and multi assault. I took a risk here hoping that I wouldn’t finish off the Bastion while shooting… Even if I did I could still assault the Horrors if they came crashing down from the lofty battlements up top along with the ScreamerStar.
Again the Rune Priest was able to successfully cast Invisibility and did not perils this turn. Yet again the Daemons were unable to deny it.
First I dropped the Chapter Master’s Orbital Strike on top of the Bastion, penetrating the fortification along with vaporizing several Horrors up top in the lofty confines of the battlement. Next all my grav guns and both multi-meltas focus fired on the Bastion but only were able to strip away two more hull points.
Next came the multi-assault… BikeStar selects the Bastion and Screamers, fully enclosing the fortification. A meltabomb from the Rune Priest explodes the Bastion and the remaining Horrors are all crushed in the tumbling pile of rubble. One biker squad also charges in as well. I elect not to charge the Grey Hunters since they can’t Hit and next turn. Another Screamer is trounced by a Thunderhammer. Everyone engaged remains locked… the trap has been set !
2nd Turn – ScreamerStar

Bikestar Wins!
CONCLUSION
~Have at it!
