Hordes: Una the Falconer

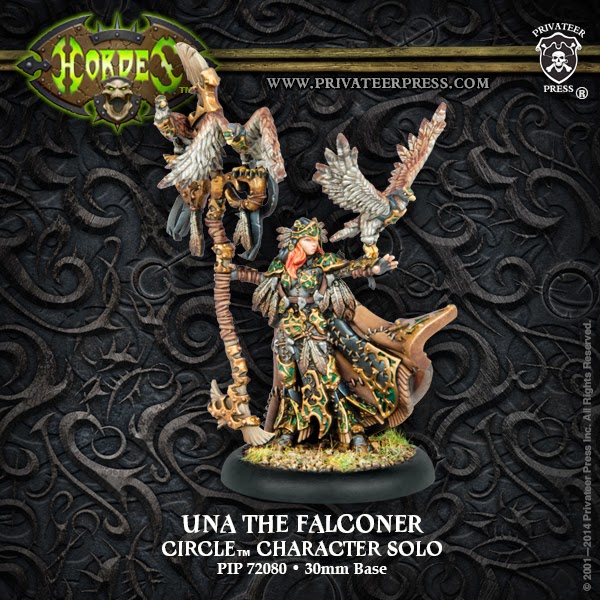
Circle Orboros overseers recently inducted a new warrior into their midst, Una the Falconer. With such a strong stable of options to choose from, what does she bring to the table?
Starting with her stat block, offensively, she strikes me more as a ranged tool. With RAT 6, three initial attacks, Bird’s Eye, and Black Penny, she seems uniquely situated to break up jams of enemy infantry that have engaged your forces either to deny forward movement or stop ranged attacks. With a RNG value equal to her control area, Una will always be able to ensure that she is not wasting ranged attacks on targets outside her range. While RAT 6 and POW 10 are not the most superb of stats on her Bird of Prey attacks, her ability to boost these attacks via her Fury 4 and the Lesser Warlock rule grant solid tools for taking out single-wound infantry. Compared to her melee kit, a single MAT 5, POW 9 attack with Reach and Magical Weapon, there is not a lot to get excited about, even with the ability to boost those attack or damage rolls.
Defensively, she can be a little vulnerable with 5 wounds, DEF 15, and ARM 13, so she may easily be cleared off the table with a single ranged attack unless you hold at least one Fury on her for transferring damage to her battlegroup. Watcher can certainly help keep her protected from fast-closing melee infantry, but the single melee attack that it provides will likely be better used for repositioning her warbeasts for the next turn.
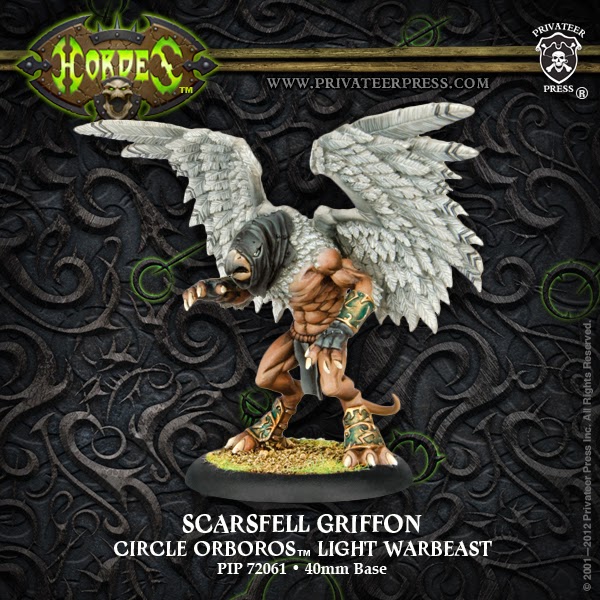
Given the rather constricted nature of Specialization [Warbeasts with Flight], she is currently limited to three warbeast options: the Scarsfell Griffon, Razorwing Griffon, and Rotterhorn Griffon. Scarsfell Griffons have obvious synergy with Una thanks to the Long Leash rule, which effectively doubles Una’s control area when measuring to the Scarsfell, allowing it to force and be leached while pushed deep into the enemy lines. Its normal cost of 5 makes it a difficult model to fit into lists, but at an effective cost of 4 it suddenly becomes a much more attractive option. Being able to move so far away from your central dominance via Long Leash makes the Griffon a solid choice for assassinating flanking solos or wreaking havoc in your opponent’s back line thanks to Shadow Shift. Given the effective 16″ control range with the Scarsfell Griffon, it can potentially interact well with Una’s Dog Pile spell, granting it a free charge against the target with an additional 2″ of threat, allowing Una to cast Dog Pile at a target up to 10″ away from her, scoot backwards, and have the Scarsfell Griffon charge her target with an 11.5″ threat range. You can find our initial coverage on the Scarsfell Griffon in our Circle Orboros Domination coverage article.
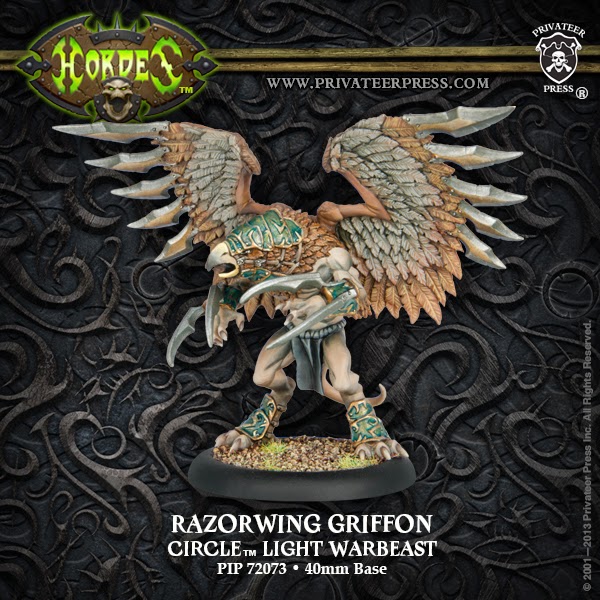
The Razorwing Griffon has the same cost as the Scarsfell, but it sacrifices Long Leash and Stealth for increased base damage with its two Open Fist melee attacks, the Blade Rush rule allowing it to make trample power attacks against any model with a large base or smaller while ignoring free strikes, and the Amuck animus granting it boosted power attack rolls. This allows the player to activate Amuck before trampling outside of Una’s control area for boosted attacks despite potentially being outside her control area after moving. Given the Razorwing’s decent damage profile and vulnerability to trades, it may not be a bad idea to use the Gorax’s Primal animus on it if you are not taking advantage of Amuck or if you believe that the +2 to attack and damage is arguably the better choice than boosted attack rolls. The Razorwing Griffon interacts particularly well with Una’s Watcher spell, allowing you to reposition the Razorwing whenever enemy models get close to Una, potentially setting up the perfect trample on the following turn. You can find our Razorwing Review here.
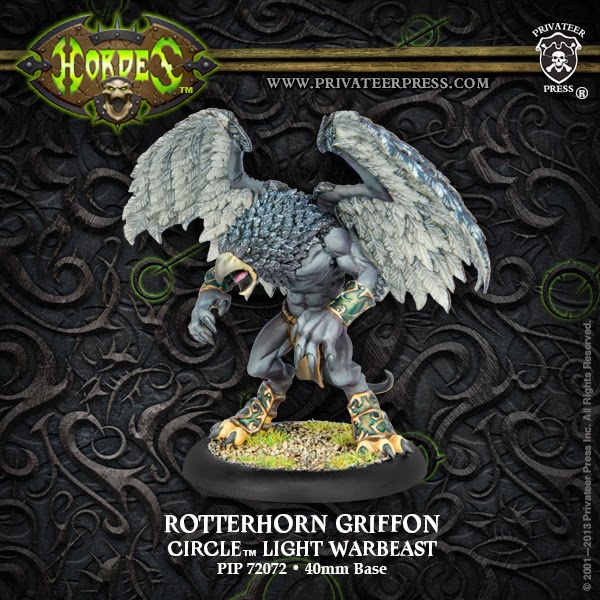
The Rotterhorn Griffon is the cheapest of all available options of warbeasts with Flight, which arguably makes it the best candidate all by itself, since three points for any type of light warbeast is a steal. Unlike the other two Griffons, the Rotterhorn only has a pair of melee attacks at P+S 11, so it does not have the strongest output based simply on stats. What it has instead is the Shrill Shriek special action, dealing a POW 8 damage roll to all models within 2″ of the Rotterhorn, making it incredibly effective against single-wound infantry, particularly those with ARM stats of 13 or lower. Since Shrill Shriek is not blast damage, it even circumvents abilities like Force Barrier, making the Rotterhorn Griffon a fantastic tool to send at Satyxis Raiders. It should also be noted that the damage rolls on Shrill Shriek can be boosted as well, so if Una is far forward enough, you can increase the damage output on Shrill Shriek incredibly by a fair bit. You can find our learn more about the Rotterhorn from our May article.
When considering taking Una in a list, I believe the most important thing to consider is whether or not she is or can bring something to table that you need covered, which will largely be determined by the nature of her battlegroup. Due to her relative fragility, I probably would always run one or two warbeasts with her, as running three or more paints a big target on her head. The reason why I think she might be okay with just a single Griffon is because she does not need to spend Fury to make all of her ranged attacks since they are three initial attacks and not a single weapon with ROF 3. Regardless of this, I feel that two warbeasts is the sweet spot. If you need to be able to take on high-DEF, low-ARM infantry, a pair of Rotterhorns with Una will run you 9 points and would not be a bad investment. If you want a mix of spot removal and infantry clear, a Rotterhorn and a Scarsfell Griffon at 10 might be the way to go. If you want a little more punch, consider the replacing one or both of your warbeasts with Razorwings.
The most notable outside synergy I would consider with Una is the Druid Overseer, which can be used to force Una’s warbeasts even if they are outside of her control area, a particularly helpful buff with Rotterhorns and Razorwings.
Positioning Una is something that will take some practice. She wants to be far enough forward to let her warbeasts be of consequence, but not so far forward that she becomes too easy to kill. Do your best to keep her screened, perhaps behind a Gorax or in a forest, which will mean little to her thanks to Bird’s Eye and Pathfinder.
For a look at the unboxing of this really fantastic model, I will direct you to GentleBen’s article from early May.
Stay tuned to Bell of Lost Souls for more Hordes and Warmachine coverage!
