WW2 Hobby: Jakob Lotz’s German Bison Conversion


Following on from his Zis-30 and Flakpanzer Hobbyist Jakob Lotz has been at it again with another conversion. This time the vehicle in question is the Sturmpanzer I Bison.
From the Gamewire, take it away Warlord!
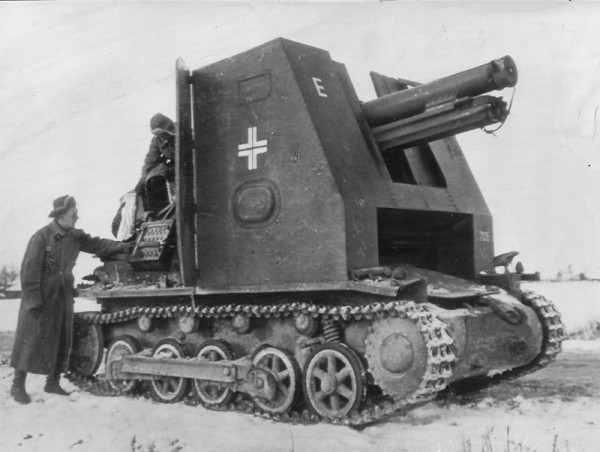
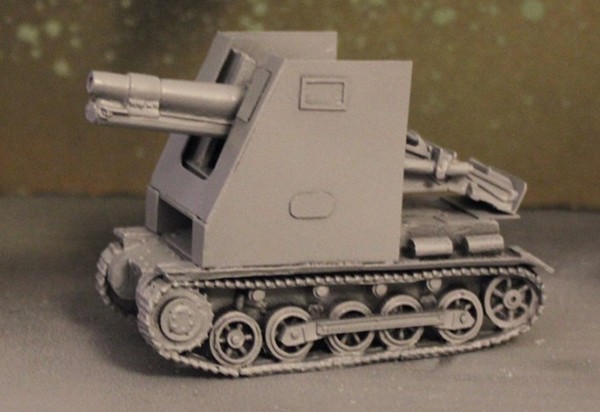
The Panzer I sIG 33 was an ad hoc solution to allow the sIG 33 guns assigned to the infantry gun companies of the motorized infantry regiments to keep up with the tanks during combat. The turret of the Panzer I ausf. B was removed and the sIG 33, complete with carriage and wheels, was simply rolled up onto the chassis. A tall open-topped fighting compartment was constructed on the forward part of the hull in order to give the gun and gunner at least a modicum of protection against small arms fire.
While the Panzer I sIG 33 gave the German army a heavy support gun that was better able to keep up with the other panzers and the mechanized infantry, the vehicles suffered from mechanical failures due to the weight and strain put upon the platform from the heavy sIG 33. Furthermore the crew was left horribly exposed in combat. As such the Panzer I sIG 33 was less than an ideal solution to the problem at hand.
All-in-all 36 Panzer I ausf. B were converted in this manner and were organized into independent schwere Infanteriegeschütz-Kompanie (“Self-propelled Heavy Infantry Gun Companies”) mot. S. Numbers 701-706, and then assigned to a number of panzer divisions. The guns were used during the Battle of France as well as during Operation Barbarossa. The last reference to these vehicles is with the 704th Company of the 5th Panzer Division during the middle of 1943.
WHAT YOU NEED
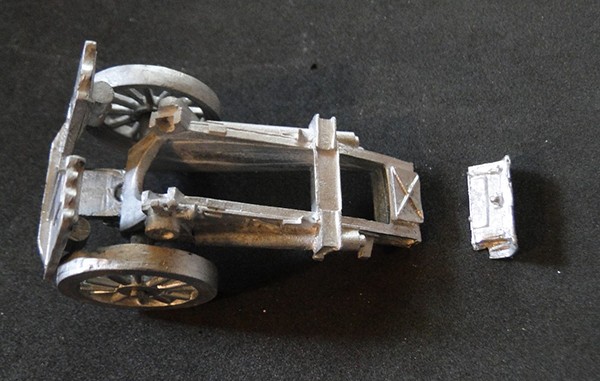
- One Panzer I ausf. B
- One German Heer sIG33 150mm howitzer (1939-42)
- Plasticard.
- Piercing saw, craft knife, wire cutters, drills, glue etc.
HOW TO MAKE YOUR OWN
I would like to first of all mention that the following guide doesn’t show every single step and minute detail of the conversion process, simply because writing such a guide simply wasn’t feasible. Instead I hope to be able to convey, mostly through the pictures, an idea of how one can go about the process of building a Panzer I sIG 33. As such be prepared to do your own measuring and such and know that getting things right takes a fair bit of trial and error.
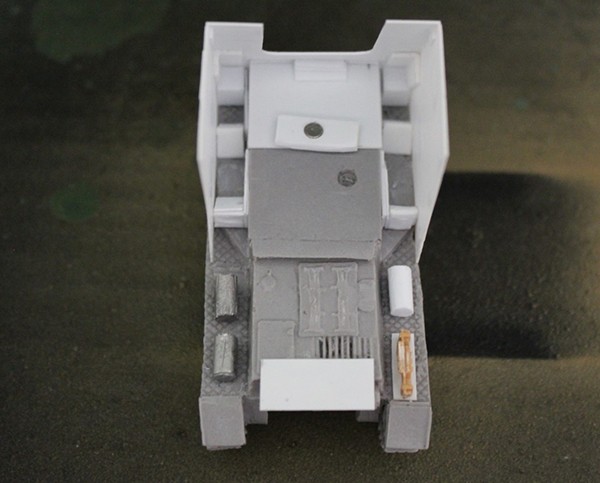
As always first off clean all the resin parts in some warm water and soap. Then take your piercing saw or similar tool and cut away the the sides of the chassis as shown below. This is to make room for the wheels of the sIG 33.
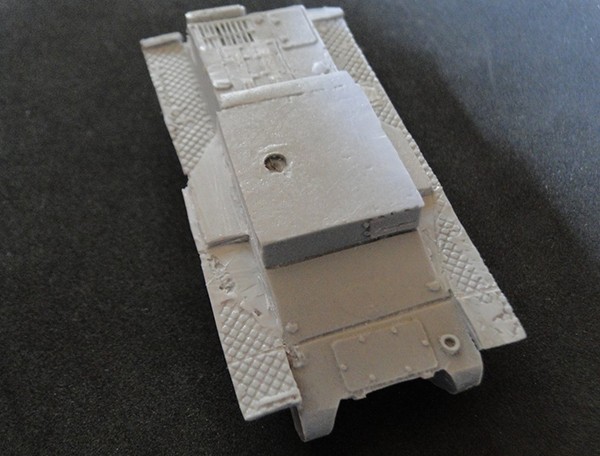
Next add plasticard as shown below. The angled parts are where the wheels of the sIG 33 will rest eventually. The squares at the front are simply there to glue on the lower front pieces of the gunshield later on.
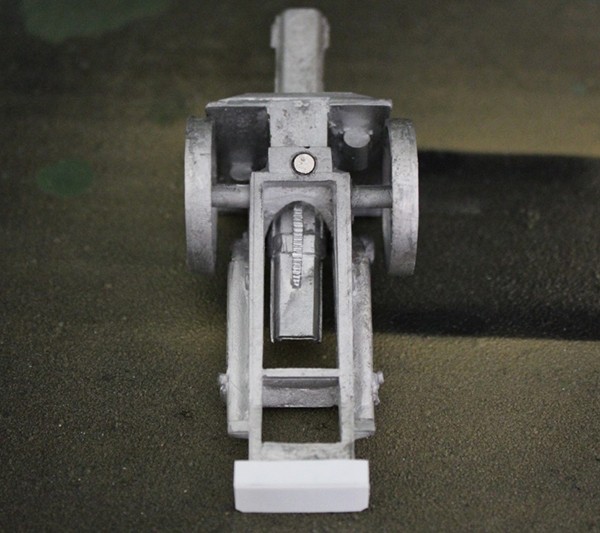
There seems to be a very slight mismatch in scale between the Panzer I ausf. B and the sIG 33 gun, so I decided to make a small modification. I therefore cut of the rear of the gun’s carriage as shown below.
And then added some plasticard to cover up the cut.
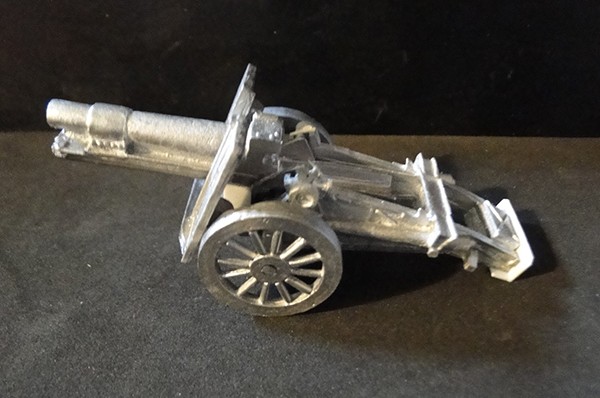
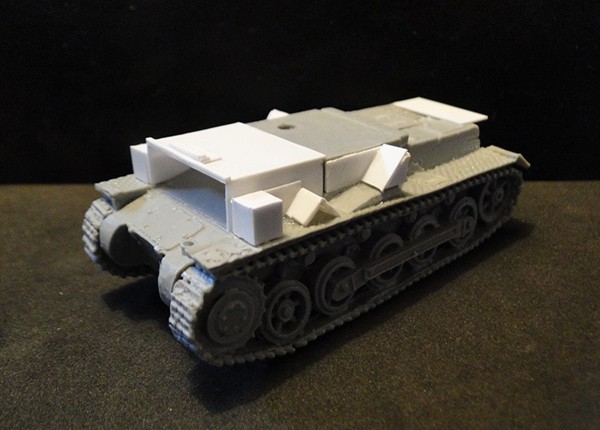
Next I test-mounted the gun on the chassis, obviously it was a perfect fit (not immediately but eventually!)
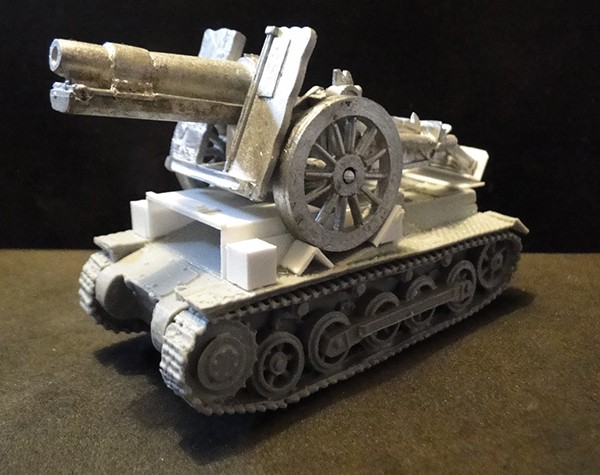
I then got started on the gunshield. Now the mathematics is not exact here and I used equal parts pre-measuring, dry-fitting and trial and error. One tip is to first cut the desired shapes out of ordinary paper and then use these as ”blueprints” for the plasticard parts.
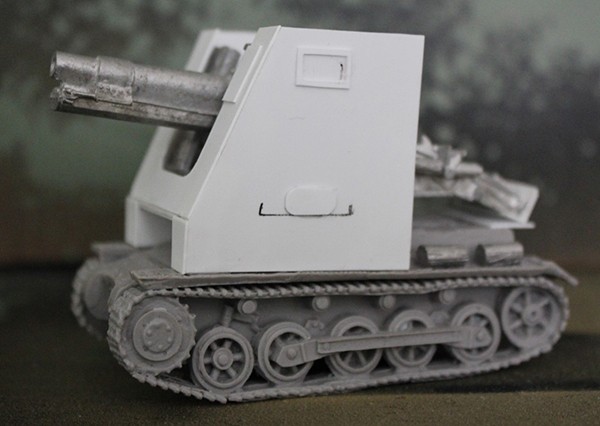
Then it is simply a matter of gluing the gunshield together and mounting it onto the Panzer chassis. I used L shaped pieces of plasticard to give the gunshield some structure and to make it easier to glue the different parts together. The L-shaped pieces are clearly visible in the pictures below. Just remember to glue them in place in such away so that they don’t interfere with anything else. I also drilled a hole in a thick piece of plasticard and added a magnet to the plasticard piece which I then glued to the chassis.
I then added a magnet to the sIG 33 gun. Thus letting me use the sig 33 separately if I want to (obviously you could just as well simply glue the sIG 33 gun in place, instead of going through the trouble getting the magnets to match up and so on).
I then added some details to the gunshield and the rear of the chassis and the model was ready for priming and painting.
I first primed it black and then uniform grey.
After which I went over the entire model with a liberal black wash.

I then drybrushed the model light grey
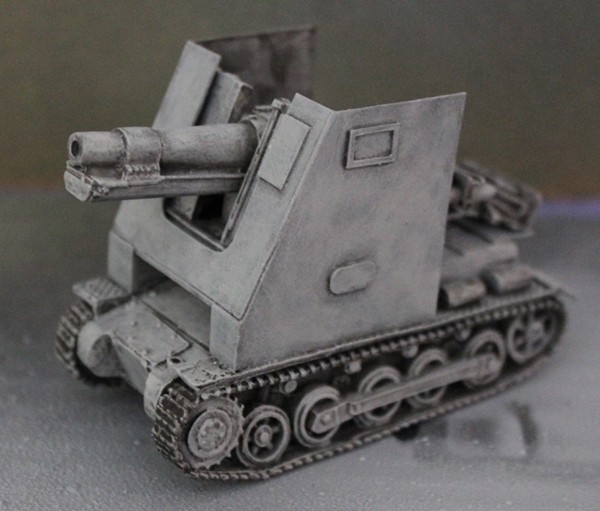
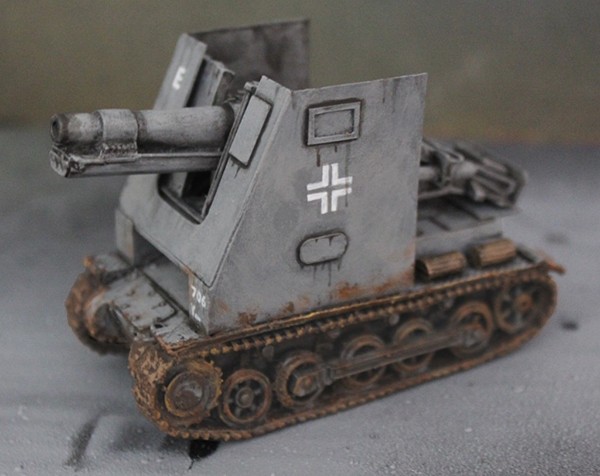
Finally I dirtied the tank up with black and brown washes as well as some texture paints for the mud on the tracks. I also added some details such as a balken-kreuz on either side of the gunshield (just google images of ”15 cm sIG 33 (Sf) auf Panzerkampfwagen I Ausf B”, “Panzer I sIG 33” or “Sturmpanzer I Bison” and you will find a fair few reference pictures to help you out). And so I had myself a finished Panzer I sIG 33 Bison. It wasn’t the easiest conversion I’ve ever made but the end result made it well worth the effort!
HOW TO USE IT
Rules for the Panzer I sIG 33 can be found on page 56 in the Armies of Germany book.