X-Wing: Top Gun – The Lufbery Maneuver

ATTENTION Starfighter Pilots! It’s time to learn a few maneuvers – every pilot needs some tricks up their sleeve.
X-Wing: Top Gun is all about explaining some of the more complicated maneuvers and tricks you can pull off in X-Wing. The concepts may help you take your maneuvers to the next level.
The Lufbery Maneuver
The ability to get all of your ships in a circle may seem like a gimmick – and it is – but it’s based off of a very successful one developed during WWI. The idea is that your fighters can cover each other once they reach their spots within the circle. As long as all your pilots are the same Pilot Skill and are able to do a Hard 3 Turn, you can keep up this formation indefinitely…baring any obstacles or outside interference.
For best results try this with turreted fighters as they can really cover each other the best. In the following photos we used 4 different ships to illustrate how it works:
NOTE: not all ships shown can perform this maneuver in formation – these 4 different types of fighters were chosen ONLY to make it easy to follow along with the pictures of each individual fighter and how it moves to accomplish the Lufbery formation.
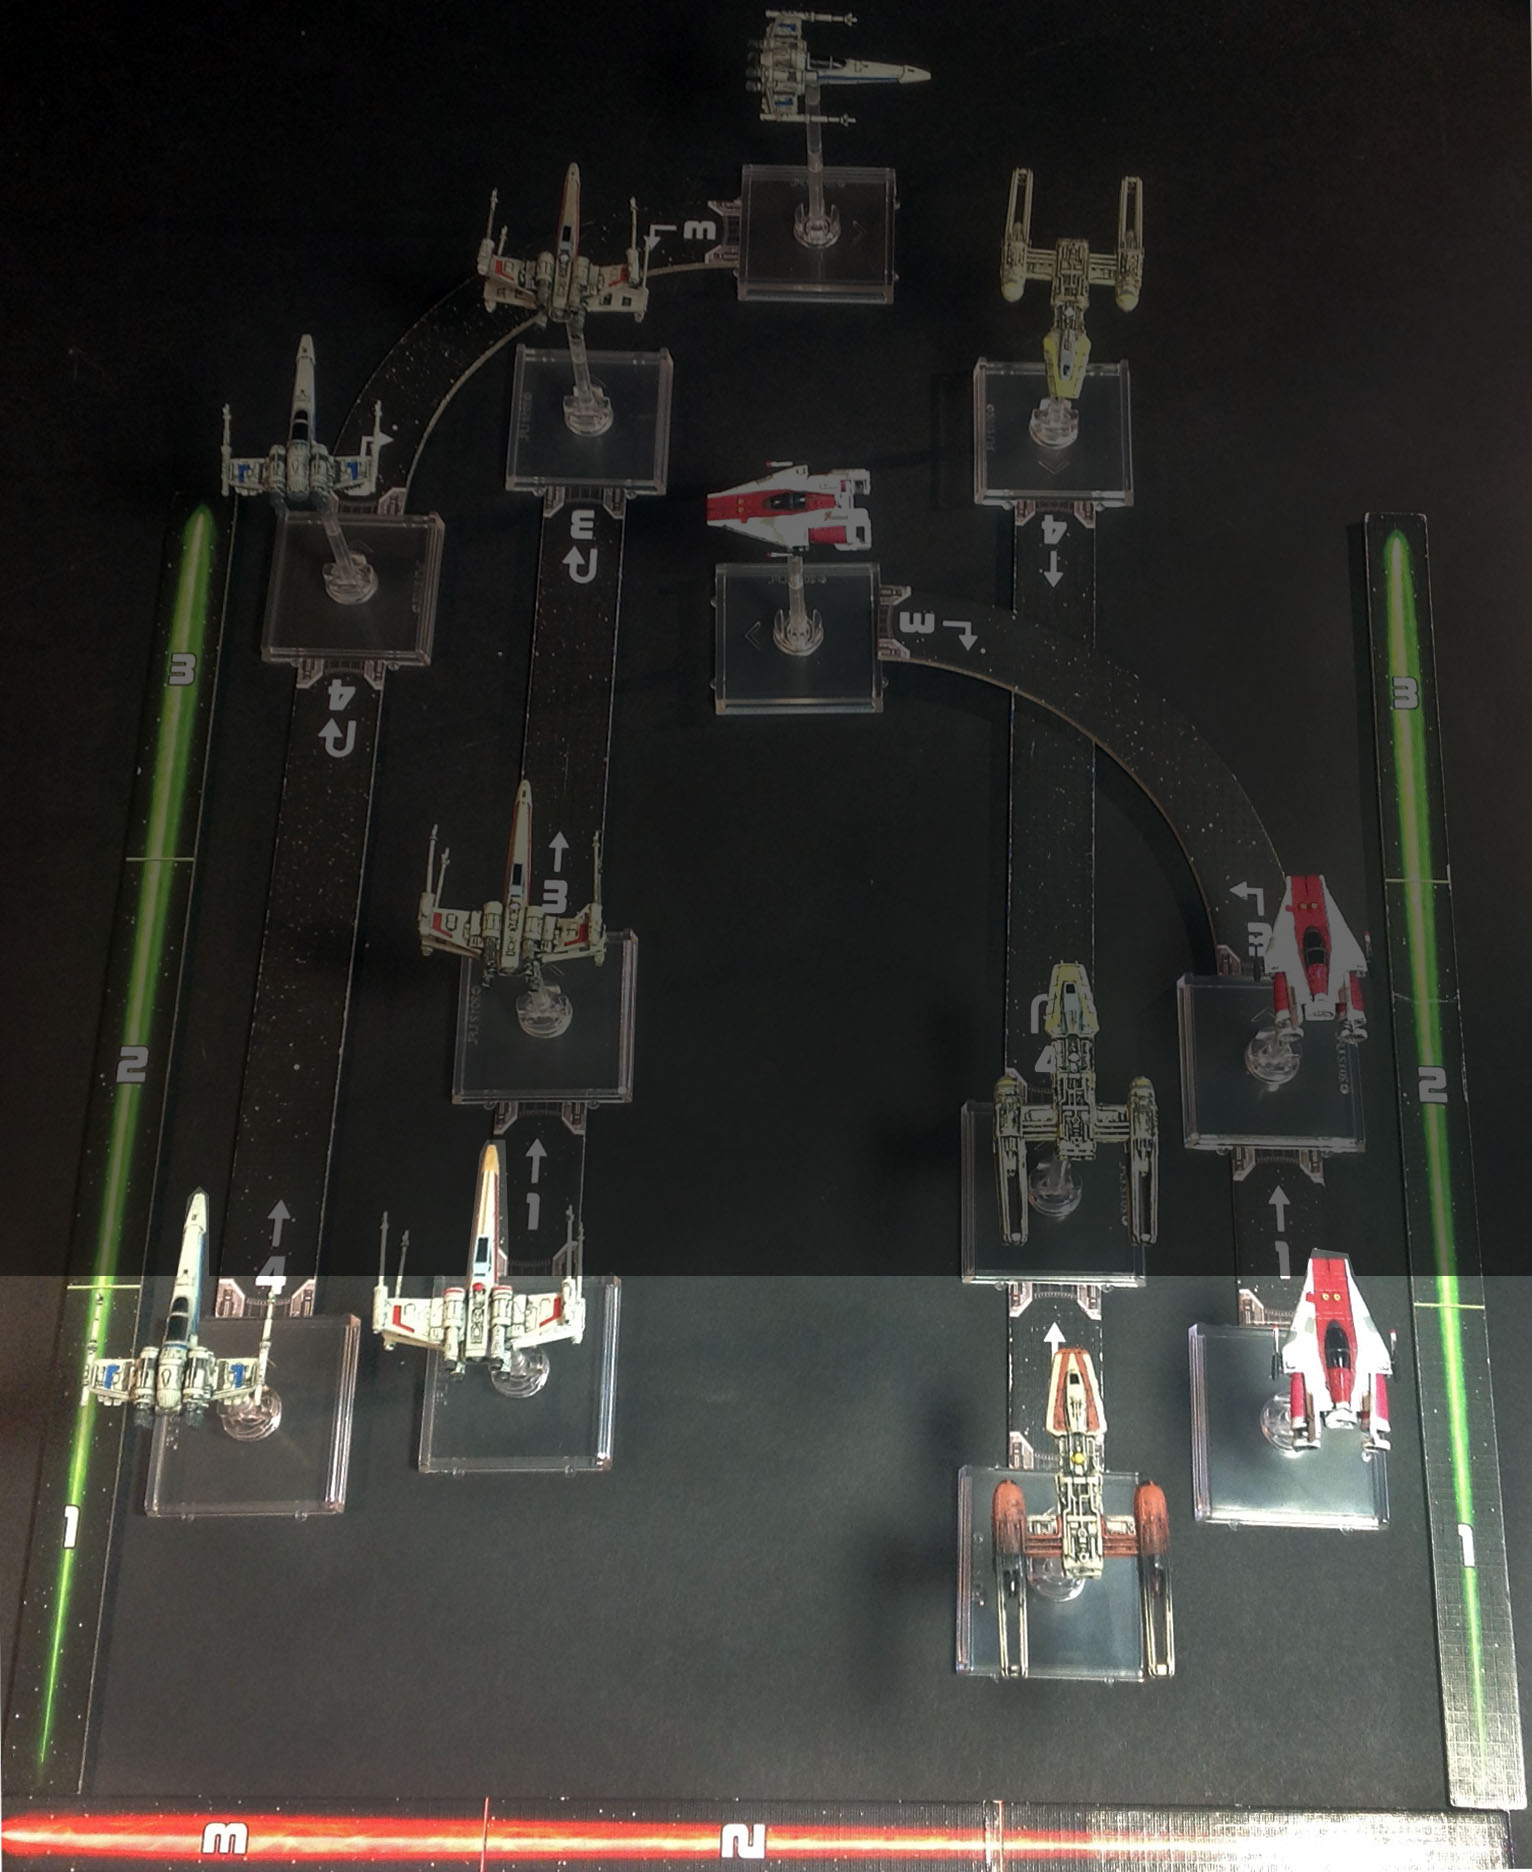
The Deployment Setup is the most crucial factor for this formation to work. The X-Wing is the frontmost ship with the Z-95 slightly off the front line and to it’s left. The A-Wing on the far right is farther back than the Z-95 and the Y-Wing is the farthest back. Because this is the most important step, you may want to work off a template or get really good at the placement. If you mess this up, everything else falls apart.
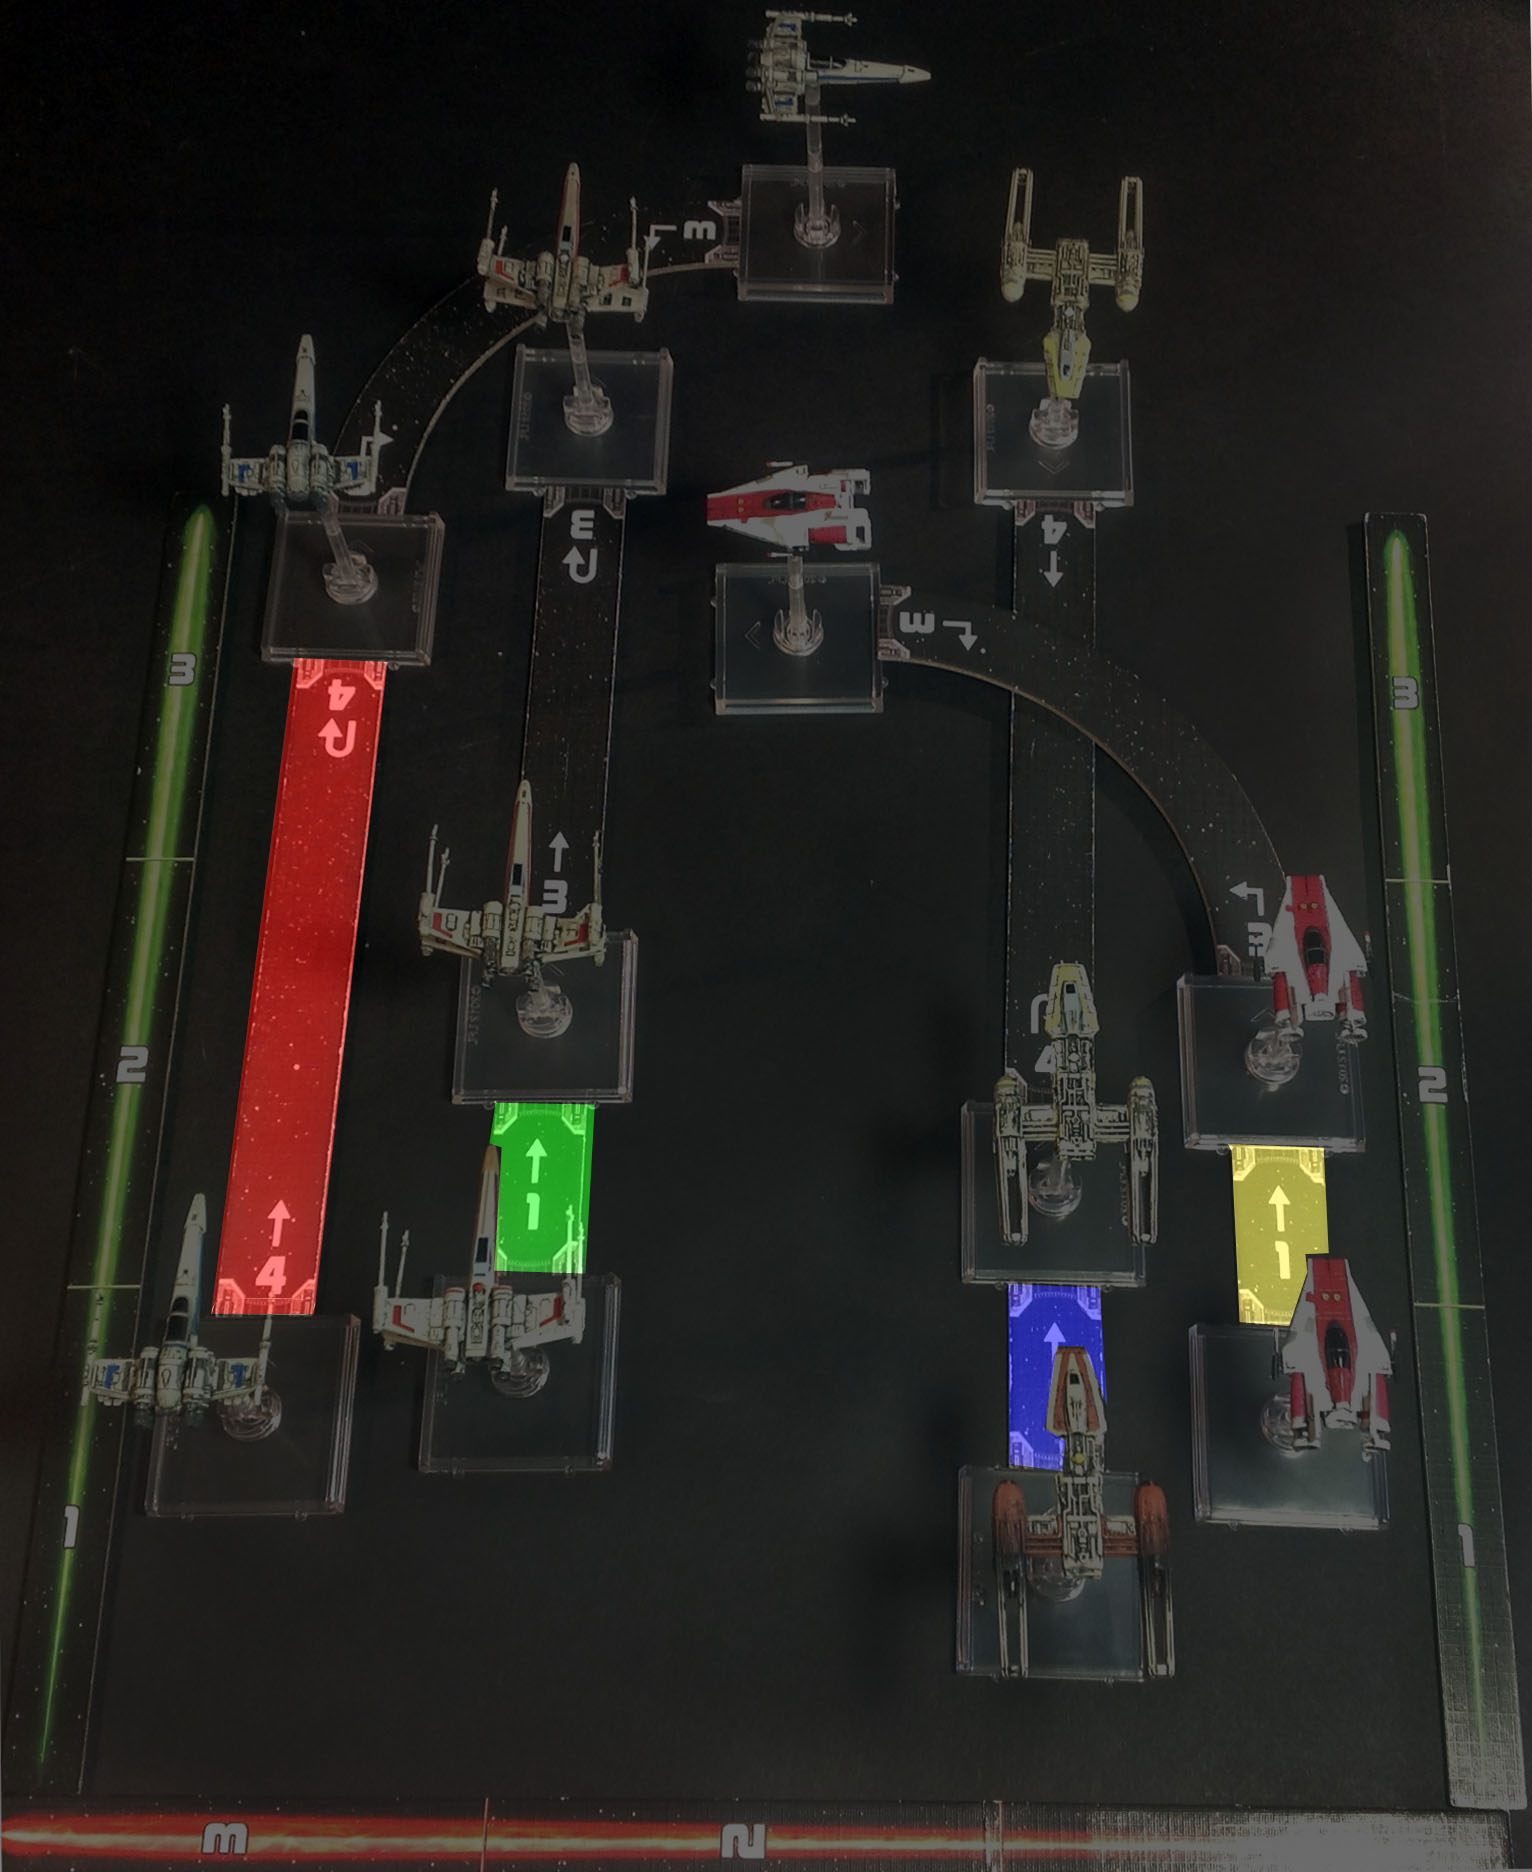
Turn One looks like a pretty simple turn. All fighters fly forward. At this point most opponents probably won’t notice anything out of the ordinary, except for your peculiar deployment of course. Once the ships start flying it will appear as business-as-usual. The leftmost ship (Z-95 in the example) goes full bore with a 4 ahead and everyone else is just going 1 ahead.
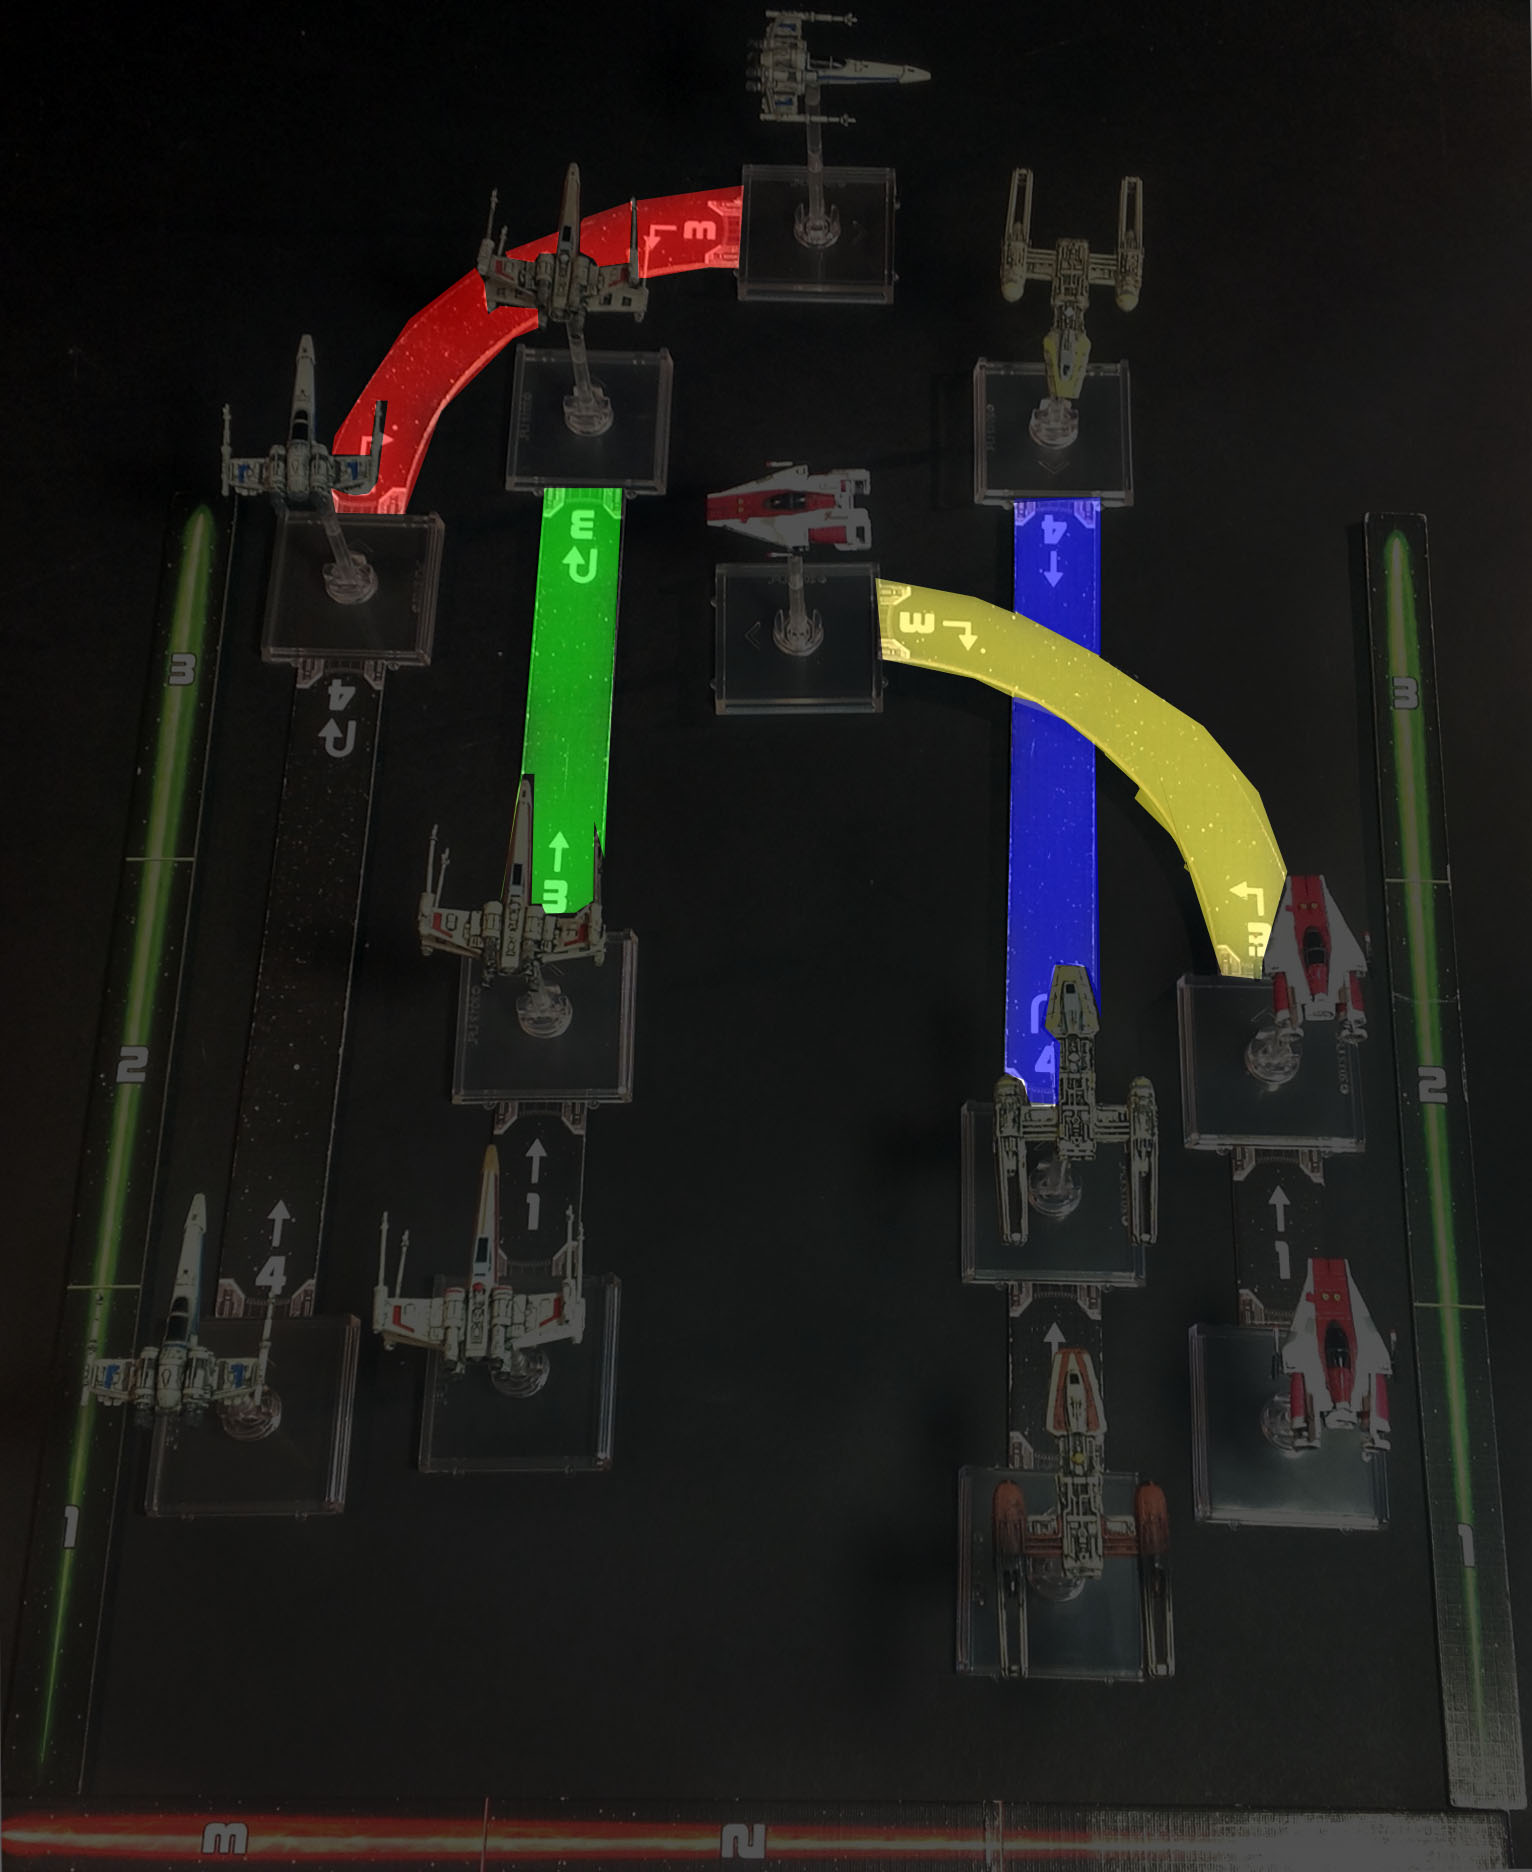
Turn Two is where the trap has been set. This is probably the second most important part of the whole maneuver. If you forget who does what then everything will be thrown off. The leftmost Z-95 is pulling a Hard 3 to the right, the X-Wing to it’s right is going 3 Ahead, the Y-Wing is pulling off a 4 K-Turn and the rightmost A-Wing is also pulling a hard 3 to the left.
Again – these ships are just visual examples and these maneuvers are things the actual ships may not be able to pull off. Check your dials and bring the appropriate ships if you want to give this a go!
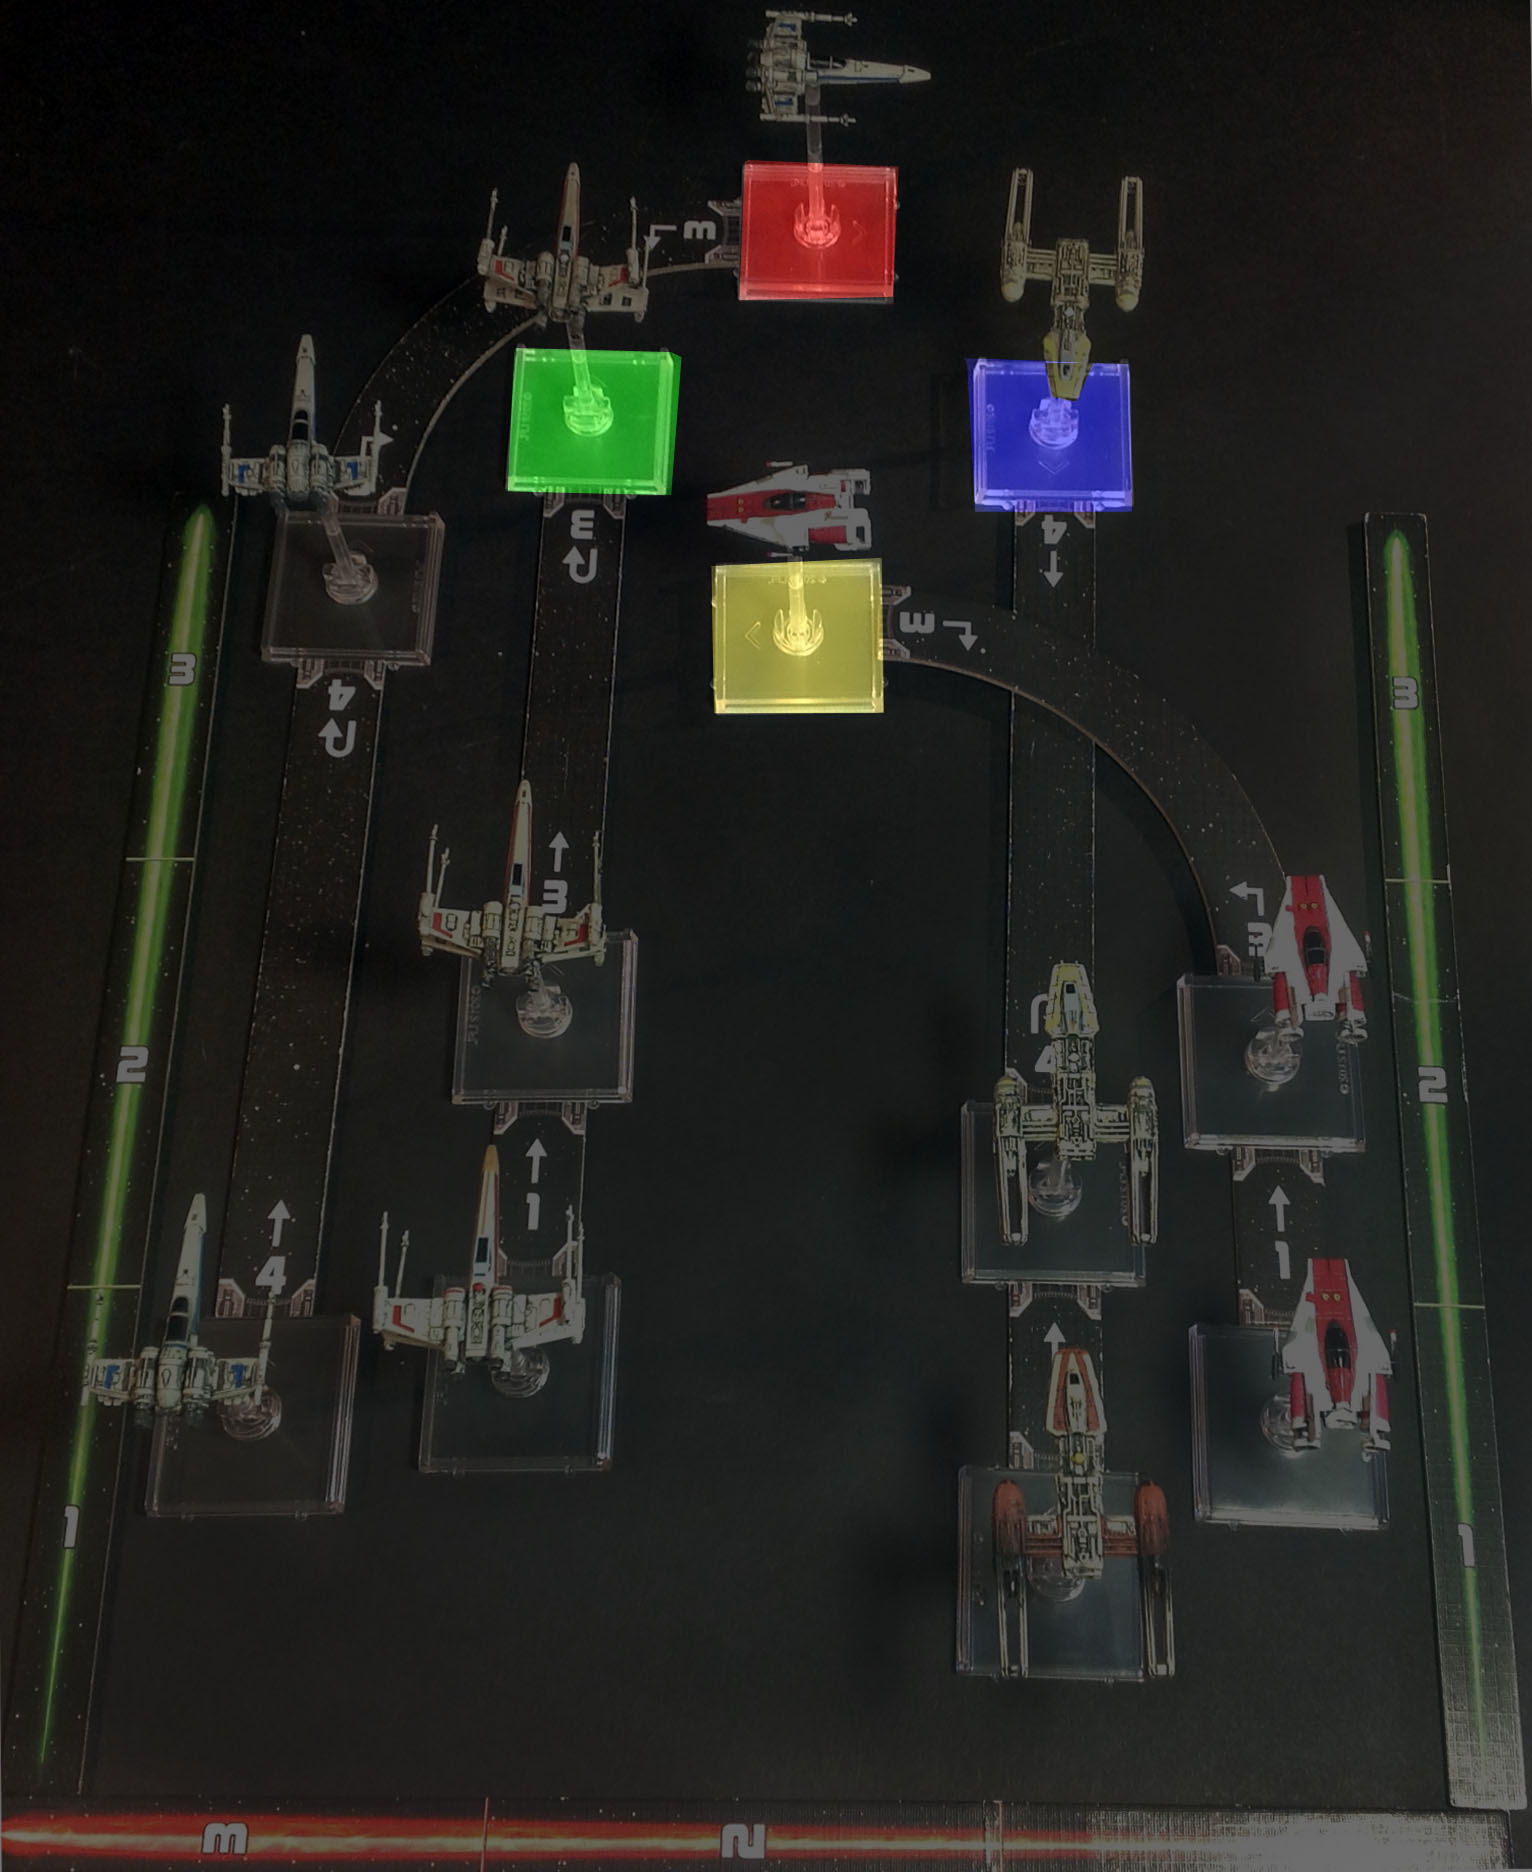
The Final Position at the start of Turn 3 now has you ready to perform this death spiral. For movement, all your fighters can now do Hard 3 Turns to the right. This will turn into a Pinwheel of Doom that expands and then shrinks back down to it’s original size over 4 more turns. The fighters will not collide (although they may get REALLY close). We found it was best to move them in opposite pairs, for example Top and then Bottom, then Left and Right.
If you can pull this one off, you’re opponents will be scratching their heads and second guessing their own actions. Don’t forget, just because you get into that spot, doesn’t mean you have to STAY in formation. You can break off at anytime to get a straggler or take advantage of a shot. That flexibility will have your opponents off balance.
However, if you stay in this formation you ships can easily cover each other, especially with turrets. It becomes one tough nut to crack as the ships are constantly rotating and no matter which one your opponent targets two other ships will be able to return fire.
If you’re looking for a recommended build to try this out, we’ve already covered that. Those Scum Y-Wings with an Unhinged Astromech and the TLT work really well with this maneuver. Being able to burn a 4 Ahead and then go immediately into a Hard 3 that becomes Green is really what makes this work. Same with the K-Turn followed by a Green Hard 3.
The concept is really what we’re trying to stress here – overlapping fields of fire from multiple ships that create a defensive circle. This same concept could be used on Big ships like the YT-1300, YT-2400, the Firespray, or even the Aggressor. The turns would have to be adjusted but it can be done.
Pilots – to your starfighters!

