Inside the Workshop: Spin Casting Mold Prep


Go behind the scenes with a Mindworm Games workshop tutorial – all about getting rubber molds ready for spin casting.
Today we are going to tell you a little bit about how we prepare a mold. This tutorial will take us through the process until just before we pre-heat the mold and add the keys/lock nuts that will keep the mold aligned during casting.
We also want to thank Slow Death Games, most especially because we use their fine line of Wild in the Streets miniatures for this tutorial. Thanks CK!
Now, all of you should know that we here at Mindworm Games are relatively new at this whole spin casting business. There are doubtless folks in the biz who would shake their heads at the way do things, and we’ll probably make a few (more) mistakes here and there. But these methods have worked pretty well so far.
And of course a good way to get the best information is to tell everyone what you know. If you see us doing something profoundly stupid, feel free to correct us!
It follows me no matter where I move…
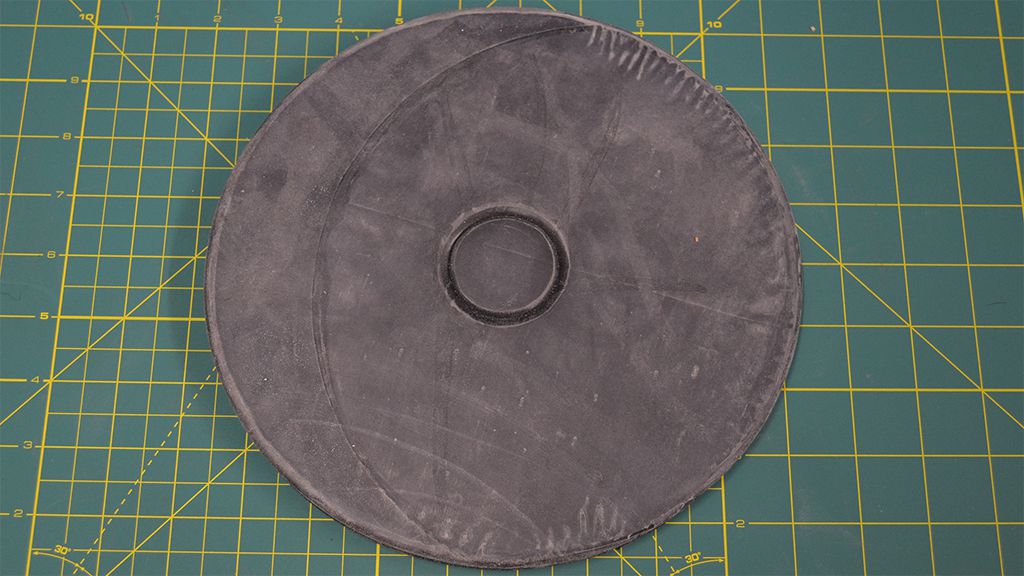
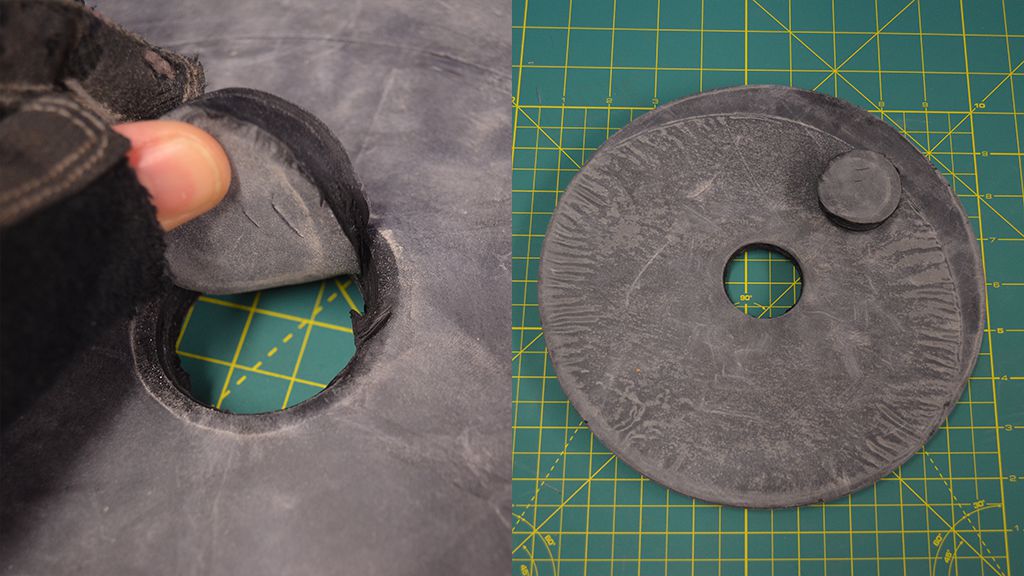
Here we have a basic organic rubber mold blank. As you can see in the pic above, the top half has a pre-cut hole in it. The first thing to do when prepping a mold is tear out this plug!
A little foreplay is a vital part of the process
It can sometimes take a little elbow grease to rip out the plug, but afterwards you have a convenient hole in the dead center of your mold.
That’s some smokin’ hot ladies right there, and you made fun of goths…
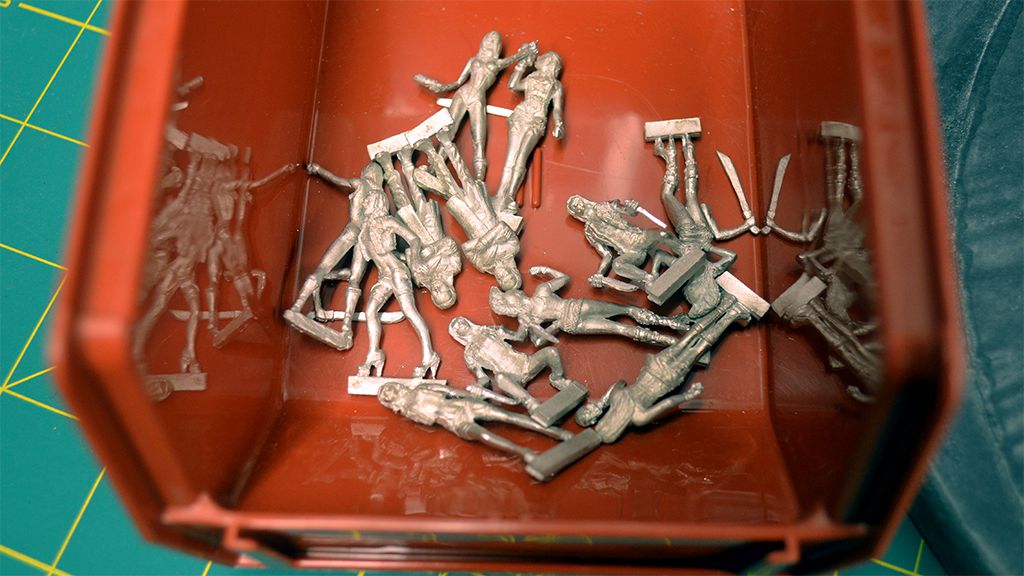
Here we have the practice miniatures we are going to be making a mold of.
We have two sets each of the Slow Death Goth Gang Starter and Murder Cult Girls Starter. These lovely models were cast by Valiant Enterprises Ltd, a US company which provides top notch contract casting services, if you’re looking.
Normally one wouldn’t (A) make a production mold from production casts or (B) make a family mold of two different product codes, but this is just for the LOLs.

GET TO THE TUTORIAL ALREADY!
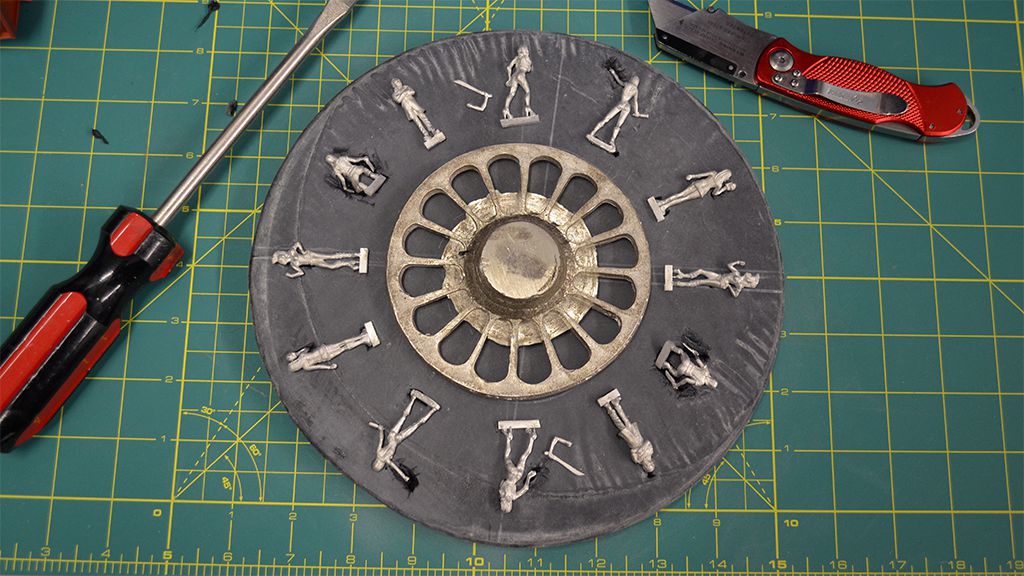
Okay, so the first step is to lay out your mold. The idea here is to figure out where the individual models are going to be located. You want the mold to be well balanced, have plenty of space for keys/locator nuts, and you want to leave room for your gates/vents, i.e. the way metal gets into a cavity and the way air gets out of its way.
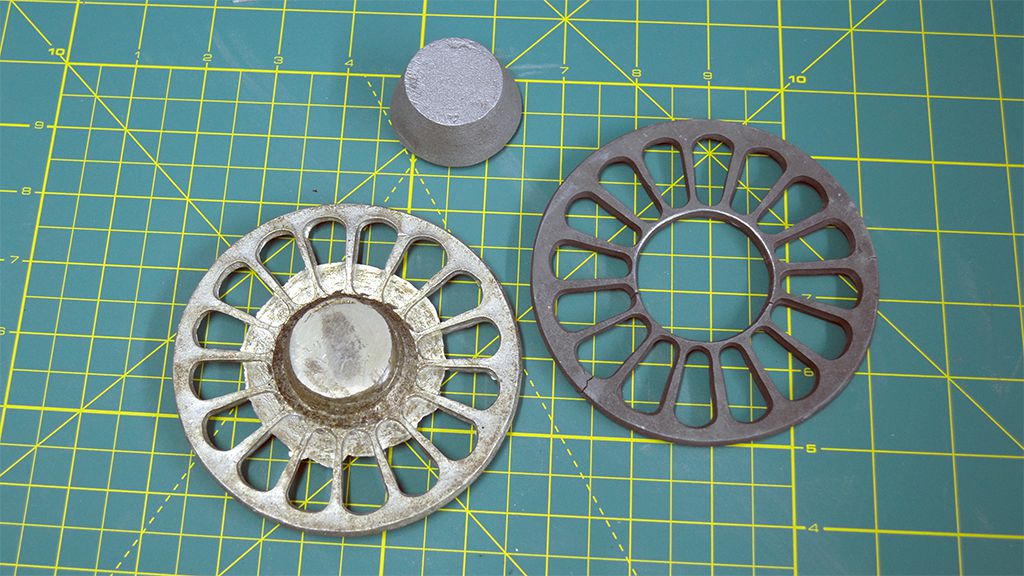
In the center of mold blank is our plug/gate form. Normally these two things are separate pieces (see below), but we have created a time-saving agglomeration of the two.
Give my creation LIFE!
The center plug maintains that all too critical hole in the top half of your mold, and the gate form keeps you from having to hand cut a ton of gates. It can also improve the flow of metal. Reaper, for example, uses a gate form with a spiral shape to it. The one above is a crappy Tekcast product (that cracked after like two molds).
The next thing to do is decide how you want to orient each model in the mold. You not only want to be careful about where the part lines end up (where the two halves of the mold meet), but you need to watch out for undercuts too.
Undercuts shouldn’t be a problem if the model has been designed well, but you want to keep part lines in easy to clean areas, or at least we like to!

It beats me where that blue color came from on her arms. Aliens, maybe…
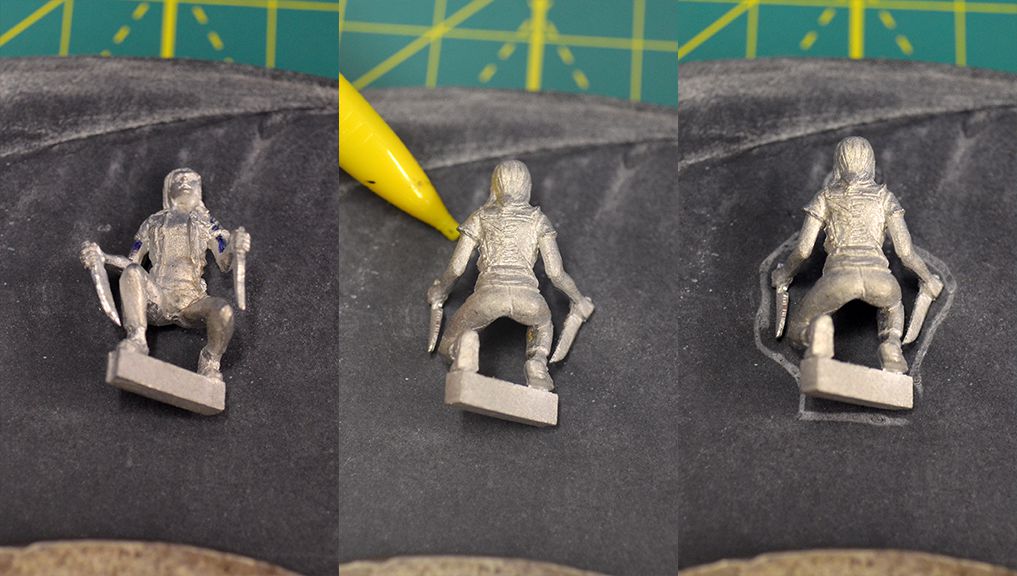
The other thing you need to pay attention to is where the pressure is going to be applied when you cook the mold. Your mold will be nice and pliable if you pre-heat it properly, but you don’t want to wind up cracking a fragile original or deforming a master.
With the miniature in the pic above, we decided to place her face down in the mold, and also remove material from the bottom half of the blank in order to take the pressure off of her arms. Otherwise, the highest point on the model would be that oh-so-bendy left arm, and it is liable to get bent out of shape.
Let’s take a look at how we did this:
First, we marked an outline of the model by scratching the surface of the mold blank.
We only use the highest quality tools
Next, we pressed the model into the mold to create an impression.
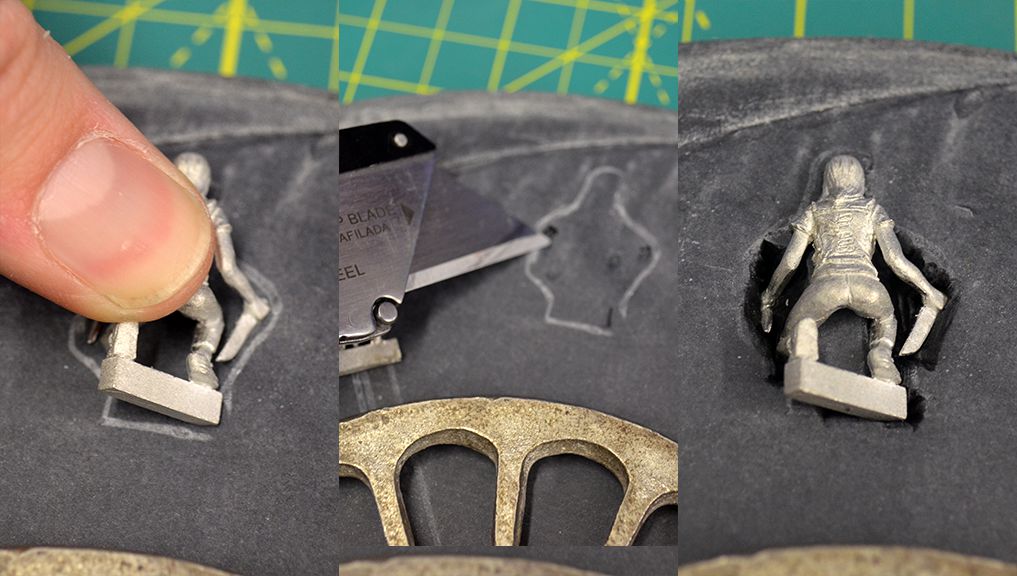
You can’t see it, but that is a HUSKY brand razor blade. Very fancy!
Finally, we cut into the surface of the mold with a razor blade and removed enough material to sit the model into the mold with all her parts more or less supported.
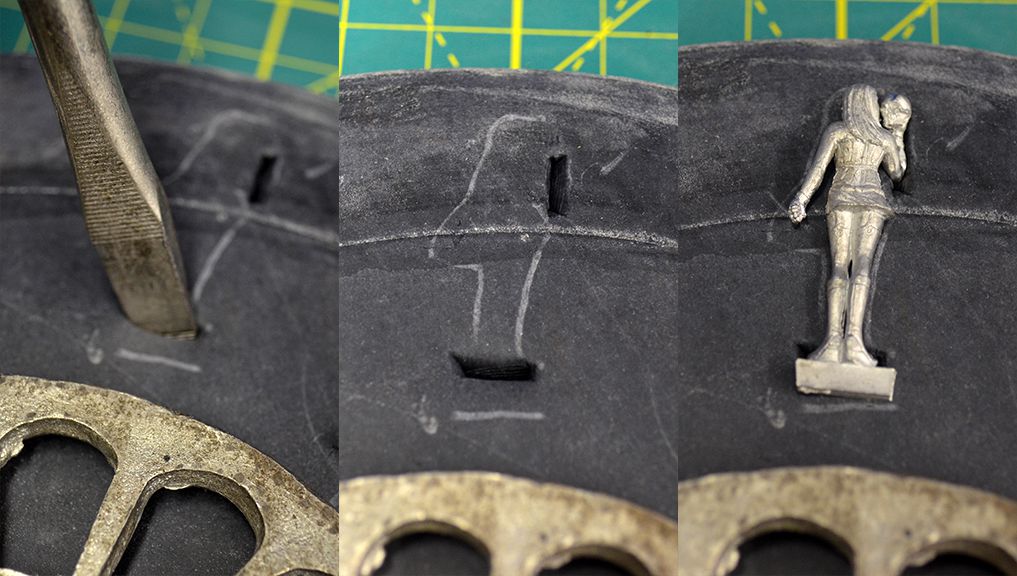
You can do this the quick and dirty way with any sort of prodding implement, like a screw driver. Here we have created some indentations to hold the model’s toes and elbow so she will sit nice, flat, and well-supported in the mold.
Screw that!
All of this prep work is one area where we are likely going to get some disagreement with various professional mold makers.
There’s many schools of thought and lots of strange proclivities out in the world when it comes to making molds, and as much habit, guestimation, and ritual as objective methodology.
Josh Qualtieri (ZombieSmith), for example, cuts all his gates and vents with a safety razor!
Forrest Harris (Knuckleduster) says we do ‘too much work’, and that all one really needs to do is pre-heat the mold and then allow it to ‘find its center’. For his part, Josh will jab holes with a screw driver, but he doesn’t cut into the mold, and neither he nor Forrest build up the surface of the mold, which is something other mold makers will often do.
Phew! Now it’s ready for heating and lock nuts.
And that’s it!
All of the miniatures are comfortably arranged, aligned, and supported to our satisfaction. Now it is time to stick this baby in our mold frame that has been pre-heating this whole time and get read to crush it under 2,000 pounds of pressure!
Our Instagram usually has some surprises
We reserve the Twitter feed for our weirdest bullshit!
~ More later and be sure to leave any questions in the comments.

