Hobby: Painting Sector Imperialis Tiles

Hey Gang, Ryan here from the WGCX terrain studio. I’m responsible for the table design and procurement of anything beyond the armies that end up on our top tables at WarGamesConX. I’ve got some fun projects going that I’d like to share.
I took over terrain for the con last year, and have tried to ensure that we provide the best table terrain we can while also factoring in game play (they keep telling me line of sight blocking terrain is important… I’m not seeing it …get it? Oh DAD Jokes). Recently I had a terrain day with Mars (who took all the photos), Goatboy and our local jam enthusiast Chris (the man makes the finest BlackBerry spread you’ve ever tasted).
I’m working on 2 full terrain tile sets that will be done up gritty industrial sectors to use at the con this year. This tutorial focuses on the Sector Imperialis tiles from GW; I’m also working on a set of Realm of Battle Cityscape tiles from Forgeworld for the con.
Let’s get started!
Base Coat
Spray Black Primer – I like Dupicolor in a can, its enamel based auto primer that has great teeth and is hard as nails (i.e. anything will stick to it and it doesn’t dent, ding or scratch easy). You’ll need to factor in durability when designing and painting terrain because thousands of dice are going to be bouncing off the surface, and it’s going to have to travel.
Silver Spray – I opted for Citadel Boltgun in a can, it’s something I had laying around and it covers nicely and the metallic flake isn’t too large. You could really use any silver spray, brushed aluminum, steel, just nothing too bright. Most of the metal foundations are square, use a piece of cardboard with a straight edge to block these in quickly, don’t worry too much about overspray because in the end we’re going to cover all those mistakes up with weathering, shading etc.
Also don’t feel obligated to paint in everything, leaving a little black showing makes thing interesting especially around the edges of the dirt.
Dark Rust Red Enamel Spray Can – Spray this on the dirt areas as a base, leave some black showing through.
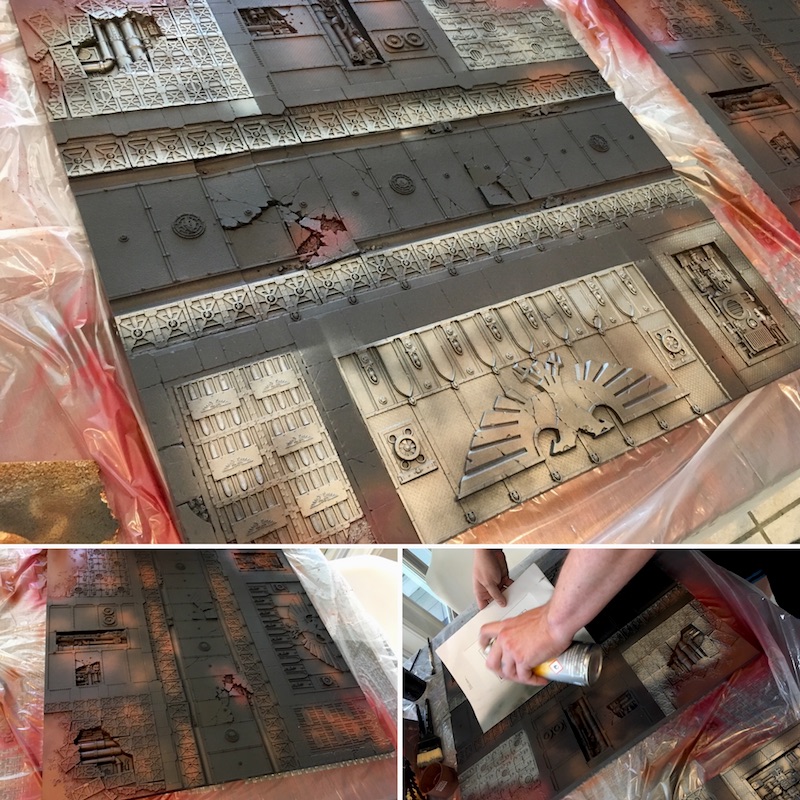
Rust Oxide- Produces an orangey brown rust color, this was used for the patches of earth as a highlight as well as light spray across some of the metal. When hitting the metal make sure you’re spraying away and above your target area so you’re getting a fine mist over the metal not direct patches, 20 inches away with the can is ideal.
Gold- I did the Imperial Aquilla in gold w/ an airbrush, any generic gold will work, a medium gold I feel is best. Go with a rich gold if you want to be bold.
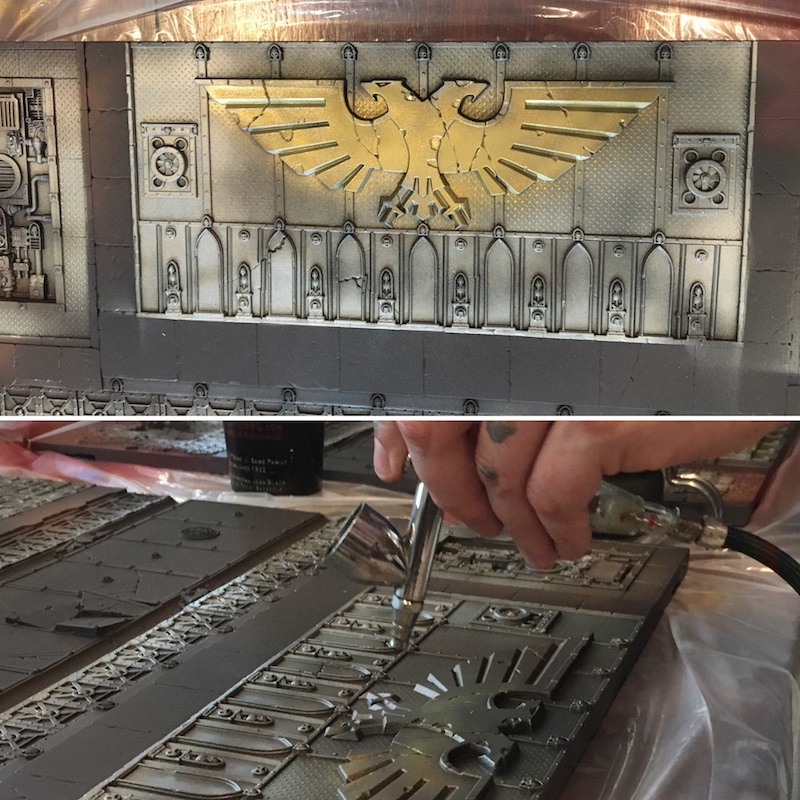
Highlights
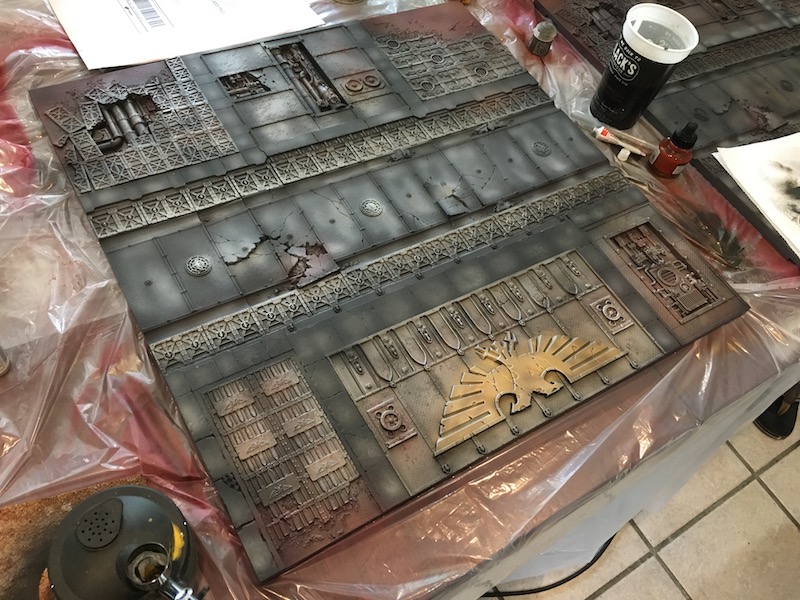
Light Grey – I used a light grey primer, but honestly any light grey, mechanicus standard grey, even white will work to bring up the highlights on the concrete portions which should still be black. Hit the centers to create color modulation or dry brush them to get the raised edges, or both, in that order.
Washes: Nuln Oil/Aggrax/Light Black Wash – Any acrylic or even an oil wash will work to shade the tile, use your favorite. I prefer to airbrush shades on tiles for time sake but a paint brush will work just as well. You want to get this everywhere, metal, concrete you name it.
I alternate between a dark black wash, soft black wash and a brown. Paint and water will work if you’re in a pinch, probably 1 part black/grey to brown to 8 parts water, make sure you’re not letting things pool (though this does add some fun patterns to concrete). Make sure that you cover those concrete highlights to bring them back in line with the tone of the tile you’re working. You’ll notice that dry brushing and color modulation has become tinted but not stark.
Let Everything Dry
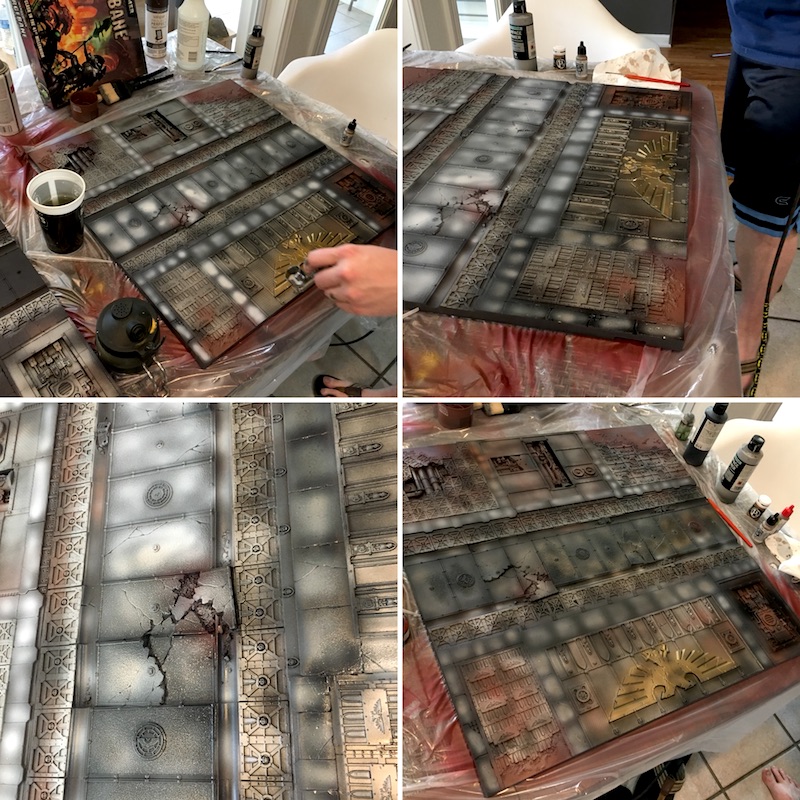
Dry Brushing
Typhus Corrosion – Using a sponge apply typhus heavily across the mechanical parts, metal foundations and on some of the concrete.
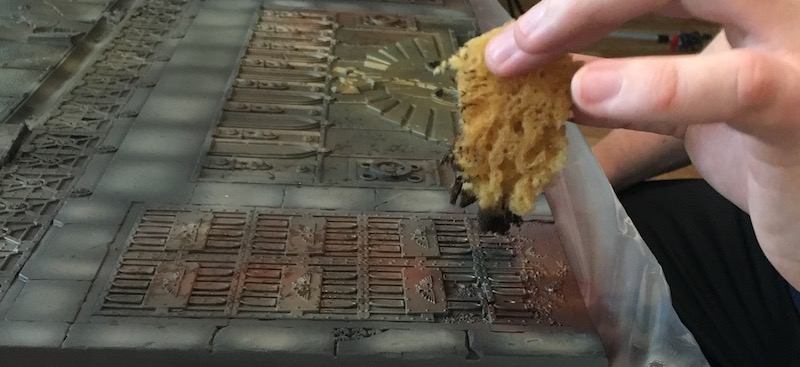
Rub N Buff Silver/Pewter – I use this product on a larger brush, it’s a gilding wax that you can find at nearly any arts or craft store. A little goes a long way.
This is the secret to really realistic metal. Something about the luster and the scale of the pigment really sells the effect. I used about a single peas worth of wax for both tiles, it goes a long way. Remember you’re dry brushing so make sure you get almost all of it off the brush prior to starting. Try your brush on some of the mechanical bits first before going hog wild. I hit all the silver, the walk ways, the foundations, and the eagle.
Rub N Buff Gold – Use this to hit the Aquila and some other small dabs here and there on any other ornamentation or metal to add some color differentiation.
Tyrant Skull/Bone/Any cream color – use this on the concrete to hit the raised edges, large brush is fine. Try and have good control and not touch any of the metal areas.
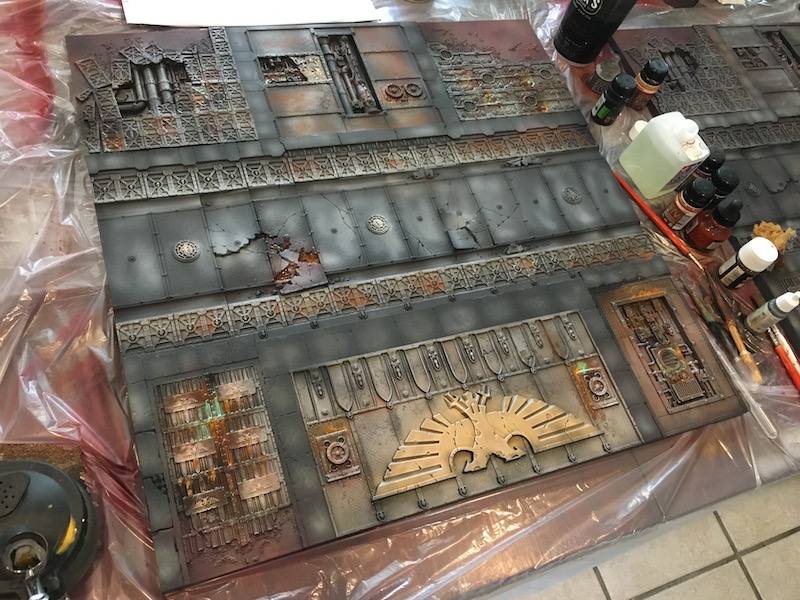
Oils Pigments and Weathering…OH MY.
Arguably the most fun you can have without just going back to finger painting. For me weathering is what I really enjoy most, and in my opinion what sells the terrain and provides immersion to players.
You can opt to apply a gloss coat over the entire tile (I usually like to do this with Johnson’s Acrylic Floor Polish, no thinning necessary) and let it setup for a day prior to weathering. This will help protect your work and create smooth surfaces in which to apply further washes and effects. In my case I didn’t have time to prep a tile for this. While not necessary if you’re using oils or enamels the mediums can be damaging to unprotected acrylic paint, do not wipe or rub areas with enamels applied to them as it will remove paint that you’ve lovingly put on.
I use an eye dropper to apply enamels onto the tile in areas where I think appropriate, a brush is fine as well, treat these like you would any other paint scheme. Your deep red brown is going to be your base, your oxide color is going to be your midtone and the bright ochre is going to be your highlight. Layering is key. Use your eye dropper and sponge to apply these enamels to flat surfaces, pipes, crevices, avoid the concrete portions. Apply enamel thinner over your work with an eyedropper or airbrush. This will cause them to run and feather, causing streaks and pulling the pigment through capillary action into crevices. Tilt the board around to get them to run in whatever direction you choose
Nihilakh Oxide – use this in conjunction with the enamels because the acrylic paint won’t mix with the enamels, think oil and water. The Nihilakh will run alongside and do its own things. Use your sponge or a brush to play with the colors, swirl them move them around.
And finally… Black – I go back with some flat black and I apply shadows and burns to areas that need it. Contrast is key here. Don’t go nuts.
Let everything dry 24hrs and seal it with a matte finish.
So – that’s it. There’s a lot of layering involved in this technique, so make sure you let things dry and don’t be afraid to make some mistakes because you can cover them in later steps.
What are some of your favorite techniques for painting terrain?
![]()
Join us for a weekend of wargaming – and a chance to play on these tiles!
Registration for Wargames Con X is open now!