40K New Terrain Showcase: Building a Giant Shrine for Kill Team

We’ve been slaving away with the new Kill Team Terrain and have step by step instructions how we built a grimdark playground for our minis.
Ok, let’s go. We had a bunch of the new Kill Team Terrain and wanted to accomplish two things with it:
- Build a small “pre-set” board that we can use for Kill Team, meaning lots of hiding places and multiple floors.
- Make it a table centerpiece that would look great and be useful in 40k games, meaning big and super tall to block even a Knight’s LoS.
Here We Go!
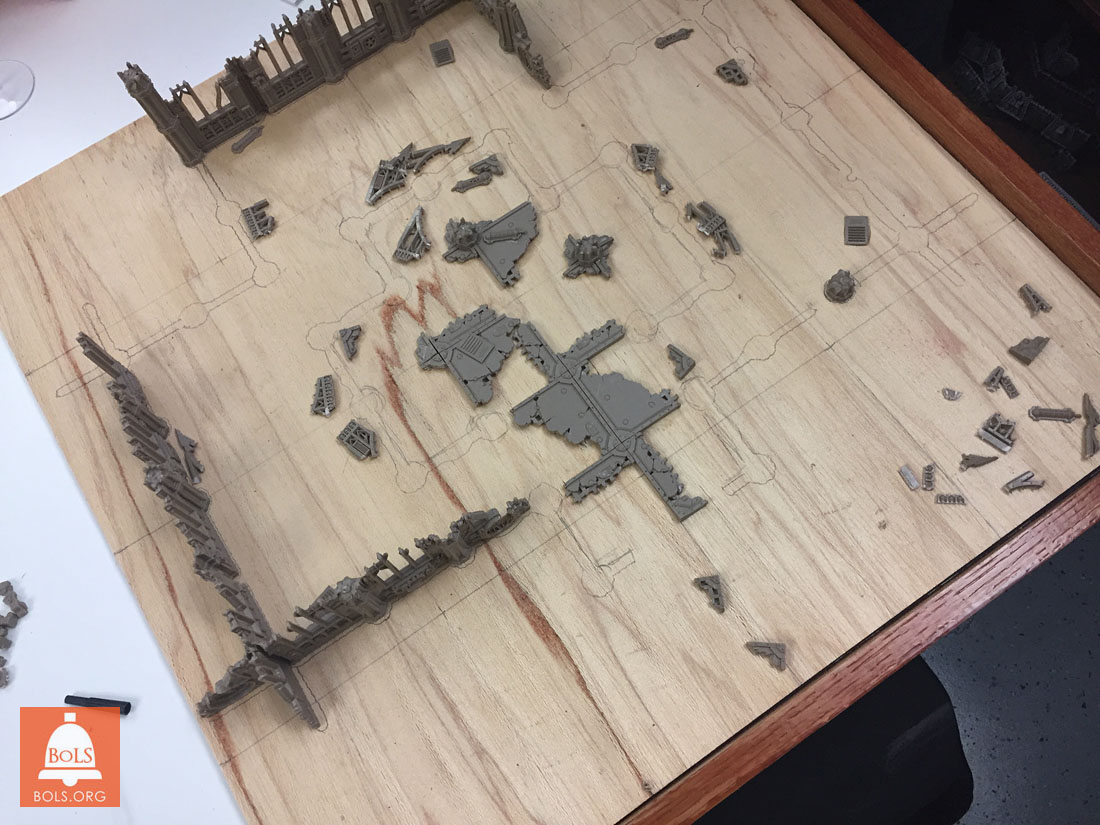
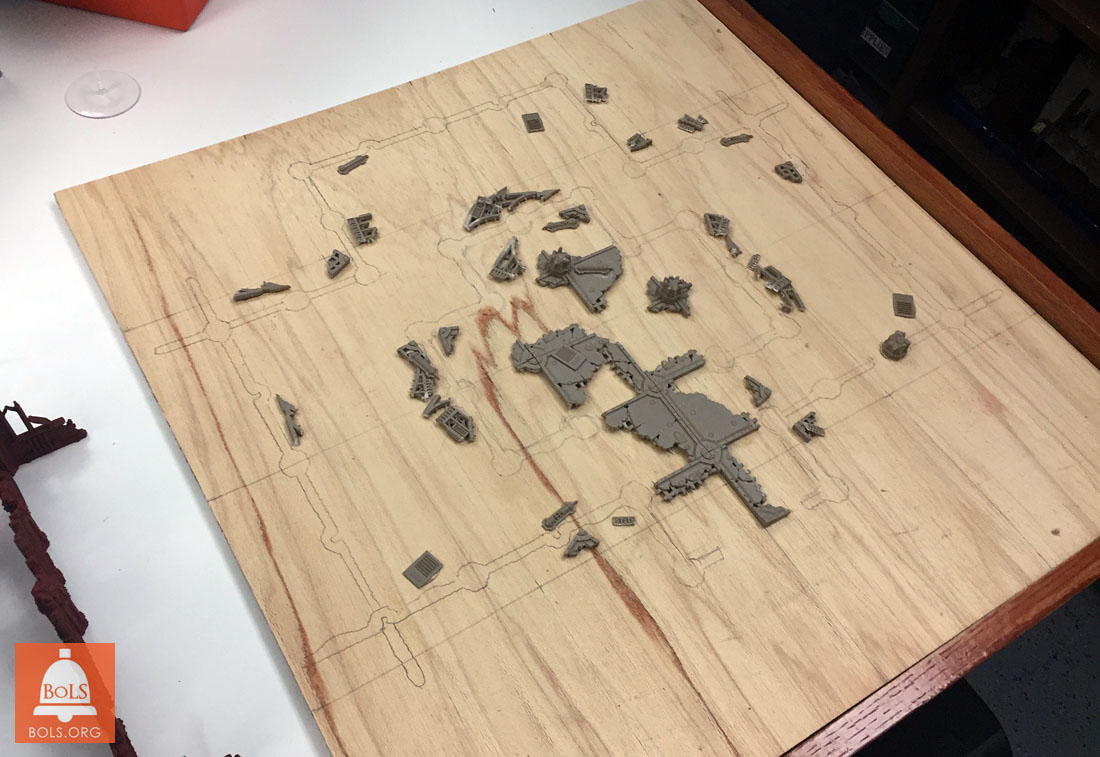
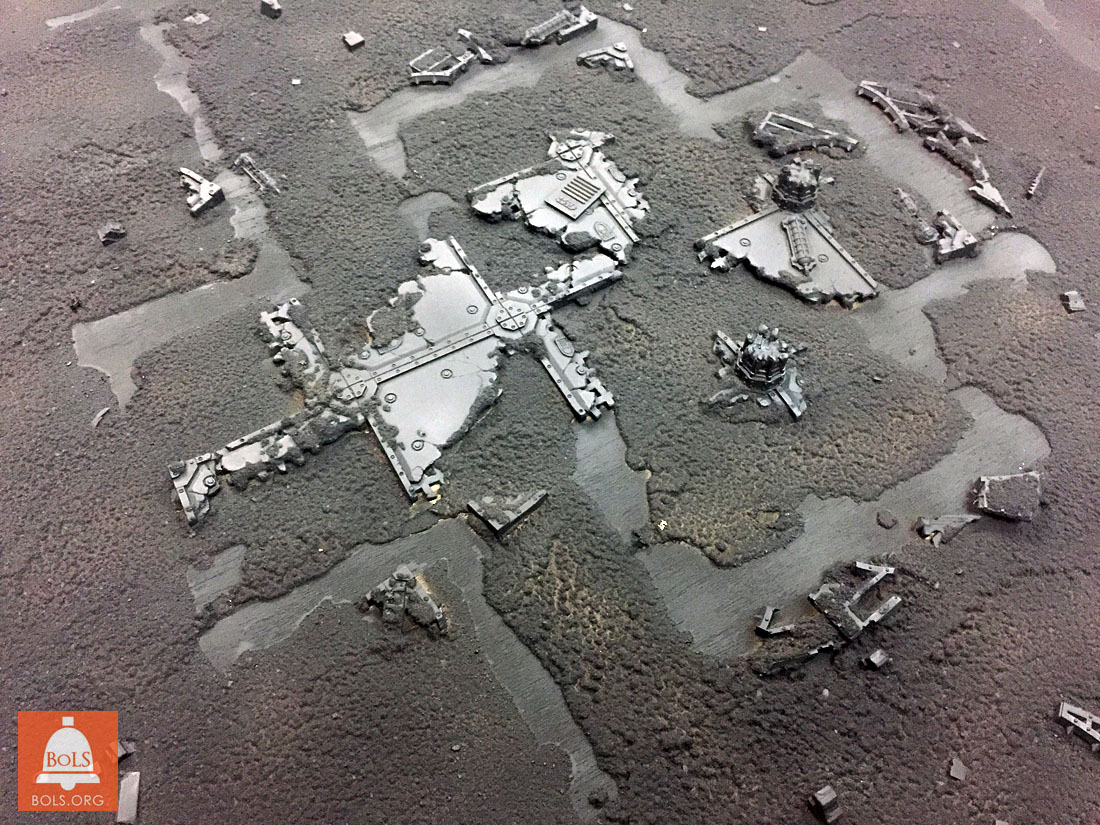
 Basic cathedral floorplan
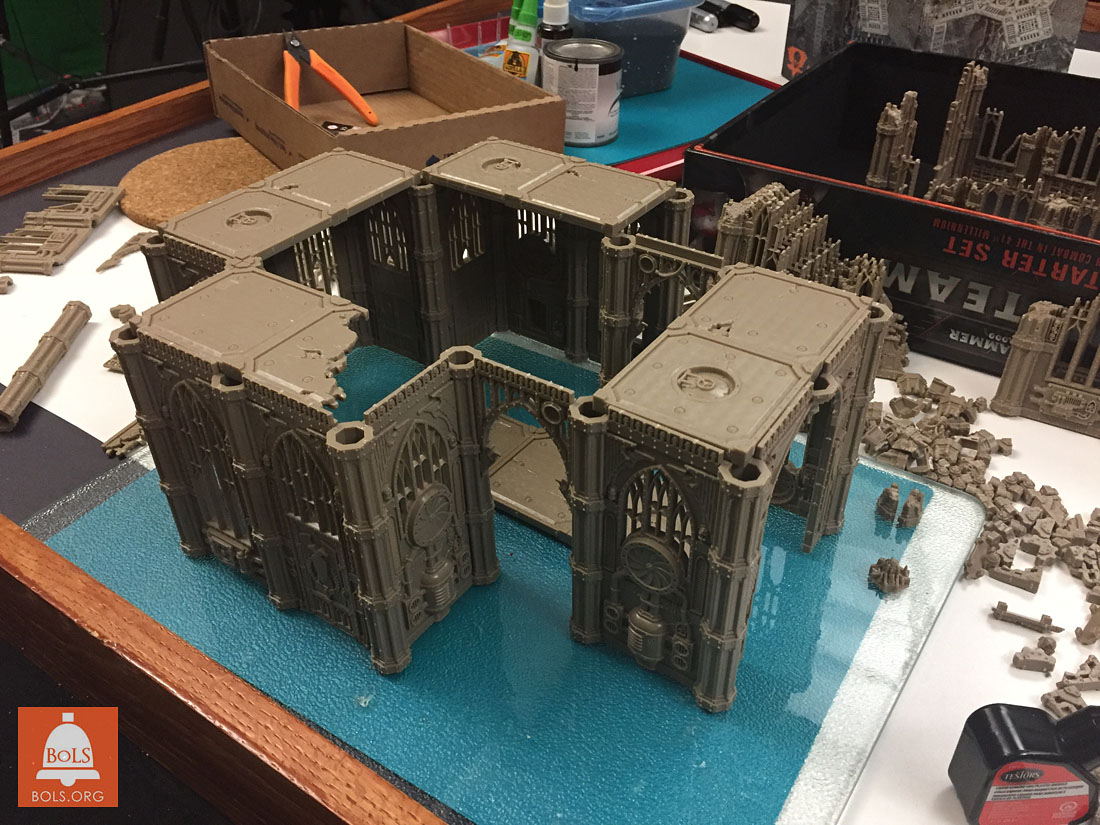
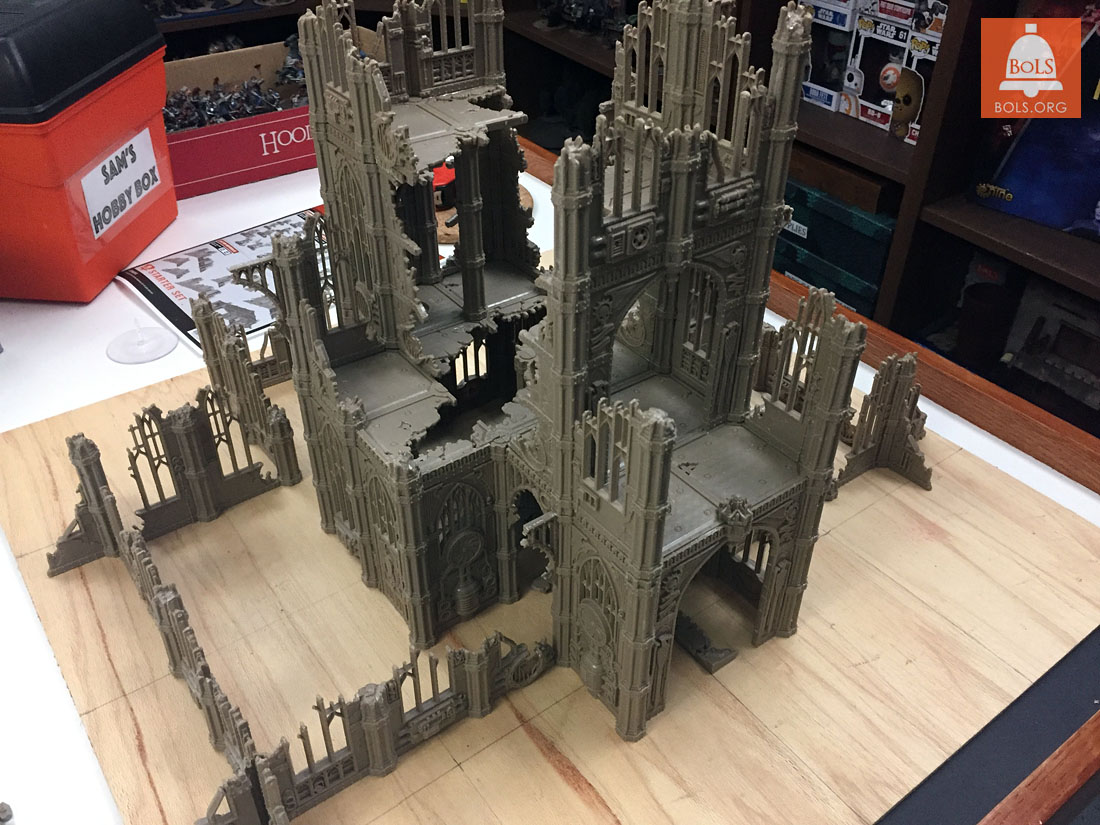
First come up with a plan. I wanted a three story cathedral. I pulled out by old college art history books, looked at gothic cathedral floor plans, the terrain parts available and made the biggest first floor I could using the cruciform shape – with the grant entrance in the front, at the end of the nave.
 Next we kept building up and up till we ran out of tall wall sections. The leftovers we decided to use to make a set of courtyard walls that form a walled walkway for shrine pilgrims who once visited. Once we had a design, we bought a 24″x24″ plywood base, and gridded it out for exact placement. (note the pencil lines)
More gridlines going down as we will want the know exactly where things go. Note the floor pieces on the ground floor…
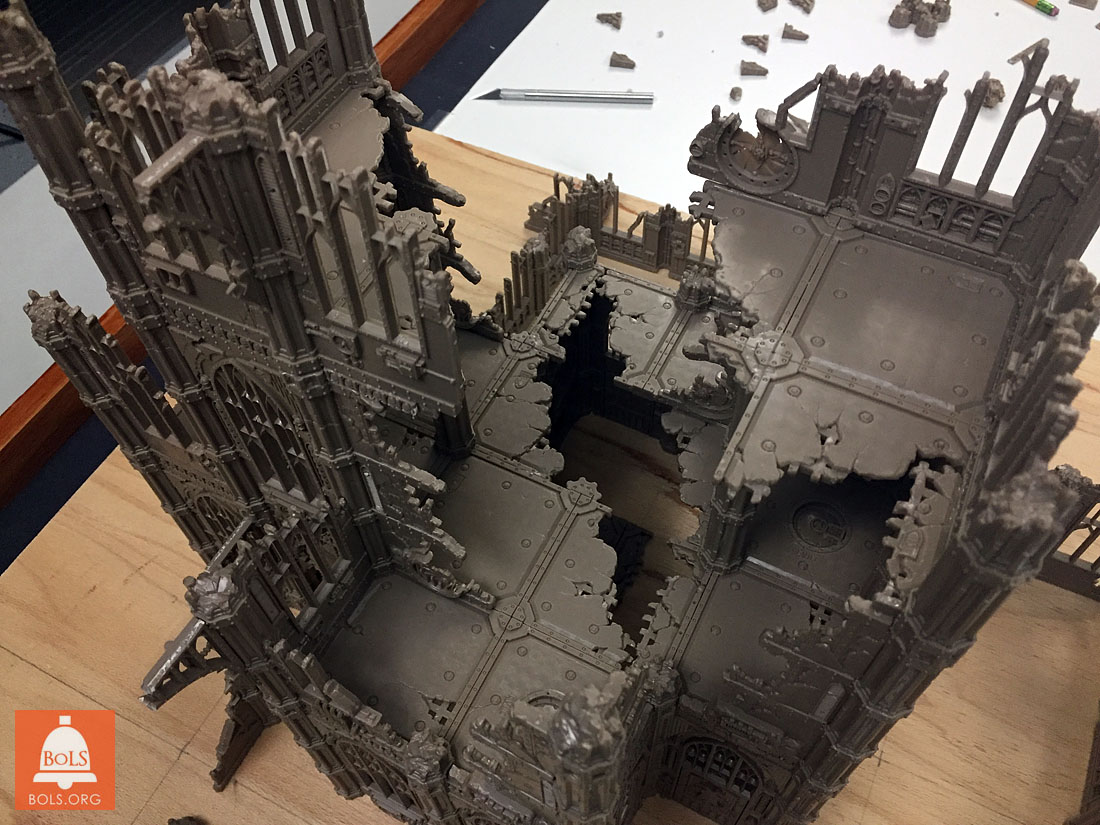 One important design goal is to give your terrain piece a narrative. When building our shrine, we decided it had been struck by a massive impact that tore a diagonal path across it. Things like this give your design a theme and keep it from looking like a hodgepodge object. We are still arguing between it being struck by either a Warlord’s close combat weapon, or an aircraft careening through it.
 Next we took leftover flooring and built a partially destroyed floor on the ground floor. Once this is covered by the main structure it will add a bit of realism to the diorama. We then began to trace the outlines of the main shrine and the walls. We will need to know exactly where they will be glued down.
Next we began to place large pieces of debris (we chopped up any extra terrain bits) and glue then down to look like they fell near the walls as the building was struck.
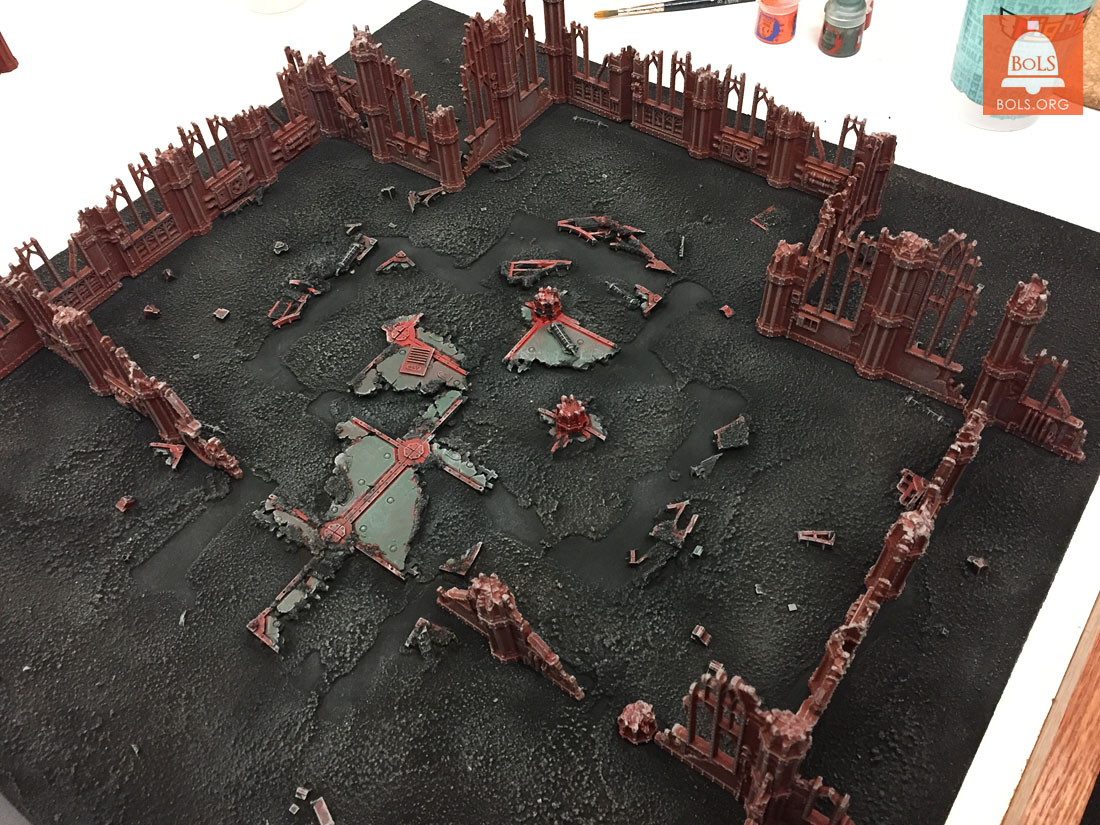
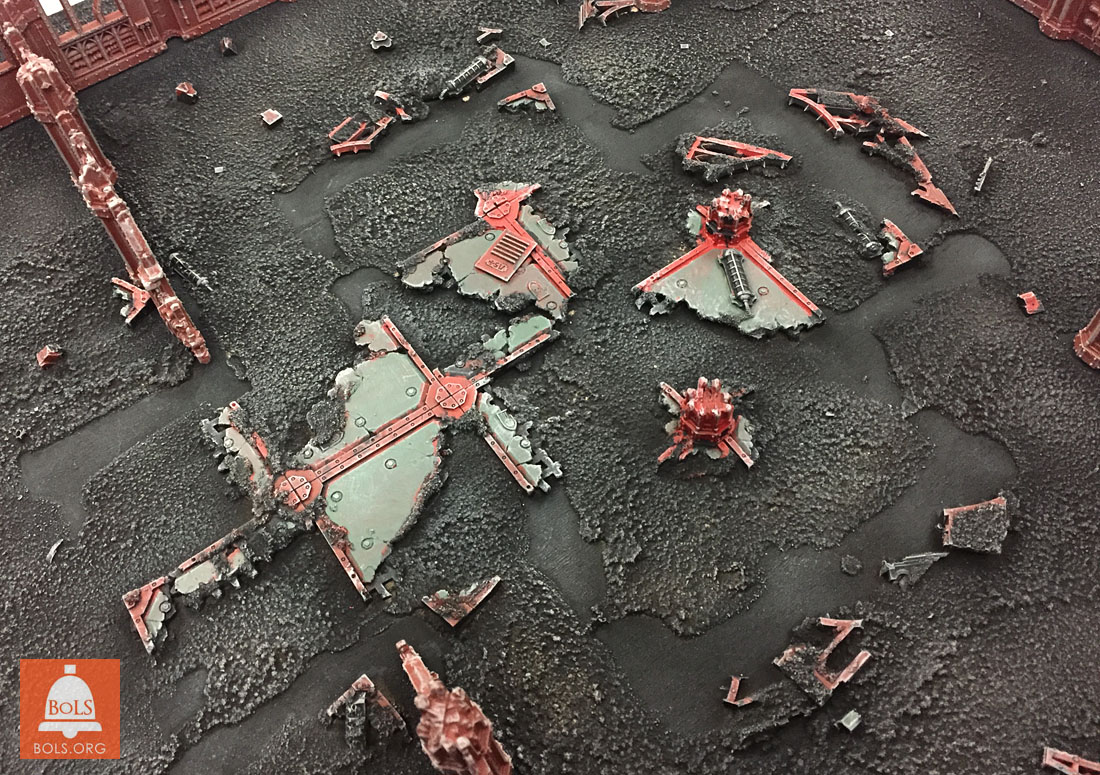
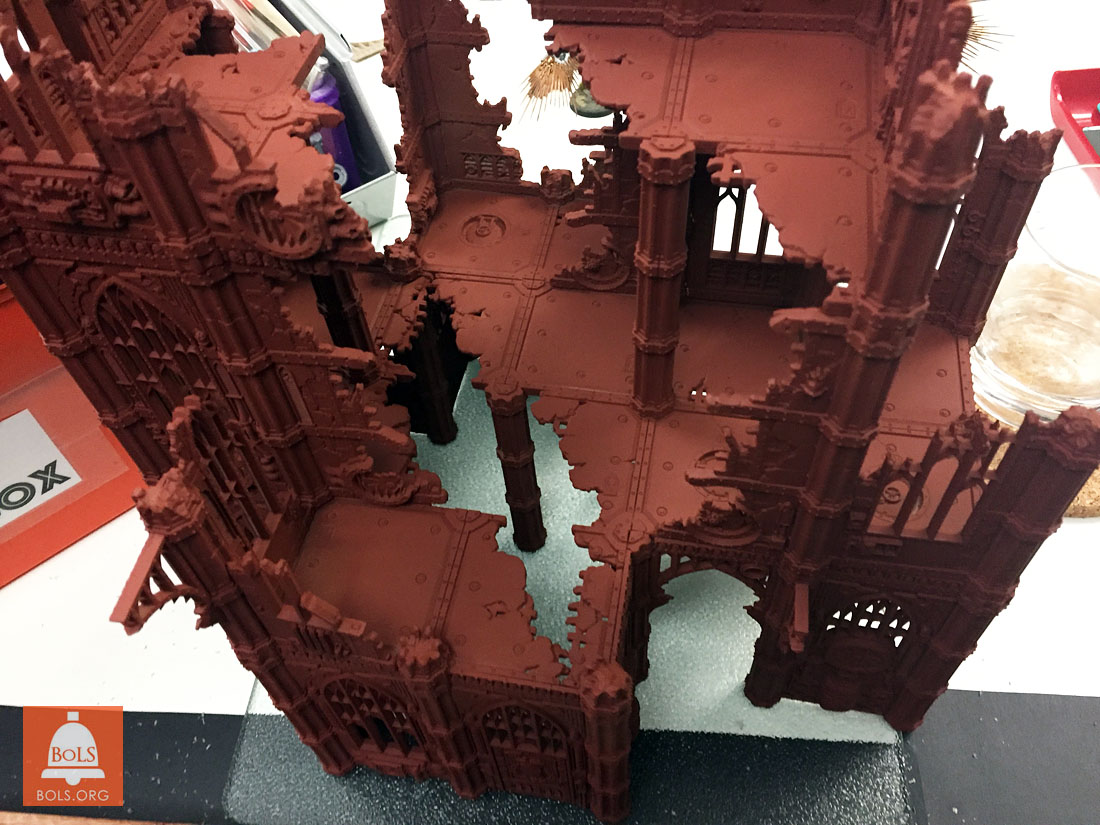 The main building is painted with cheap matte rust primer, inside and out, and from underneath.
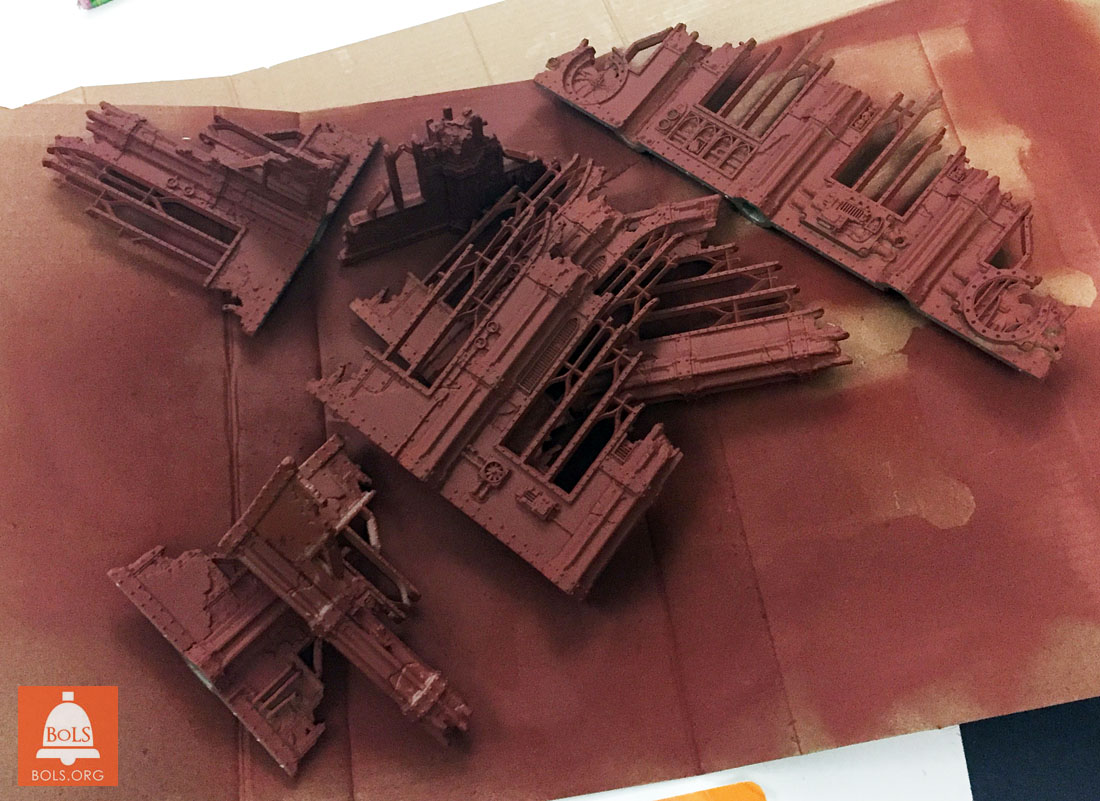 Outer courtyard walls are also sprayed.
 Next we dry-fit all the parts onto the board, only using the pencil outlines as guides. It looks like everything fits including the debris. YAY!
All walls removed, we add additional smaller debris inside the ground floor of the shrine and the courtyard walls. Now it’s time to get DIRTY!
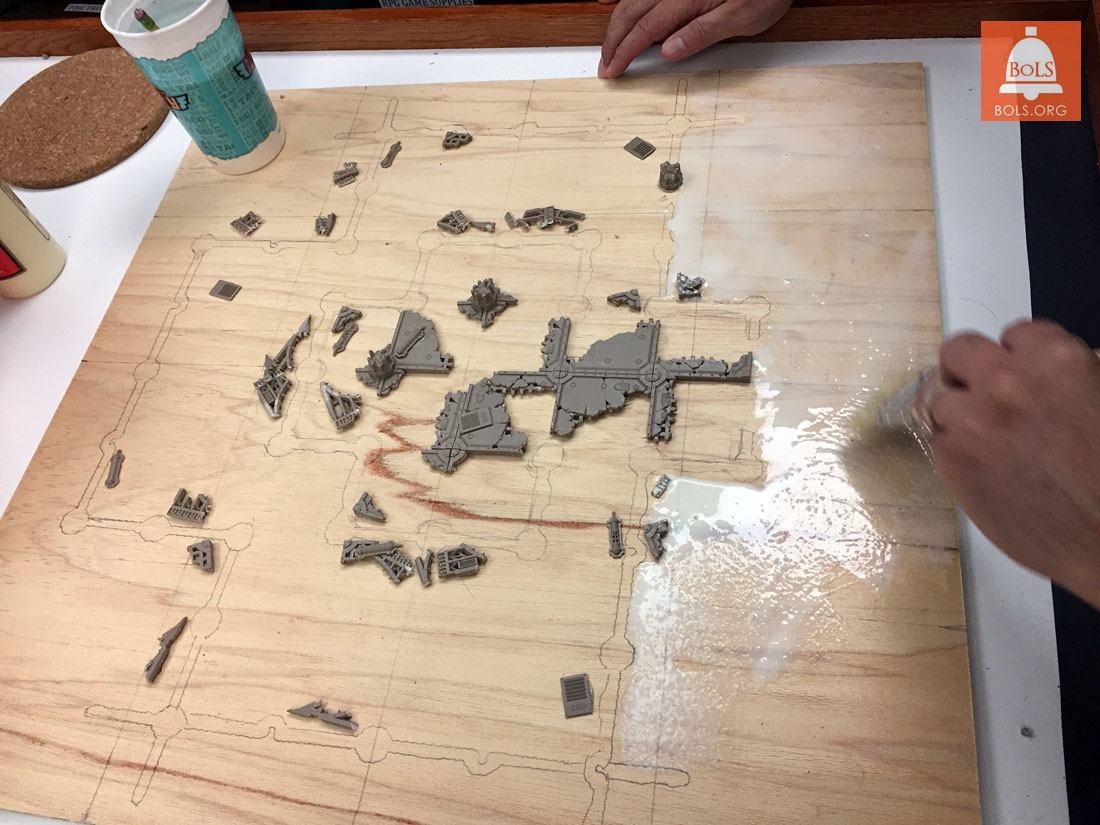 GLUE TIME! Using thin watered down wood glue we paint over the entire base – avoiding the outlines. You have to go fast (glue can’t dry), but be very careful in the tight areas… Tricky.
 HURRY HURRY! Outside we go and douse the entire thing with playground sand. Then we wait 5-10 minutes for it to set.
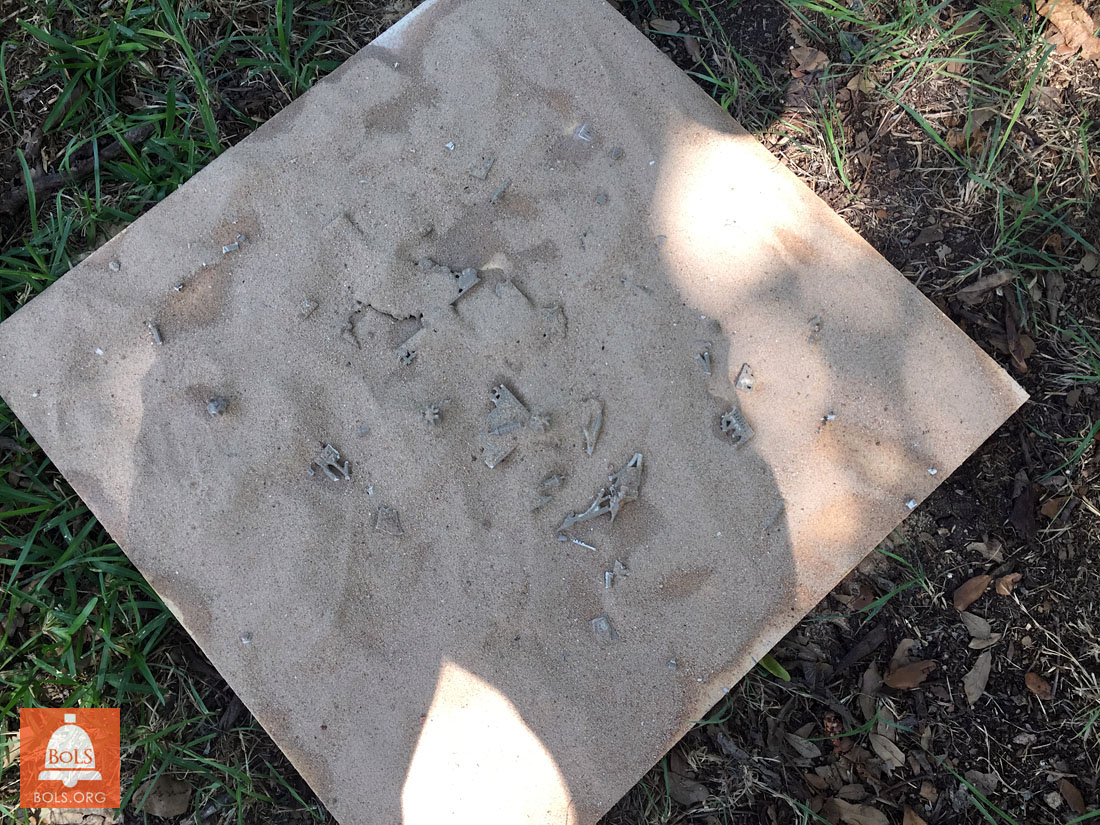
 Victory! Shake off the excess and VIOLA! A sand textured base with the clear place to glue the walls.
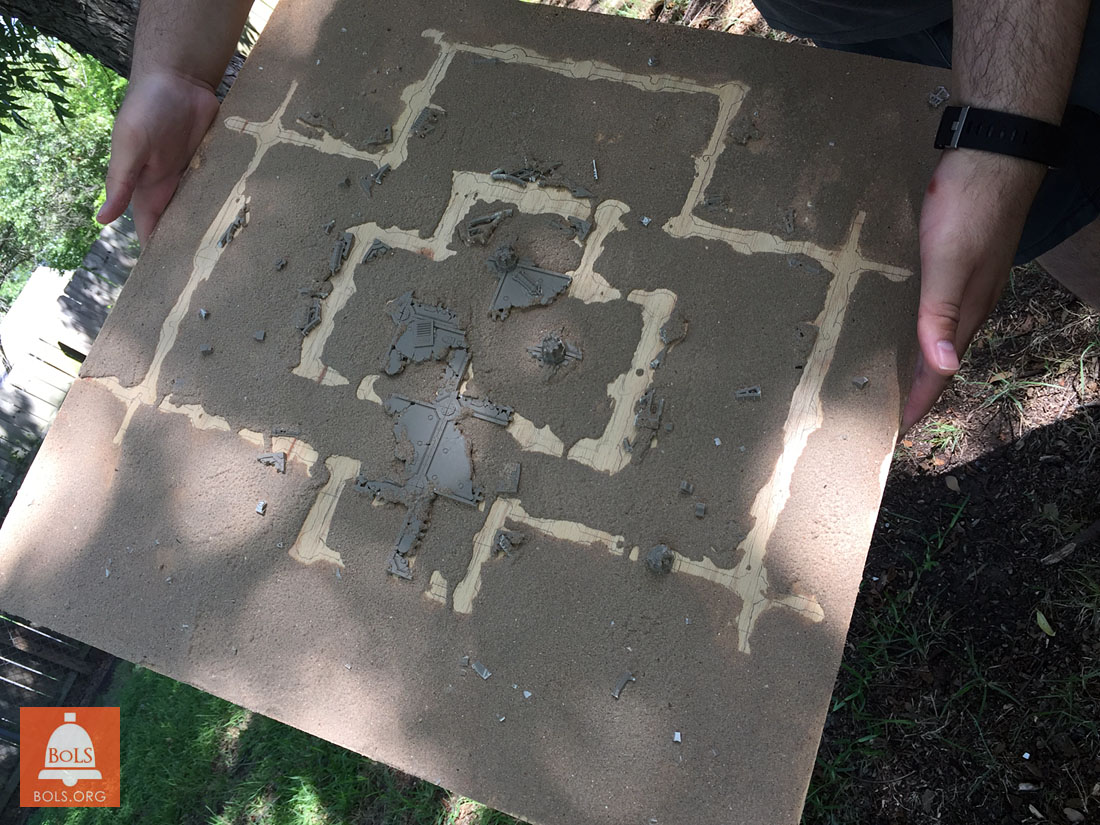
 Black spray paint the entire base.
 Time to start drybrushing. PRO TIP: Go to the hardware store in the interior house paint section and choose your desired (dirt/ash) color for drybrushing your entire terrain set from the giant wall of color samples. Buy a “sample size” in matte finish. It should cost you under $5 and get you half a pint of paint – plenty! Also pick up a 2-3″ cheap house brush. Here we’ve put on red and green to match the main shrine on the ground floor debris and drybrushed everything a tan-grey, including the ground.
More detail. This part is remarkably easy with some subtle drybrushing. Too little paint is better than too much. Take your time, and do multiple passes.
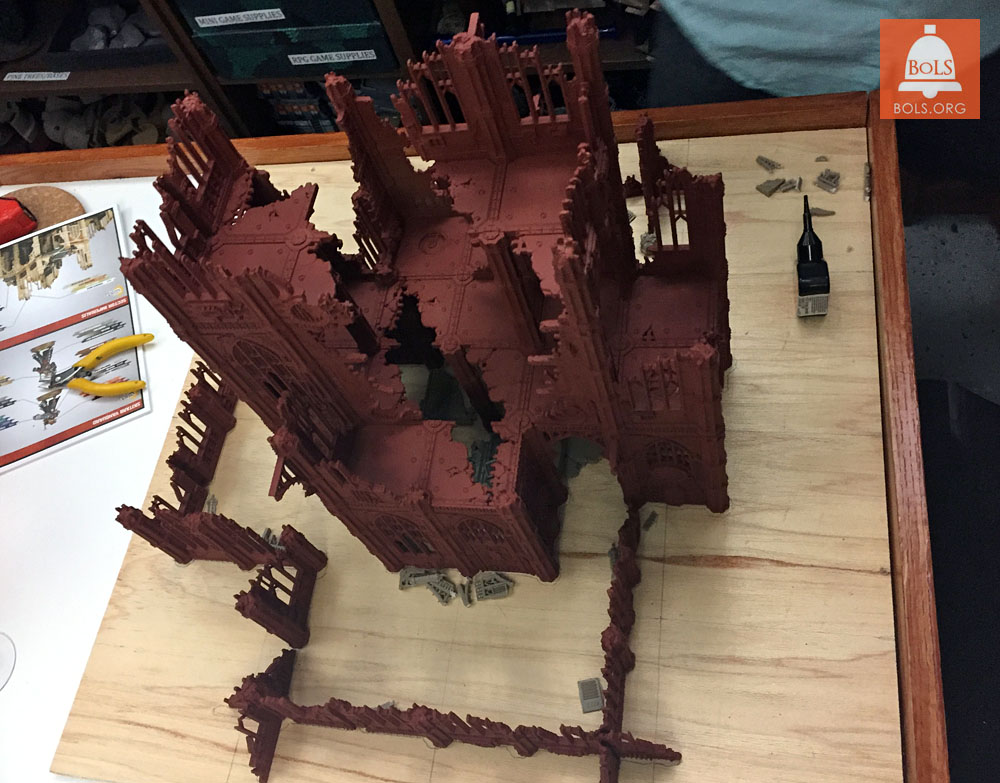
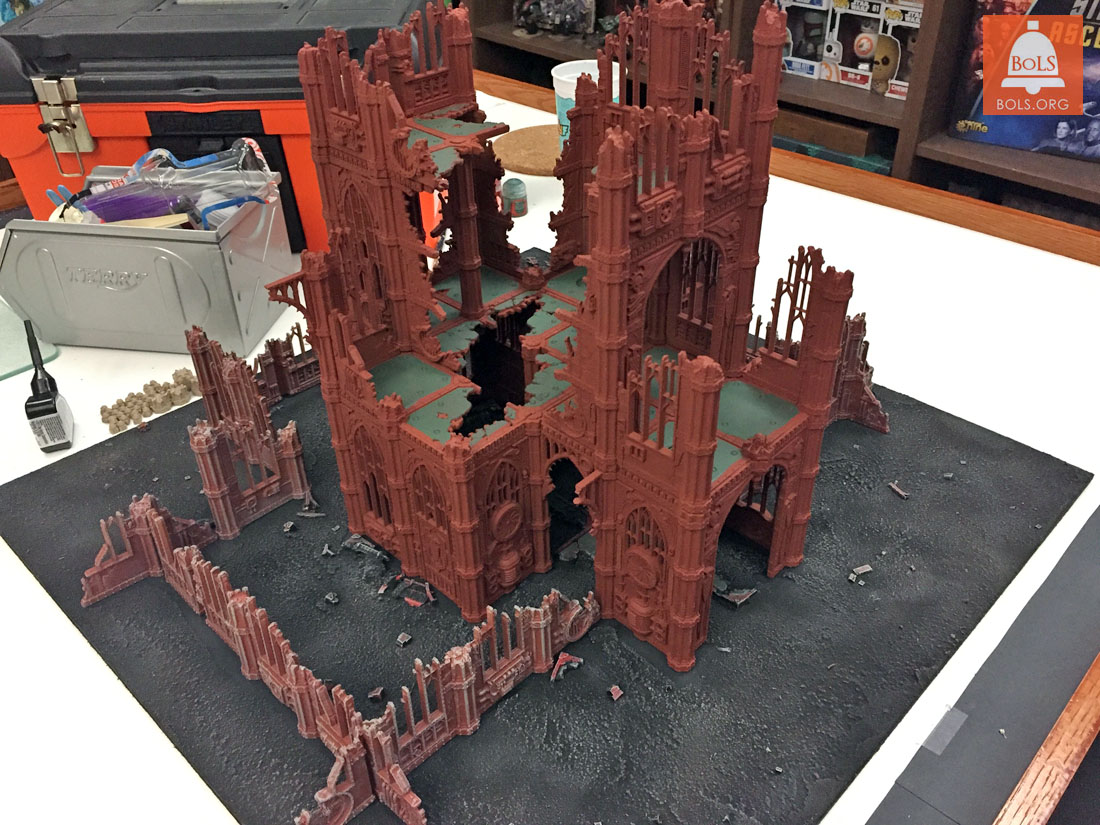 Main shrine in place for testing. It’s getting drybrushed next. We have added the green panels to the floor plates to give it some detail, and break up the primer color.
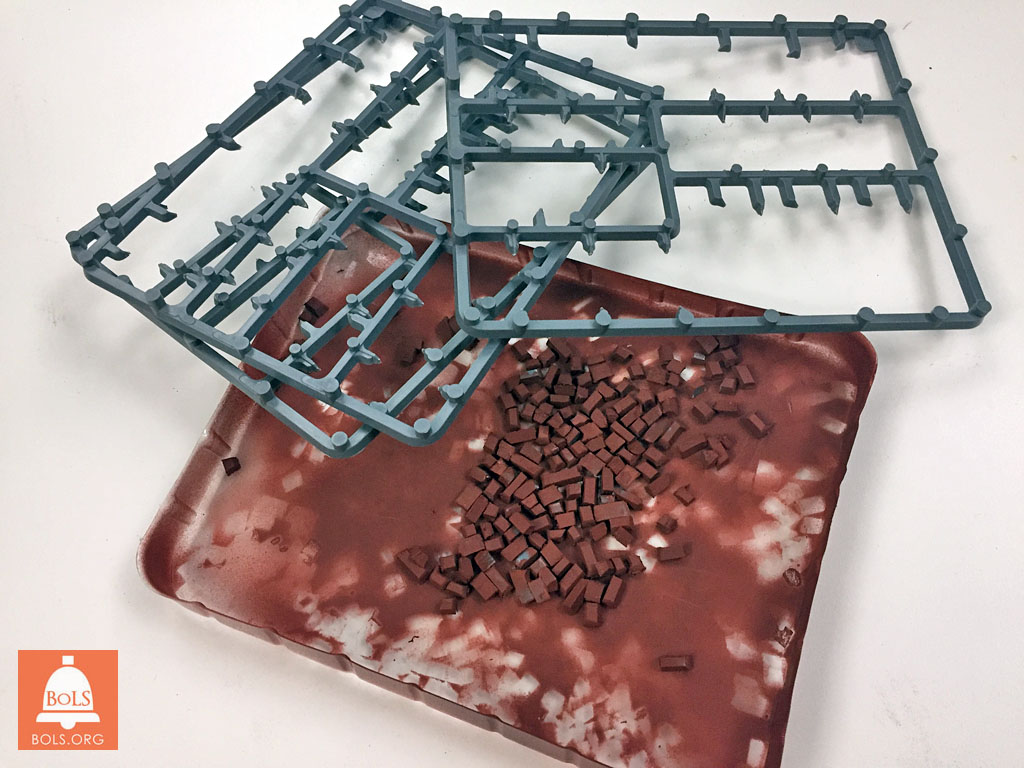
The old sprue trick. Chop up the straight parts of excess sprue and spray them to match your building. Now you have a pile of broken bricks and small debris. We will add this to any areas that look a little plain.
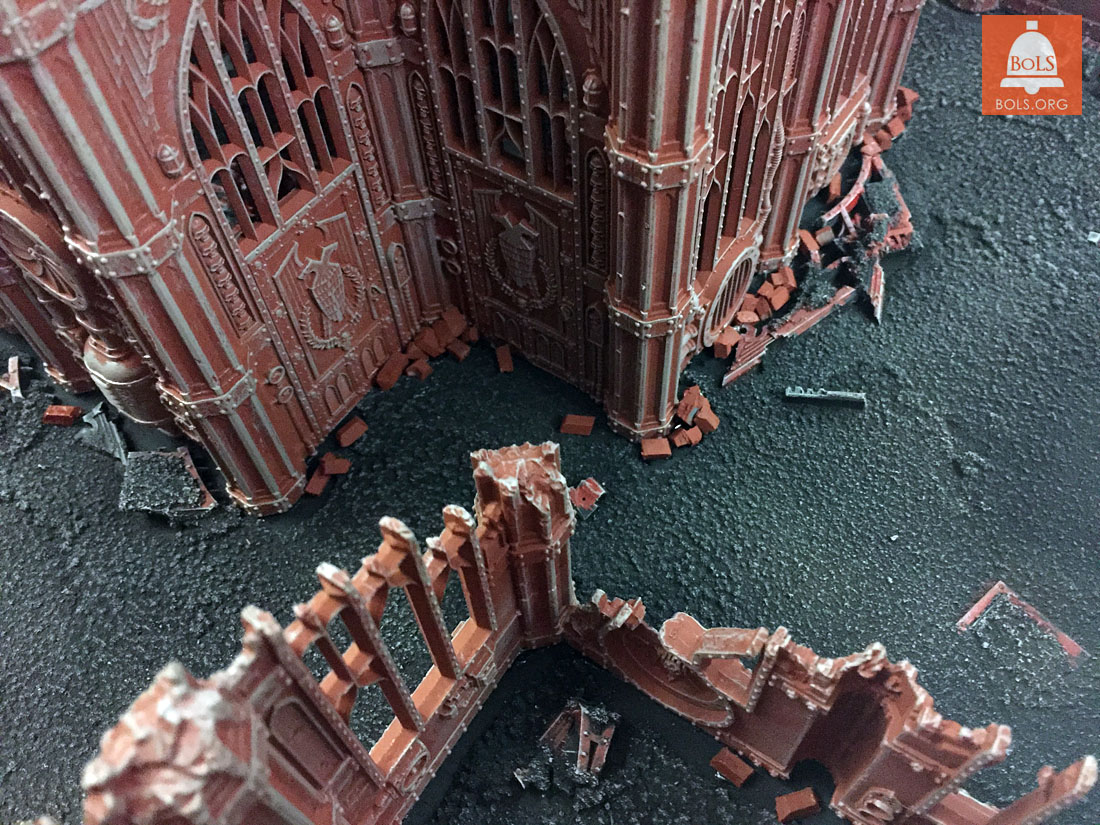 Main shrine and the courtyard walls are glued down (use epoxy for strength), and we are adding that brick debris right around the walls. Once the glue dries, these will be drybrushed to make them match their surroundings.
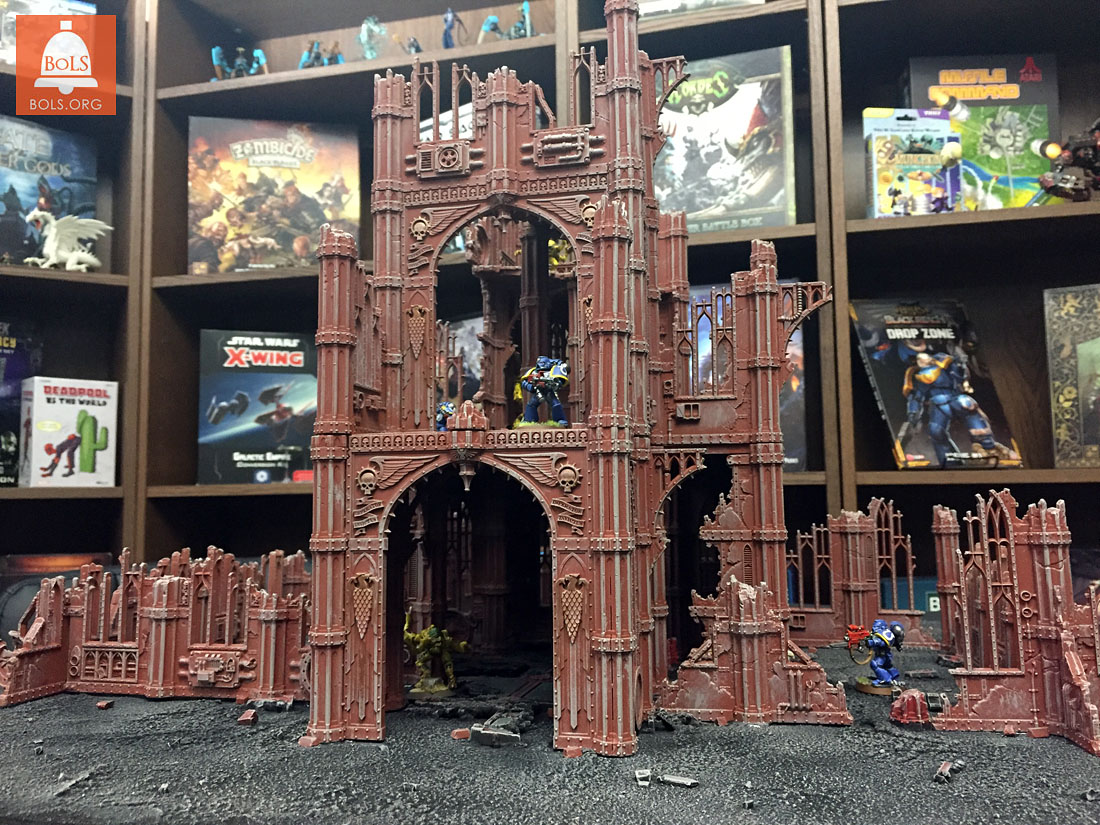
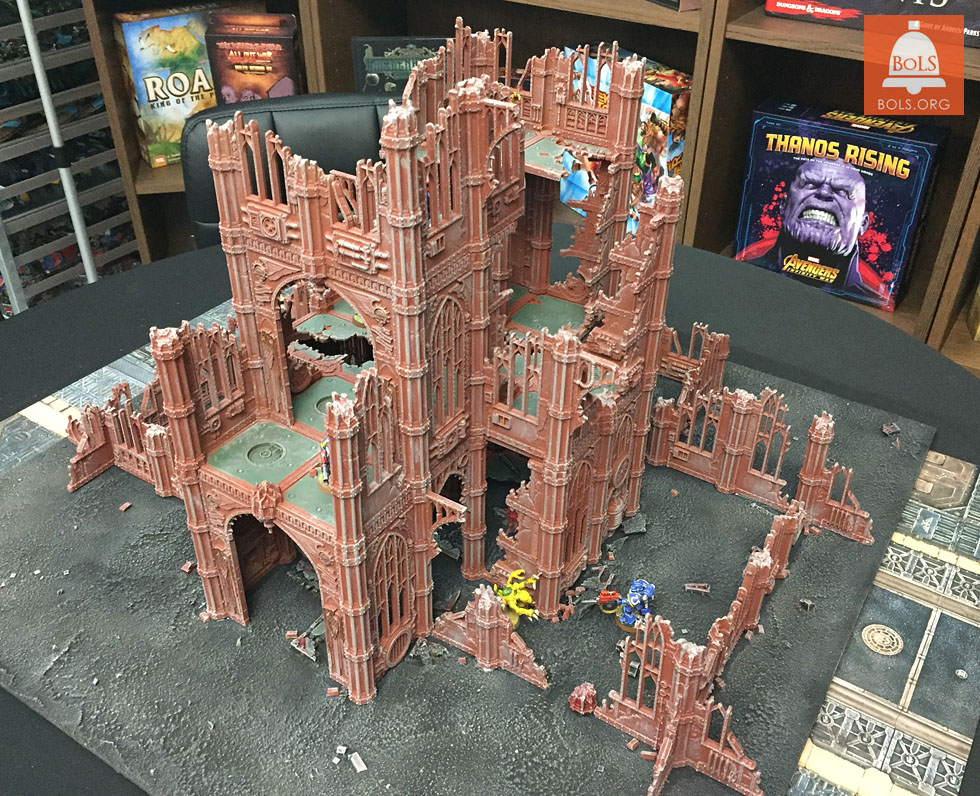 DONE! Let’s take a look around with some Kill Teams for fun.
 It’s 3 floors, way taller than a Warhound titan, and is on a 24″x24″ base. We have left space to add further fancy terrain elements to dress up the facade if we buy more. We are eyeing those giant statues.
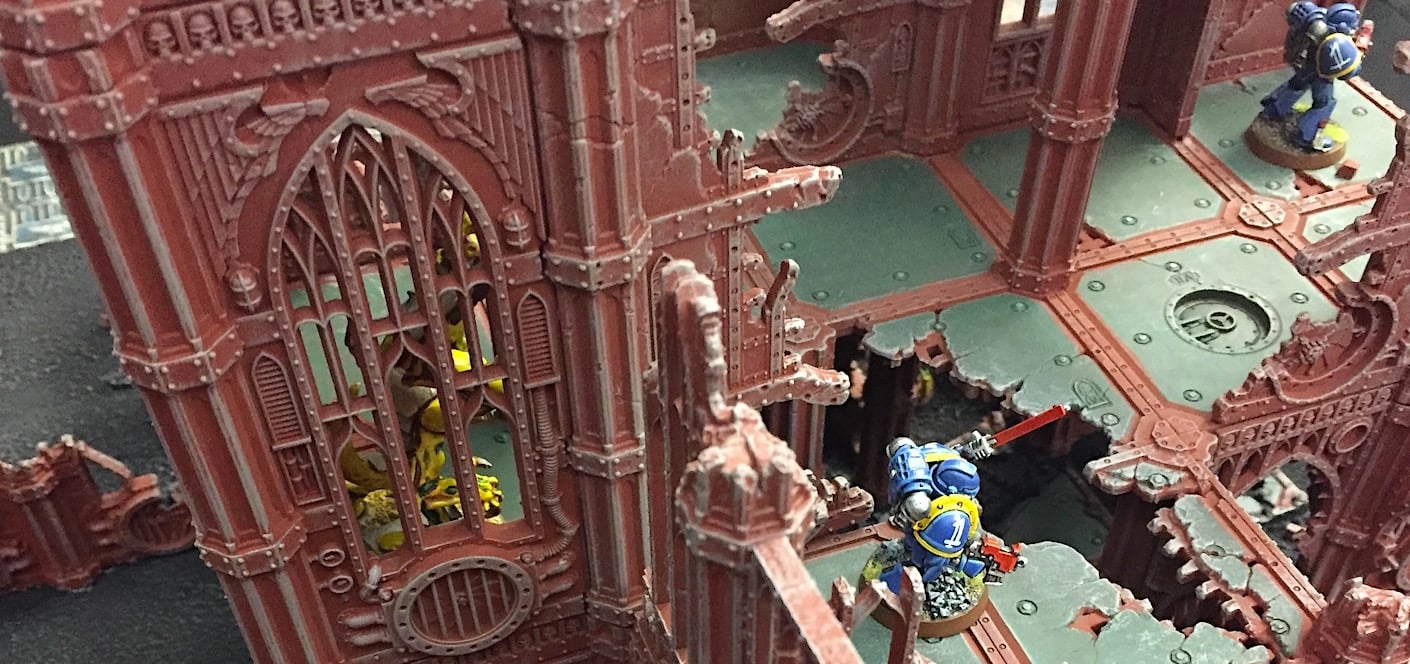
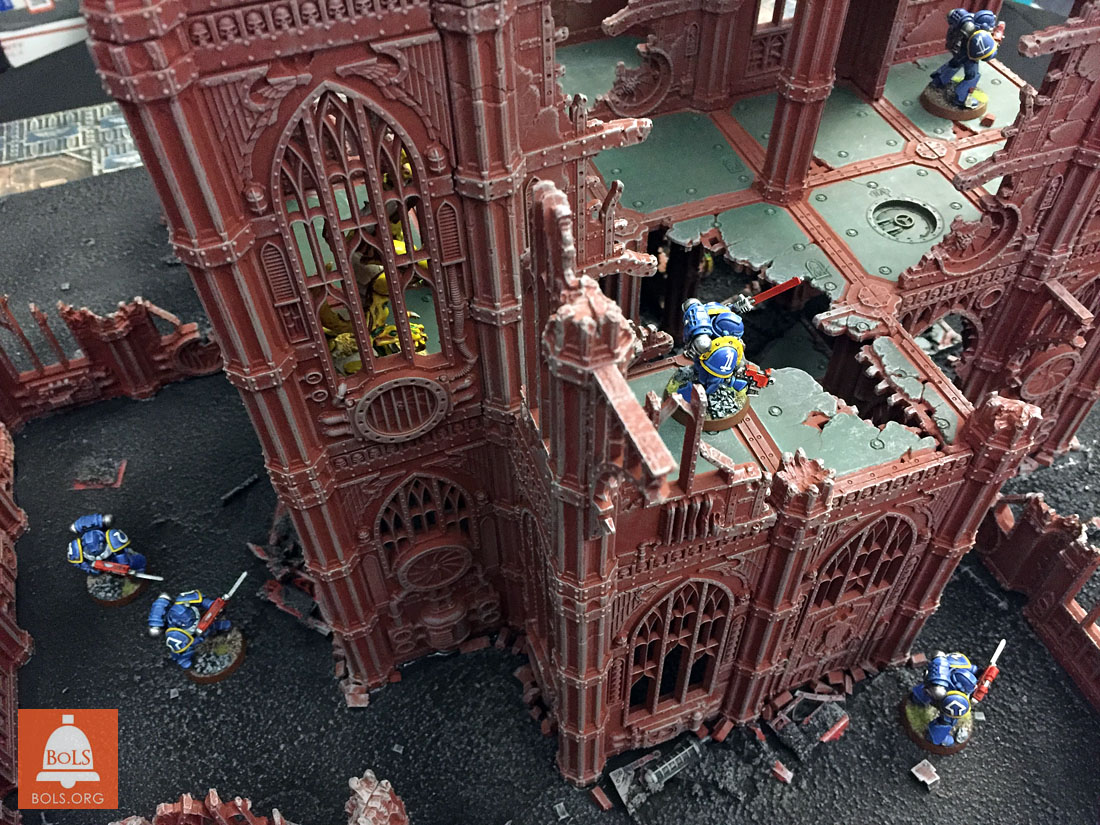
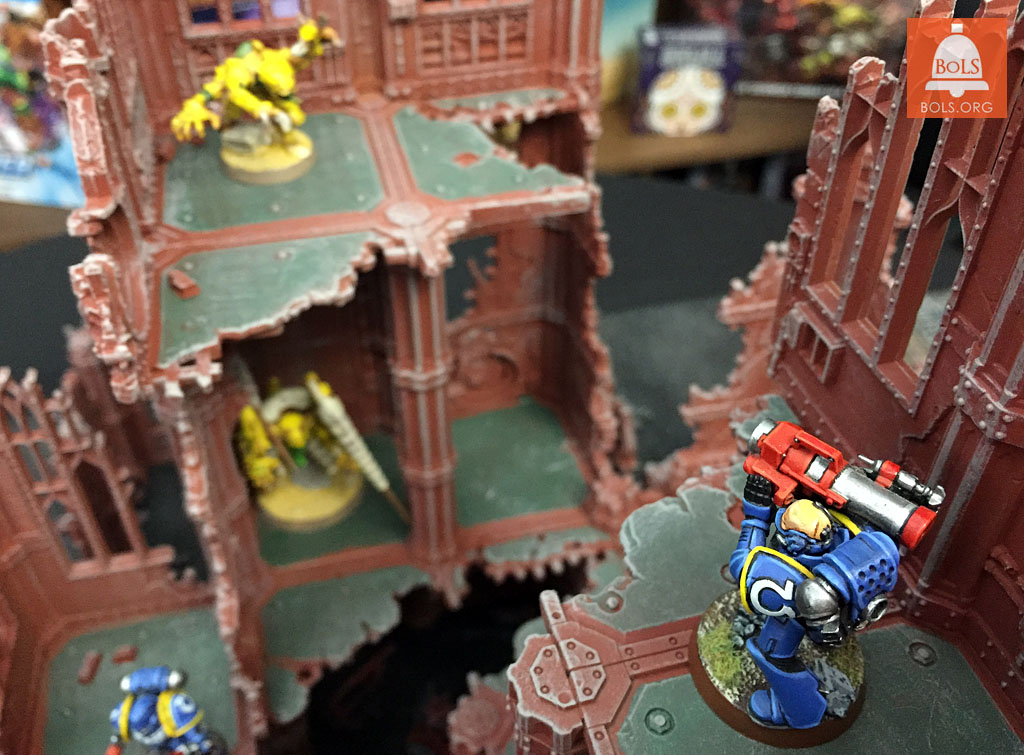 Don’t look down Brother! Also FIRE! I bet a Genestealer can make that jump…
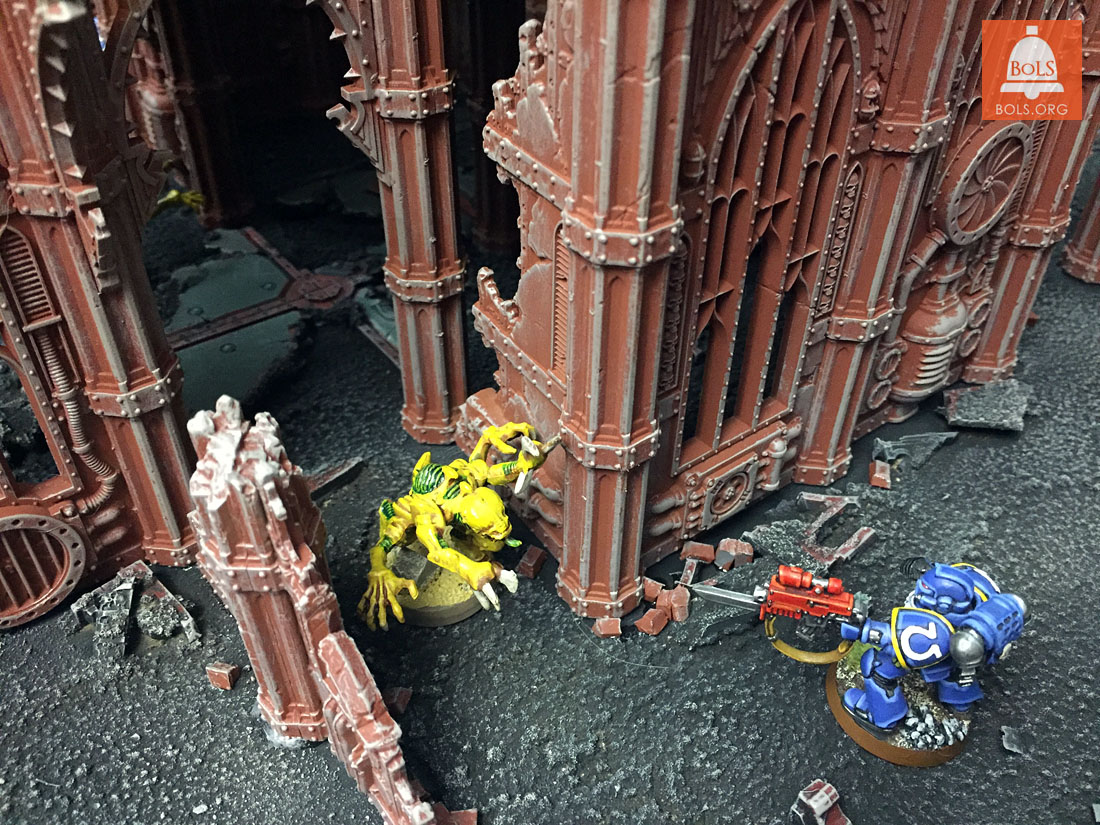
 Very happy with the ruined ground floor. Serg, what do you mean “proceed inside”?!
What’s that clicking? Can you keep it down, I’m trying to pray.
 Two Brothers check out the back courtyard. All clear.
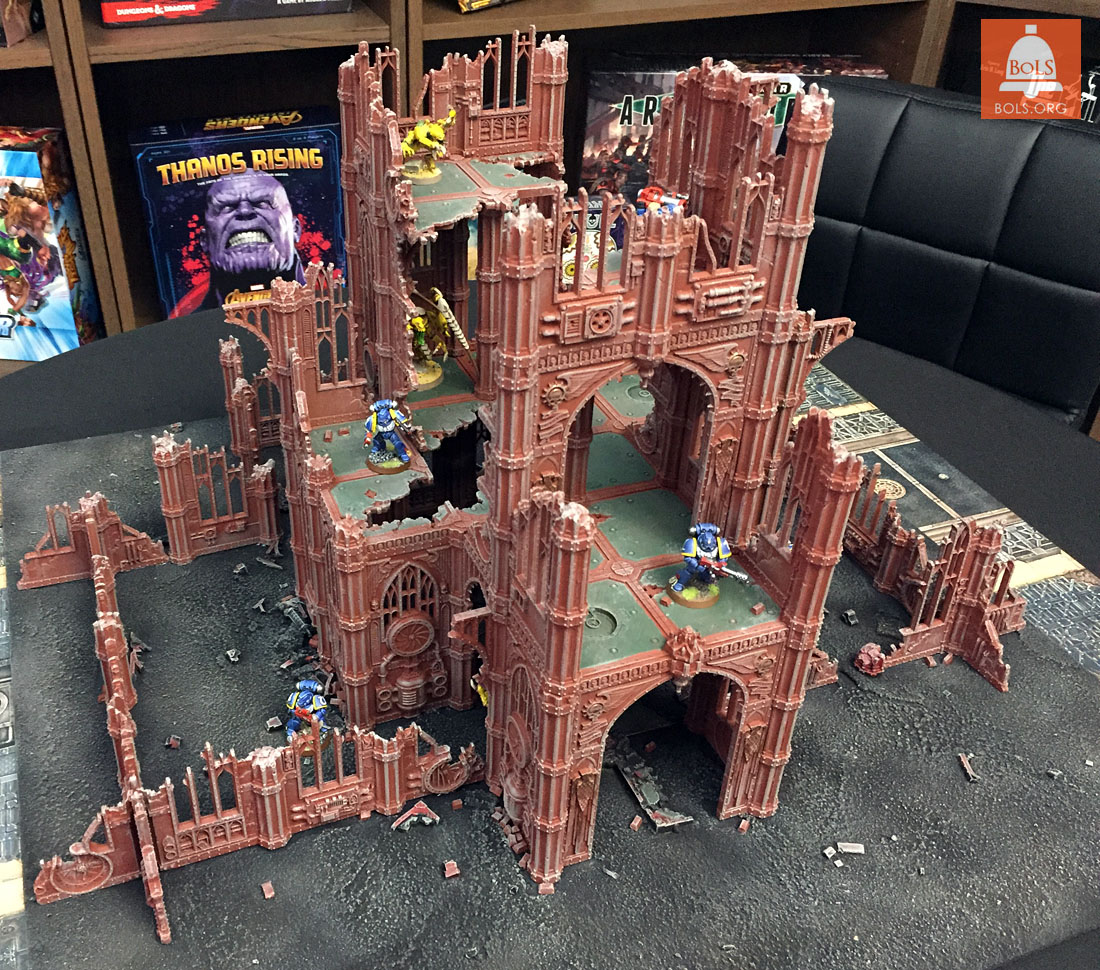
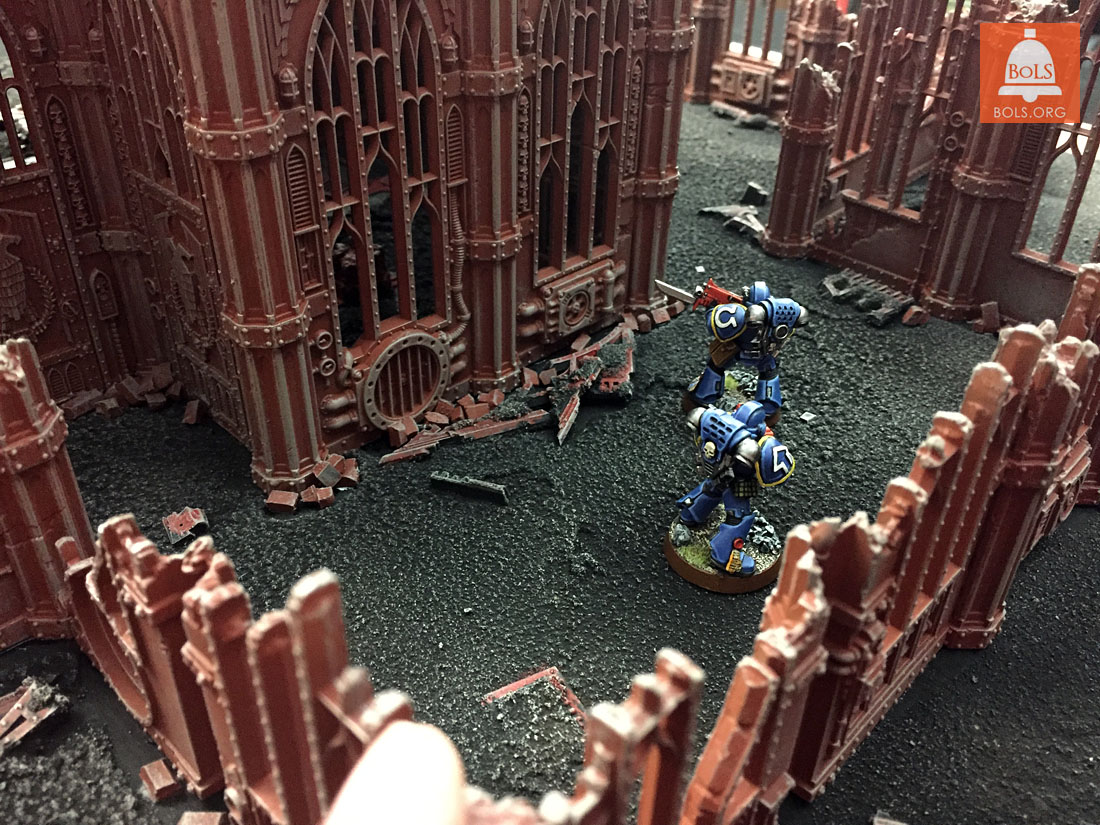
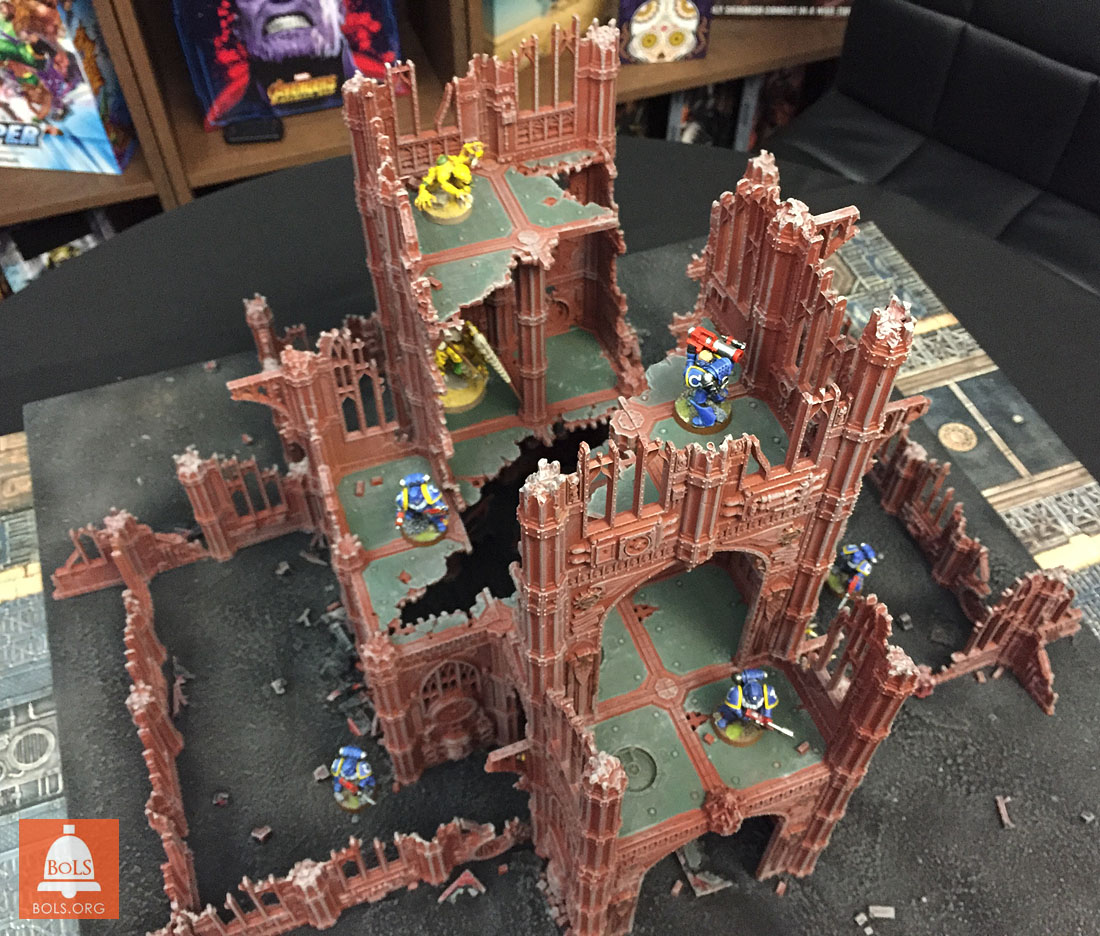 Lots of vertical space and places to hide, ambush, and fall to your doom. Perfect!
 Check those corners, check those corners… Too late!
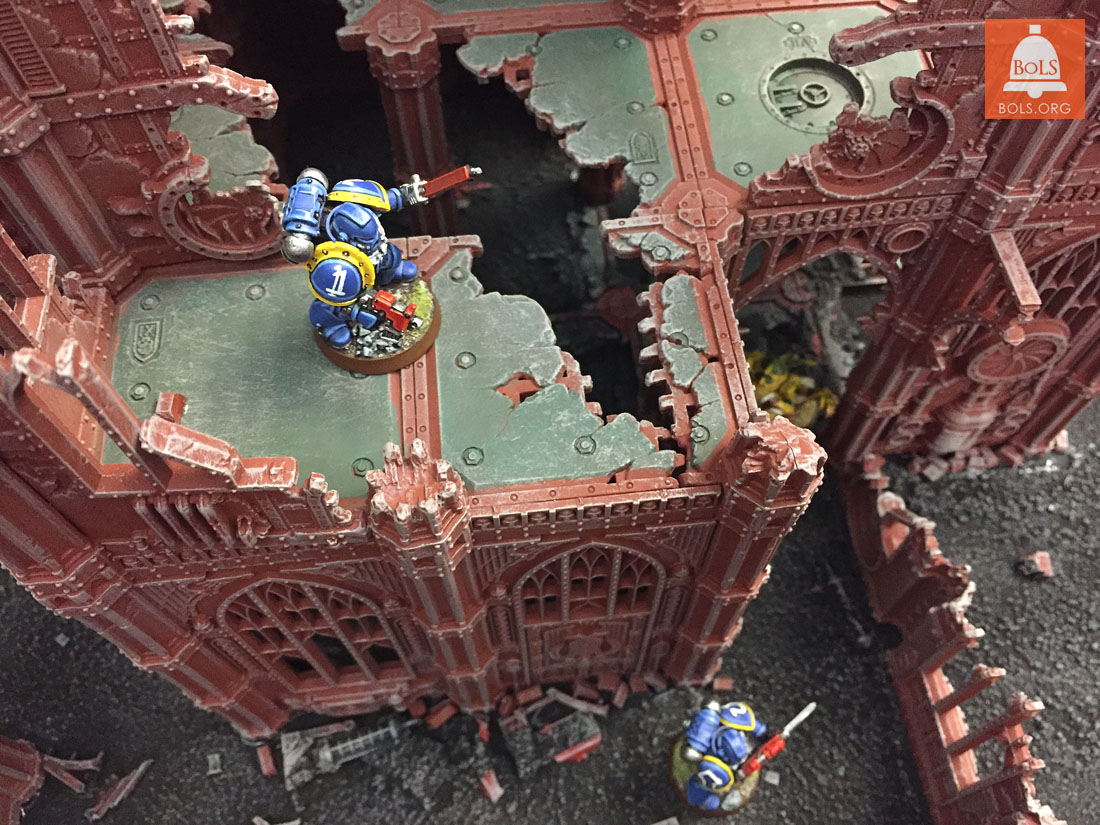 Long way down, and there is still another floor up…
 Thanks for following along. The new terrain is great for 8th Edition. It’s tall, modular, smartly designed and has fantastic detail. Look for more Kill Team coverage and games in this terrain project in the days ahead!

