40K Hobby Hour: Freehanding Flames With GentleBen


Have your army looking fired up with these quick tricks to help make freehanding flames a little easier.
Freehanding flames can be difficult, but with these tips, you’ll have your minis looking hot in no time.
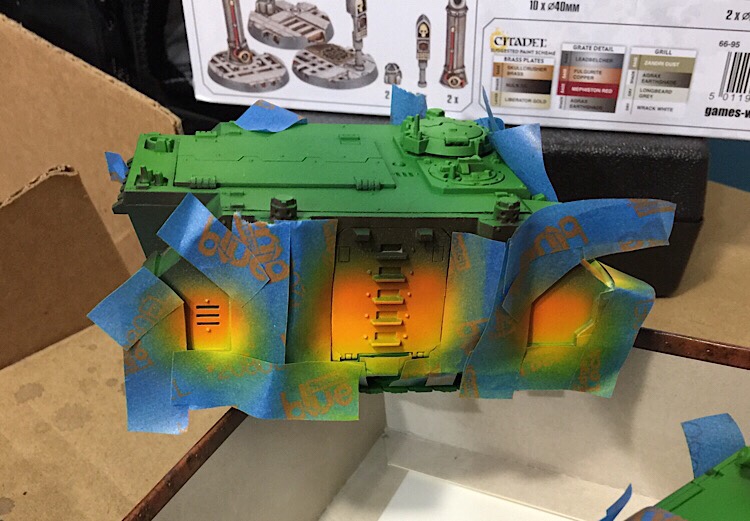
The first step is getting a nice orange and yellow base. I like to use an airbrush since it gives such a nice even coat but that means masking off a lot of areas. Leaving the doors off makes it a lot easier but I bought this tank used with doors glued on tight.
If you don’t have an airbrush you can start with yellow primer and wet blend that yellow to orange gradient on. Even if you’re not used to wet blending, large areas like these are a great place to practice. Paint the green of the rest of the tank next. Masking can help with this but its better to be careful since no tape can totally protect from brushed on paint.
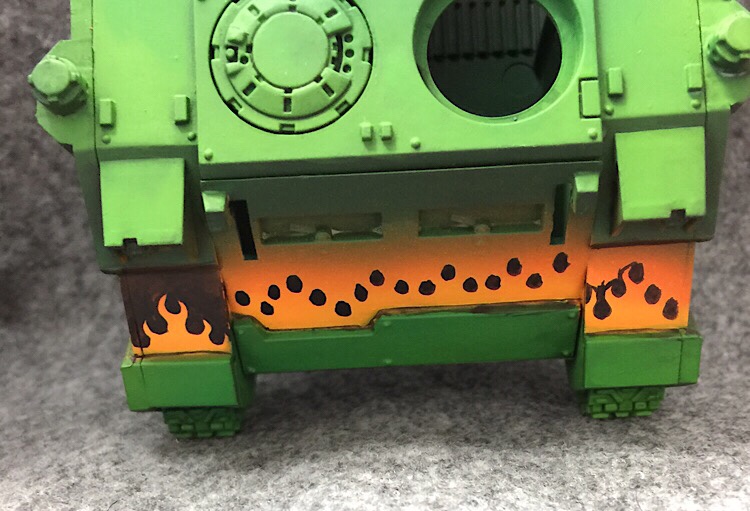
Now here’s the simple one shot tutorial on how to get those flames. I start with dots like the ones in the middle as a guide. They help me make sure I get the spacing right. Then I begin connecting them and adding the points to the flames as seen on the right-side panel. Finally I fill in the rest of the area with black as seen on the left panel.
As you can see, for this particular freehand it’s all about painting the negative space – the shapes that create the flames rather than the flames themselves. It’s the easiest way to get a nice clean orange or yellow shape on a black background. Painting light warm colors over black can take hours and dozens of coats building up thick on top of each other.
If you’re still starting out with freehand, learning when to paint the negative space is an important part of getting good results.
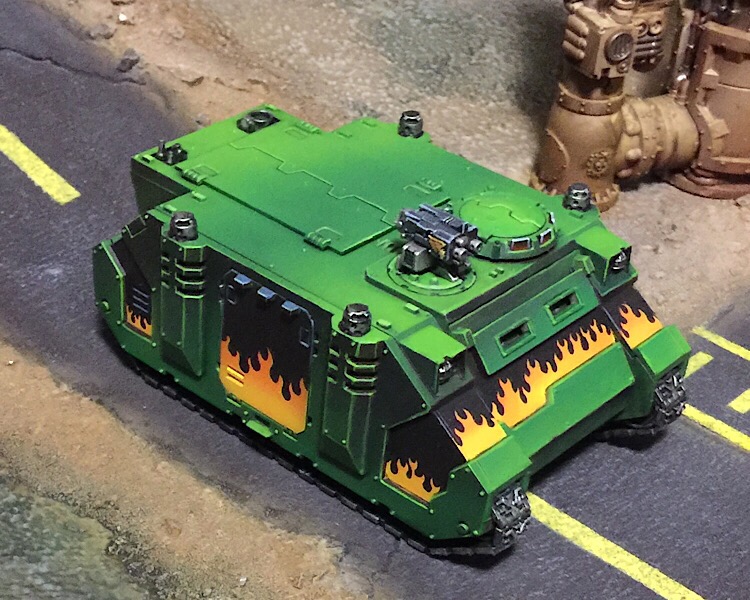
This wip shot above was for the third tank I painted and by this point I had managed to perfect the technique somewhat.
This was the first tank. Notice how the flames look too uniform and have an almost crab claw appearance. I think it feels a little off compared to the final tank. Too bad I didn’t practice first or I could have avoided this. You can’t really touch these up as you lose the gradient from the airbrush. It would never really look right. Not to mention how many coats of orange and yellow it would take to really cover the black. I’d have to start all over again and the claw flames just don’t bother me enough to make it seem worth it.
This Rhino was tank number 2. Improved I think but still not perfect.

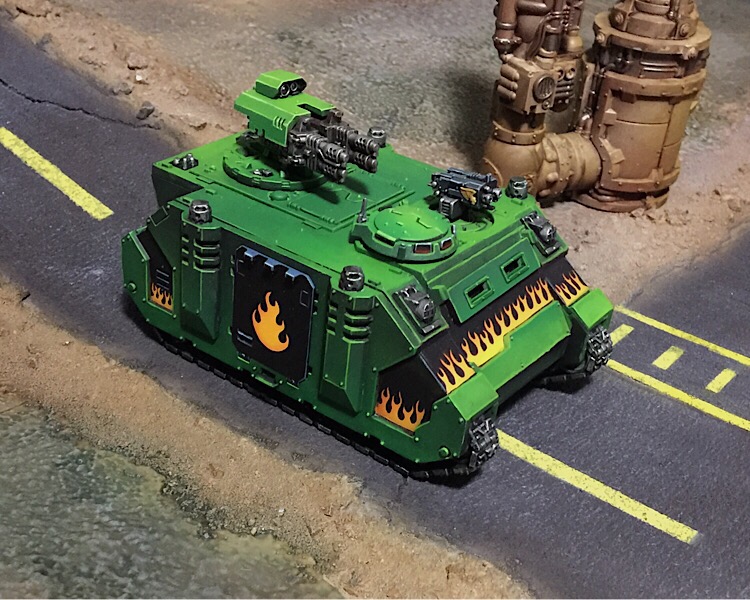
Definitely the best of the lot. Except that the door flame looks kind of like it has a butt.
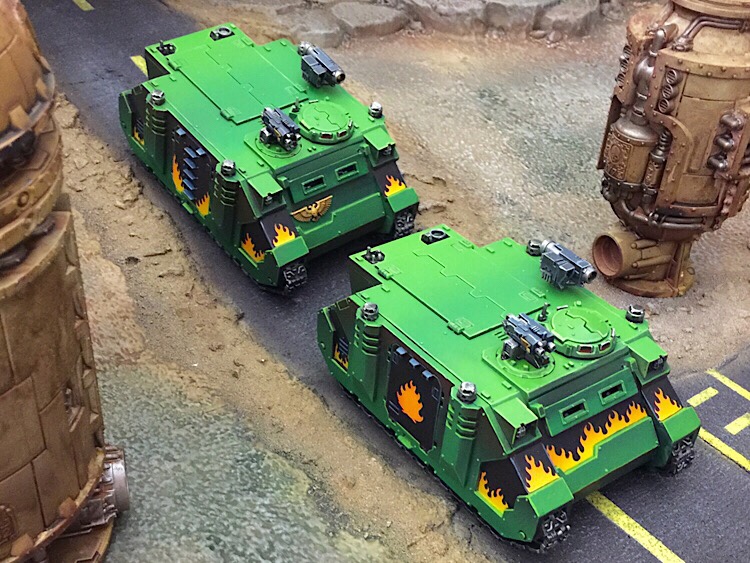
I love tanks so I kept painting them and trying different variations on the pattern. How many games of 8th do you think I’ve played with all 3 Rhinos?
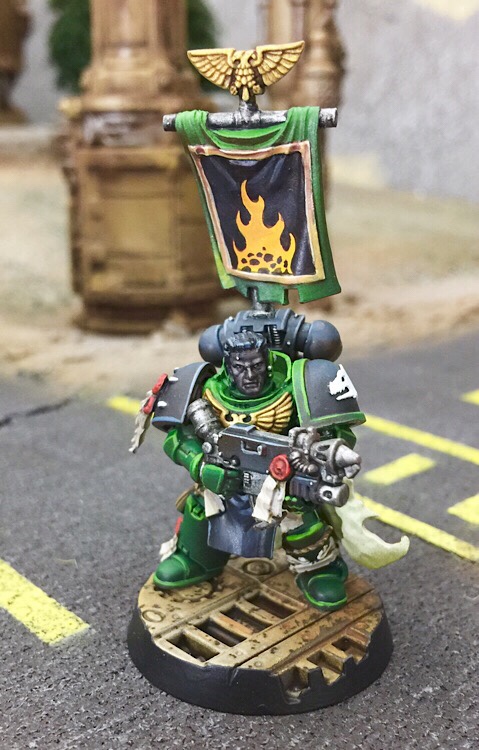
I do something similar with the banners for all my sergeants as well.
~Hope the article was helpful! Do you have any favorite freehand tips?
