The Wargamers Guide to Durable, Budget Terrain; Hills Edition – Prime
Howdy fellow wargamers! Today lets take an in-depth look at the basics of building good terrain for your tables, with a special guide to hills.
Terrain is a key part of any tabletop wargame. Having quality terrain can be a massive bonus for you and your gaming group. Now, not every player needs to have terrain all the time. Normally a game group or a game store will have a good stock of terrain to use. Conventions and tournaments also need a good supply. Many players, however, do like to have a table or so worth of terrain so that they can get in games at home. No matter if you are playing at home, or need to fill out a store or conventions stock of terrain, knowing how to build good and useful terrain is important.
I’m one of the principle terrain masters for the BOLS Open and have built terrain in the past for other conventions and several stores. I felt it would be helpful to do up a primer on some of the basics of terrain building.

Terrain Goals
Today we are going to take a look at the basics of homemade terrain and as a bonus, we will go over some steps and tips for making that most basic of terrain pieces: hills. Now there is plenty of pre-built terrain or easy to assemble stuff out there. Games Workshop and many other companies make great terrain kits if you are looking for something easy and pretty quick they are great options. However, if you are wanting a hobby project of your own, or need to fill out a whole ton of tables on the cheap, you might want something different. Building a couple of hundred tables worth of terrain for a convention comes with restrictions of its own. For instance, you normally can’t spend hundreds of dollars per table to get pre-built or pre-painted stuff. When making terrain for stores or events there are few things I look for in terrain:
- Durability: This is one of the key things I look for when designing terrain. Unlike terrain for your home table, which you’ll take good care of, terrain for stores or events needs to be able to withstand heavy use by uncaring people. It also often needs to be able to survive storage (being thrown in a bin) and travel. A lot of really nice terrain pieces I might put on my home table will disintegrate after a few weeks at a store.
- Easy To Mass Produce: This can vary a bit (and you can have some hard to make stuff), but generally you want terrain that’s easy to make in large quantities. For a home table, it might be fine to spend hours on one cool piece. For a major tournament, however, you often need to be able to make scores or hundreds of each terrain piece, and it often needs to be built by volunteers. Stuff needs to be simple and easy so that you can turn in out quickly.
- Cheap: Again, this comes down to the simple fact of needing to make hundreds of terrain pieces. While it will all depend on your overall budget, I’m normally looking for terrain that costs less than $3 (USD) per piece.
- Generically Useful: You want pieces that you can reuse over and over again. Building a bunch of terrain that’s only useful for one mission, or to combat some temporary trend in the meta, isn’t great in the long run.
- Interactive: I want terrain that people will interact with. While it can be necessary, I try to avoid terrain that simply creates a negative space where nothing happens. I want to change how you interact with the battlefield, not prevent you from doing so.
- Looks Good: While other concerns moderate the looks of terrain, I do want terrain that looks good.
So with all that said, let’s take a look at some of the basic tools and material you need for building your own terrain.
The Two Most Important Materials
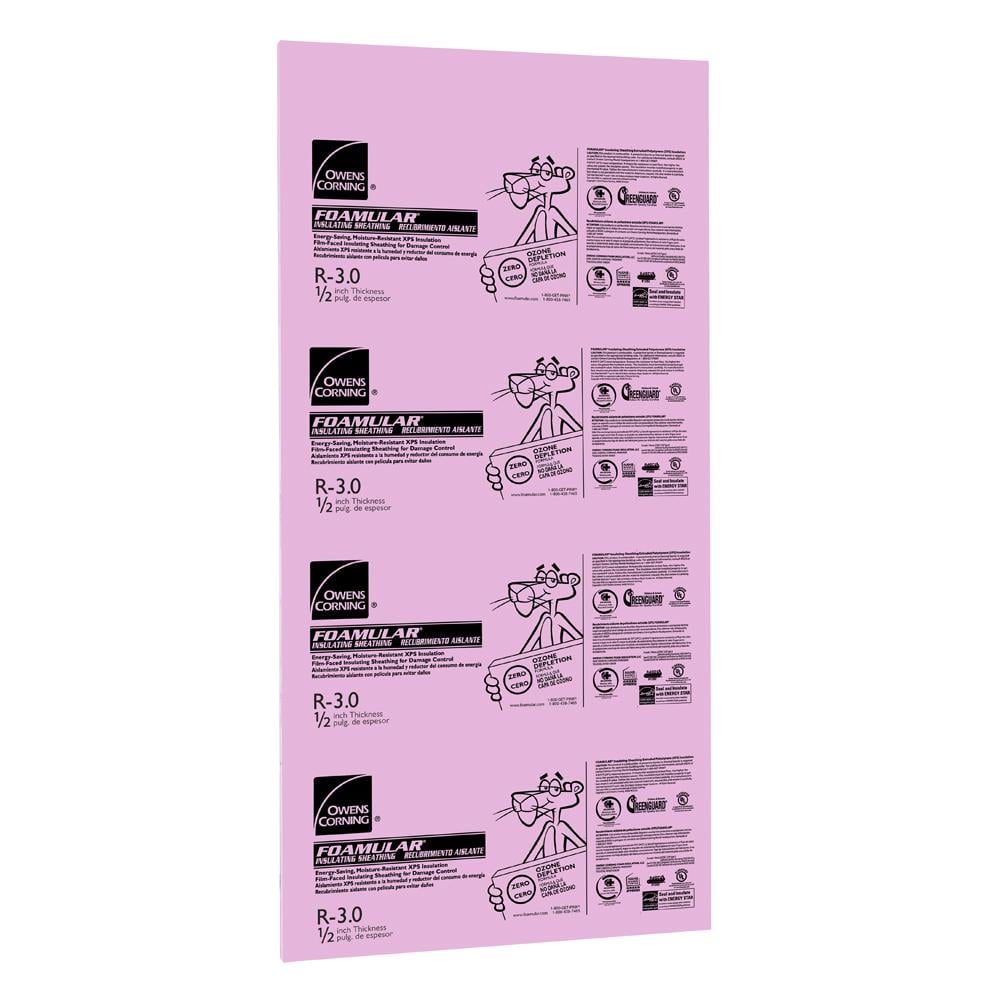
Insulation Foam: Hard insulation foam is going to be one of the core building blocks you will use for cheap and easy to make terrain. This stuff is easy to work with, can be used for a ton of things and is super durable. It’s impact-resistant, heat resistant and flexible. It can be chipped away at or cut, but properly coated terrain made from it will last through decades of heavy use. There are a couple of different types and brands of it. The key to look for is “R-3” foam (which I think has to do with density). You can find it at your local hardware store. In the US I’ve found the pink Owens-Corning at Home Depot and a blue version at Lowes. I like the pink best myself as the blue stuff it seems a little more brittle, though that has advantages.
The foam normally comes in 8-foot by 4-foot sheets and in 1/2 inch, 1-inch and2-inch thickness. The 1/2 inch is the most versatile, this is great for hills, walls, building, ruins, rubble and a ton of other things. Local it’s around $14 for a 8 ft. x 4 ft. sheet – that will build you a lot of terrain . The 2-inch thick version is a little harder to work with but is great for hills and hill like objects (ridges, buttes, etc.). While you can get the same effect using many layers of the thinner stuff, its a lot easier to just use a couple of layers of the 2-inch thick stuff. It is however useful for less stuff, and since you have to buy it in large quantities, it’s sometimes better just to go with 1/2 inch. The 1 inch stuff is my least favorite, but depending on how high you want a hill can be useful for that.

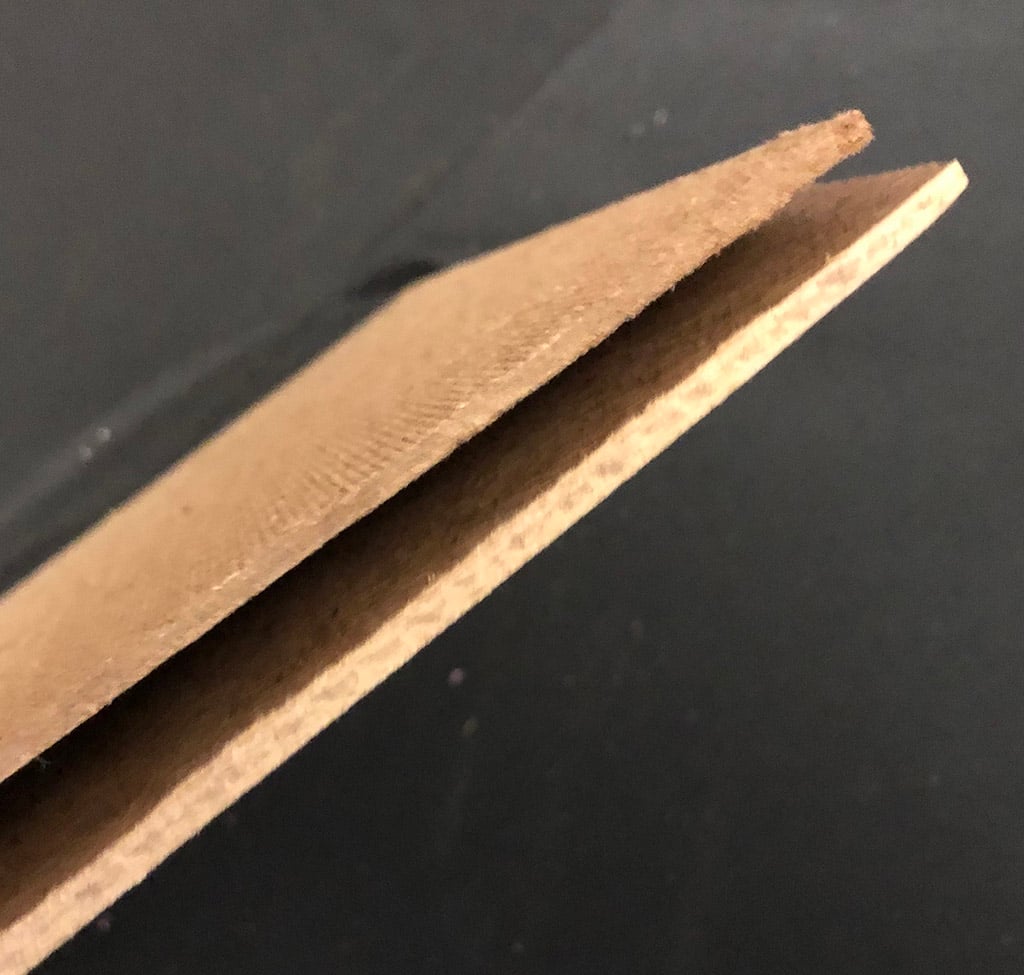
MDF Board: This is another staple of terrain building. MDF is going to form the base of most of your terrain pieces. There are various types and thicknesses. I like this brown stuff that is laminated on one side. It’s easy to affix stuff to and gives you a smooth side if needed. The thicker board will warp less, especially if you live in a very humid place. Again this normally comes in an 4 ft. x 8 ft sheet, though I’ve found the thinner version in 4 ft. x 2ft sheets. This stuff goes a long way.
The Tools of the Trade
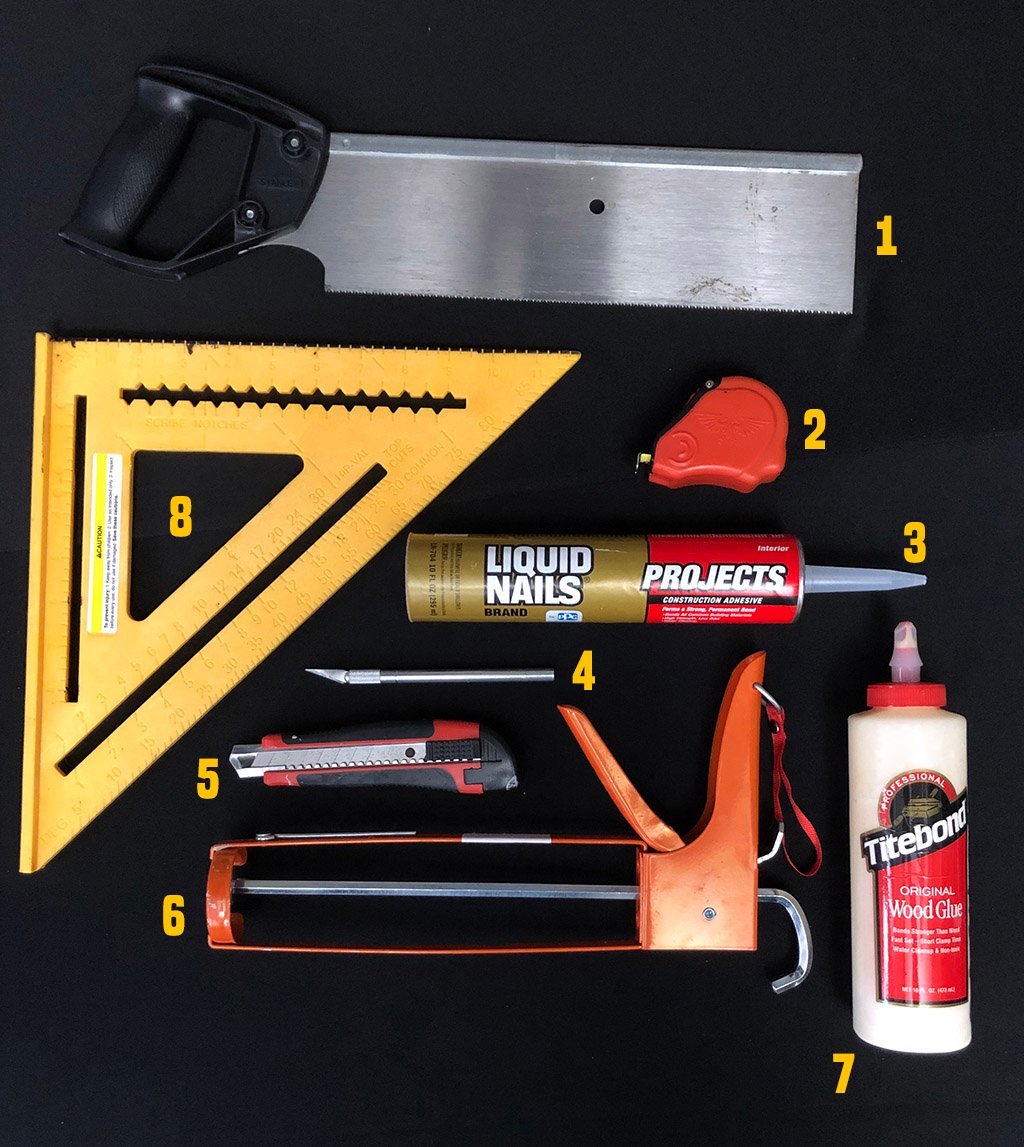
Let’s go over the necessary tools…
- Saws: You’re going to want a few saws on hand. A hacksaw, as shown, is great for cutting up pipes, vehicles and other bits and things for making terrain. You’ll also want some sort of powered saw of choice (jig, table, whatever) for cutting MDF board.
- Tape Measure: You are going to need to measure a lot of things. Luckily you are a gamer and should have one of these around.
- Liquid Nails or some form of Caulk: This is one of the most important things to have available. This is going to be your main bonding agent and you’ll use it on just about everything to hold stuff together. What super glue (or plastic cement) is to normal model building, Liquid Nails is to terrain building. This stuff is super strong and will keep your terrain together forever. Since it is thick and spreadable it’s also useful for filling in gaps. Besides, saying caulk a bunch is one for the immature joys of terrain building. There are a ton of different brands and types of caulk. I’ve pictured my favorite, it’s cheap (under $2 a tube) and strong. Whatever you go with make sure it works on the materials you are using. Some forms won’t work well on MDF or can even melt foam.
- X-Acto or Hobby Knife: These go by a few names, but are very handy to have around. They are great for cutting and shaping foam or cutting any other bits you are using. You can do a whole lot with just one of these and some liquid nails. Again, as a gamer it’s likely you’ve got one of these on hand.
- Snap-Blade Knife or Box Cutter: Different names, same thing. Like the X-Acto Knife, this a great tool for dealing with foam and probably the tool I use the most. It’s longer, more robust blade makes it better for cutting through large hunks of foam than and X-Acto Knife.
- Caulk Gun: Needed to apply Caulk/Liquid Nails. Pretty simple.
- Glue: In addition to your Liquid Nails it’s useful to have some other glues around. Wood Glue isn’t as strong as Liquid Nails but works great for some things, and is thin. Its great for gluing on detail parts and for water/slime effects. Your basic Elmers glue can have its uses, in particular for texturing, which we will talk about later. You’ll want some basic superglue/plastic cement if you are using plastic bits (such as any GW terrain elements or bits). However be careful, superglue and plastic cement will melt the foam rather than bonding to it, so never use it on foam.
- Straight Edge/Other measuring devices: There are lots of tools you can use for measuring things. The more you have the better. Having a rigid measuring surface (as opposed to a flexible tape measure) also makes it easier to draw straight lines.
Extra Tools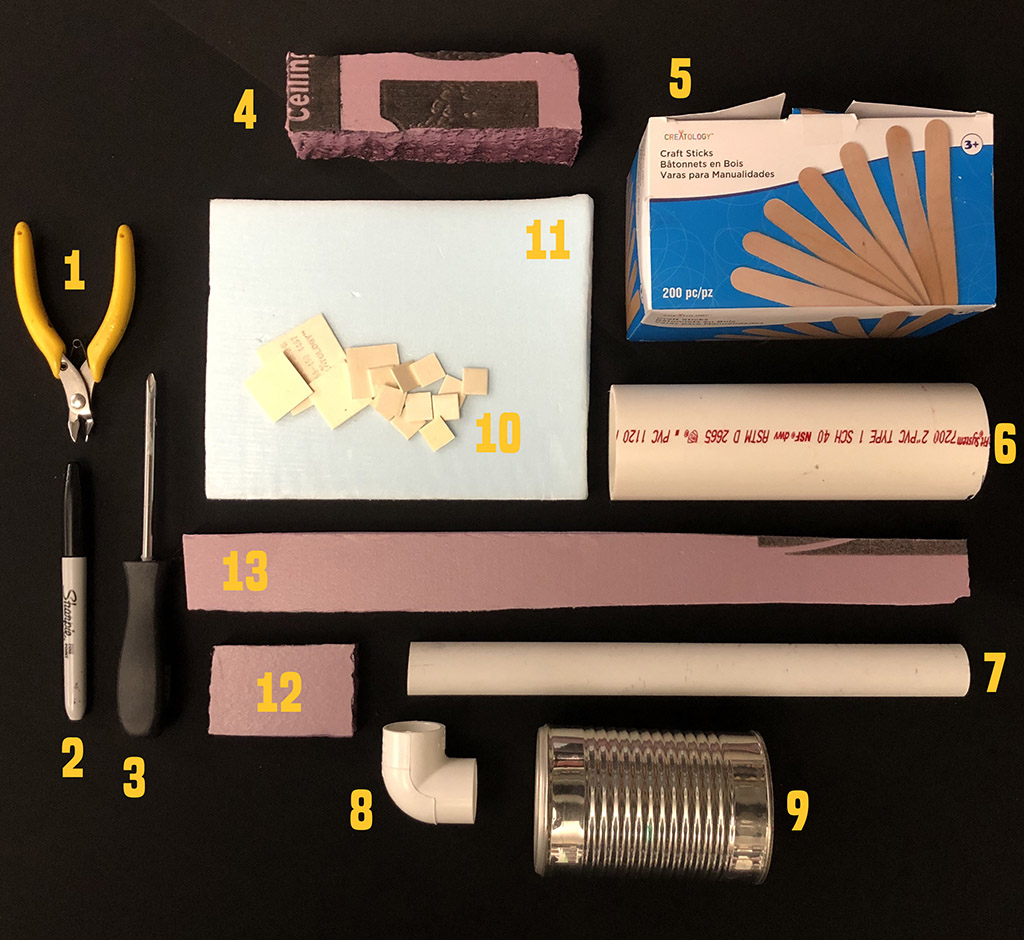
- Clippers: Another basic hobby tool. Great, if you are using any plastic models, are part of the terrain or some snipping wood or wires.
- Permanent marker: You need something to mark up your materials. Great for drawing your cutting lines or anything else you might need.
- Screwdriver: While you could use this for screwing in screws that won’t be super useful in terrain building. I use screwdrivers for distressing foam and making bullet holes.
- Cut 2-inch foam: See foam section above. This 2-inch foam is useful for a lot of things.
- Craft Stick (popsicle sticks): A staple of arts and craft tables the world around. These things have a ton of uses.
- PVC Pipe: There are a bunch of different thicknesses of the PCV pipe you can use. Again a ton of uses for this and it’s a great thing to have on hand. If you are making 40K tables, this is perfect for Promethium and other industrial pipes.
- PVC Pipe Ends: Accent your PVC pipes with a huge variety of end caps, they make tons of shapes. I find the basic 90 degree elbow the most useful, its also the cheapest. Two of these and a 12-inch section of pipe can get you a cheap Promethium pipe terrain piece.
- Cans: These come in a huge variety of shapes and sizes. They are super useful for all kinds of industrial and futuristic terrain, they work great as fuel or processing tanks. You can normally get then for free with your food. Just make sure to clean and dry them well.
- Wooden Hobby Squares: These thin, shaped wood cutouts come in a ton of sizes and shapes and can be found at your local arts and craft store. They are great for adding detail and accents to your terrain. Gluing a couple of these on to a solid foam wall can add, windows, doors and other designs.
- Paper Towels: Because you will make a mess.
- 1/2 Inch foam: See the foam section of more details but this is the base of a huge number of terrain projects.
Hot Knives 101
Another super useful tool for your terrain projects is a hot knife (pictured above). These knives are great for cutting and shaping foam. Locally they go for under $20 (USD) and are well worth it. Essentially a super hot strip of metal, they will cut/melt through foam with ease. Using them is pretty easy but here are a few pointers:
- The ones I’ve used all come with a protective guide/guard bit on them (shown above the knife in the picture). The first thing you want to go is take that off. It will just get in the way and you will have trouble cutting 2 inch foam with it on.
- Be safe when using the knife. It’s HOT. Don’t touch it, and try to lay it on a non-flammable service, like concrete, when you are done so it can cool down. It will produce some pretty bad fumes when cutting foam, you should ALWAYS invest in a reliable filtered mask.
- When cutting use continual pressure and a back and forth sawing motion, it will go a lot faster. Try to always keep the knife moving, if you stop moving the heat will, still melt the foam, leaving you with uneven cuts and large melted holes in your foam.
- Use this on the 2-inch foam. It’s pretty much the only way to cut through that thick foam and is a must-have.
- Since the hot knife melts the foam you will lose foam in the process. This means it’s not super precise. Using a pre-cut- wooden jig (MDF that you should already have is great for this) can help, however, if you need very precise sizes a regular hobby knife is better.
- The hot knife is great for doing circles and curves that X-Acto knives struggle with.
- You can also use it to create a lot of cool melted/eroded effects.
- Experiment on some scraps for a while to get the hang of using it.
Sand and Paint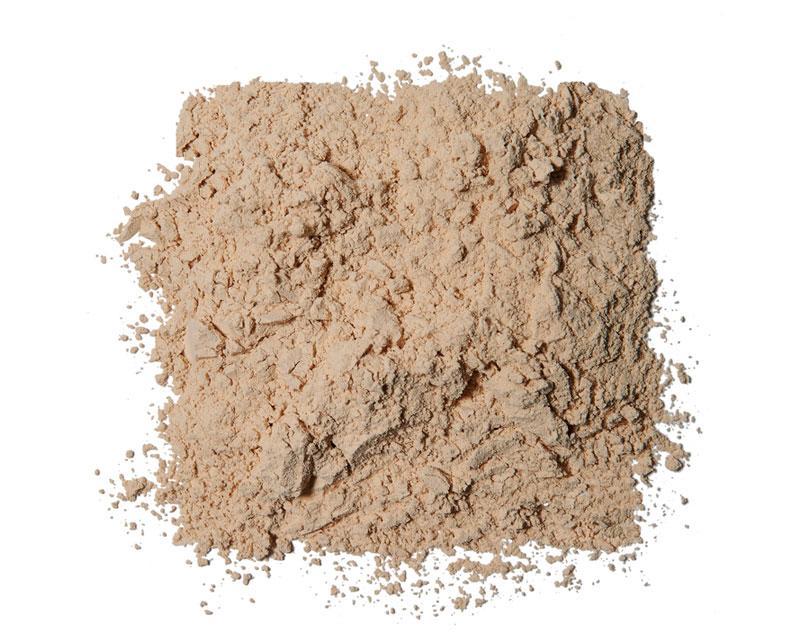
Another standby of basic materials are sand and paint. Sand is cheap and easy to get and great for adding texture and protection to your terrain. I’ll go into that more later. Paint of course is what you’ll need to finish your terrain and make it really look good. I find your basic latex type house paint to be cheap and useful for the big parts. Use your normal paint to add details later. Do be careful however spray paint will melt the foam, so never spray foam directly. You can however use a spray gun loaded with latex or other similar safe paint.
How To Build Hills
OK, so let’s put this all together and go over how to build some basic quick hills. This is one of the simplest and quickest projects you can undertake but it makes some very useful terrain.

Step One: Determine what size hills you want
Planning is key and this is the most basic step. You can make your hills in any size of course. A couple of good standard sizes I’ve found are 12″x 6″ and 10″ x 10″, but anything works. The key is to make sure they are big enough on top for models to stand. Height also matters. For 40K I like 4 inch hills for good LOS blocking, through 2 inch hills also work. Because of this, we are going to use 2 inch thick foam.
Step Two: Gather Materials
For this we will need:
- 2-inch foam
- Liquid Nails and a Caulk Gun
- Sharpie and a measure tape
- A Hot Knife
- Elmer’s glue
- Sand
- Paint
Step Three: Measure Out Your Hills and Mark Your Foam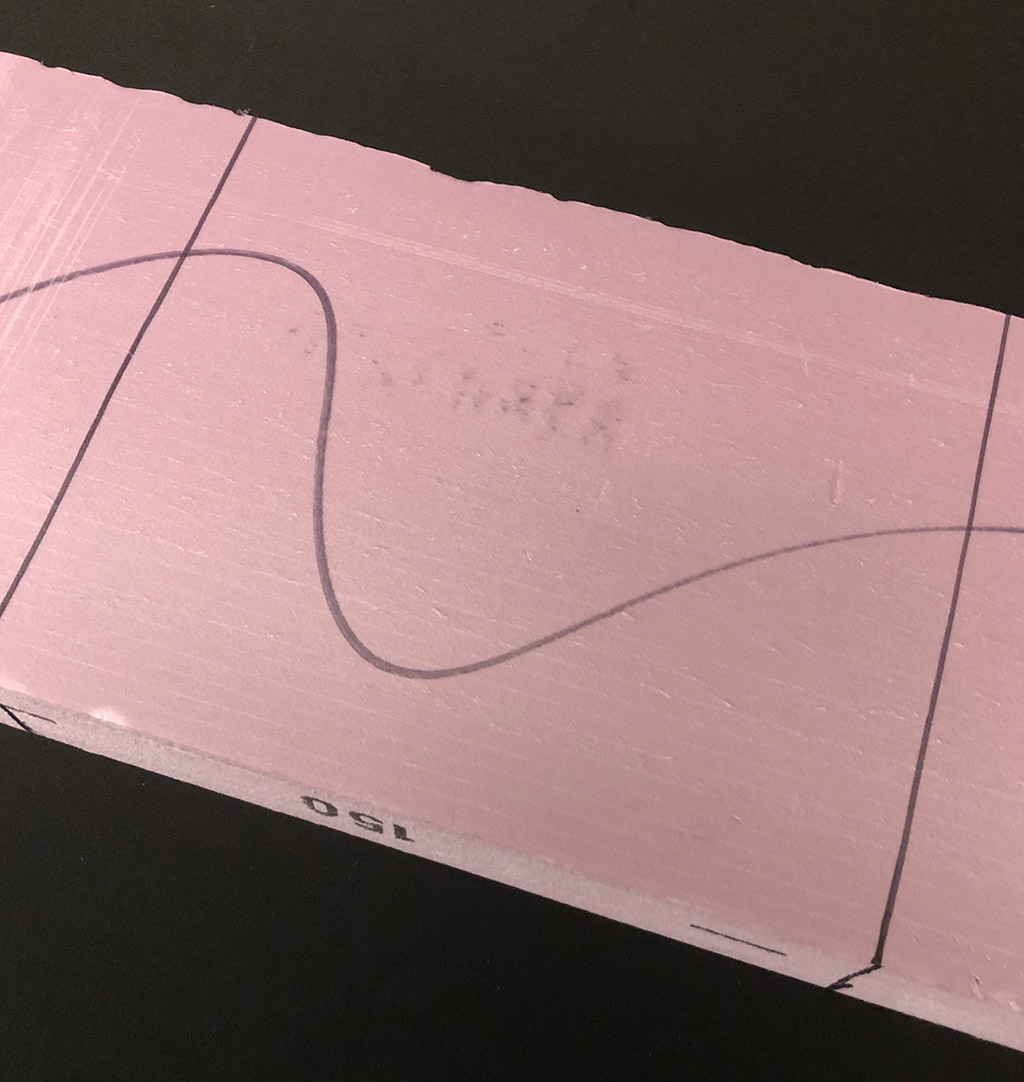
Using the tape measure and sharpie draw the outlines of hills. I find the easiest thing is to measure out them out as squares, 10x10s or 12x6s or whatever I’m going to use.
Step 4: Cut Out The Block Hills
Using the hot knife, cut out all the rough hills. This should leave you with a large number of roughly the same size/shape foam blocks.
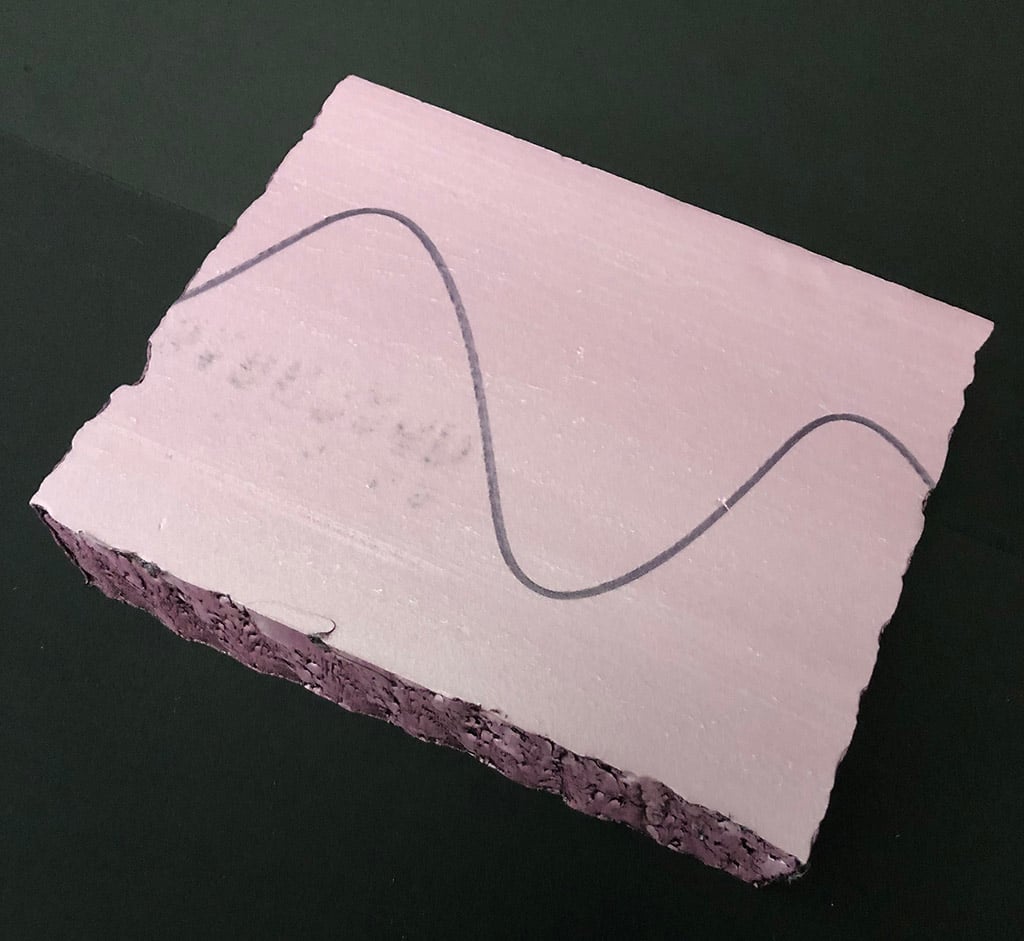
Step 5: Shape The Hills
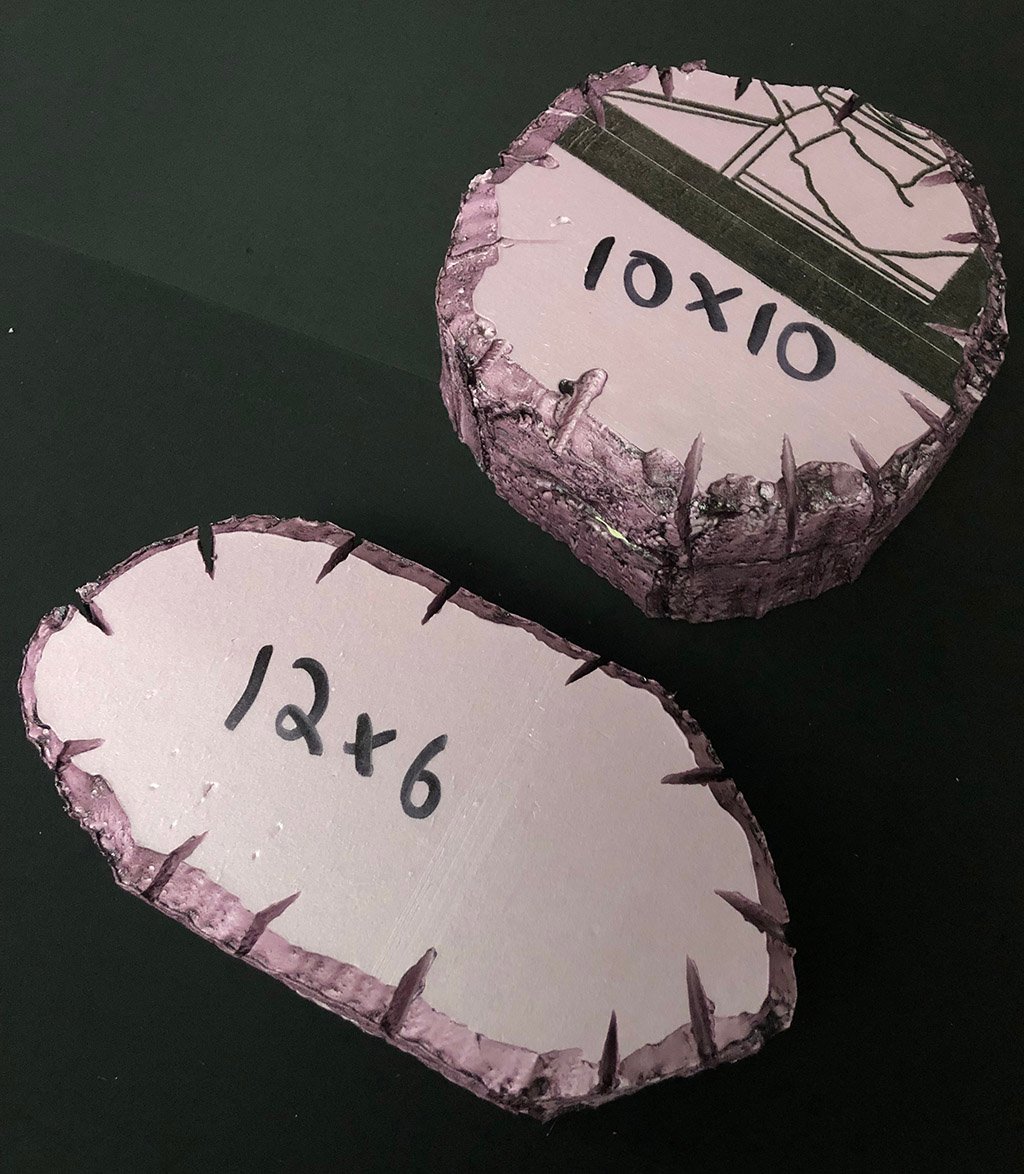
Using the hot knife round of the corners of the hills to give them a more nature shape. You can spend a lot of time on these to get a very round shape, or do it quickly and get a more octagonal shape, it’s up to you. If you are making hills with more than one layer (such as 2 pieces of 2-inch foam for a 4 inch hill) line up all the pieces and hold them together in one hand while using the knife in your other hand to shape the hill. Do not try to shape each layer on its own, they will never line up right.
Once the corners are shaped to your satisfaction you will want to use the hot knife to add a bevel to the top edge, again giving it a more natural look. You can also chose to keep the sharp cliff like edge if wanted. At this point, you can also use the knife to add any scoring or other effects you like, as shown above. Once done here you basic hill has formed.
Step 6: Glue the Layers Together
If you are using more than one layer in you hill you’ll want to glue them together now. Using your caulk gun put a bit of liquid nails down between each layer. You’ll then want to use something, a hobby stick works great, to spread the glue down into a thin layer. Too think and the layers wont be flat, so go thin, then press the hills together. Liquid Nails can take a long time to dry, so be careful with the hills for a bit.
Step 7 Adding Texture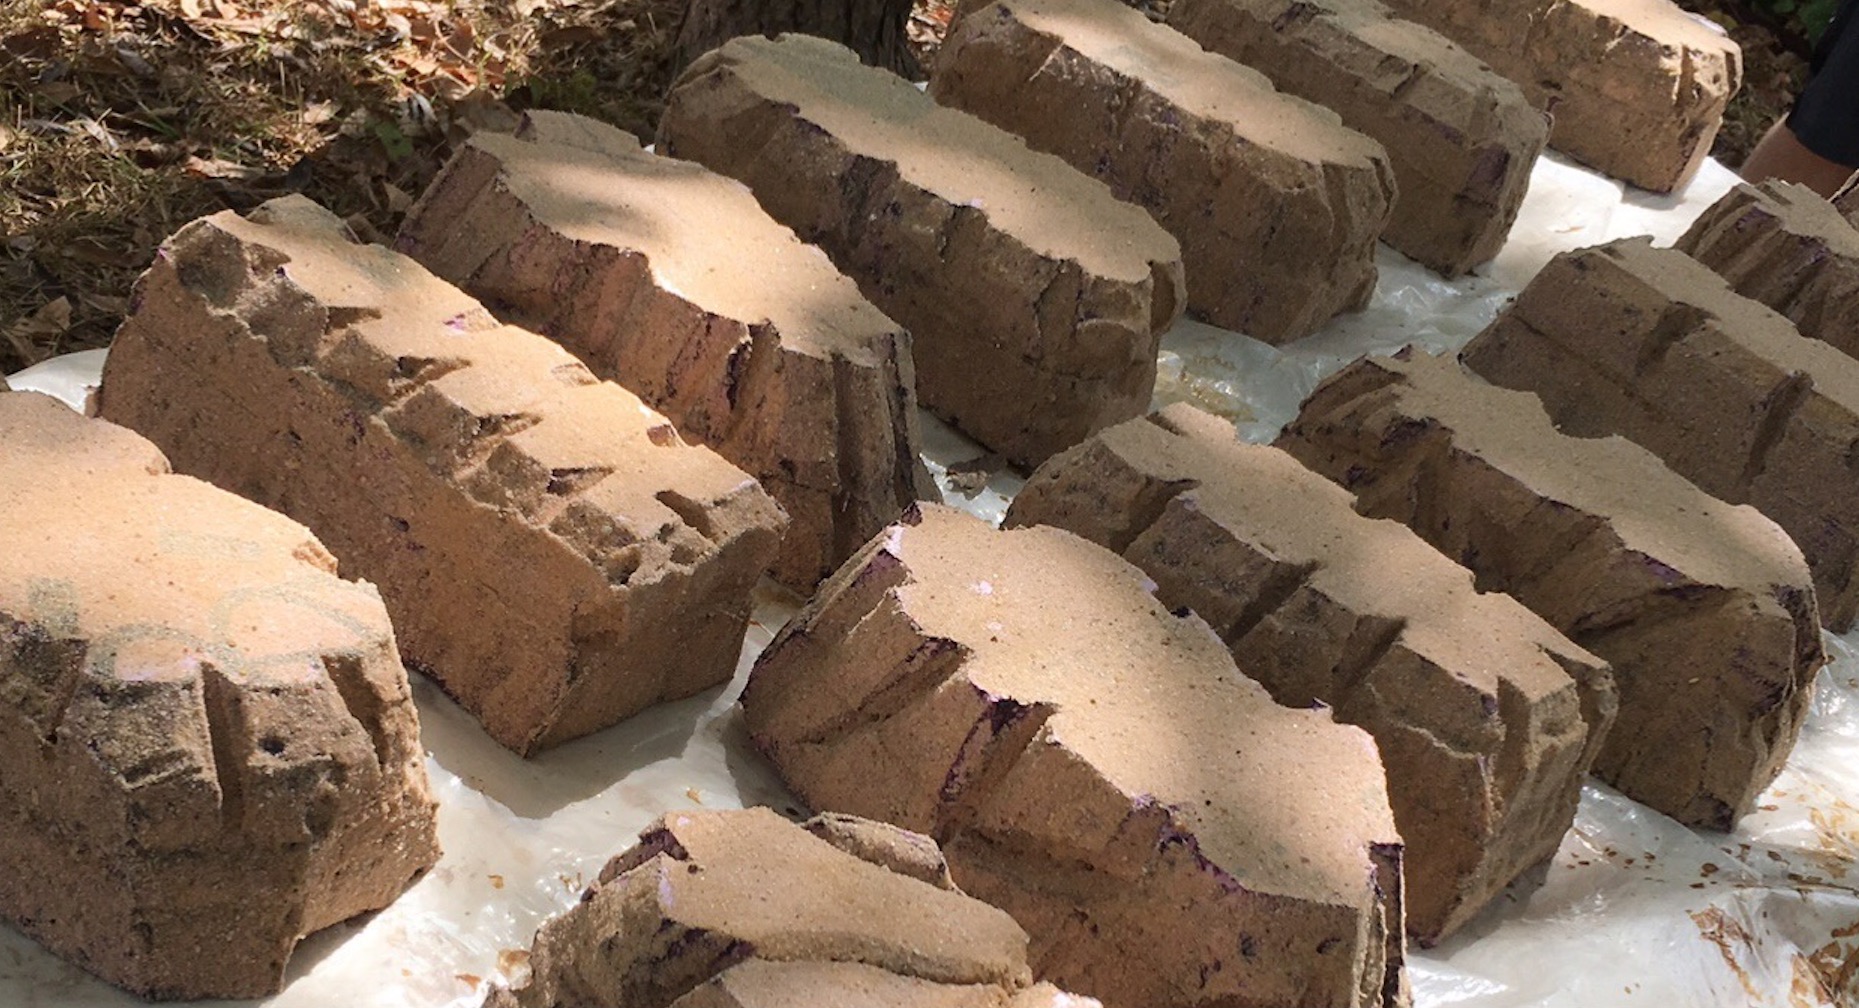
Next, it’s time to add a layer of texture and protection to your hills. In a container mix up roughly equal parts Elmers glue and water. The goal is to get the glue runny enough that you can paint it on, but think enough that it will still have some stick. Using a cheap brush paint a layer of glue onto the your hill. You’re going to want to cover all the surfaces that will be showing, for the hill that means leave the bottom clear, but cover everything else. Before the clue has a chance to dry cover the hill in fine sand.
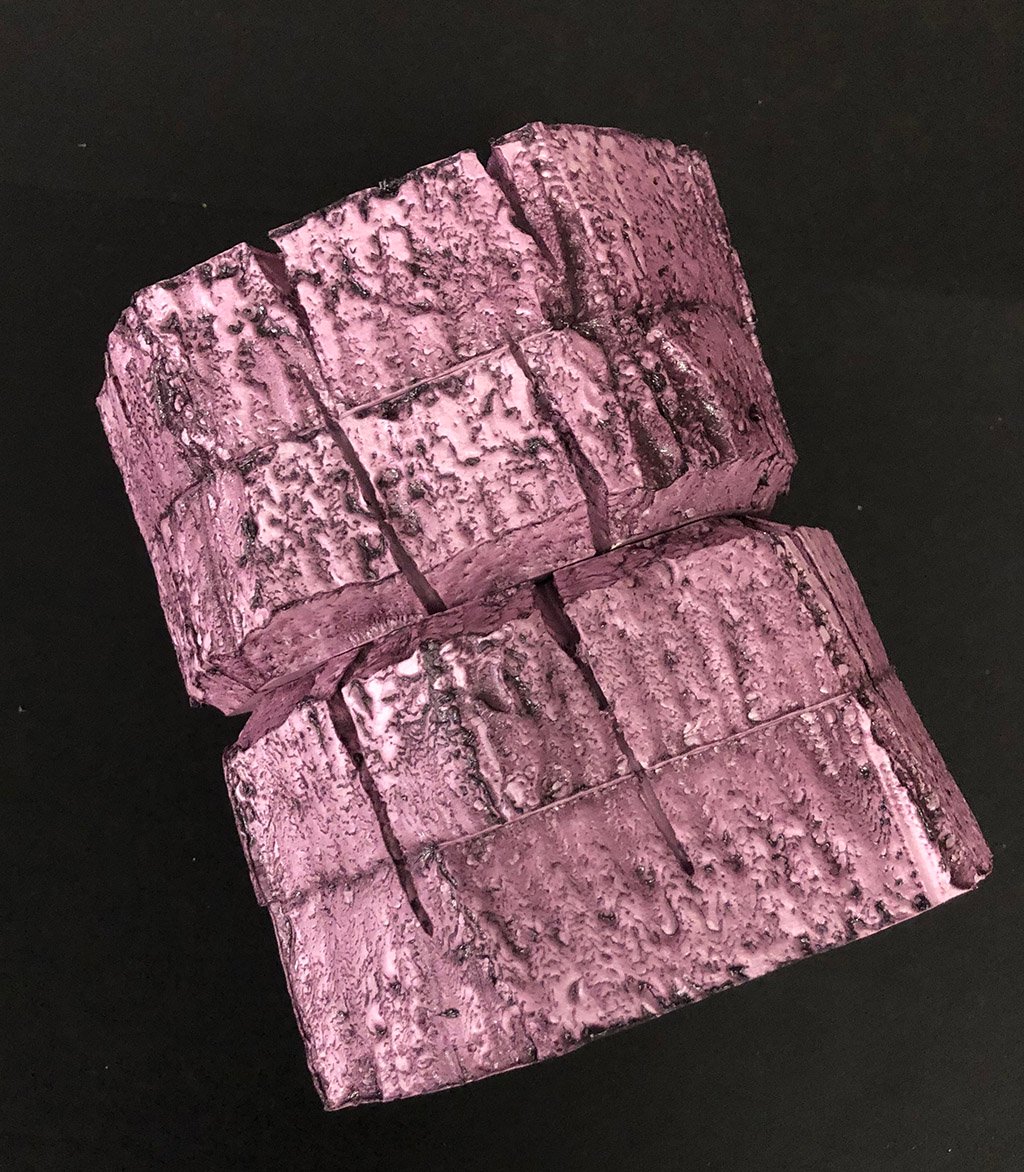
Be careful that the sand doesn’t clump up or get too thick anywhere, and make sure to shake up excess into a bucket, you can reuse this. When done your hills should like those in the picture above. Adding sand like this does a few things. It’s great for adding texture and can be used to help fill in gaps and cover up minor errors. It and the glue also help add an extra layer of protection to the hills making them harder to damage.
Step 8: Paint The Hills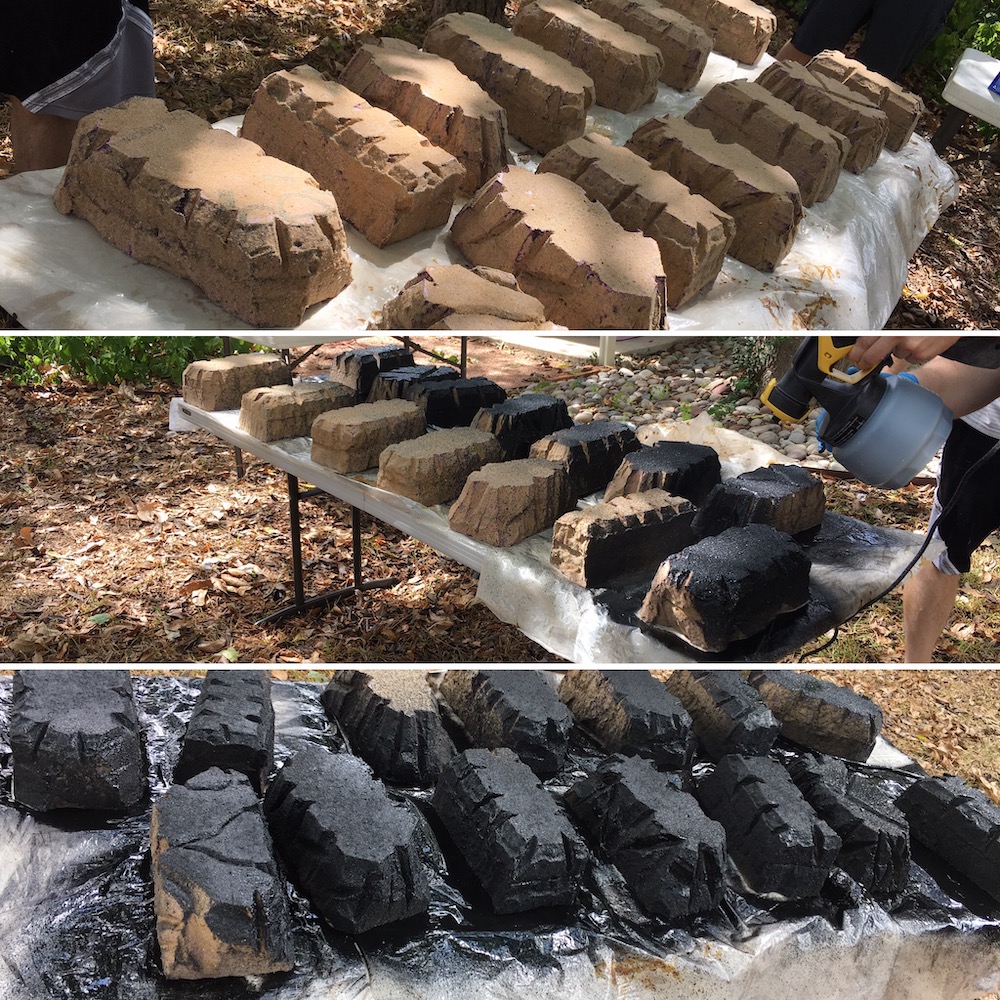
After giving your sand/glue mixture a change to dry it’s time to paint the hills. The first step is to give them a basic base coat, black, grey or even green are great choices. Use strong latex paint, and a power sprayer if you have one. Once done and dried, you’ll want to just add more layers as needed. I normally go with my basic color after the base coat (whatever I’m using the match my matt, green or brown are common) then a layer or two of dry brushing and maybe some detail work if I’m feeling fancy. You can also chose to add flock to the hills if desired.
The Finished Product
 20 hills complete!
At the end of the day, you’ll get some super durable and usable hills out of this. The tough foam, combined with layers of glue, sand and latex paint makes these almost indestructible. They will last for years of heavy use.
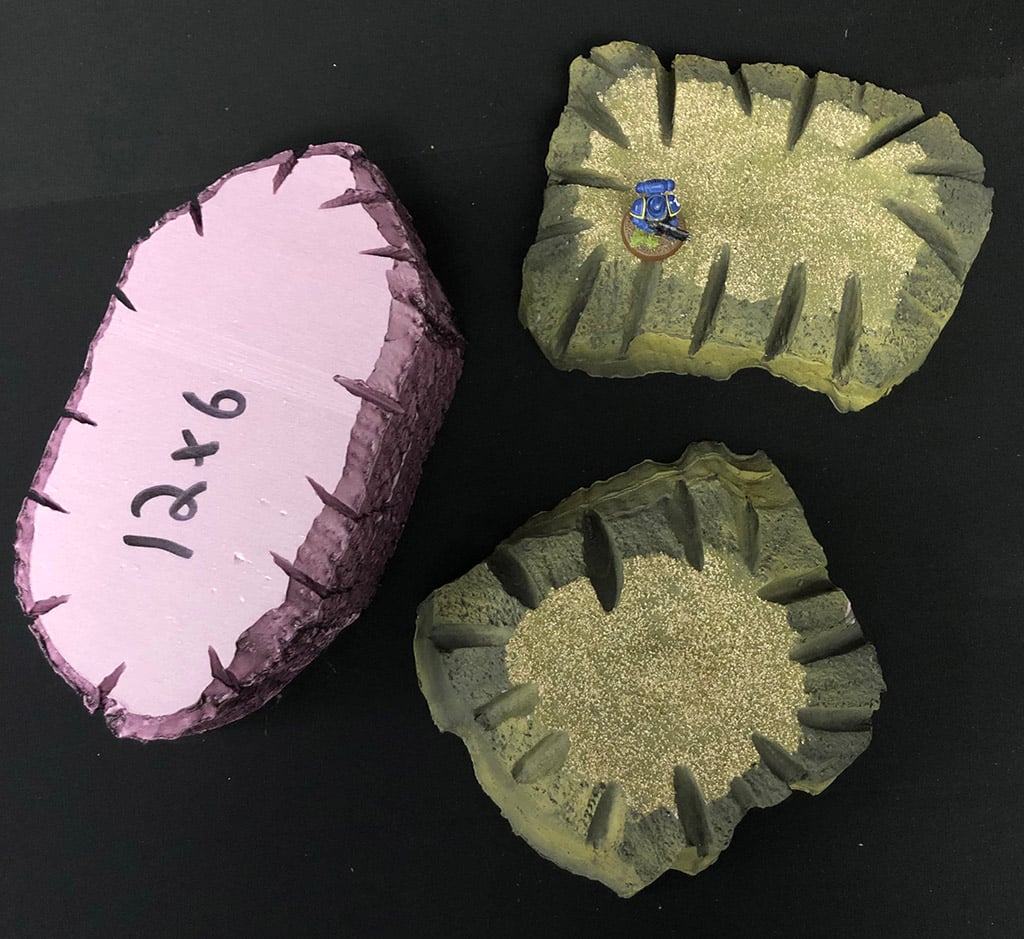
These hills are also highly adaptable and you can change up the basic formula to fit your needs. You can make just about any shape, size or height you want.
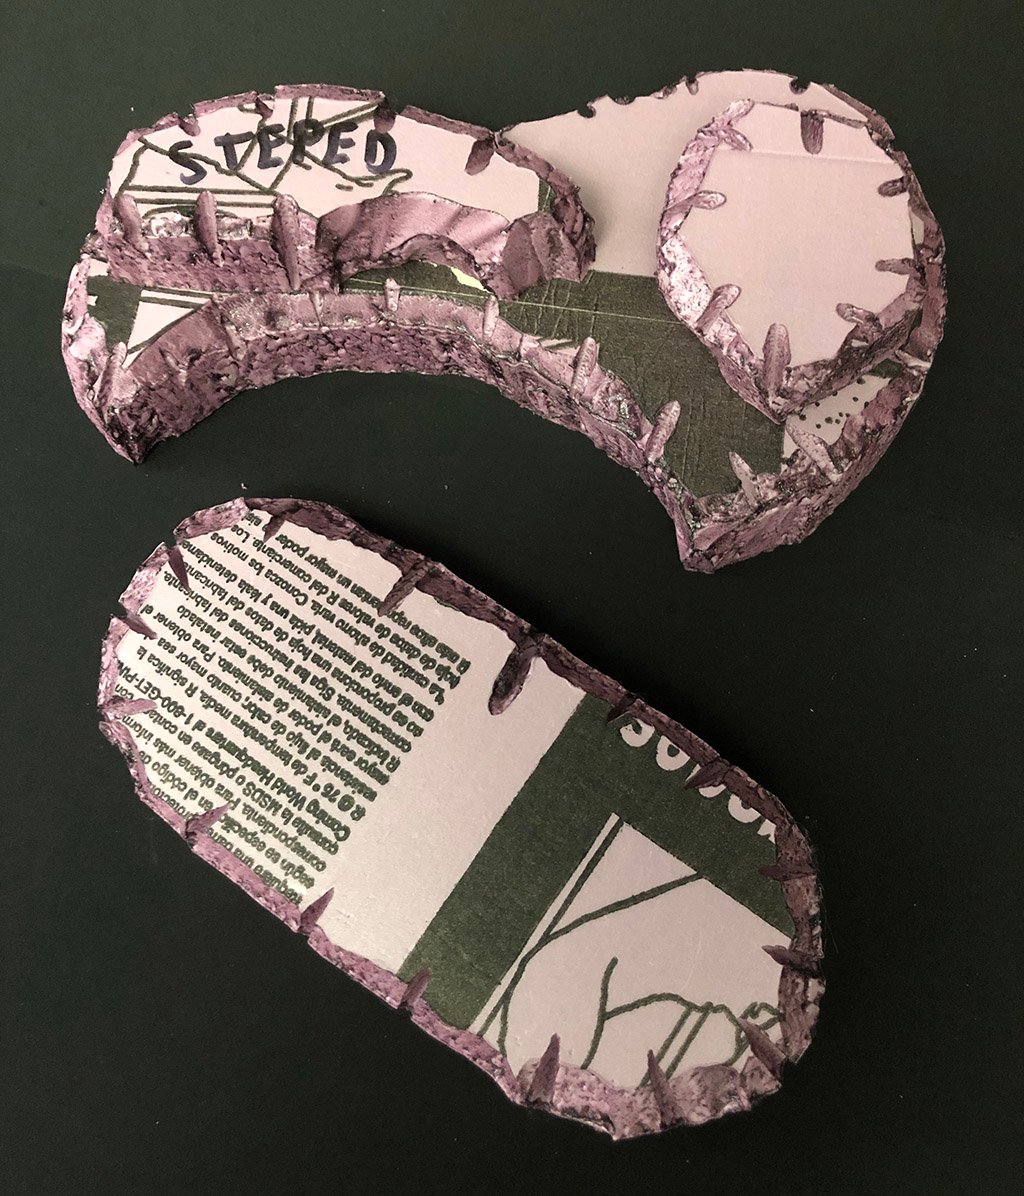
If you want a lower hill, a single 2 inch sheet still makes great hills and saves you a lot of time and effort. You can easily make non-standard shapes or stepped hills, as shown above as well.
By stacking two 4 inch hills (with their “tops” touching) you can also make a hill pillar or butte for a cool South Western (or DBZ) table.
Make It Your Own
I hope you’ve found this basic primer useful. You can use the basic hill building steps are I’ve laid them out, or adapt them to fit your needs. Terrain building tends to be a highly personalized process and each person/store/event has its own needs and wants. Take what I’ve laid out here and make it your own. Putting more effort and care into your work will pay off, and experimentation is the real secret to success. If you’ve enjoyed this piece feel free to let us know and I’ll cover how to build more types of terrain in the future. Thanks for reading.
![]()
