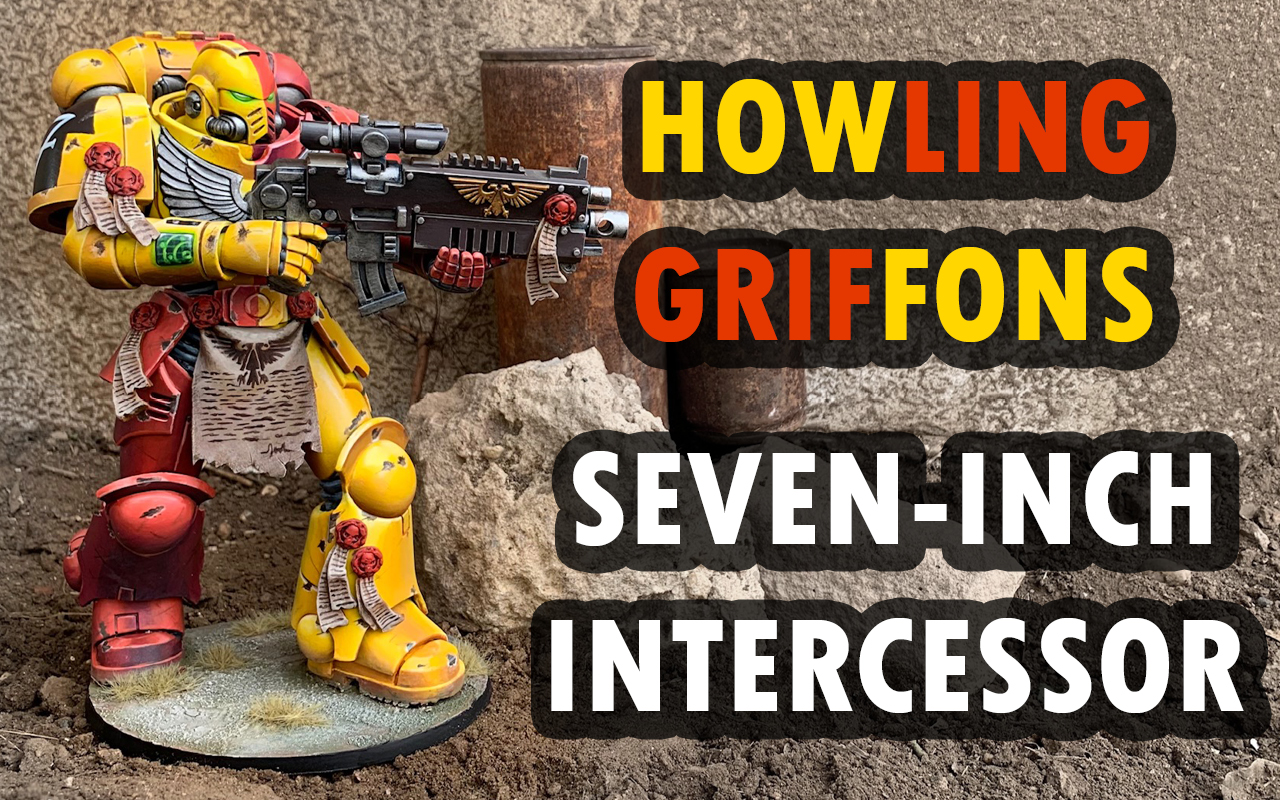
Warhammer 40K: Painting a Howling Griffons McFarlane Intercessor Part 1: Prep
Today I take the first steps down the long road of painting the McFarlane Toys Artist Proof Intercessor as a Howling Griffon.
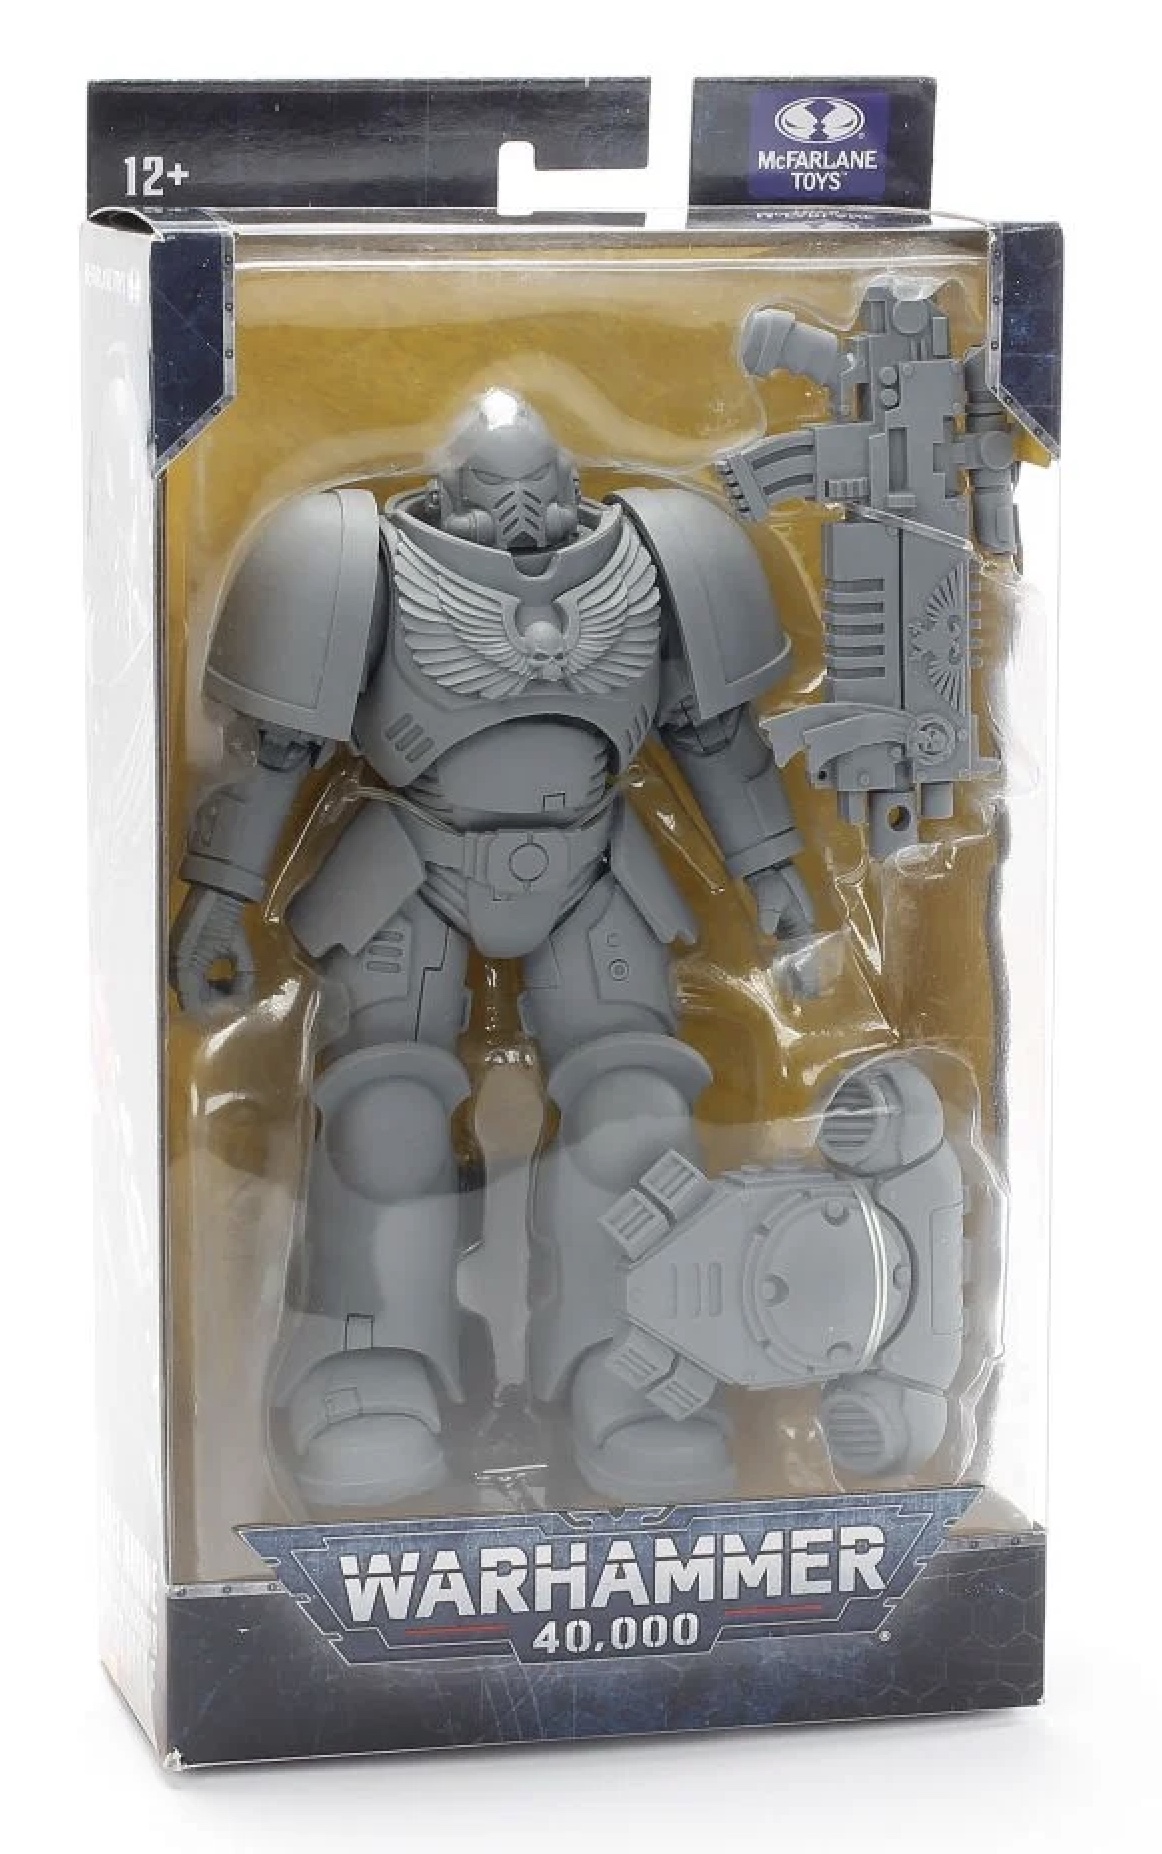
Beofre we get started, here’s the 40k McFarlane Intercessor Artist’s Proof in his box. And away we go.
Cleaning
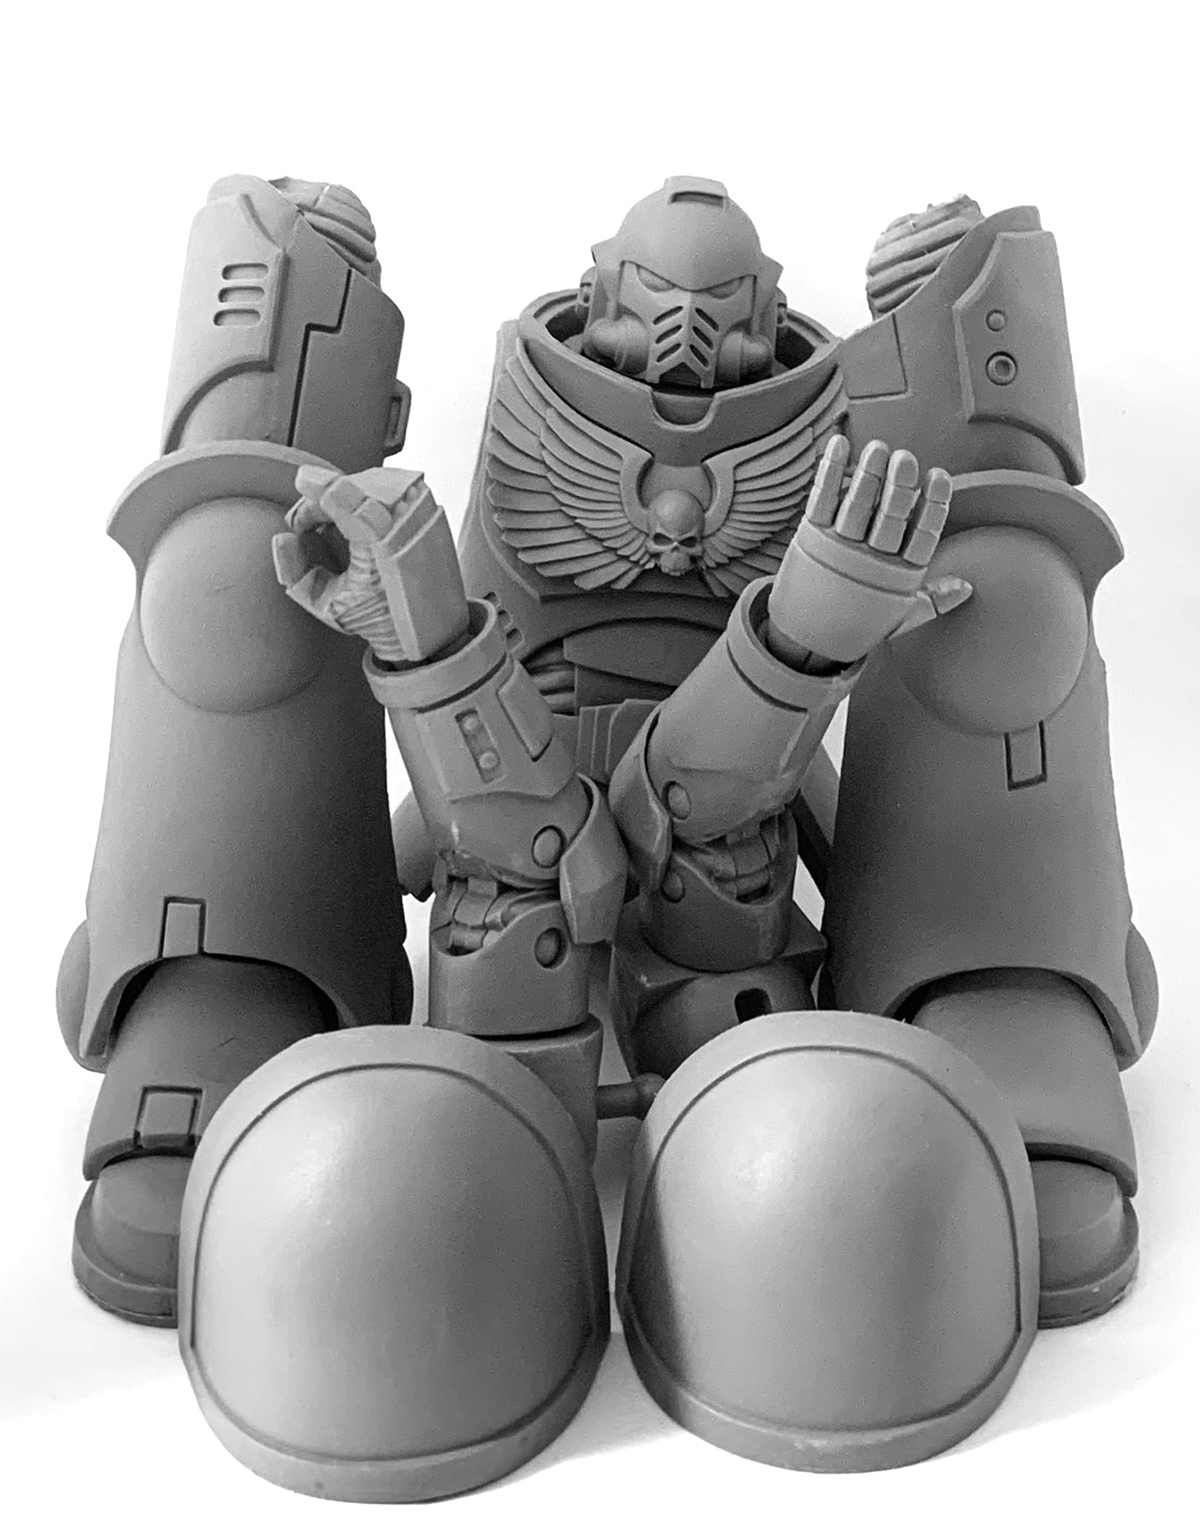
First I broke it down into as many pieces as I could. There are many reasons I had to do this. A lot of the pieces were overlapping each other and I would not be able to get a brush to reach everything if I left him all put together like this. Additionally, the McFarlane Intercessor is a big heavy boy. Handling such a massive thing is difficult and painting the individual pieces is so much easier. Lastly breaking him down would make it easier to reach all the mold lines and file them off.
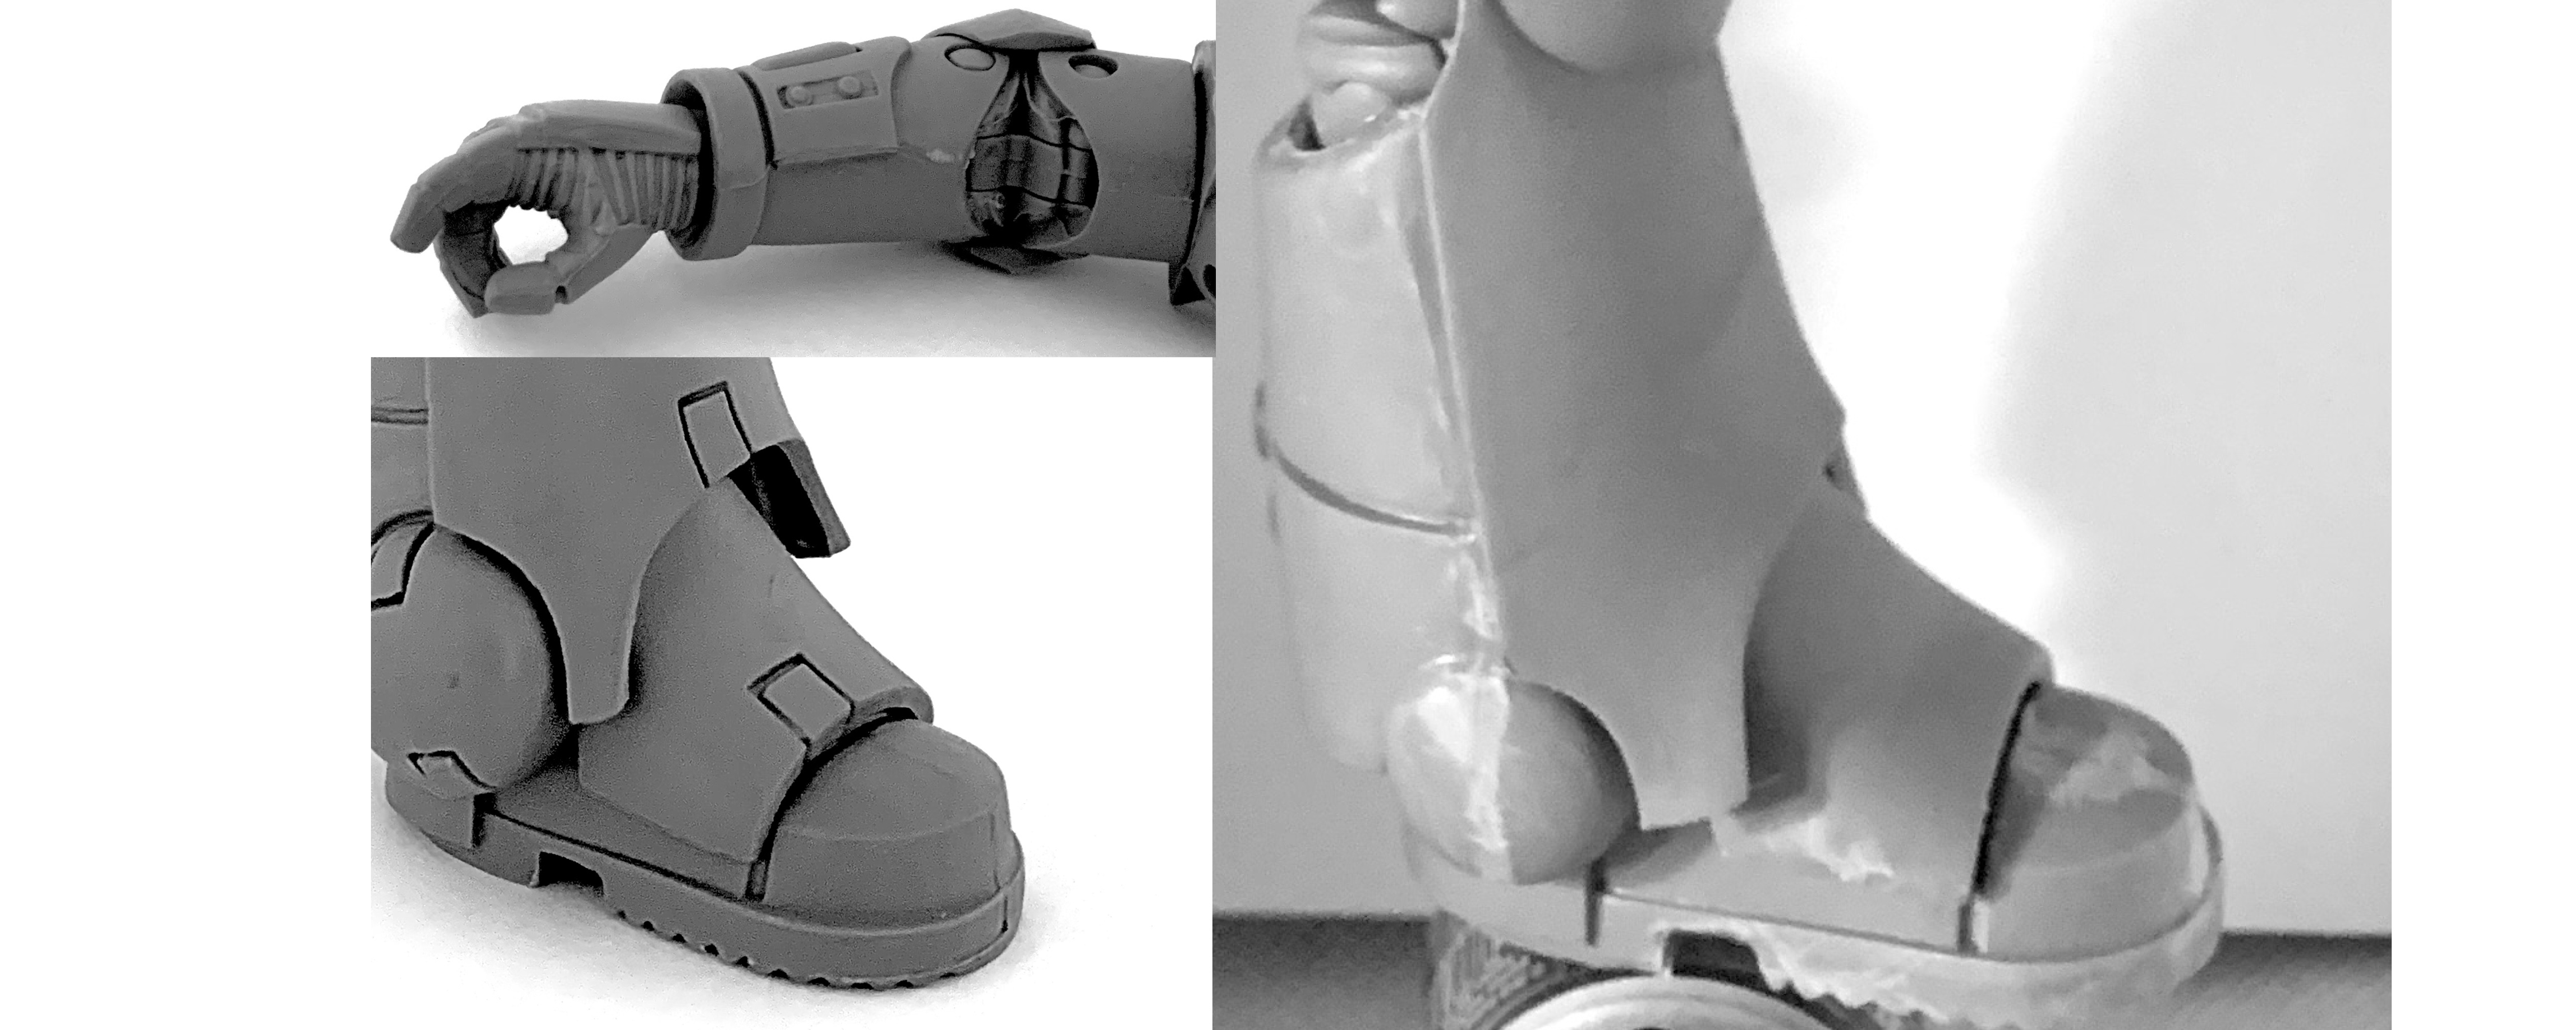
The mold lines were not noticeable immediately but if you look at the forearm and the edge of the foot, you can see them. They’re bigger than they look. It’s actually easier to see where they were after I filed them all off on the left. I started with a pretty standard coarse metal file like the ones used often for miniatures. But that one left some deep gouges in the soft rubbery material this guy is made of so to even them out I used a standard nail file. You can buy them at grocery and drug stores and they’re pretty inexpensive. The finer grit ones are great for getting a nice smooth finish on surfaces like these.
Reposing
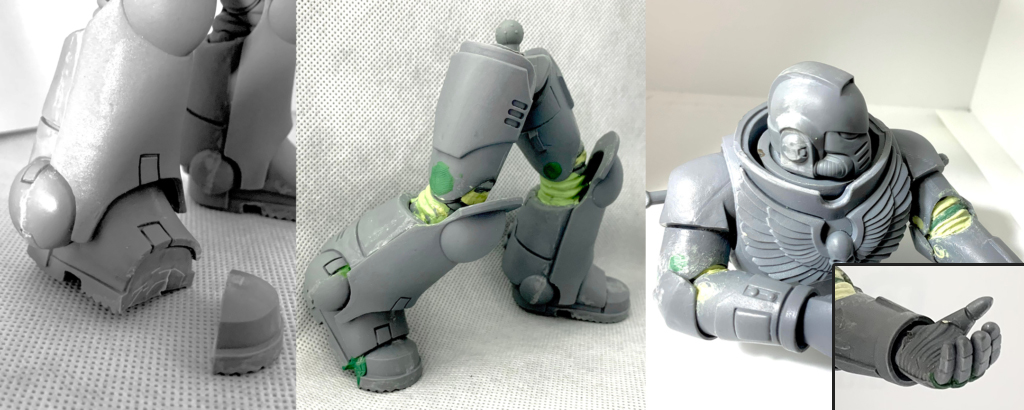
Next, there was a little reposing and gap filling. There was a brief moment where I wondered whether it would be best to leave this fellow poseable but of course, trying to move him around would easily hurt the paint job. So that meant picking a static pose and setting him up to stay that way. We decided he should be advancing into battle like any good Space Marine. But no matter how I posed him his two flat feet weren’t able to create a sense of movement. So I sliced off the front of his right foot and reattached it at an angle. It took a few steps to get it back looking like a proper space marine boot. The first application of green stuff was really just used to hold the pieces in the proper place. I sliced away the excess and had to sculpt the soles back on. A triangular file was the perfect way to get the tread pattern back in the boots after the putty had cured.
In addition to the foot, I also repositioned the fingers on his left hand. His palm was flat which seemed like no decent way to hold a giant bolt rifle. I sliced along where the fingers met the glove and folded them in, filling the gaps with green stuff and sculpting in similar ribbing to what you see on other
I also decided to get rid of all the action-figure parts that don’t really belong on a space marine. The studs by the elbows and the gaps that enabled those joints to bend were all filled in, and in many cases that meant resculpting that rubbery-looking tubing you see in those armor gaps. At first, I just used green stuff but ended up switching to some Miliput I’d bought recently. It’s a very different two-part epoxy that has an oily feel to it. While it is rather crumbly it can be smoothed easily with water and it is not insufferably sticky like green stuff. It also files down a bit more easily and I ended up having to do a lot of filing to get everything smooth again after I filled in those elbow holes.
In the end, the best way to use Miliput is, weirdly, to mix it with green stuff. It makes it less crumbly and a little sticky which is important because you want it to adhere to the surface you’re working on. In the middle image you can see some of this light green mixture at the knee joints.
One final thing you’ll notice is that in this pose, his kneepads are completely disconnected from his knees. They are connected to his greaves. To get them where they should be I had to heat them with a hair dryer and bend them into place. This material turned out to have a decent amount of memory and refused to set how I wanted it to. Eventually I had to drill a hole in them and pin them into place. That was enough to keep the shape to finally hold.
Customization
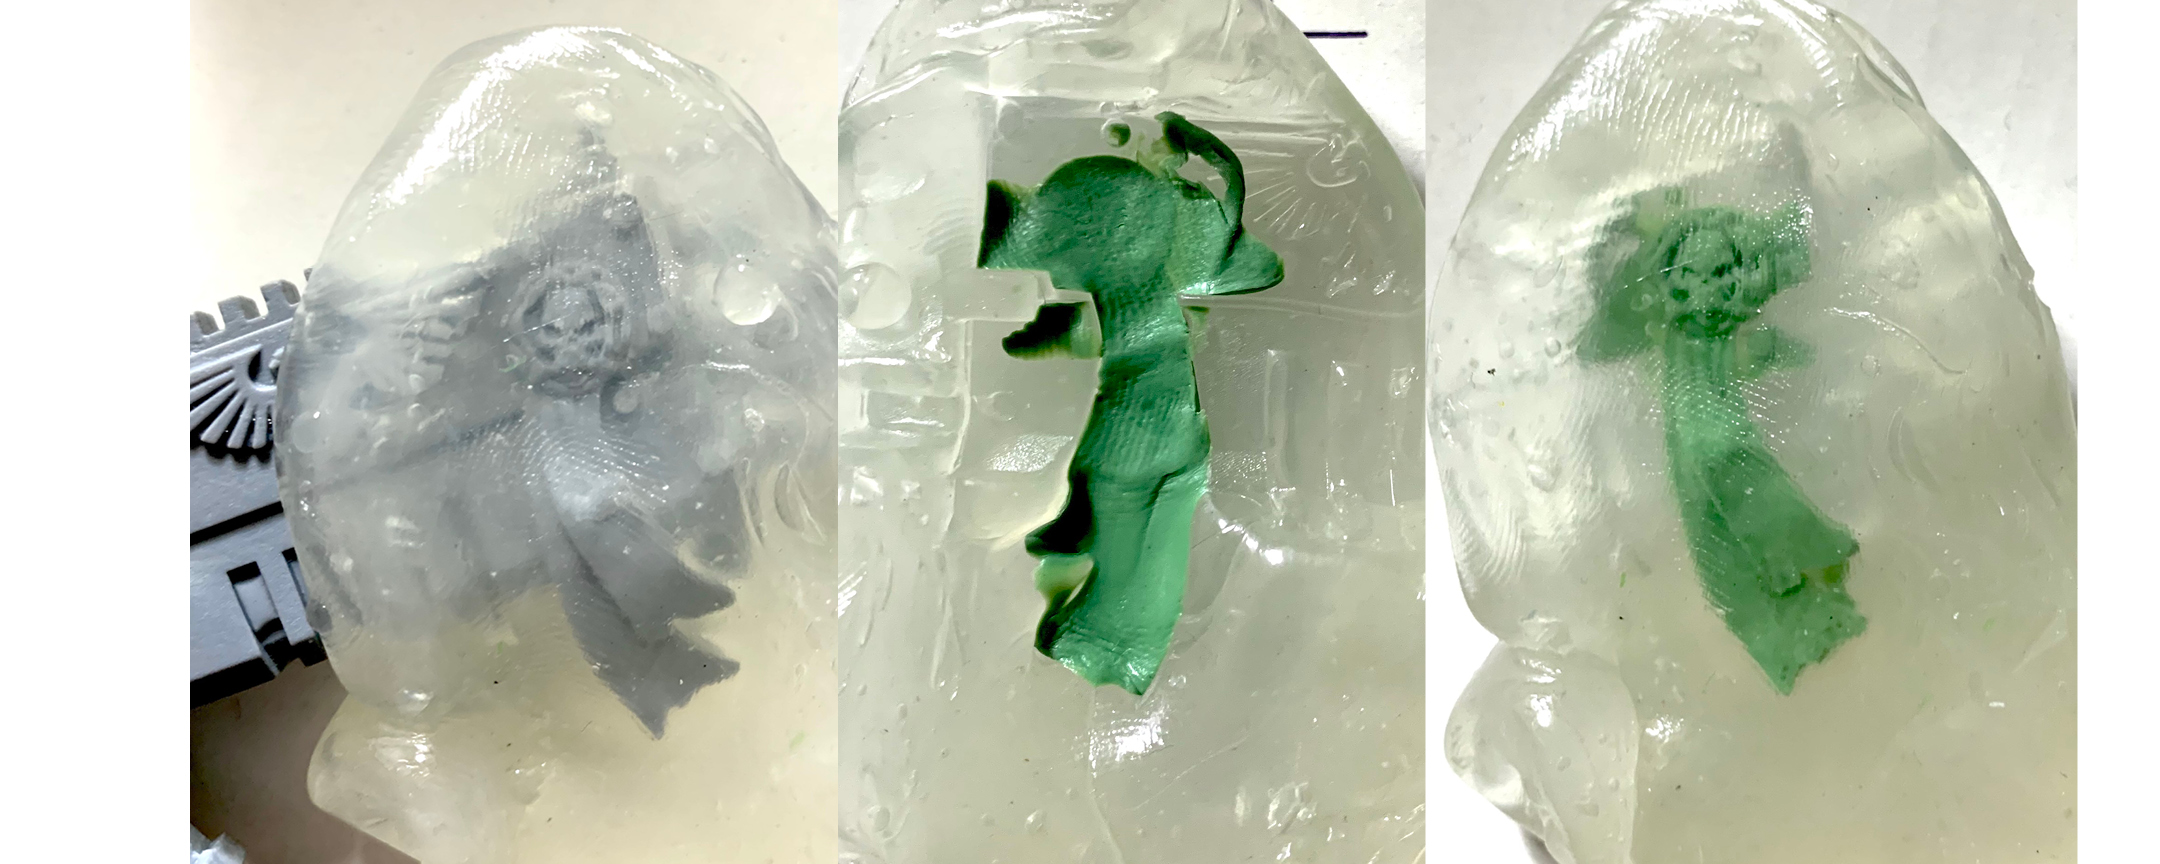
I really wanted to personalize this guy, but how do you convert something when there are no other bits in the right scale? I figured out an easy solution to that with an old trick I only recently learned. Insta-mold (it goes by other names) is a soft rubber that melts easily in hot water and can hold the shape of things its pressed into.
I’d never used it before and it ended up being 2020 shutdowns that finally got me to try it. A kit I ordered (not from GW if anyone cares) had some missing bits. Then everything shut down and I had no way of knowing how long it would be before I could email the company for a replacement. A friend lent me some Insta-mold and molding the missing parts ended up being easier than I thought.
Why not cast a few giant purity seals to give this guy some extras? That would make him stand out from the crowd.
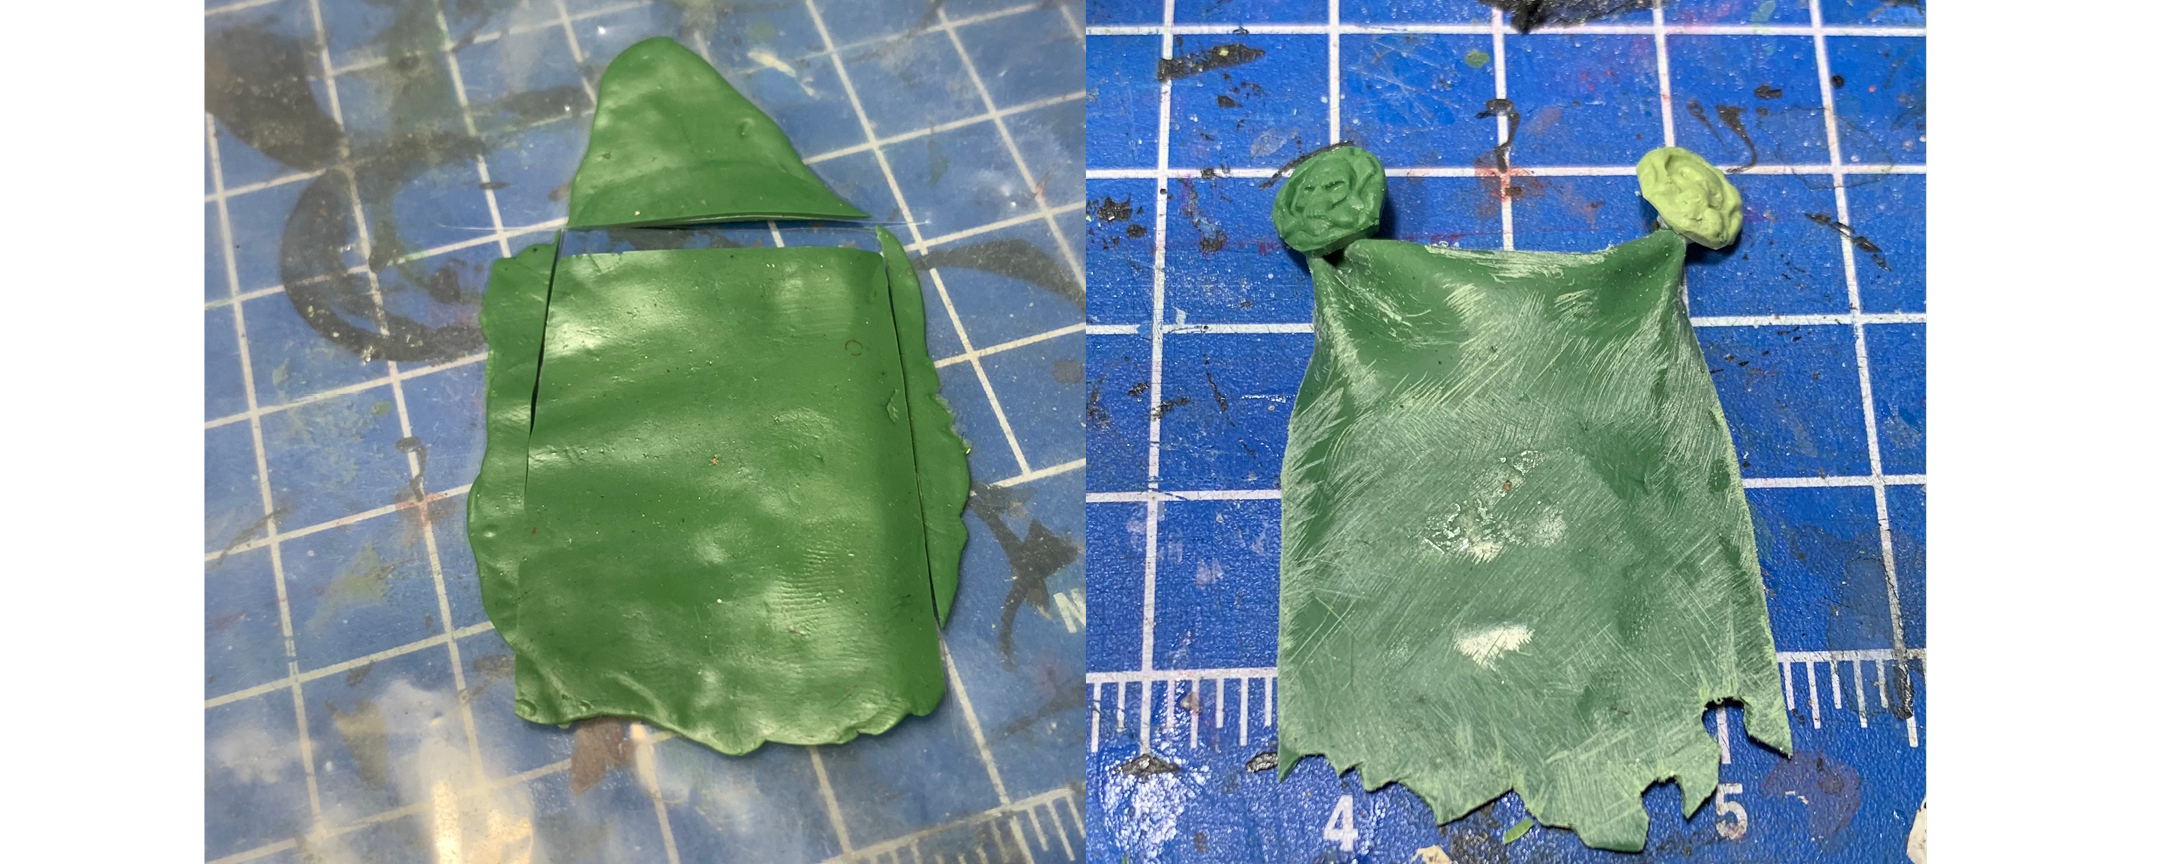
I ended up casting seven in all. After you cram the green stuff into the mold you have to let it fully cure, so I had to keep molding them the entire time I worked on the project. After the first, I ended up using the same mix of Milliput and green stuff mix I’d used on the joints. It goes into the mold better since it’s a little softer. Two of the seven were cast just for the wax seals to use on this tabard.
To create the tabard I rolled out a generous amount of green stuff and gave it a few hours to partially cure. Then I sliced out a nice tabard-sized portion and carefully pinched the corners to create the folds. After it had fully cured I cut the tattered portions out of the bottom and then went at the whole thing pretty aggressively with my metal file. It was too smooth and needed a nice texture. Then I glued the wax seals onto the pinched corners.
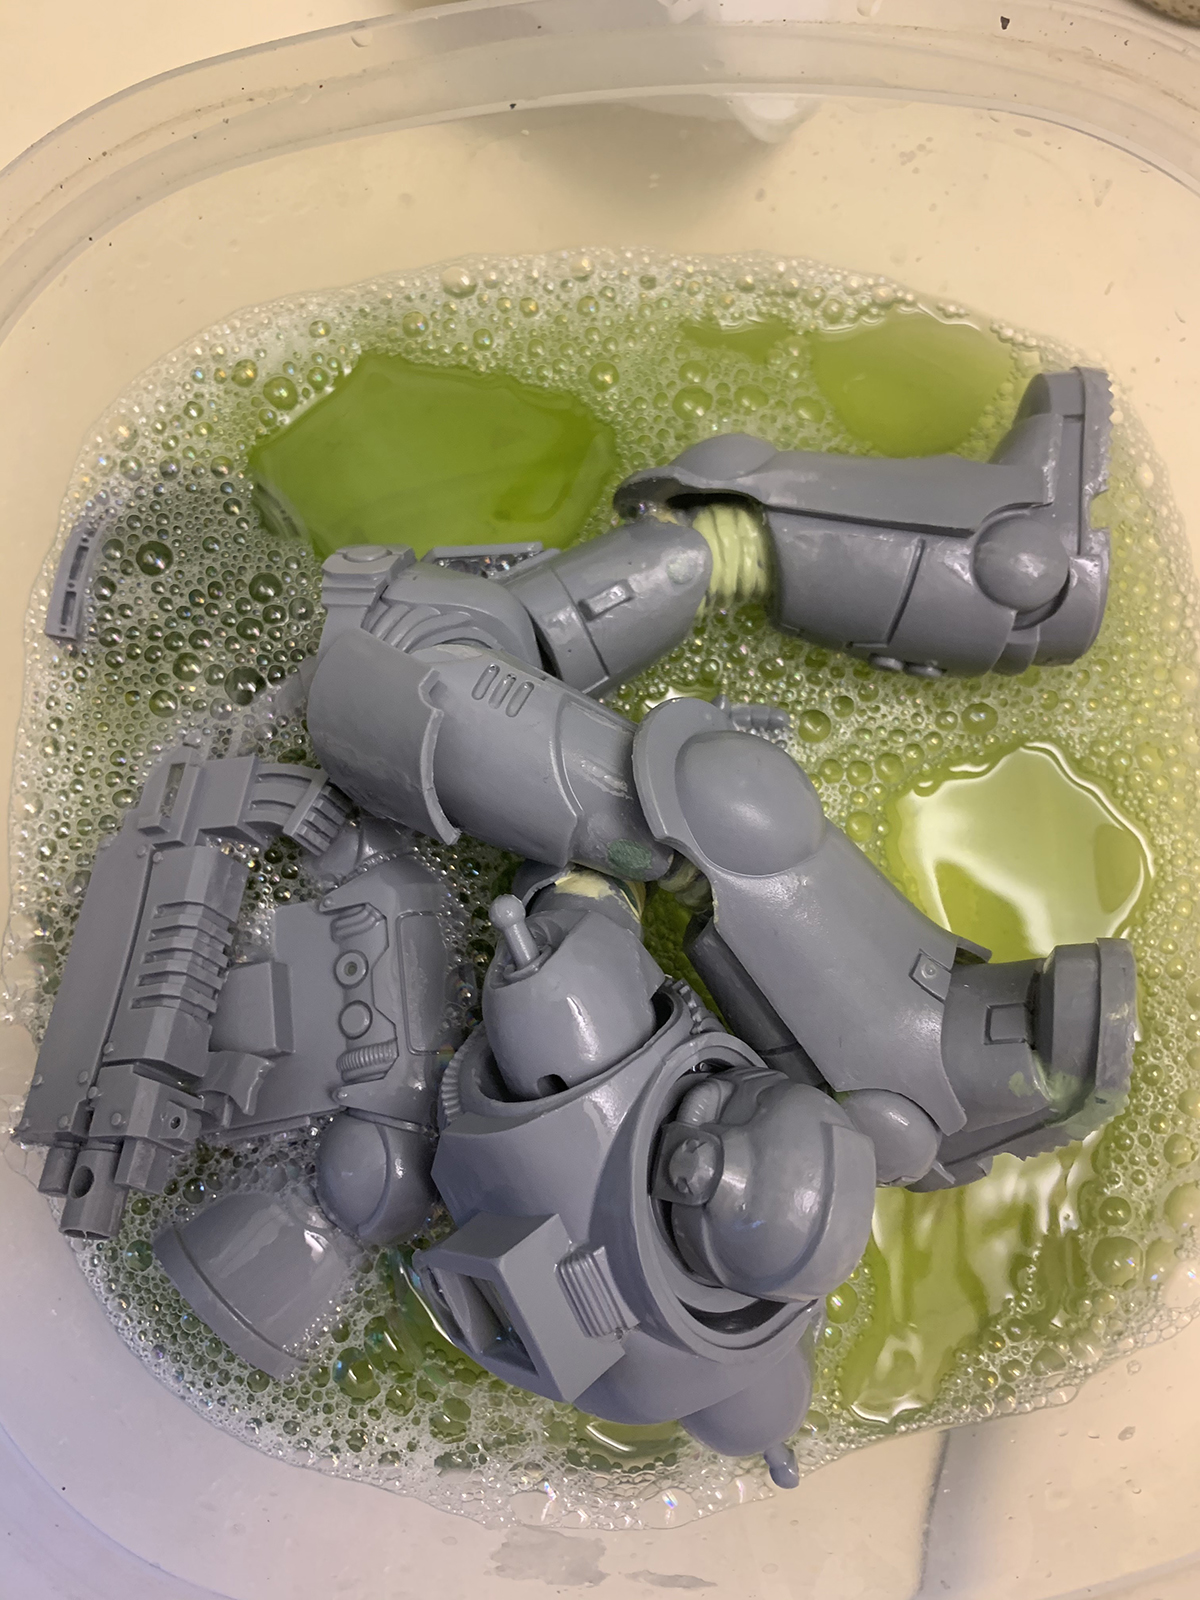
Then I let the big guy stew in some Simple Green for a bit before giving him a brushing with an old toothbrush. This gets off any mold release agents that might have been involved in casting him as well as any oil that might have rubbed off from my fingers.
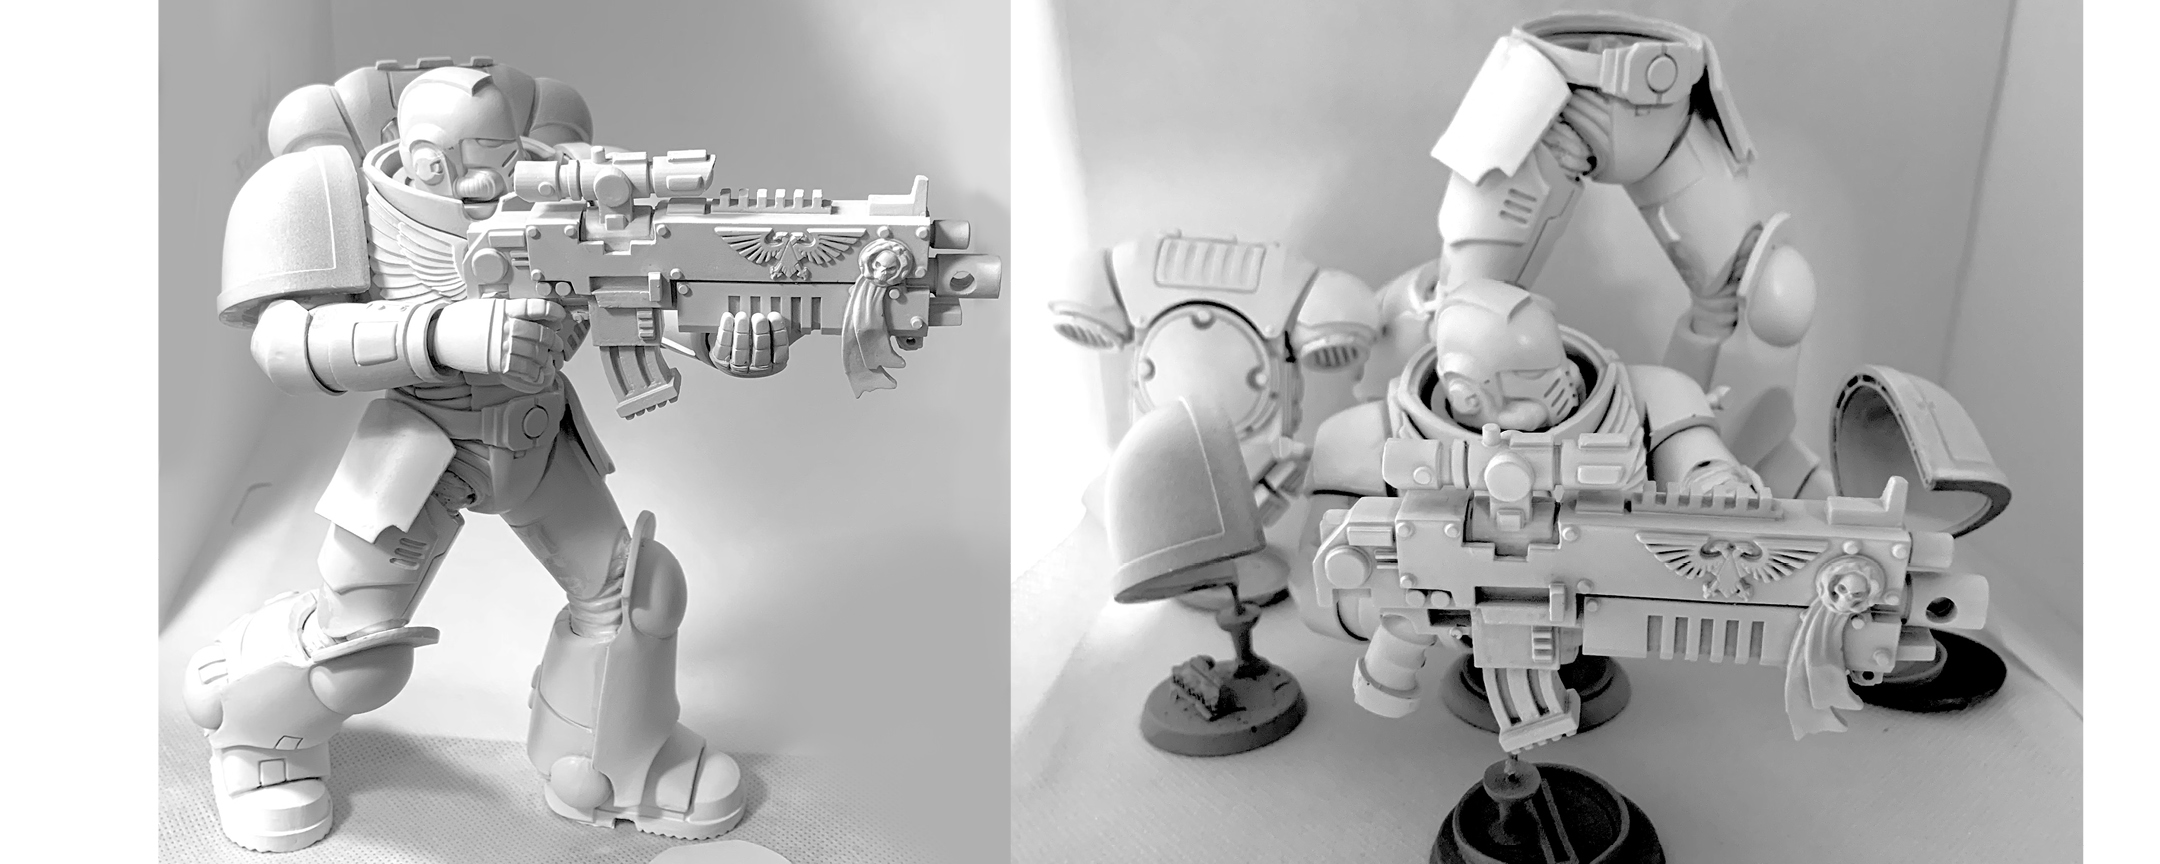
While I primed him in multiple pieces, I just had to stick him all together again to see how he looked. Then it was back to individual pieces again. I glued each one to a pushpin glued to a base to give me something to hold onto while I paint.
~Thanks to everyone who voted in the contest to decide what chapter would be painted. Hope you enjoyed everything so far. I’ll be back soon to actually put some paint on this oversized goon. If you want to see more of my work, find me on Instagram (#t00mini) for what I’m up to day to day. I also have a blog: [email protected], but I don’t post there as much as I used to.