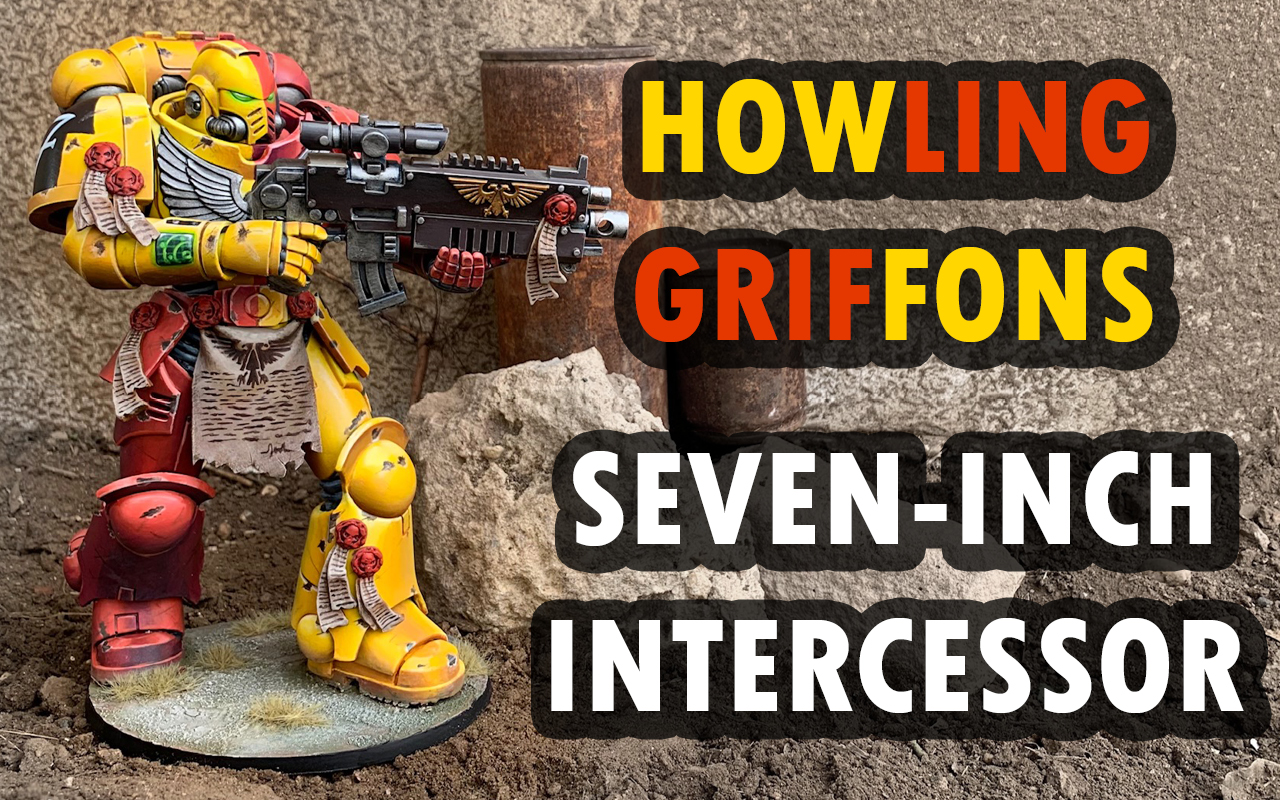
Warhammer 40K: Painting a Howling Griffons McFarlane Intercessor Part 2: Painting
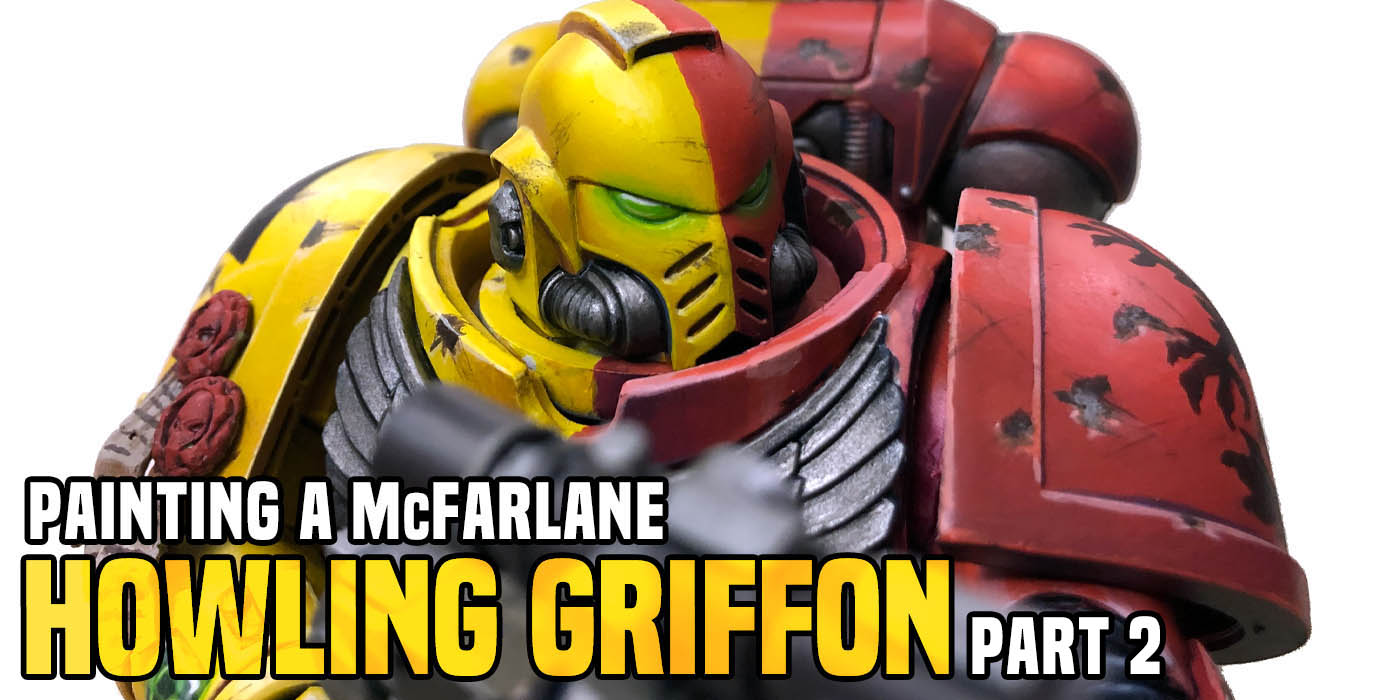

Today I start putting some Howling Griffon paint on the McFarlane Toys Artist Proof Intercessor.
Catch up with Part 1 (assembly and prep) here.
Yellow Armor
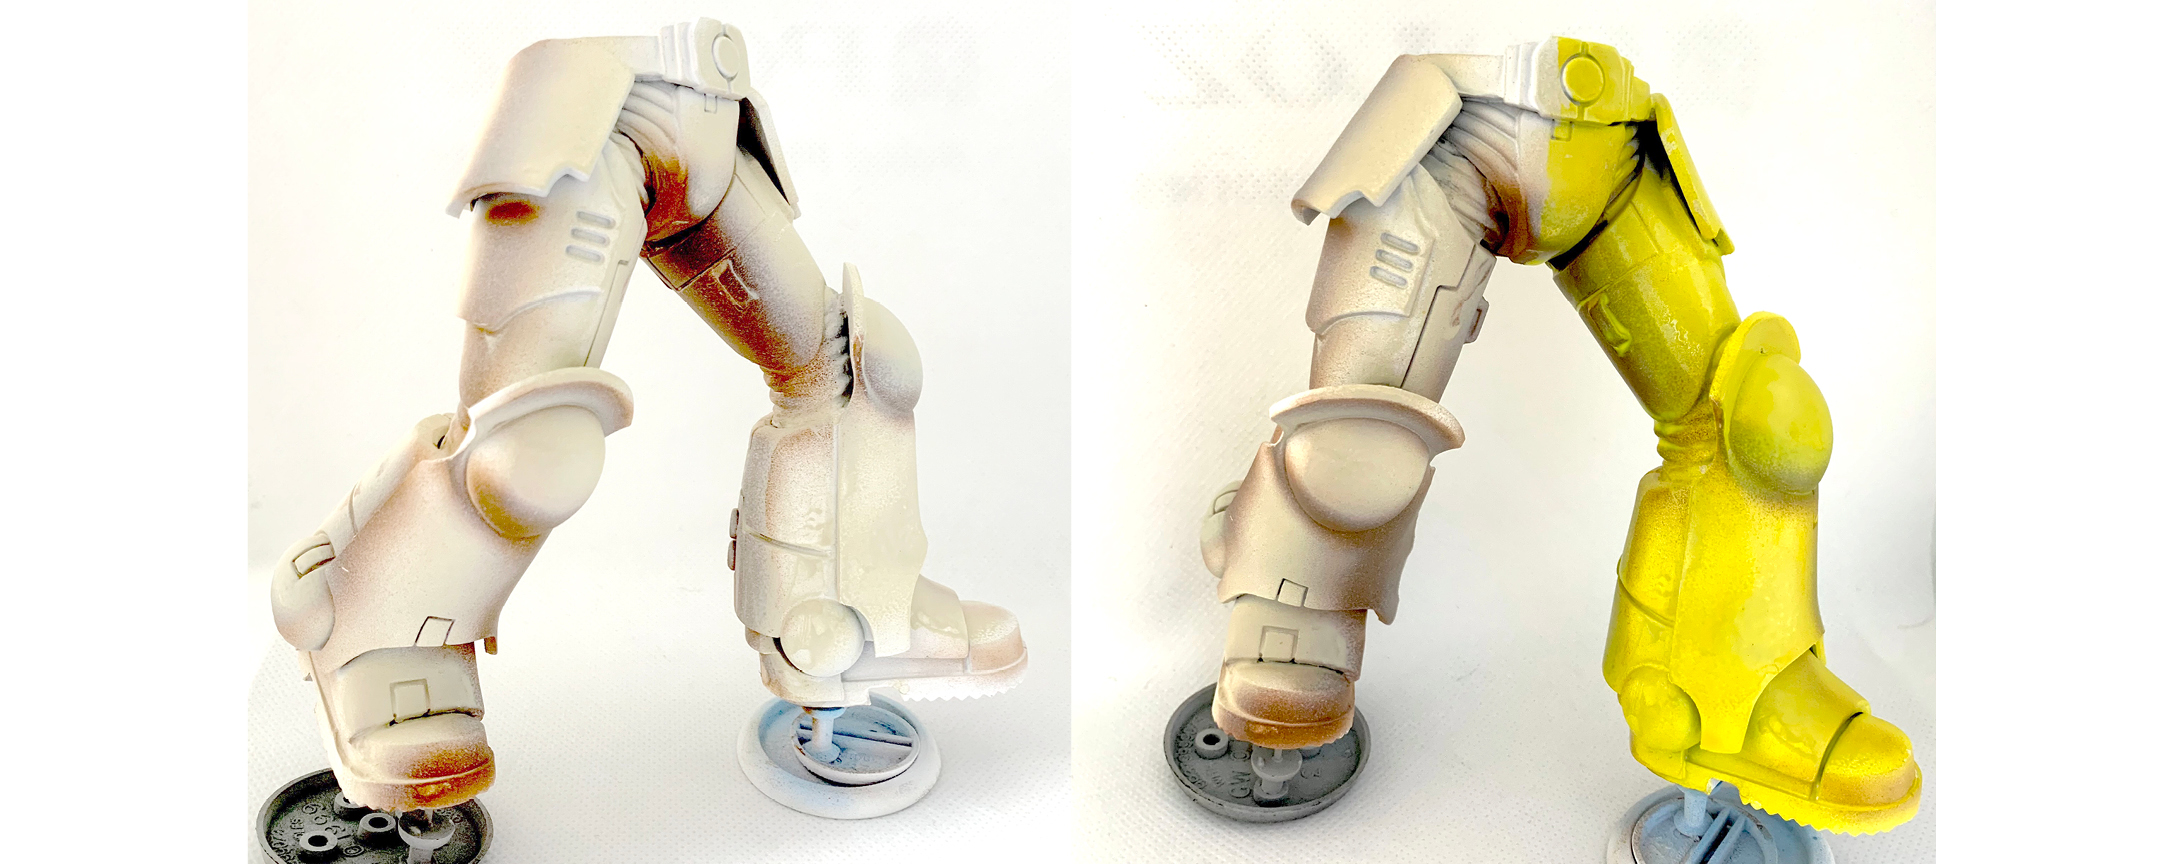
I was going to try to do a lot of this with an airbrush, but mine just wasn’t cooperating and kept splattering the paint regardless of anything I tried. I have done some airbrush paintjobs that I’m really proud of, so I’m always a little taken aback when I suddenly can’t get it to work. All I ended up finishing was some very basic shading. So switching to a traditional brush, I gave the left leg a thin layer of Flash Gitz Yellow.
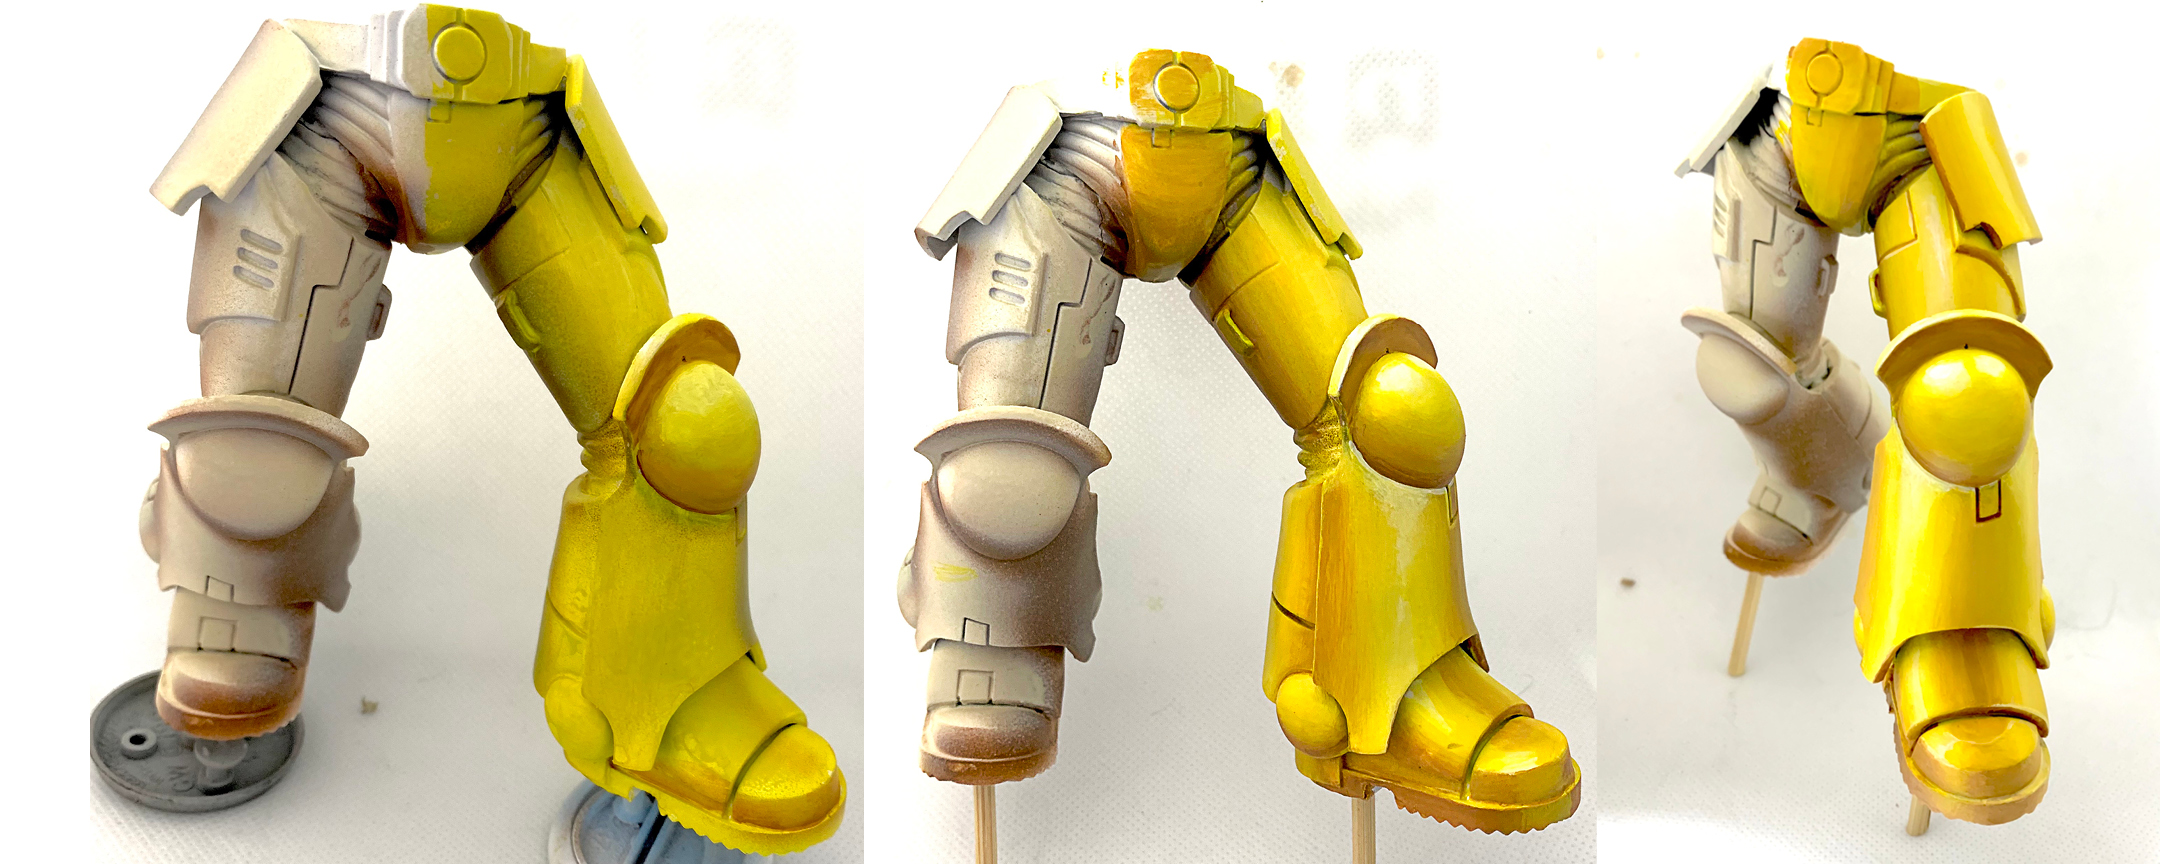
I add some shading to the Flash Gitz Yellow with Averland Sunset and Skrag Brown, also adding a few highlights with White Scar. I build up the values by wet blending layer after layer of those four colors until they finally look smooth. It takes awhile with yellow, but fortunately I plan to add some battle damage later. In addition to looking cool, Battle damage is a great distraction from any uneven blending.
Red Armor
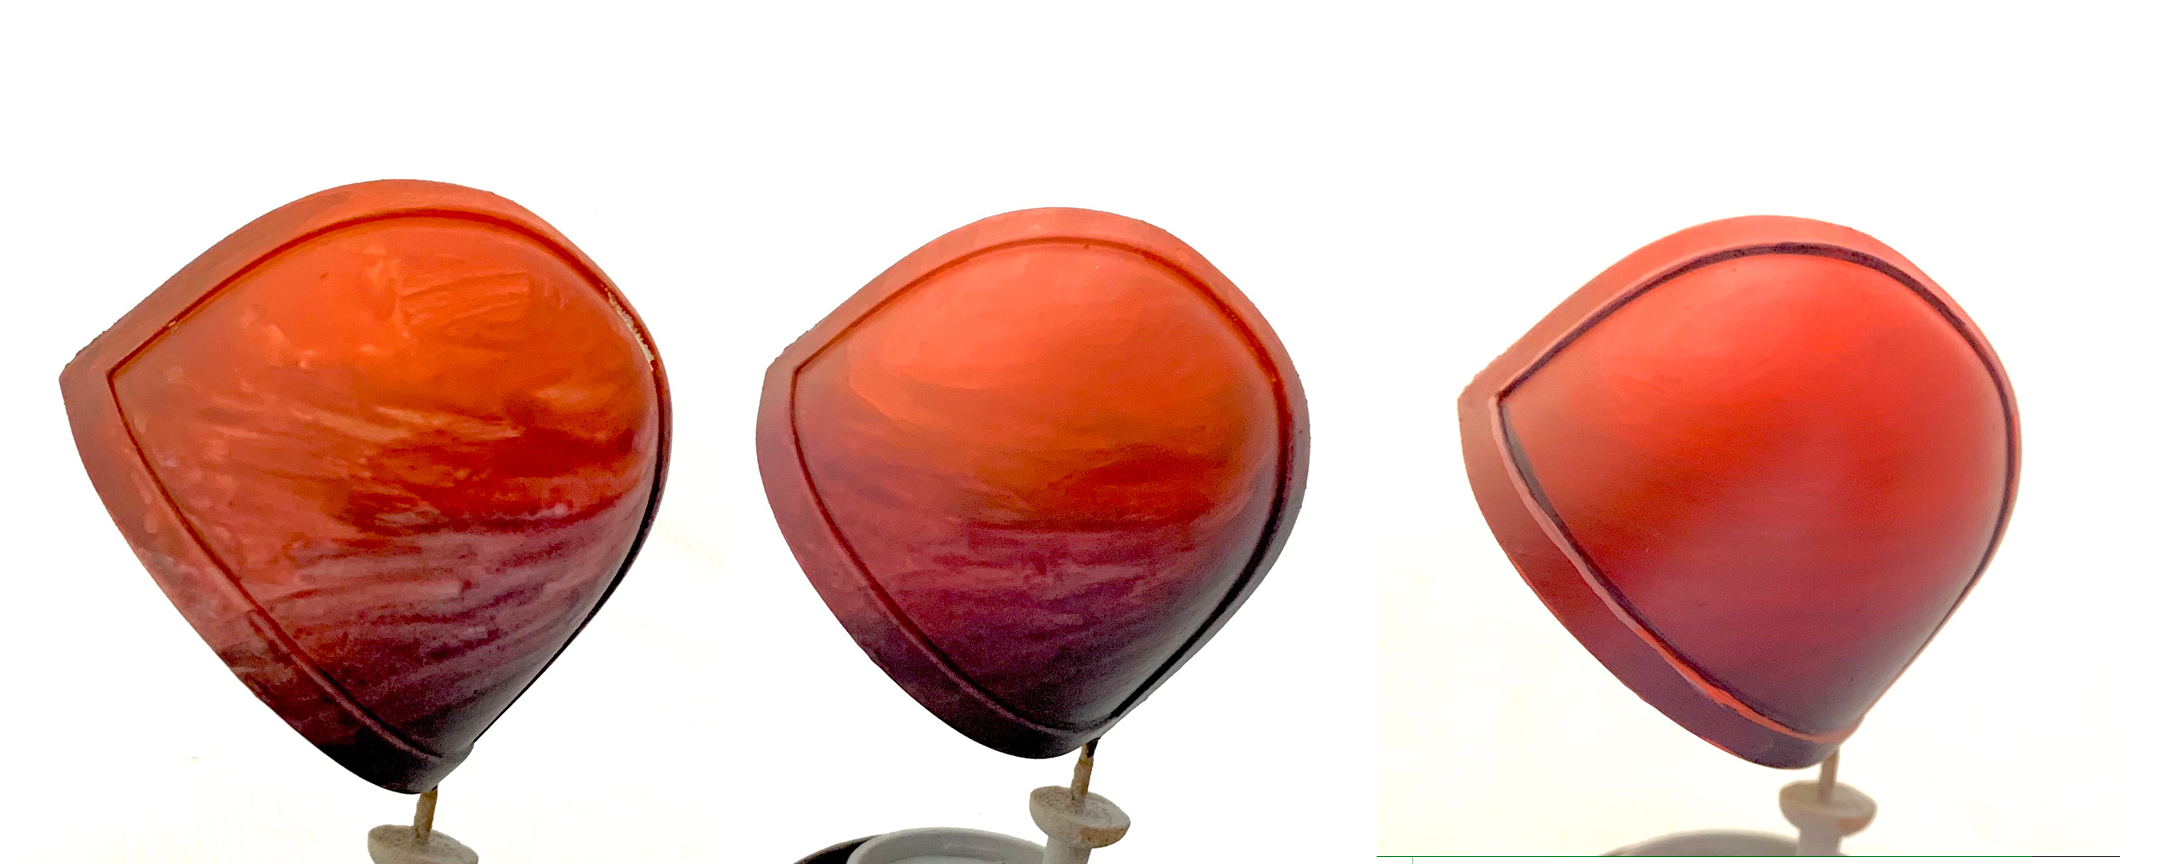
The right shoulder pad offers a simpler example of the wet blended layers. The colors in the first step are Wild Rider Red, Screamer Pink (which is a deep red and not a pink), and a dark turquoise color I get by mixing Caliban Green and Kantor Blue. This color is an attempt to match an out of production Citadel Color – Scaly Green, that I once used to shade all my reds. This is never used pure and always ends up with at least a little red mixed in.
As you can see in the first pass everything is still quite rough. But after a second coat it’s already starting to look more smooth. The final step is actually five coats, and has a little Fulgrim Pink blended in as a highlight at the top. Then I line the edges with a mix of Screamer Pink and the turquoise, and highlight all the edges with a line of Wild Rider Red mixed with Fulgrim Pink.
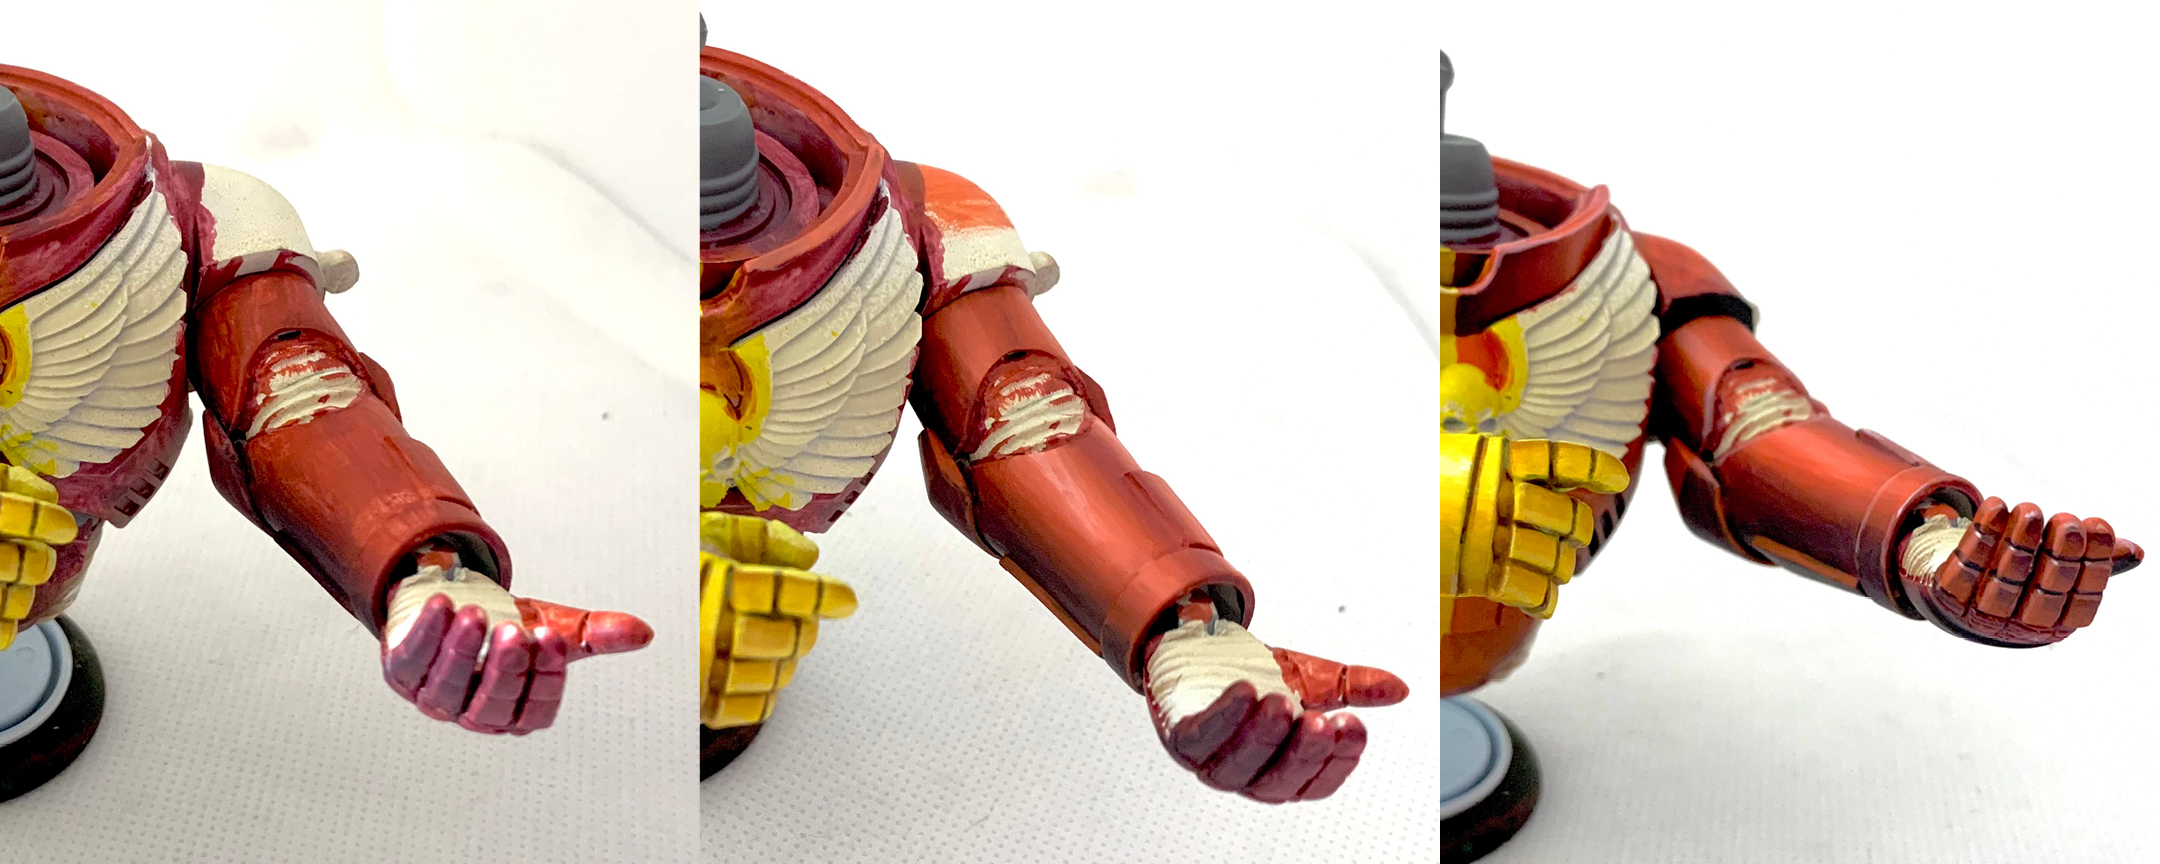
Here are those steps again on the red half of the torso. Note that a few spots get highlights of pure Fulgrim Pink on the fingers and a bit of the wristguard.
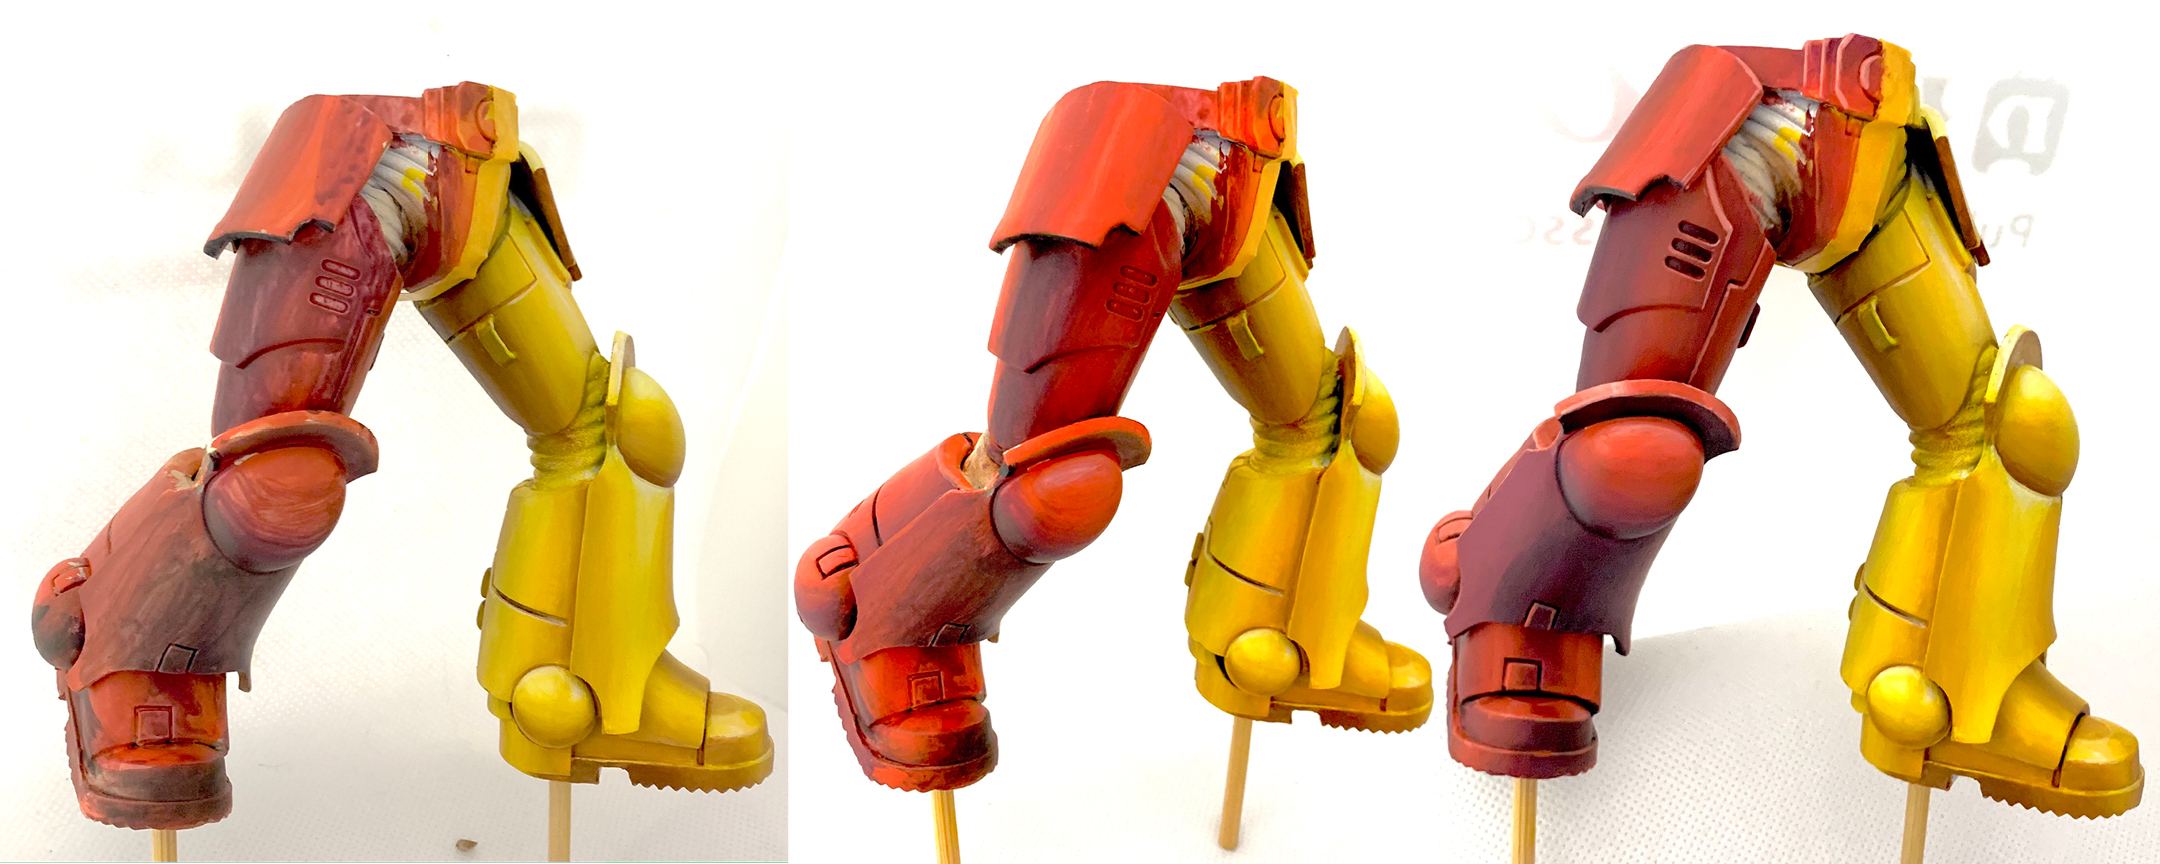
And here are the same red steps on the legs again.
Boltgun
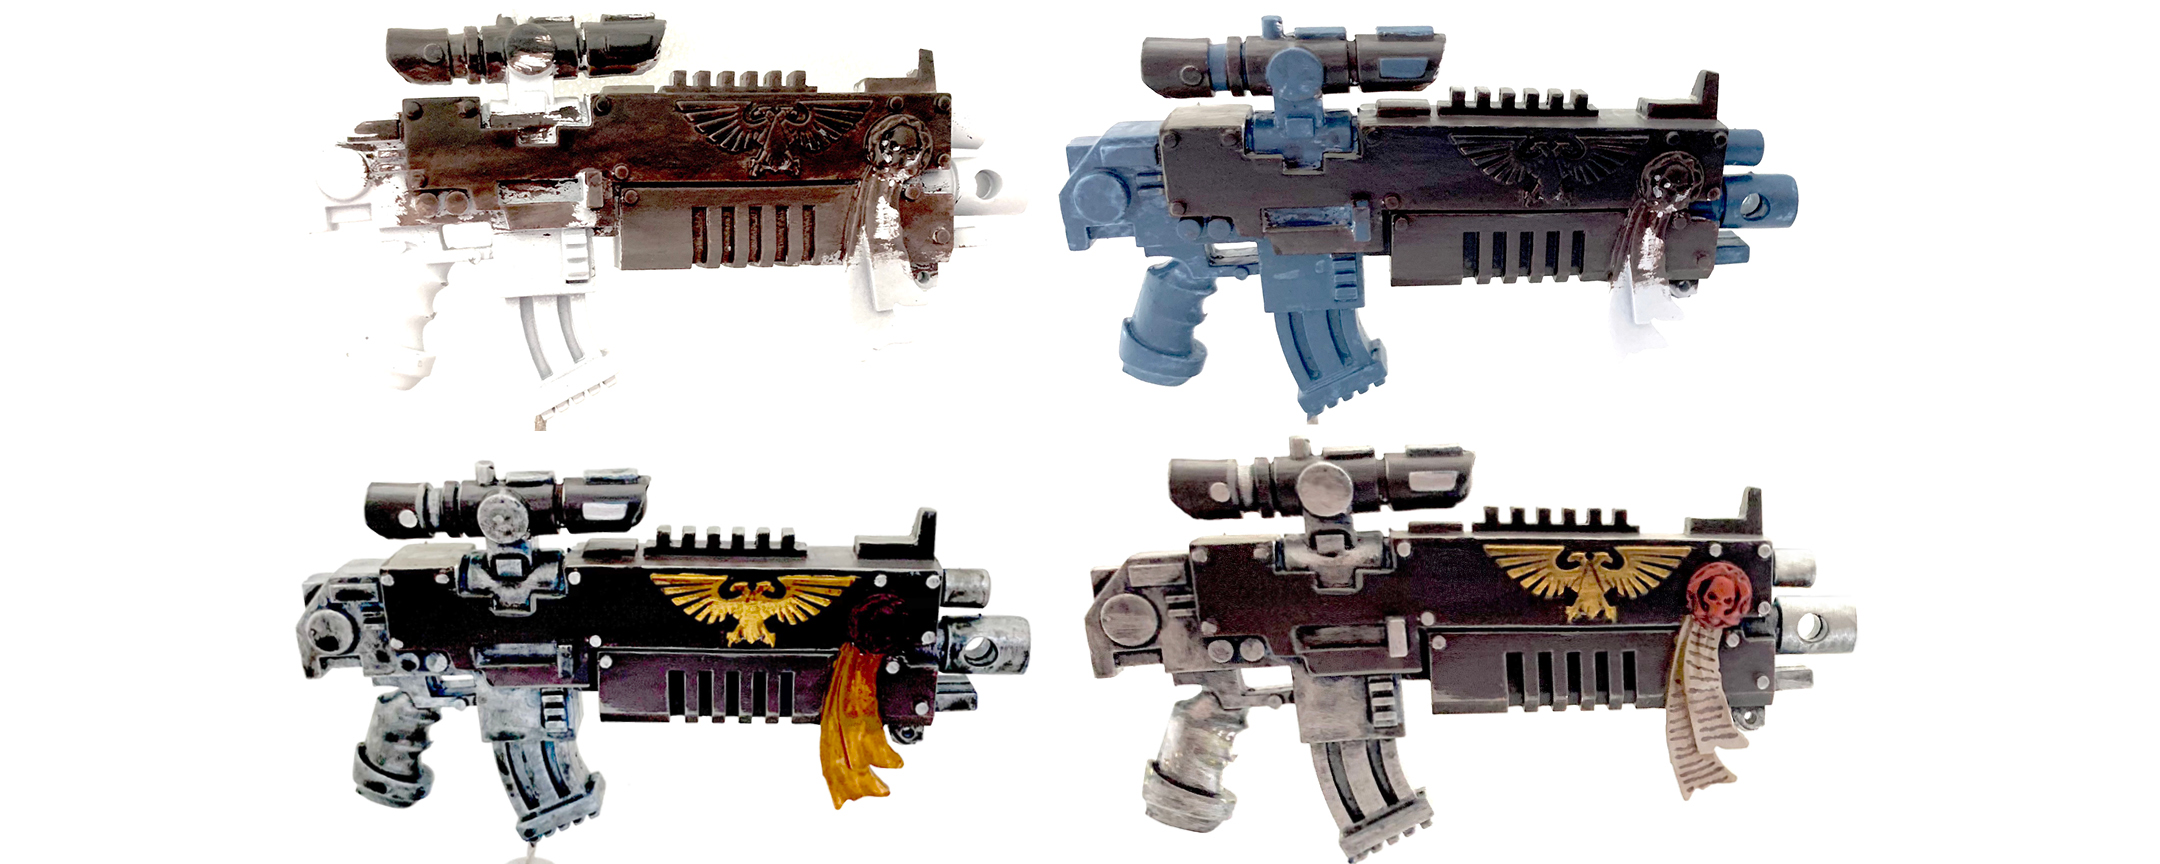
The steps were similar for the bolter casing. Here the colors were just black and Administratum Grey. For the metallic bits here and everywhere else on the model I started with a base coat of Russ Gray. This was drybrushed with Runefang Steel, then washed with gloss Nuln Oil. Then it was drybrushed again with the Runefang. The gold started with a basecoat of Averland Sunset mixed with a little Skarg Brown. This was drybrushed with Auric Armor Gold which was then washed with Agrax Earth with a little Mournfang Brown mixed in. Then it was drybrushed again with Auric Armor Gold.
Seals
Last up we have the seals and tabard. The parchment parts are based with Skrag Brown with highlights of Rakarth Flesh Stippled on to try to get a textured paper look. Then a mix of Rakarth Flesh and white is used to create a few final highlights where I really want some of the raised areas to pop.
I wanted the red wax seals to look a little different from the red armor so I used a base coat of Gal Vorbak Red then drybrushed on a couple coats of Evil Sunz red.
Tune in next time for more progress!
~ Hope you’re enjoying the article so far! If you want to see more of my work, find me on Instagram (#t00mini) for what I’m up to day to day. I also have a blog: [email protected], but I don’t post there as much as I used to.