Dark Age: Painting Mongo Pt.1

Time for another painting article. This time it’s Mongo from the Dark Age line.
We’ve been talking about doing some more Dark Age articles on BoLS, and so I headed to Coolminiornot to browse some Skaard minis. On the homepage I saw they were hosting a Dark Age painting contest this month. I figured I might as well paint up one of my favorite Dark Age minis I already own and enter myself.
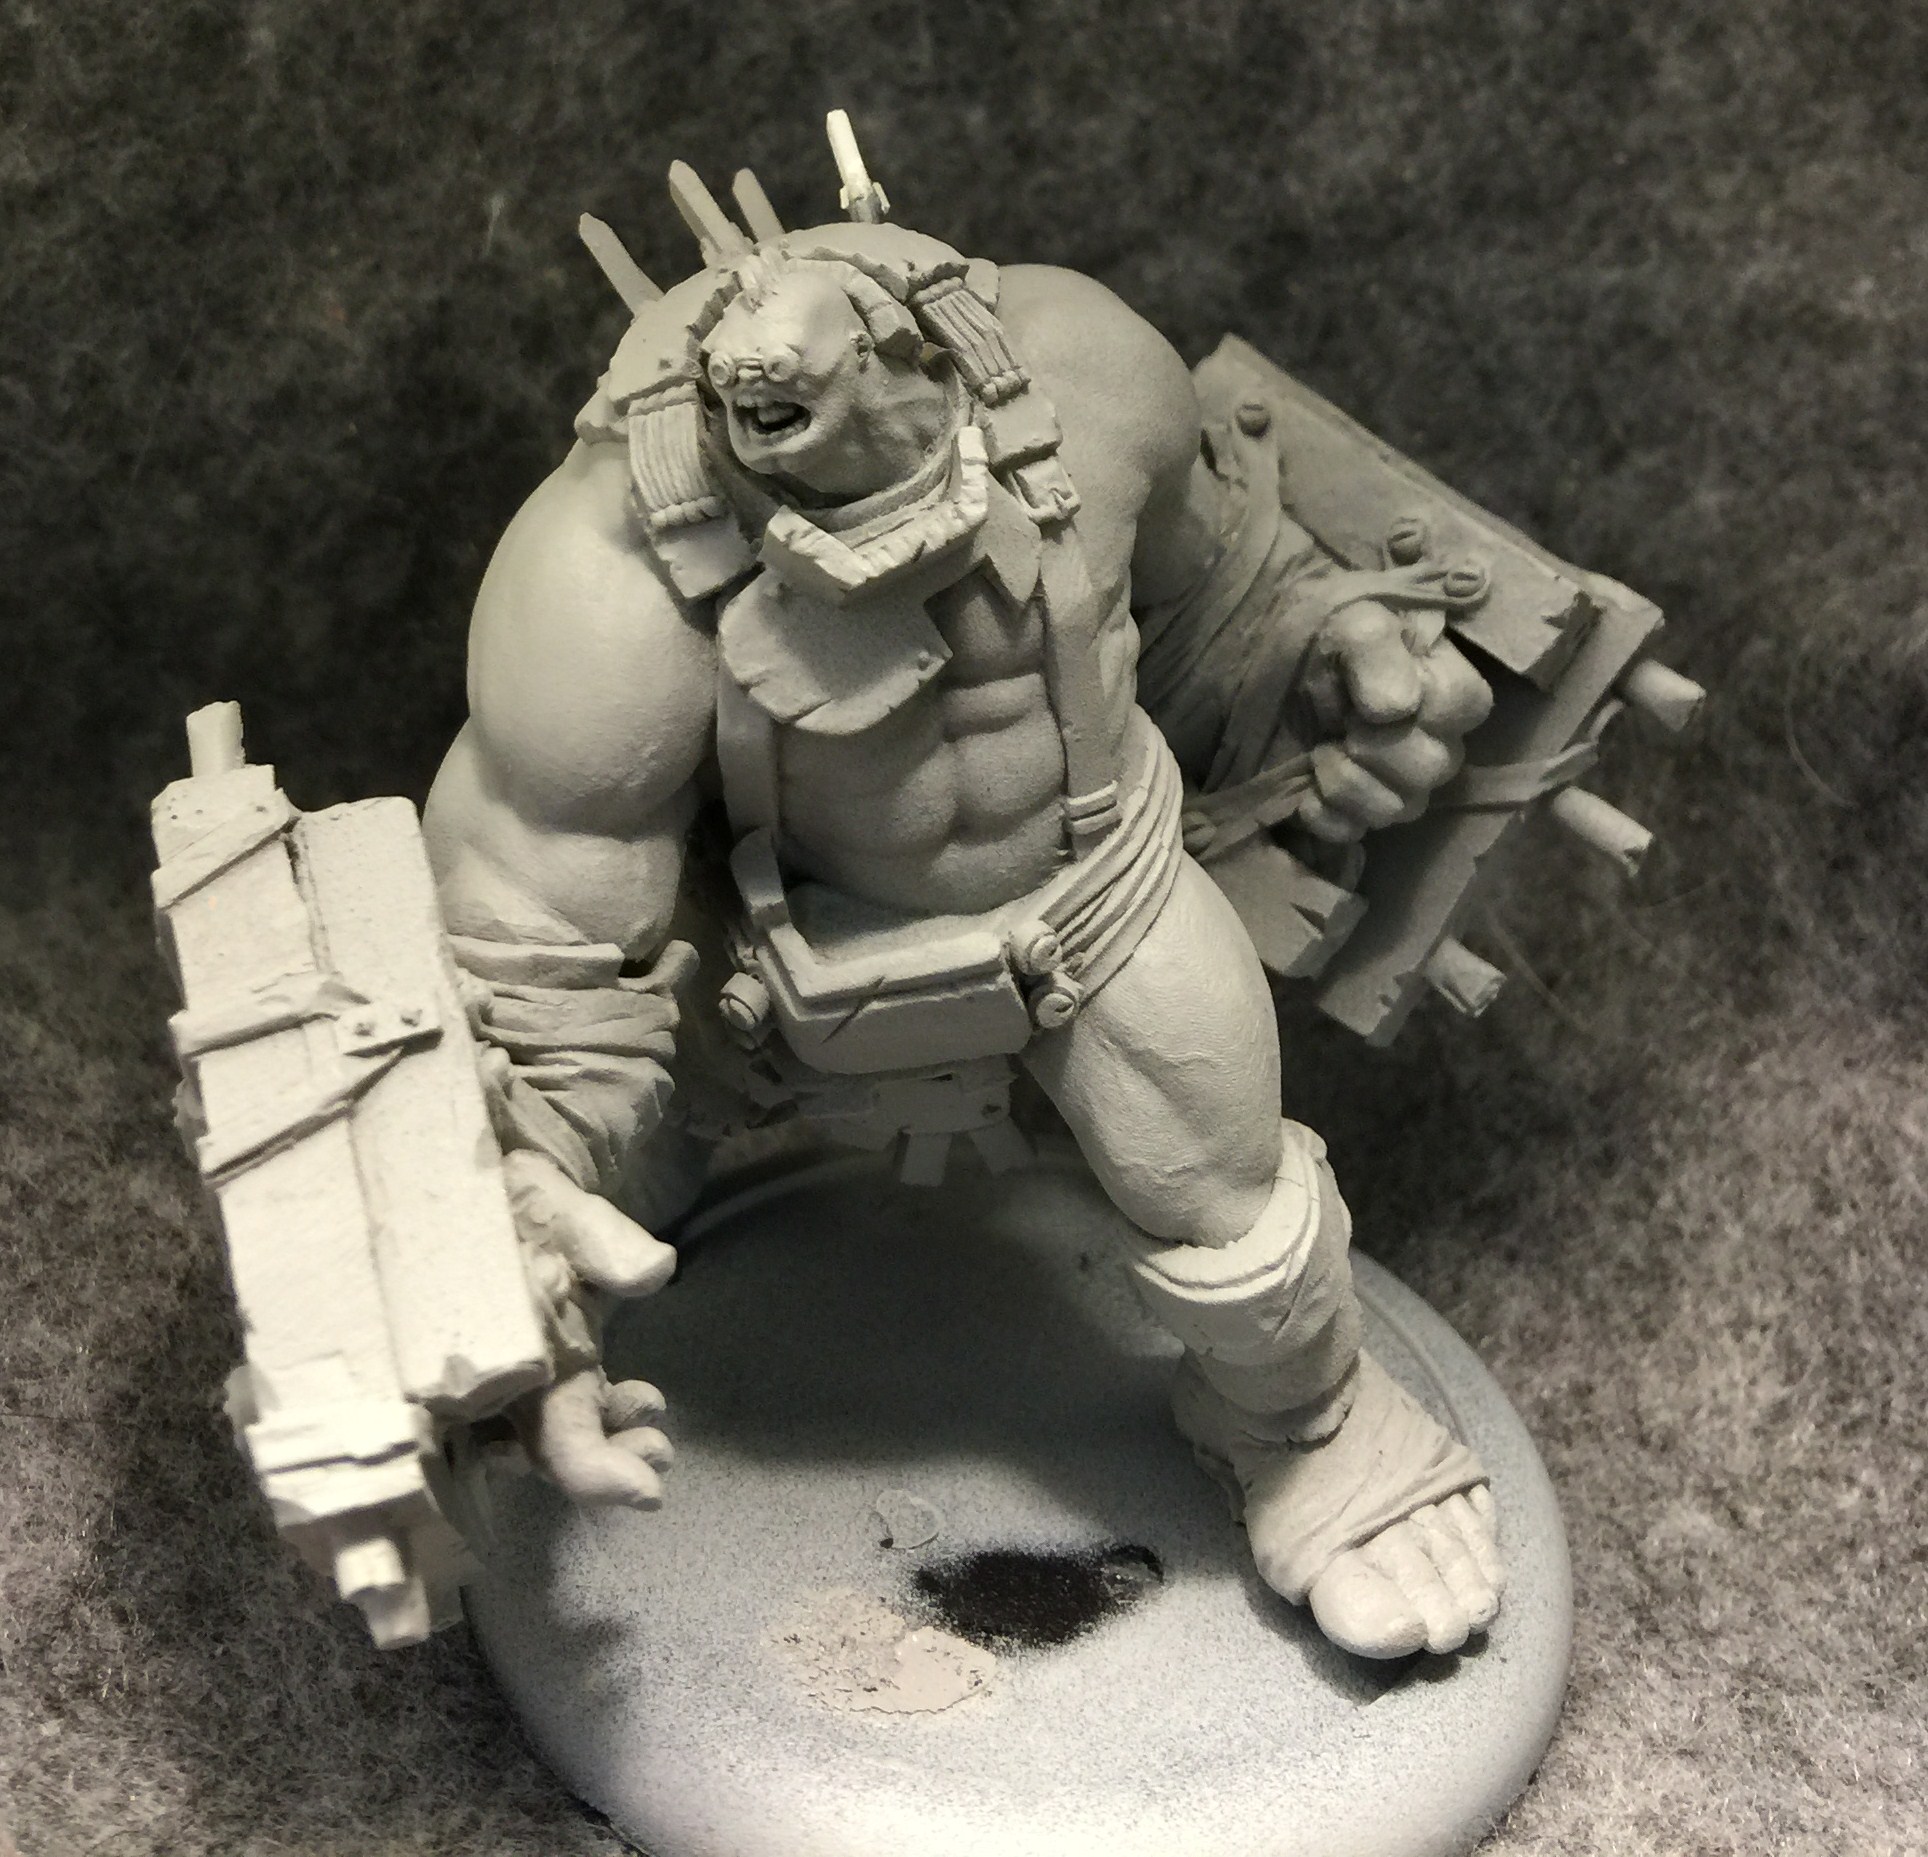
Here’s the big guy with just a coat of primer.
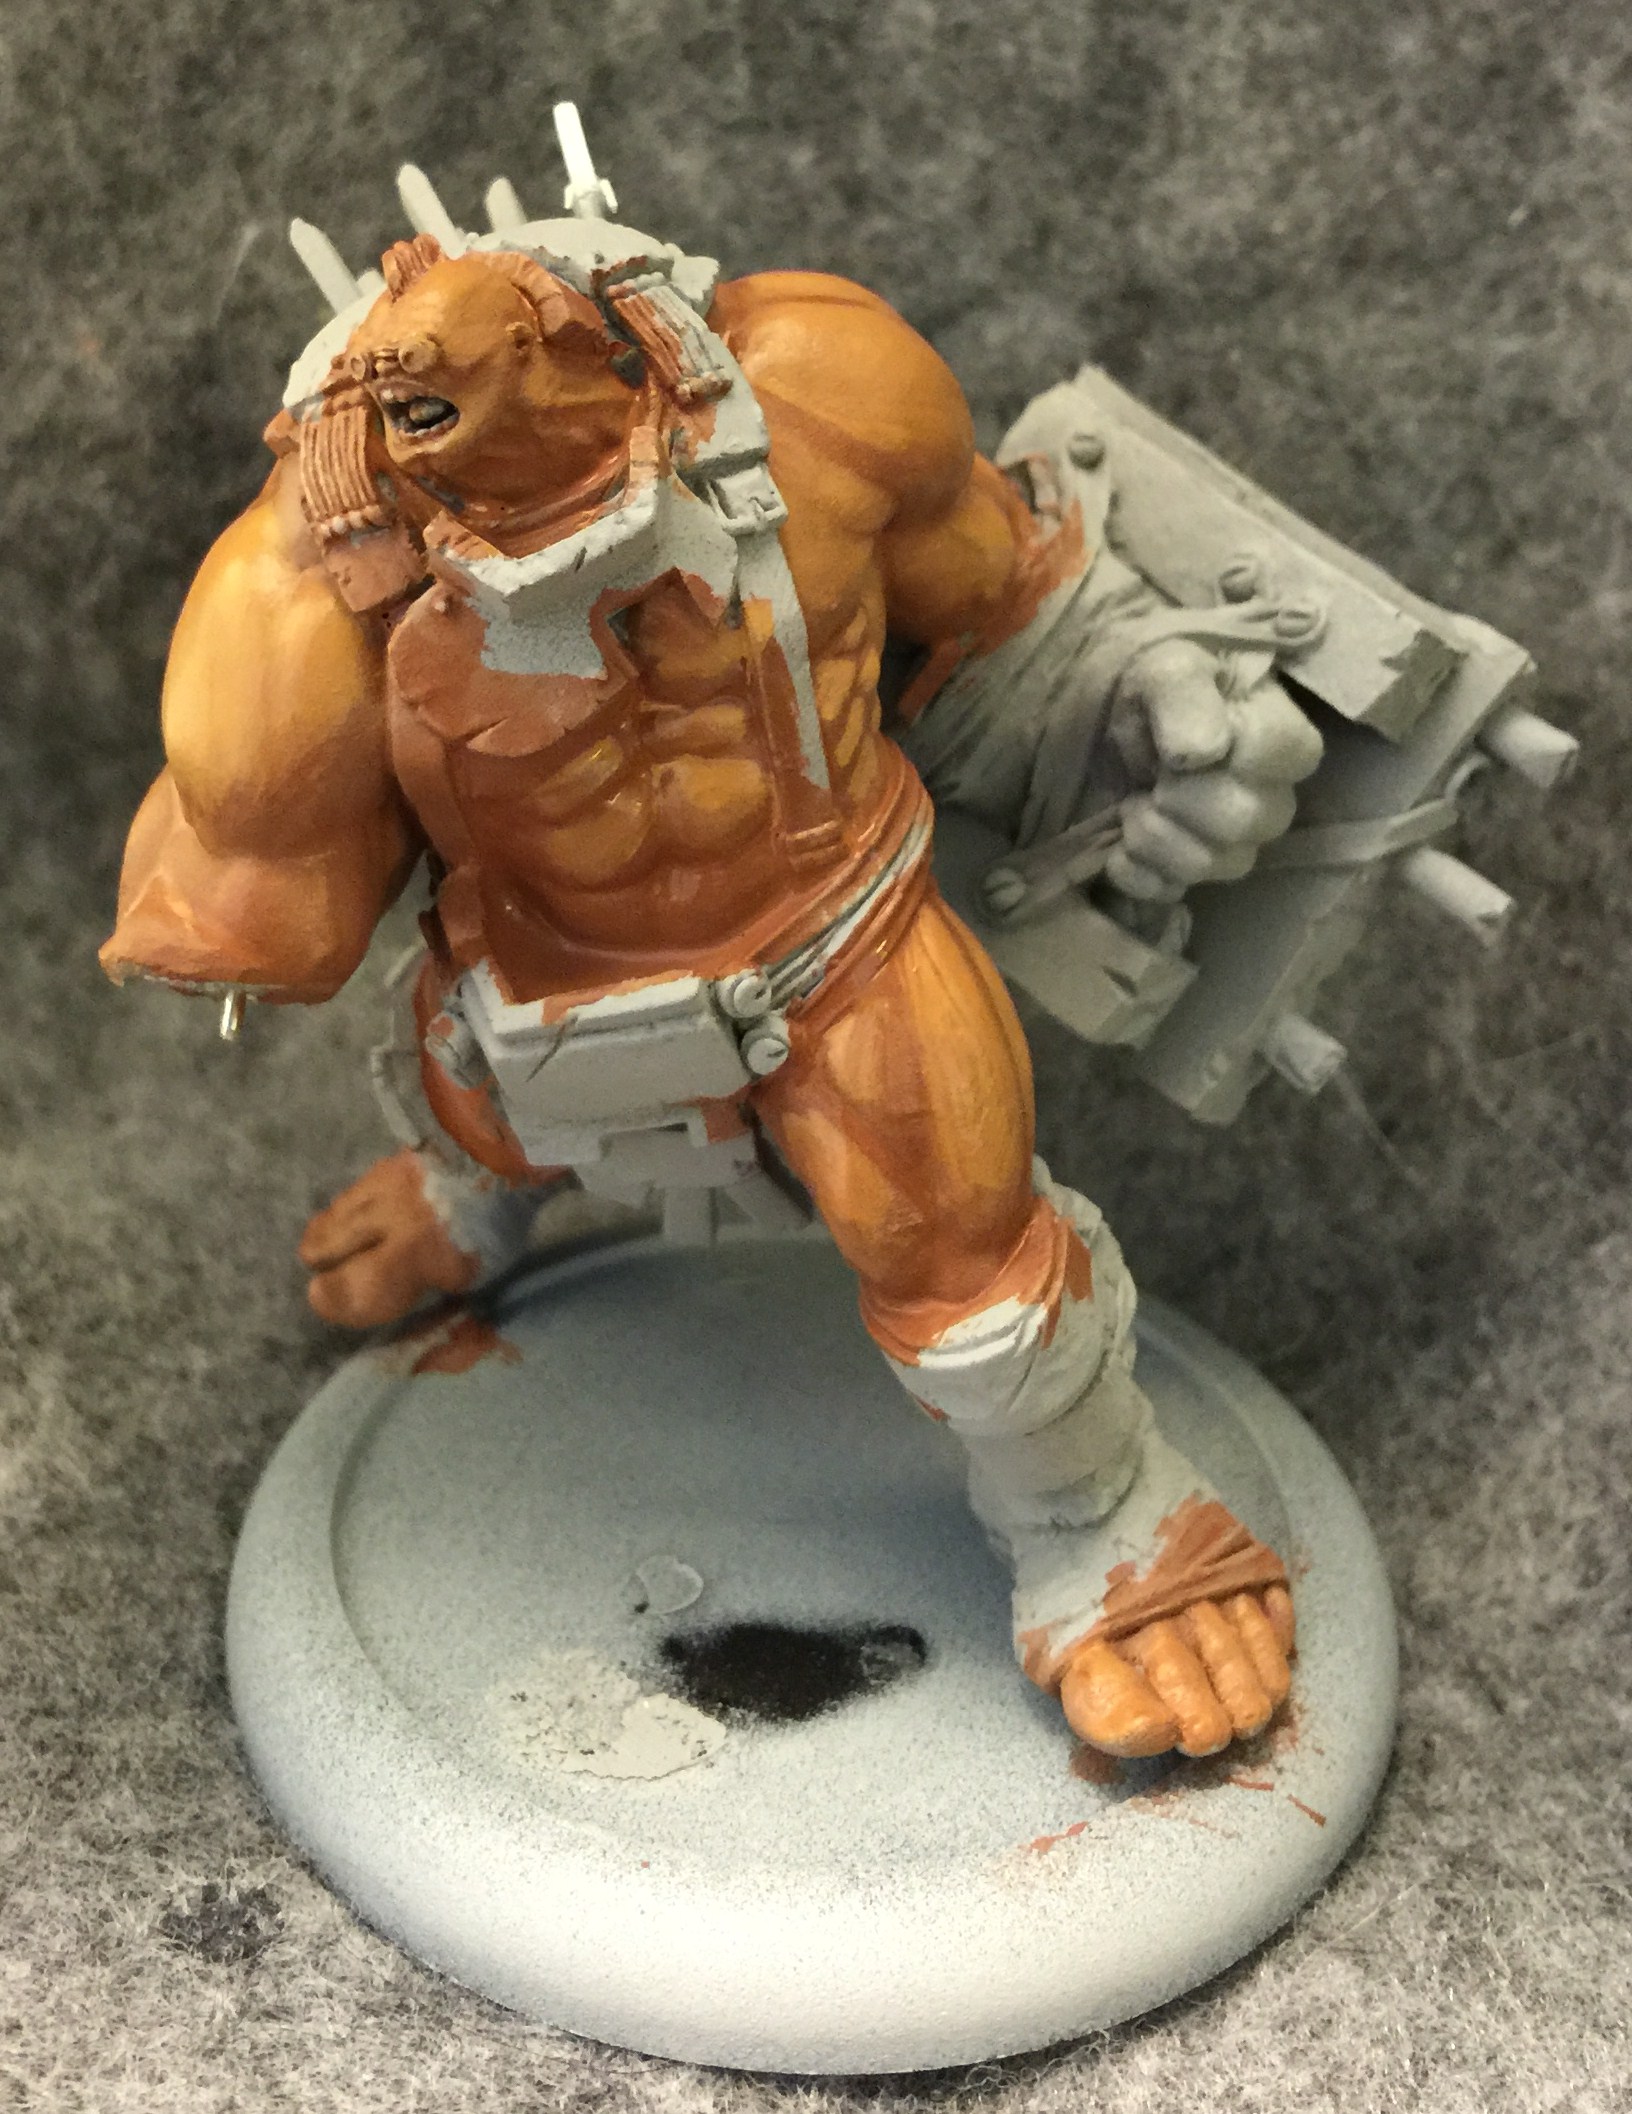
I start off the painting with the skin. I figure Mongo should be a pretty tan dude given that most of Samaria is a desert wasteland, so I start with Idrian flesh from the P3 range highlighted with some Rucksack Tan. I do all my blending wet on wet. Working fast and controlling the amount of paint on your brush are both important. A lot of what you’re looking at now will get painted over. Thick paint ruins detail, and thin paint is usually somewhat translucent so sometimes you have to do blends on top of blends.
Mongo’s right arm will be coming off and on throughout the process. That big block of his makes it tough to reach a lot of areas. I would have left both arms off but the left one required a lot of gap filling during assembly and doing that after painting can be a pain.
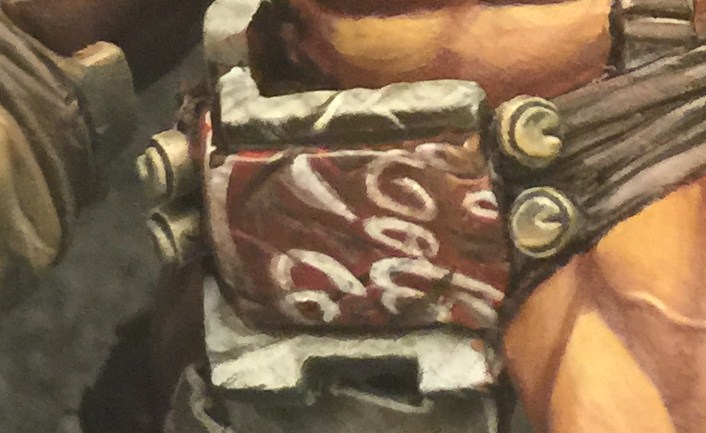
I begin blending the two colors together while they’re still wet, and add some shading with a mix of Umbral Umber and Beaten Purple. I keep a pot full of that purple mix ready because I use a lot of it. In fact I’ll be mentioning several mixes like this one throughout the article.
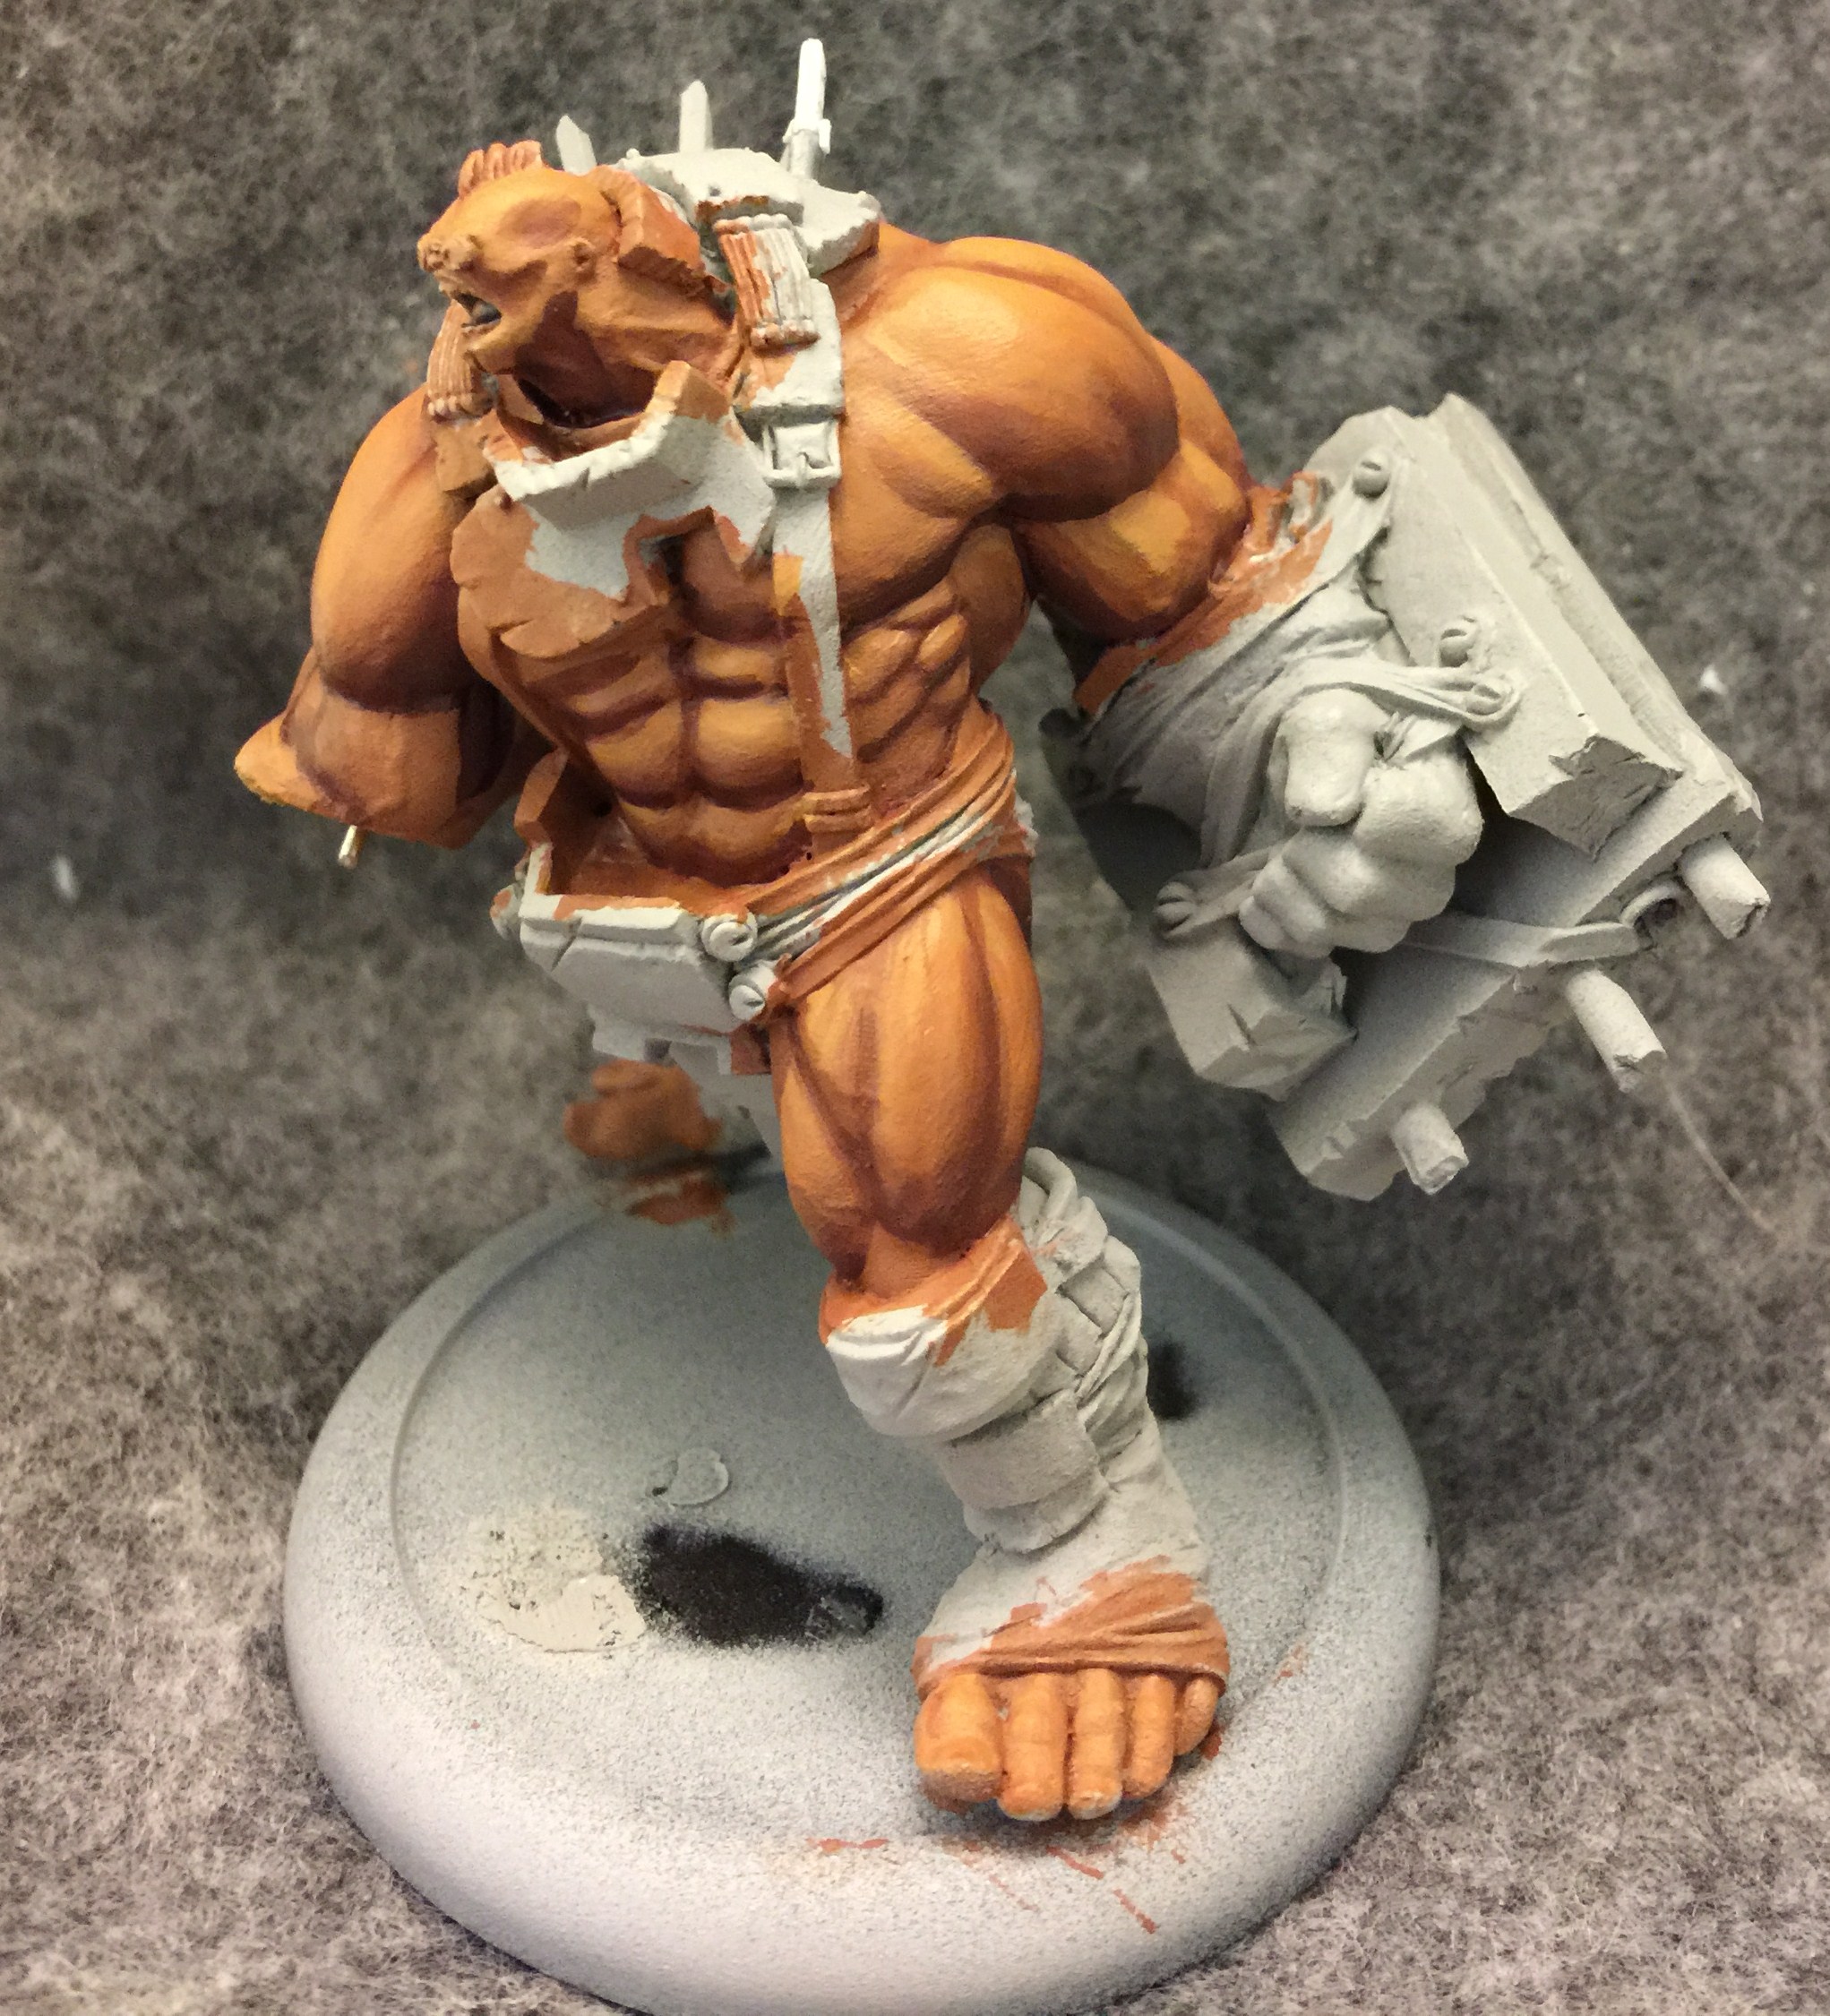
More of the shade tones are added as I continue cleaning everything up and boost the contrast.
Some final highlights are added by blending in some Menoth White Base with the Rucksack tan in the highest areas. All that’s left is just a bit more blending on those abs and this step will be done.
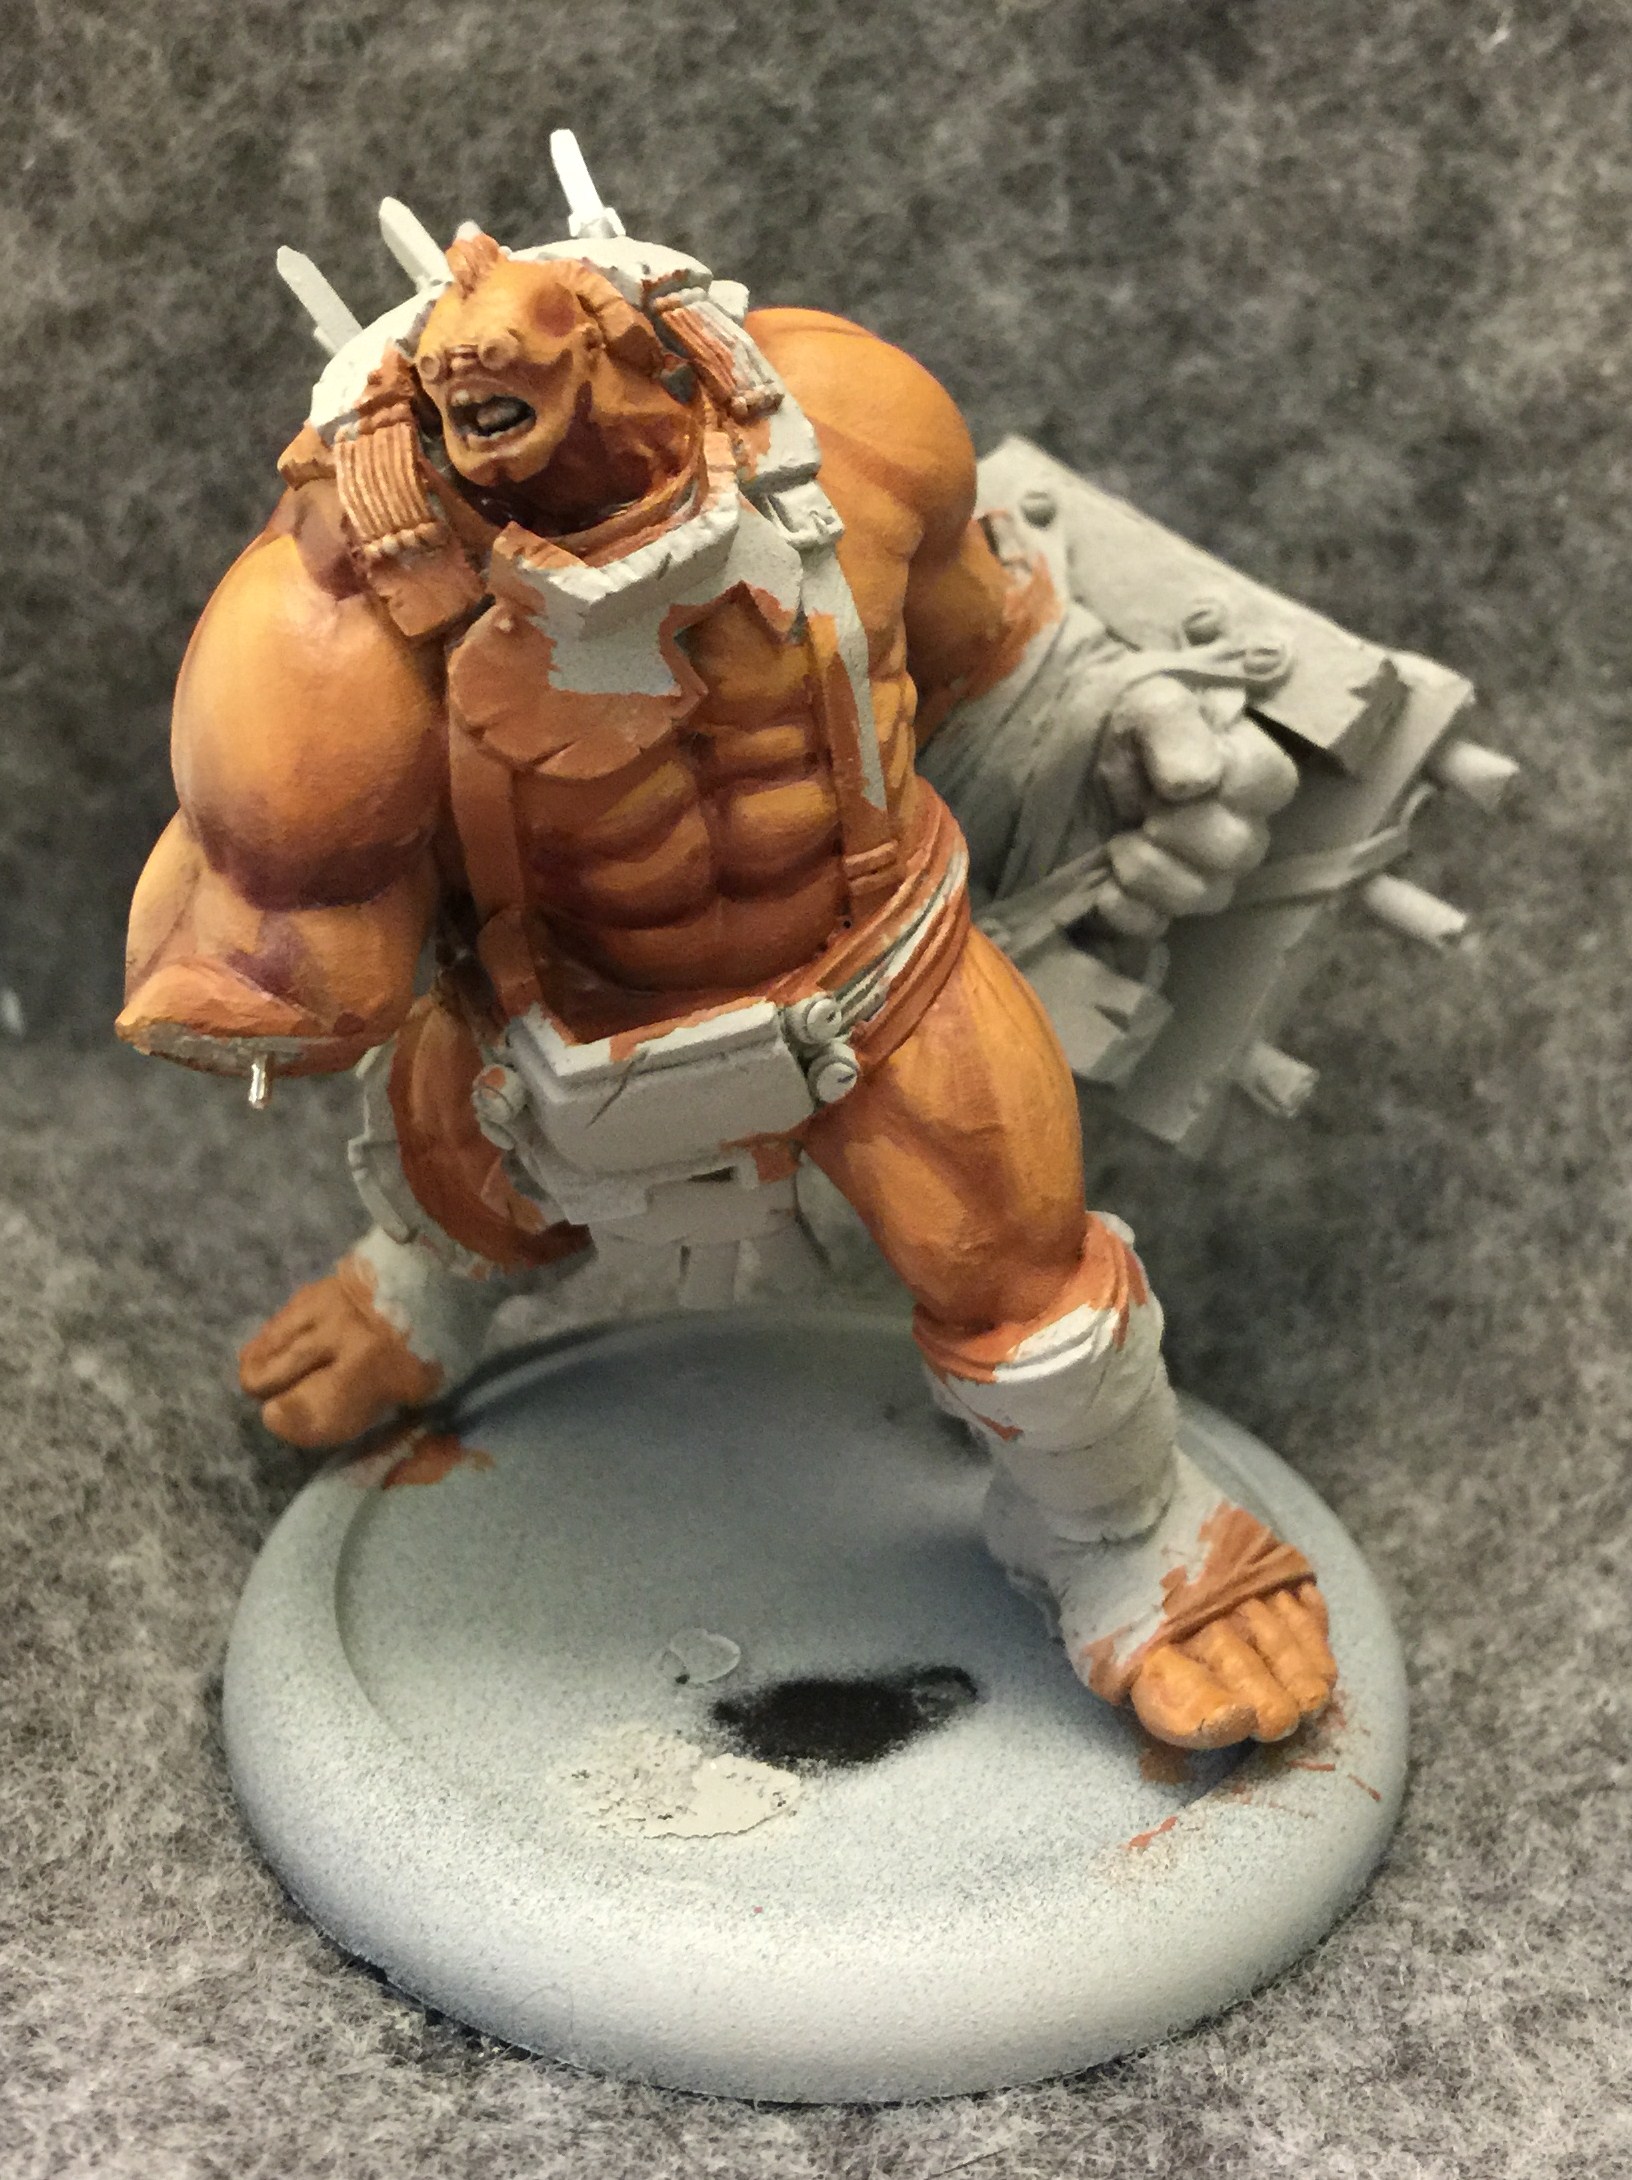
For the toenails I skip the midtones and just blend that white directly to a basecoat of the purple mix I’ve been shading everything with. The trick is to use less gradual transitions.

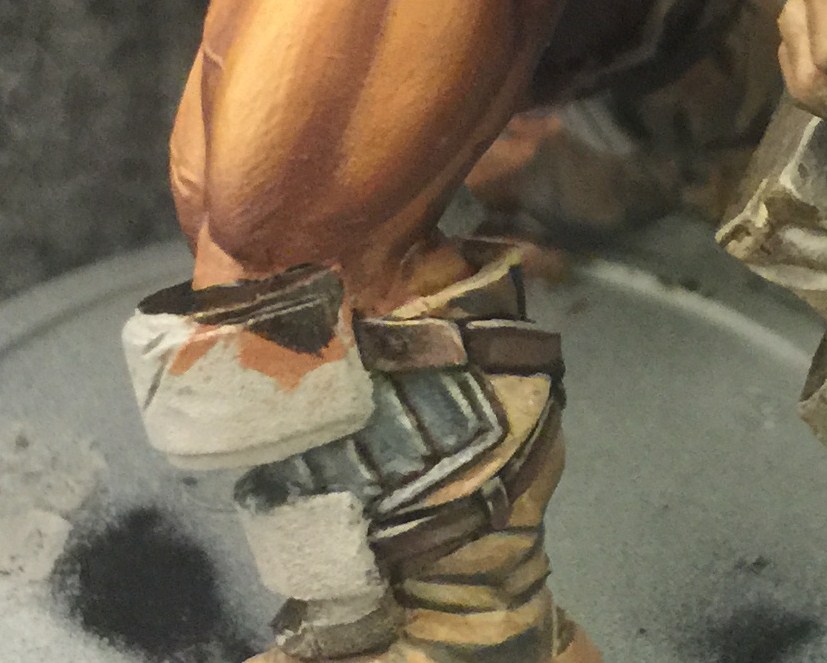
Next I move onto Mongo’s big concrete slabs. I start with a basecoat of Thrall Flesh, and begin stippling in some Thornwood Green while it’s still wet.
More Highlights are added with Frostbite while the shadows are deepened by blending in just a little bit of my warm black (black mixed with Bloodstone). Everything is added in thin layers using energetic strokes so I can build up the texture you see.
Here he is with the other arm so you can see both of the blocks. I ended up doing some stippling texture over the more “scratchy” strokes of the previous step. A few of the “scratches” are left but I think this texture makes it feel more like concrete.
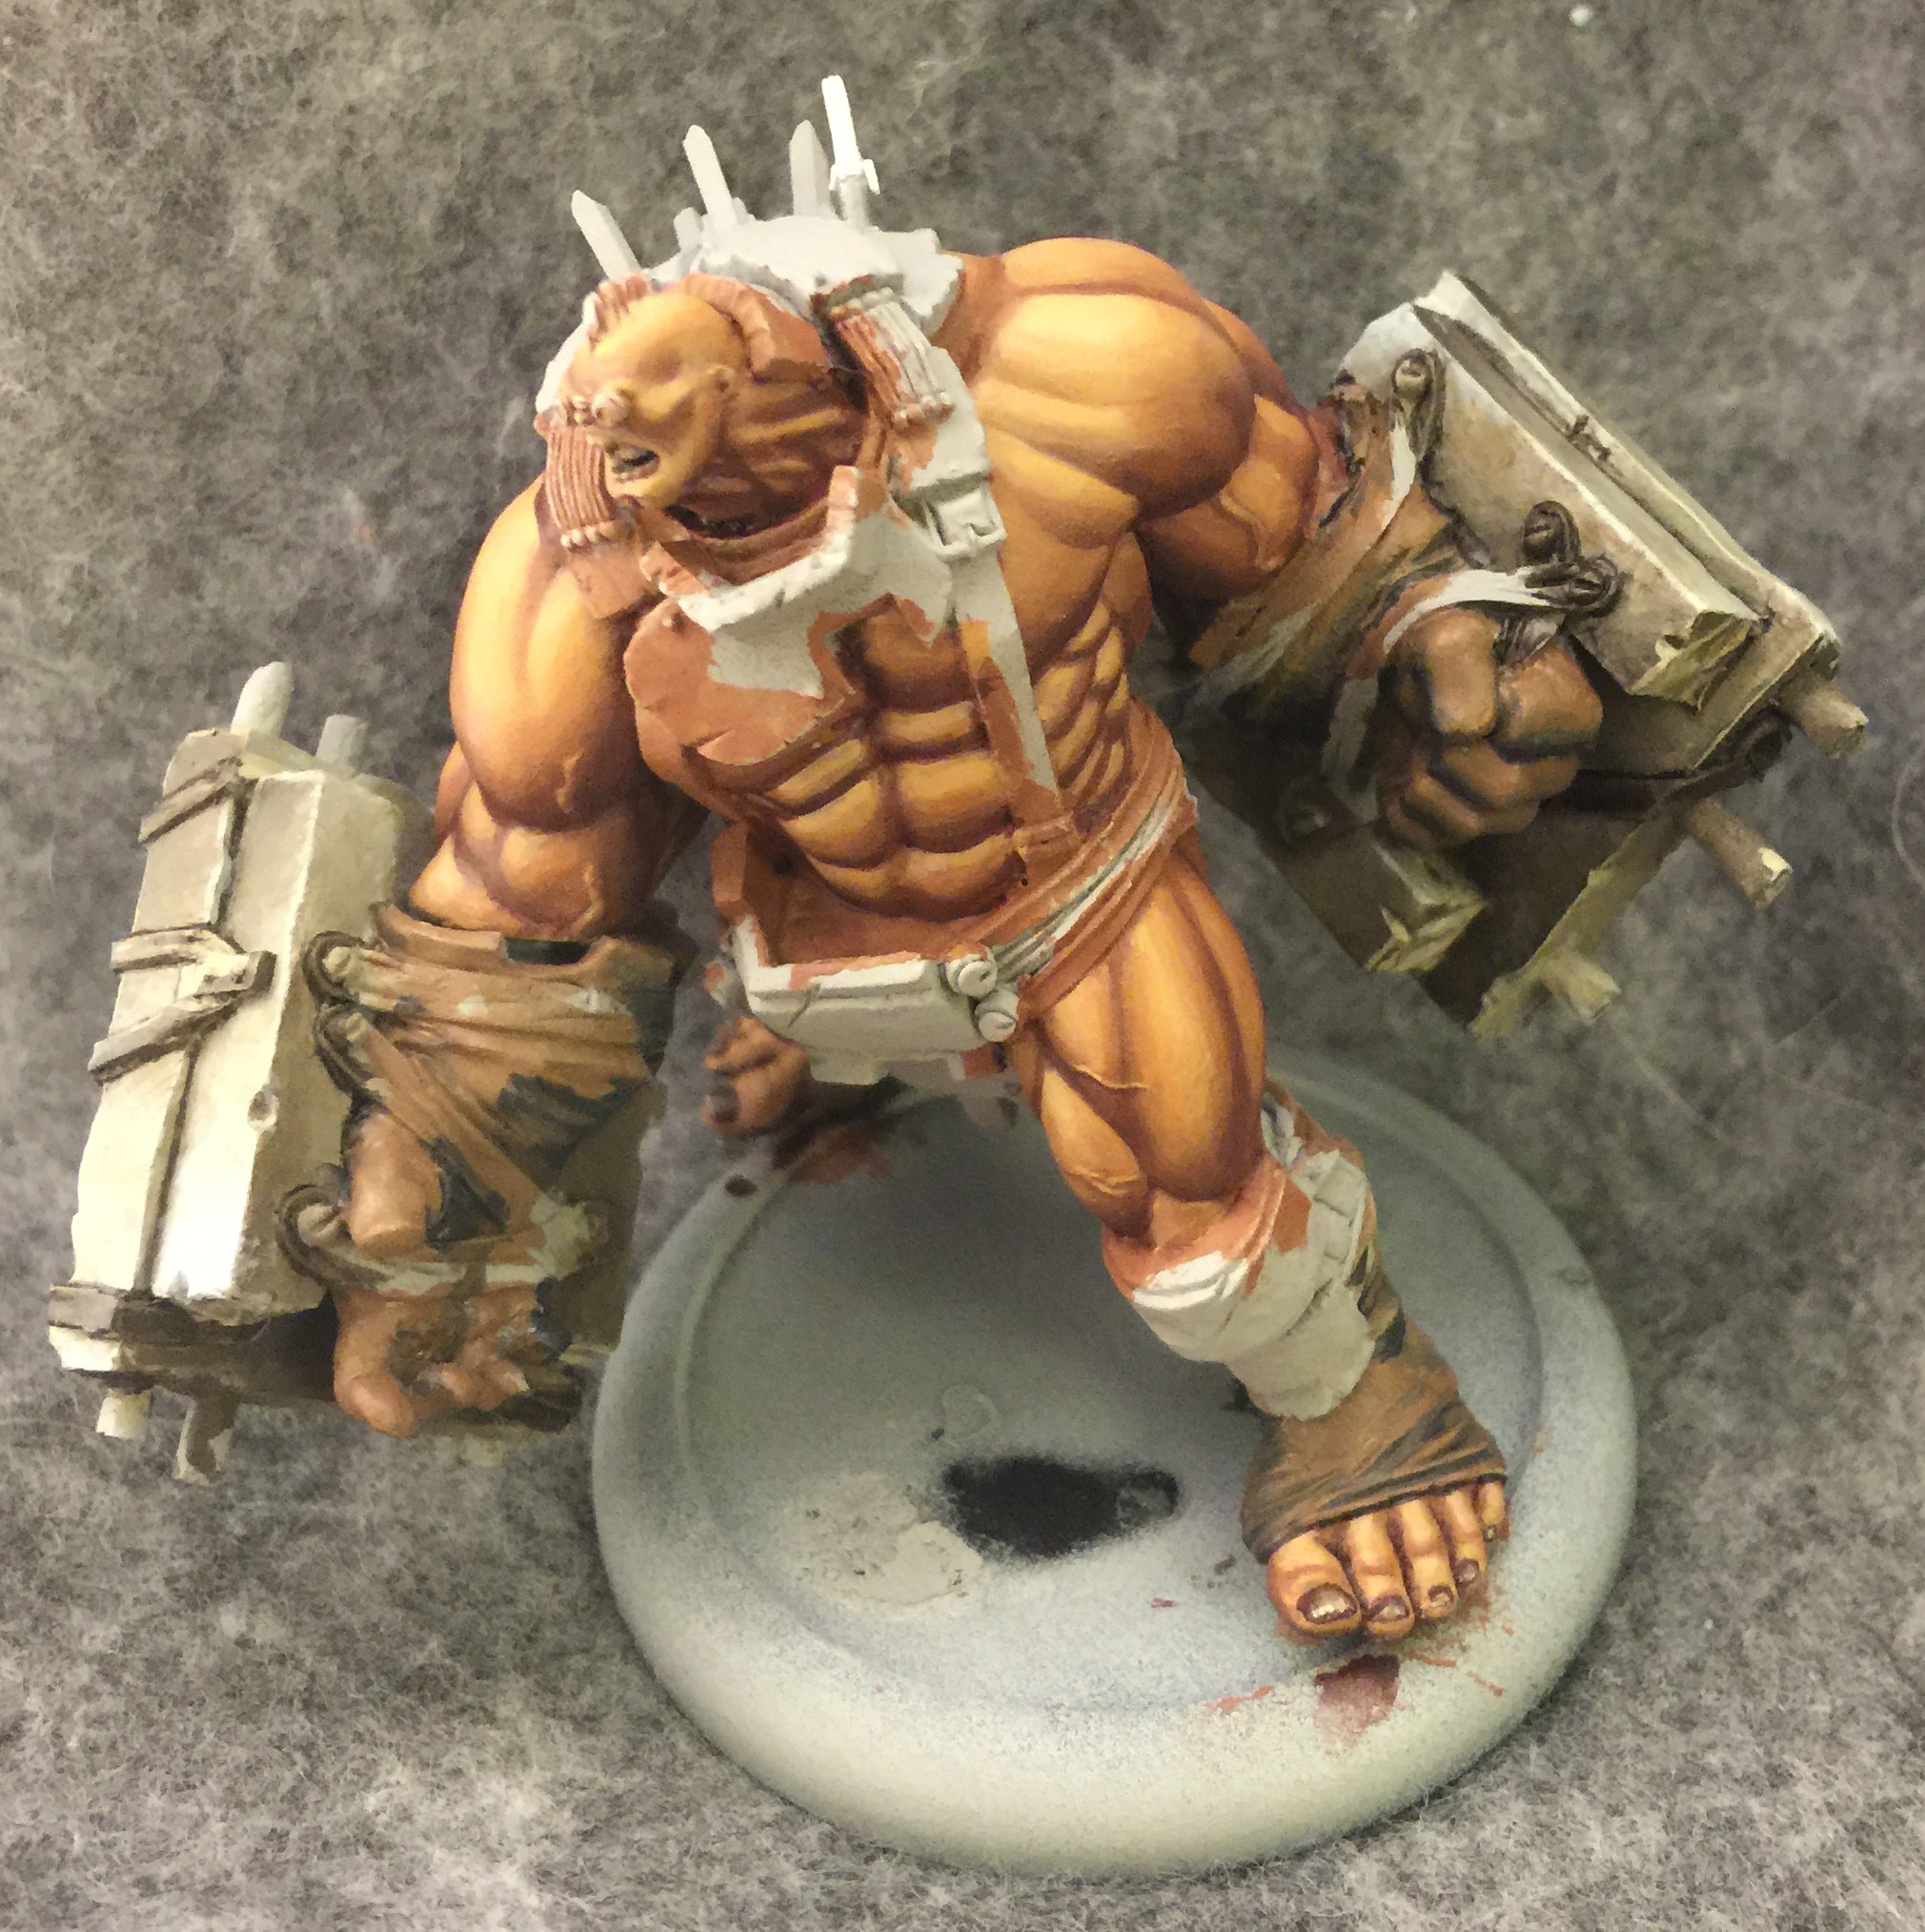
Next its time for the gloves and spats. These start off with Gun Corps Brown which is shaded with my Navy Mix – a roughly 50/50 mix of Exile Blue and Umbral Umber.
Here’s a look at that same leather but on a different area. Once I have the Navy Mix and Gun Corps Brown nice and blended together, I mix a little bit of Menoth White Highlight into the brown for the lighter areas.
Next it’s onto all the straps. I start these off with a basecoat of that warm black I was talking about before.
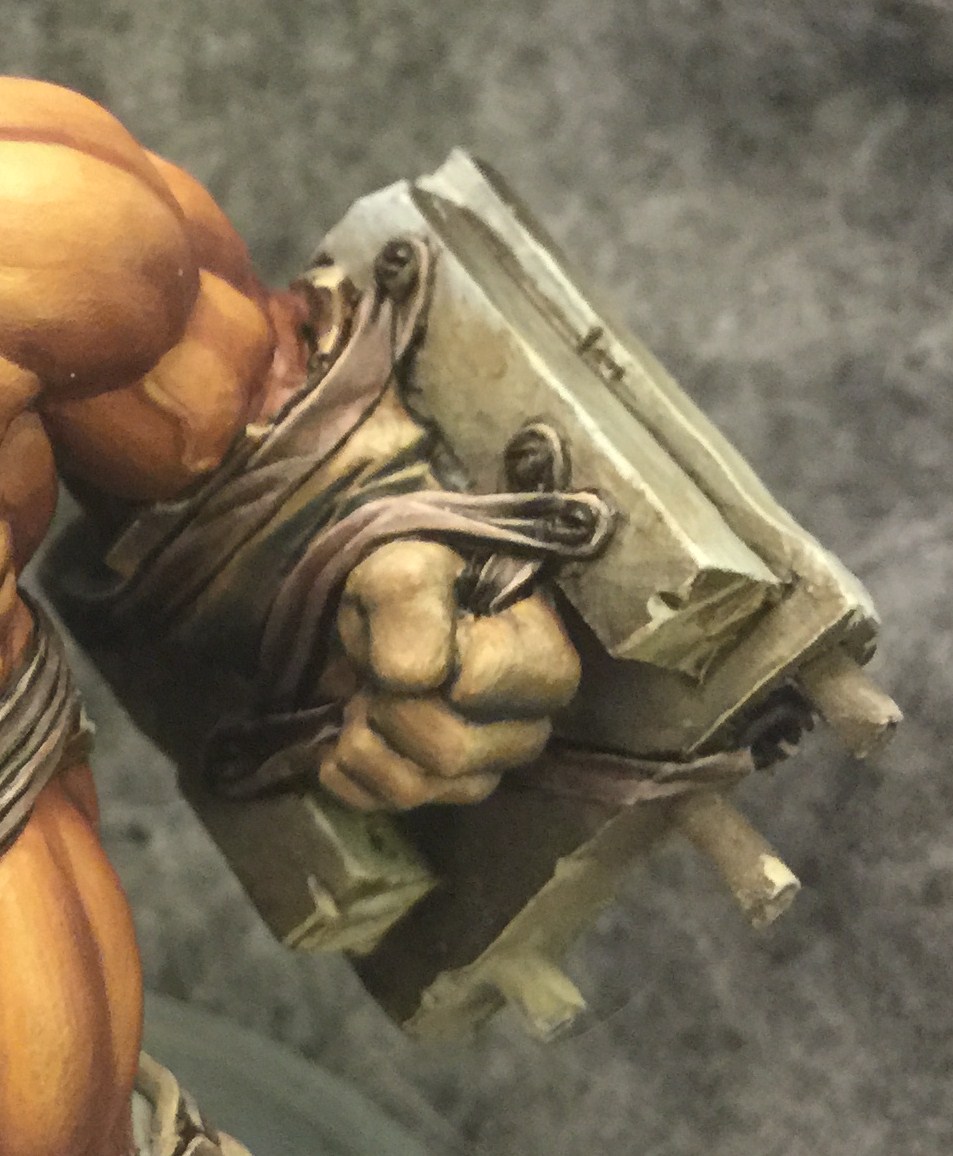
They are gradually highlighted up with Umbral Umber then with increasing amounts of Ryn Flesh. The sculptor did a great job of adding all these little creases to all of these straps, and I want to make sure my painting brings it all out.
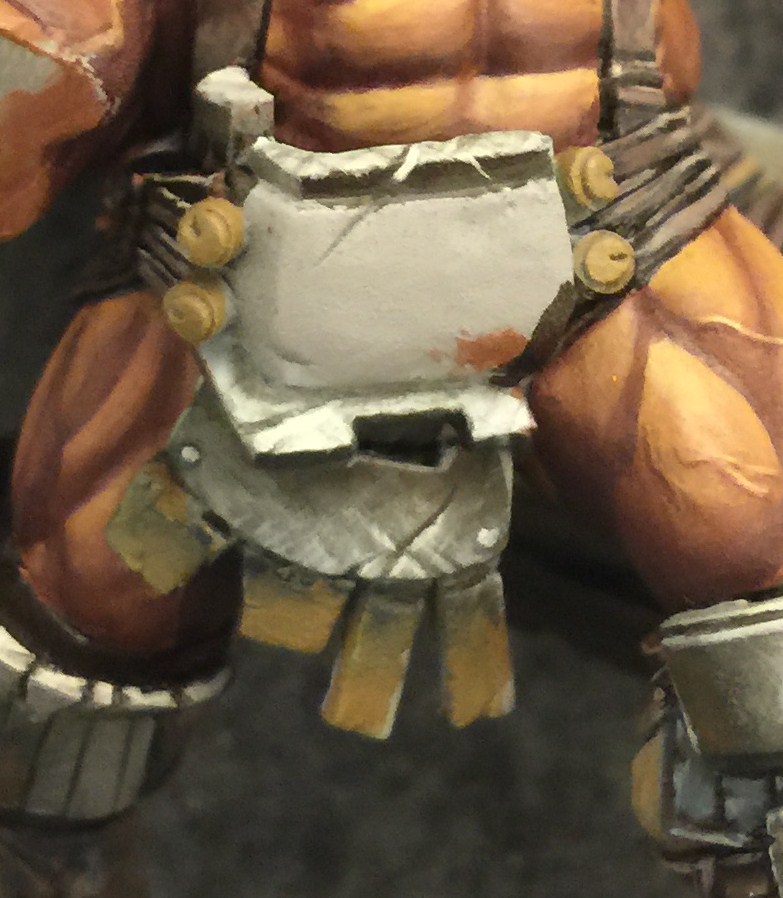
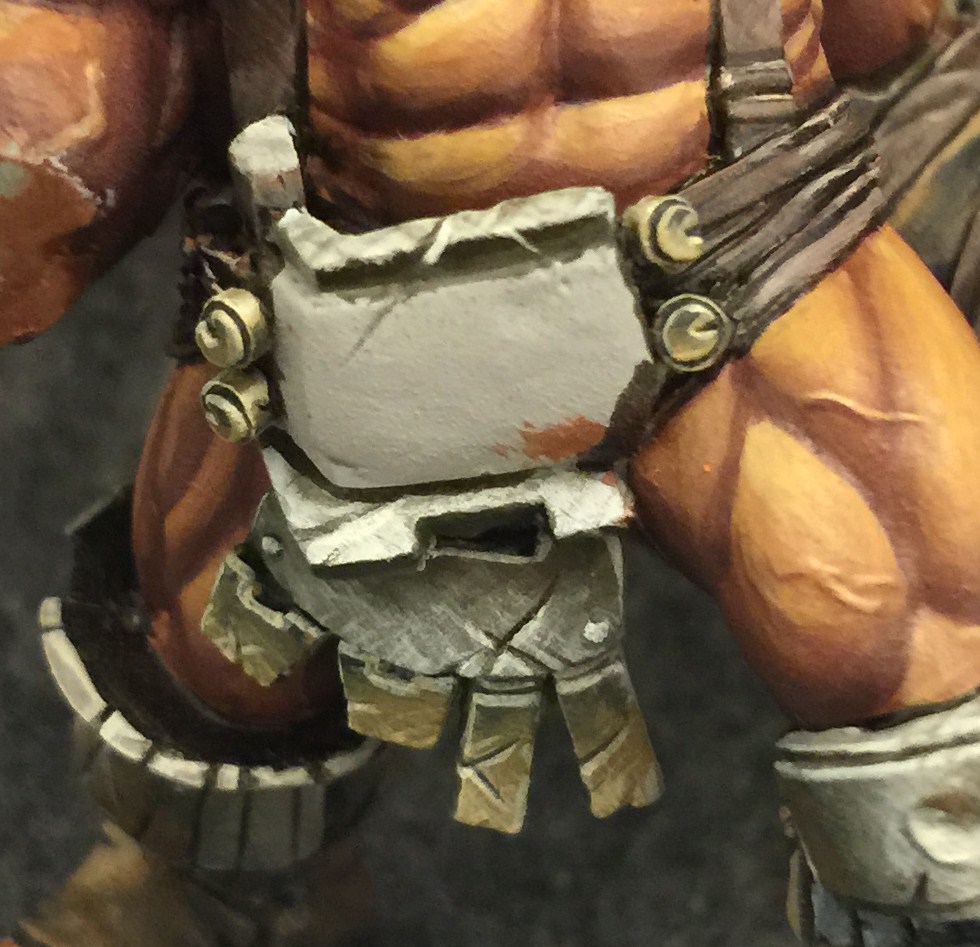
There was just one last bit before moving onto the metals: this little bit of padded cloth. I started it with a basecoat of Greatcoat Gray and highlighted it with Menoth White Base. Darker tones were added with Navy Mix and the creases were lined with Warm Black. If it looks a little metallic it’s because I was trying to give it kind of a sheen like you sometimes see with padded cloth.
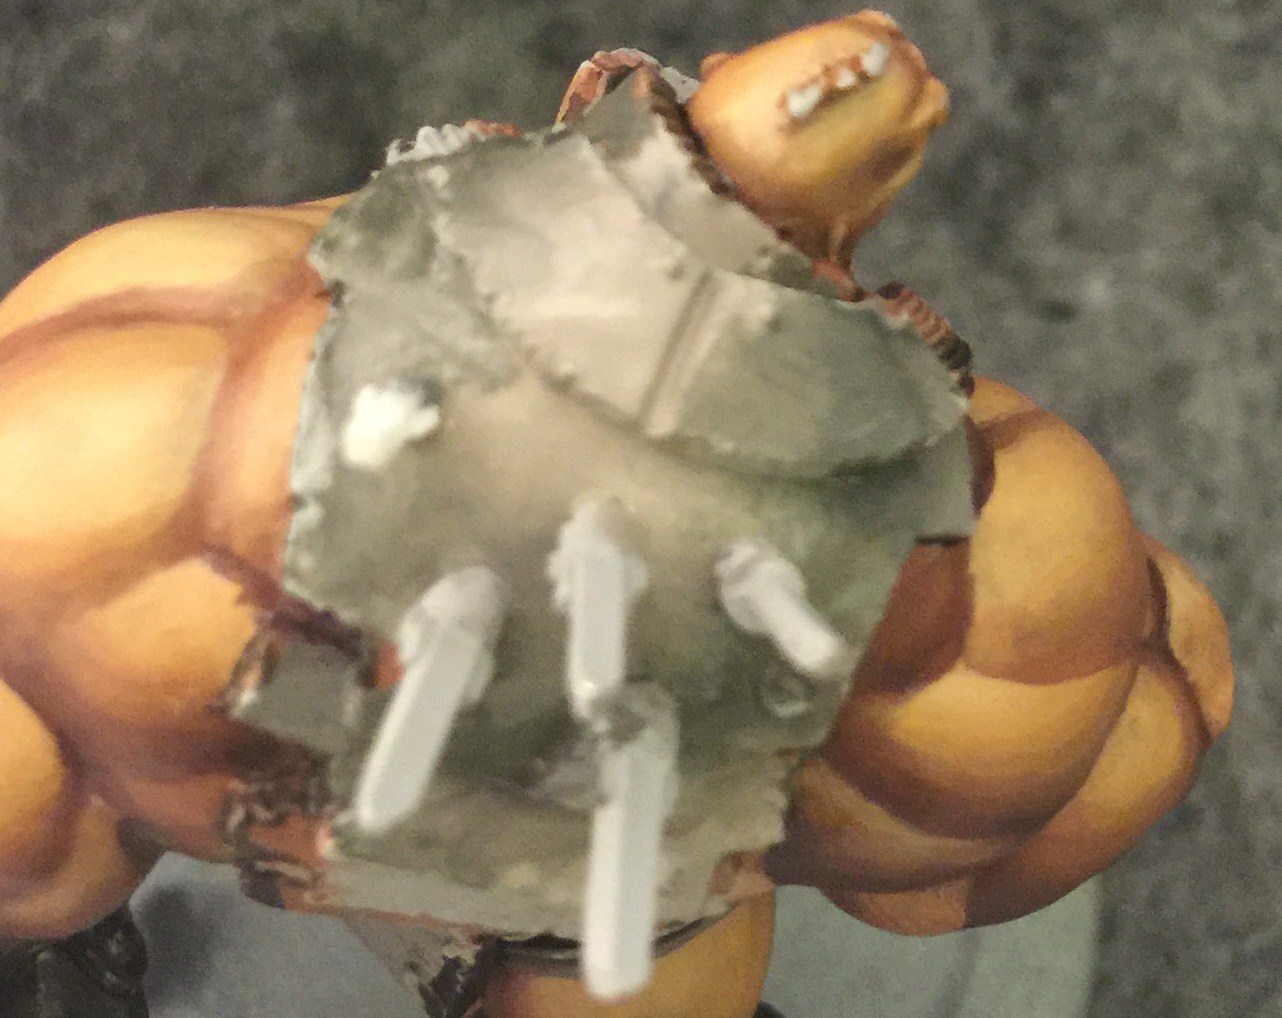
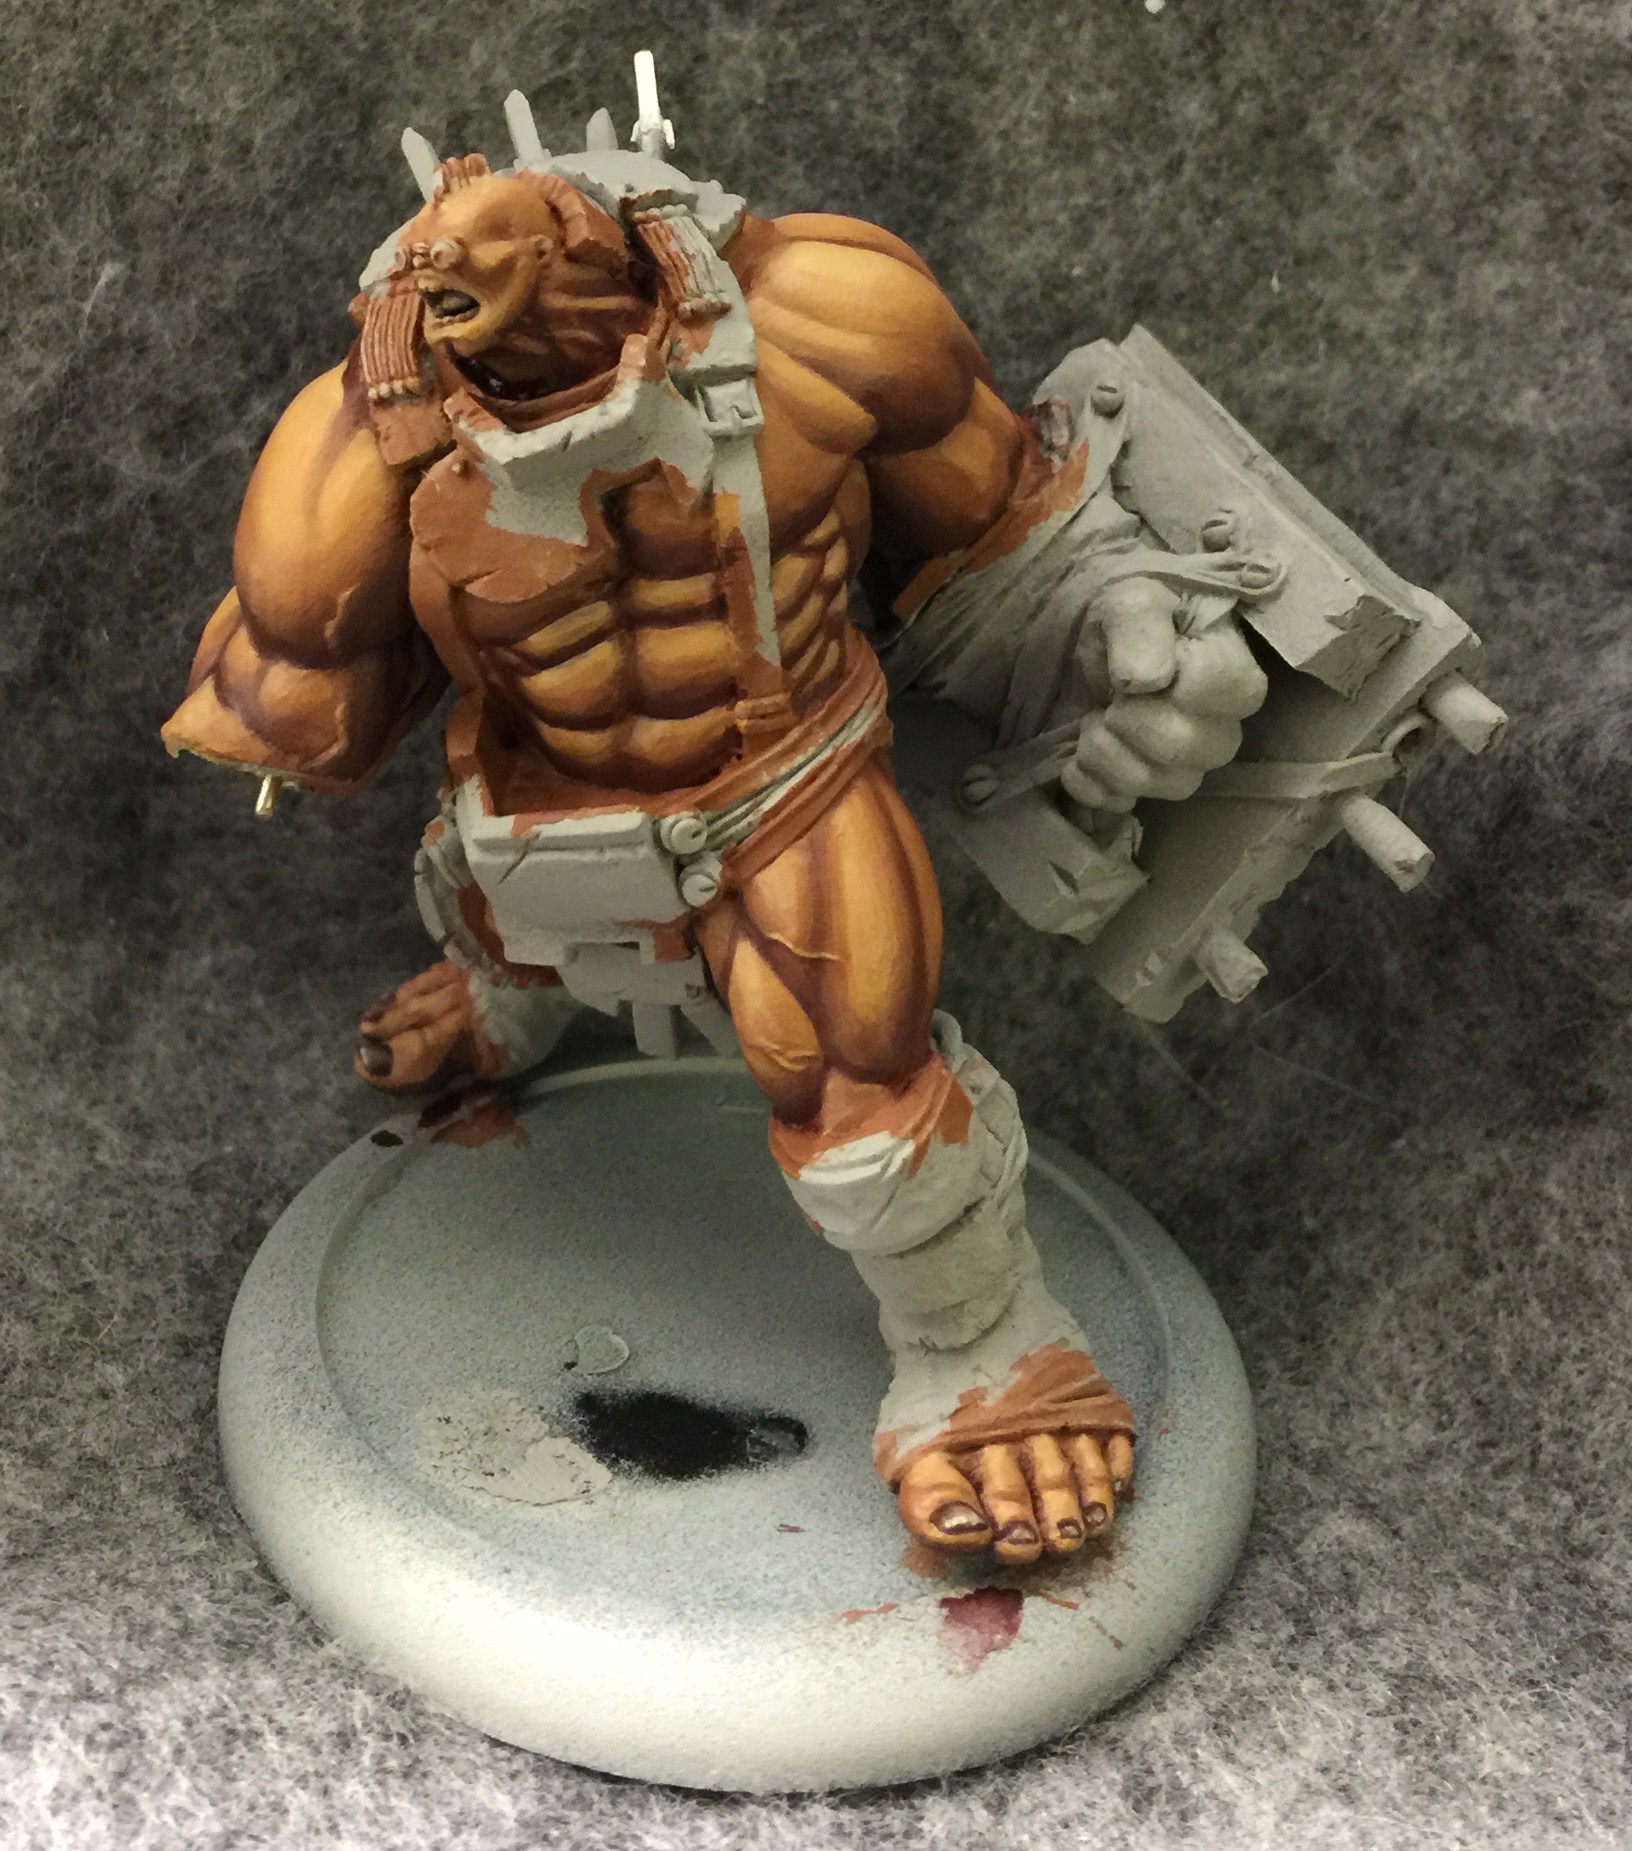
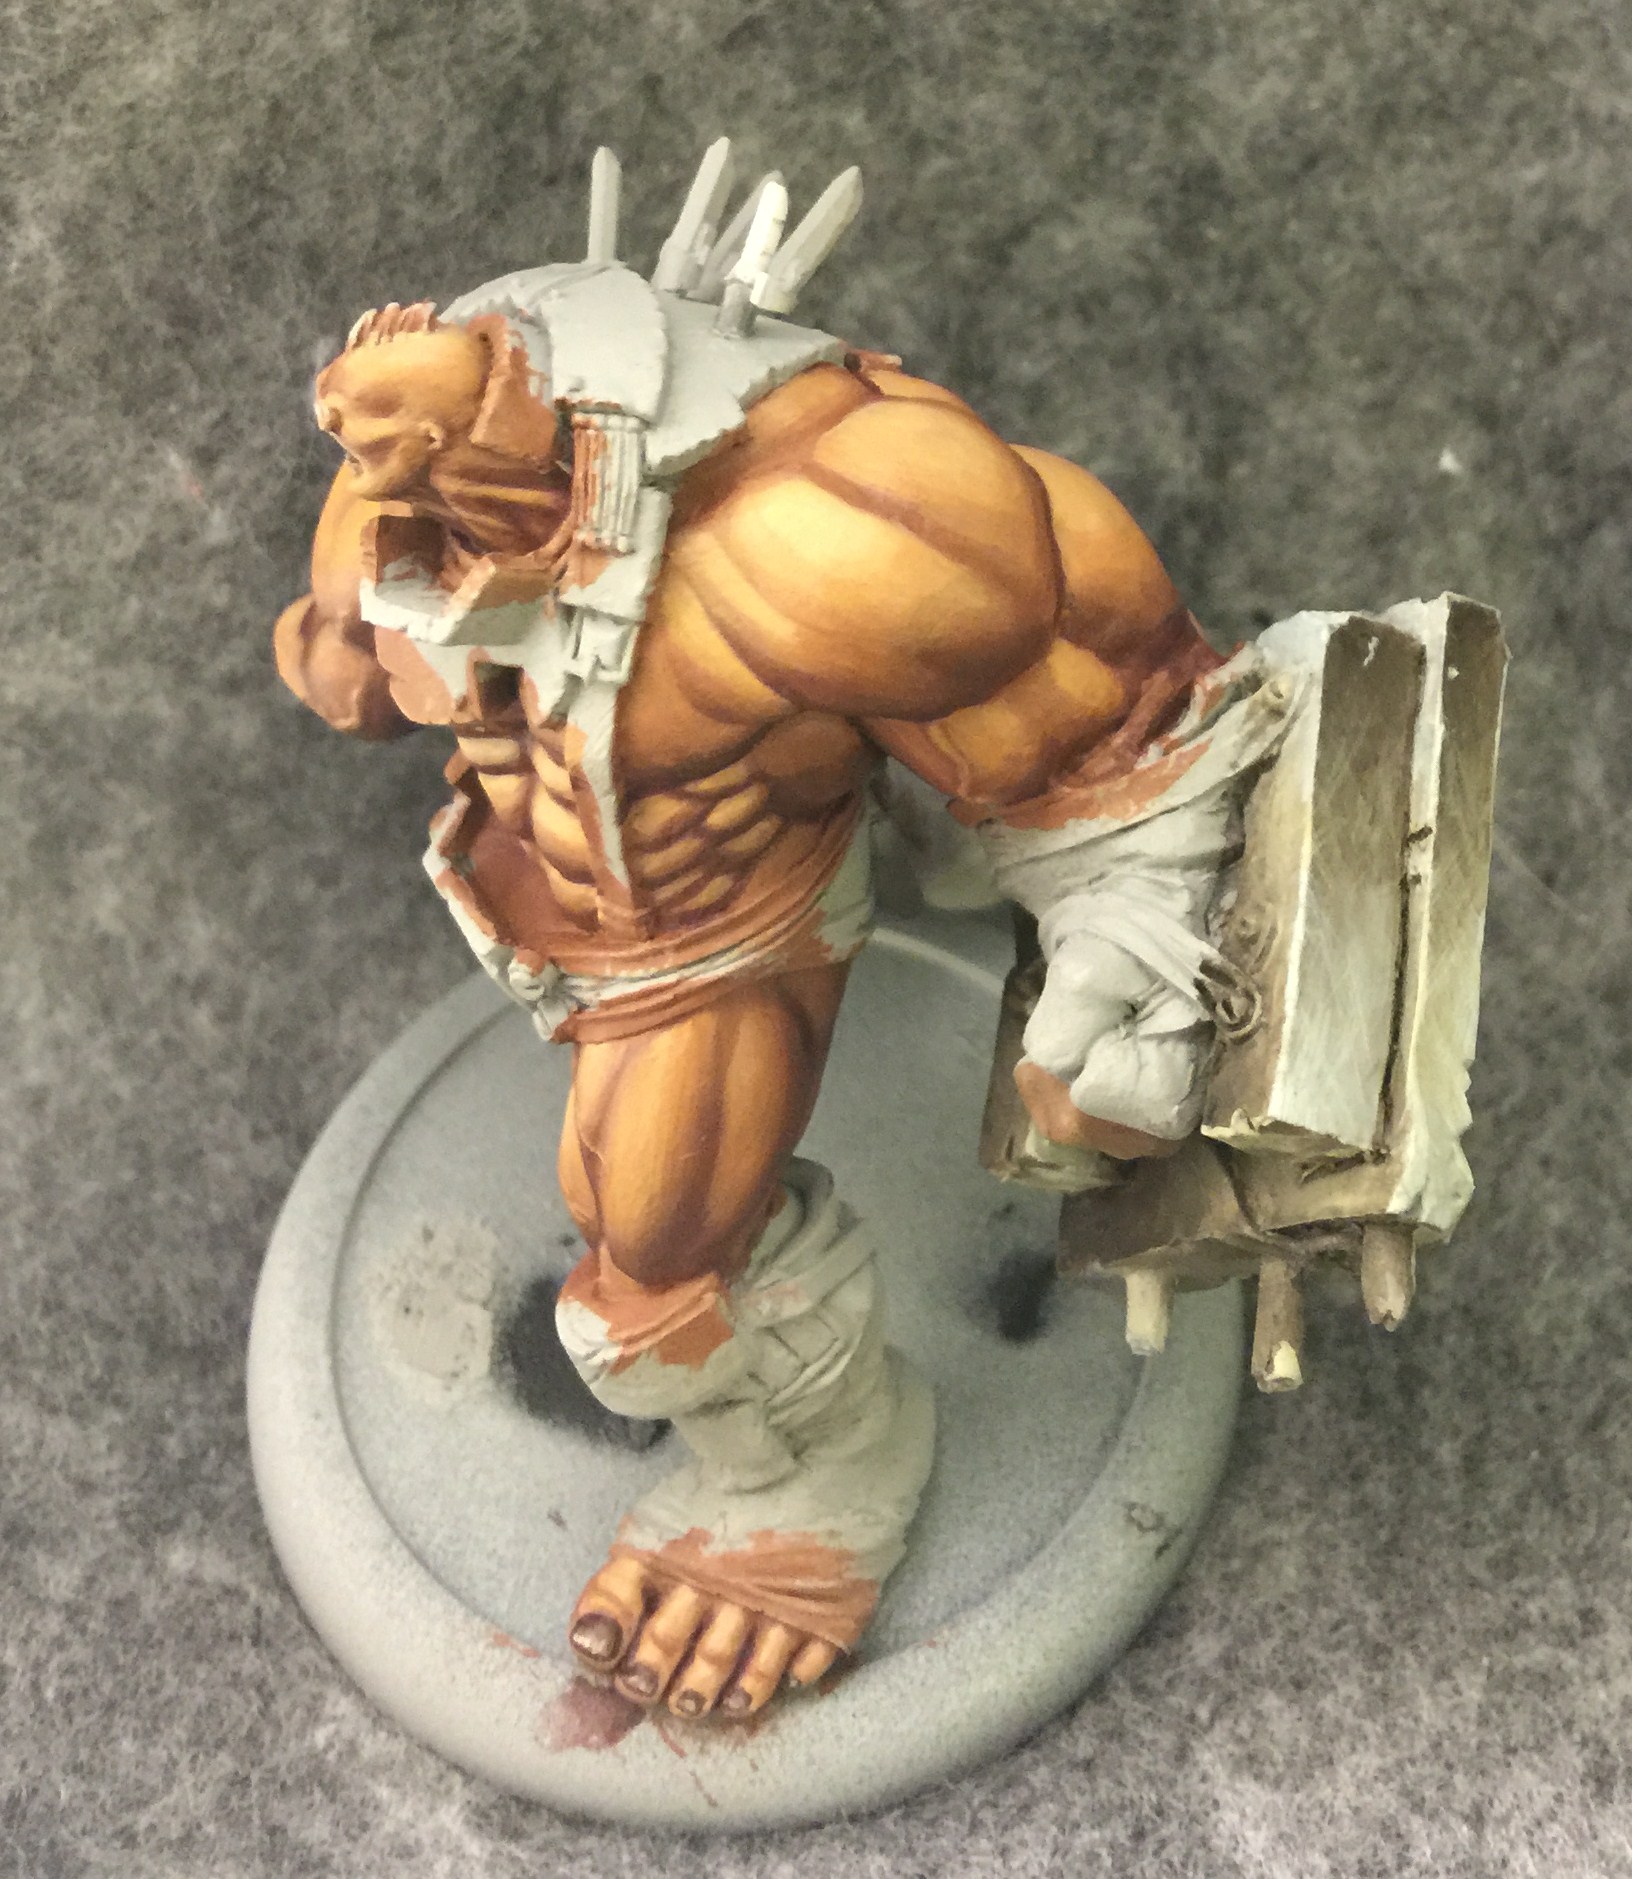
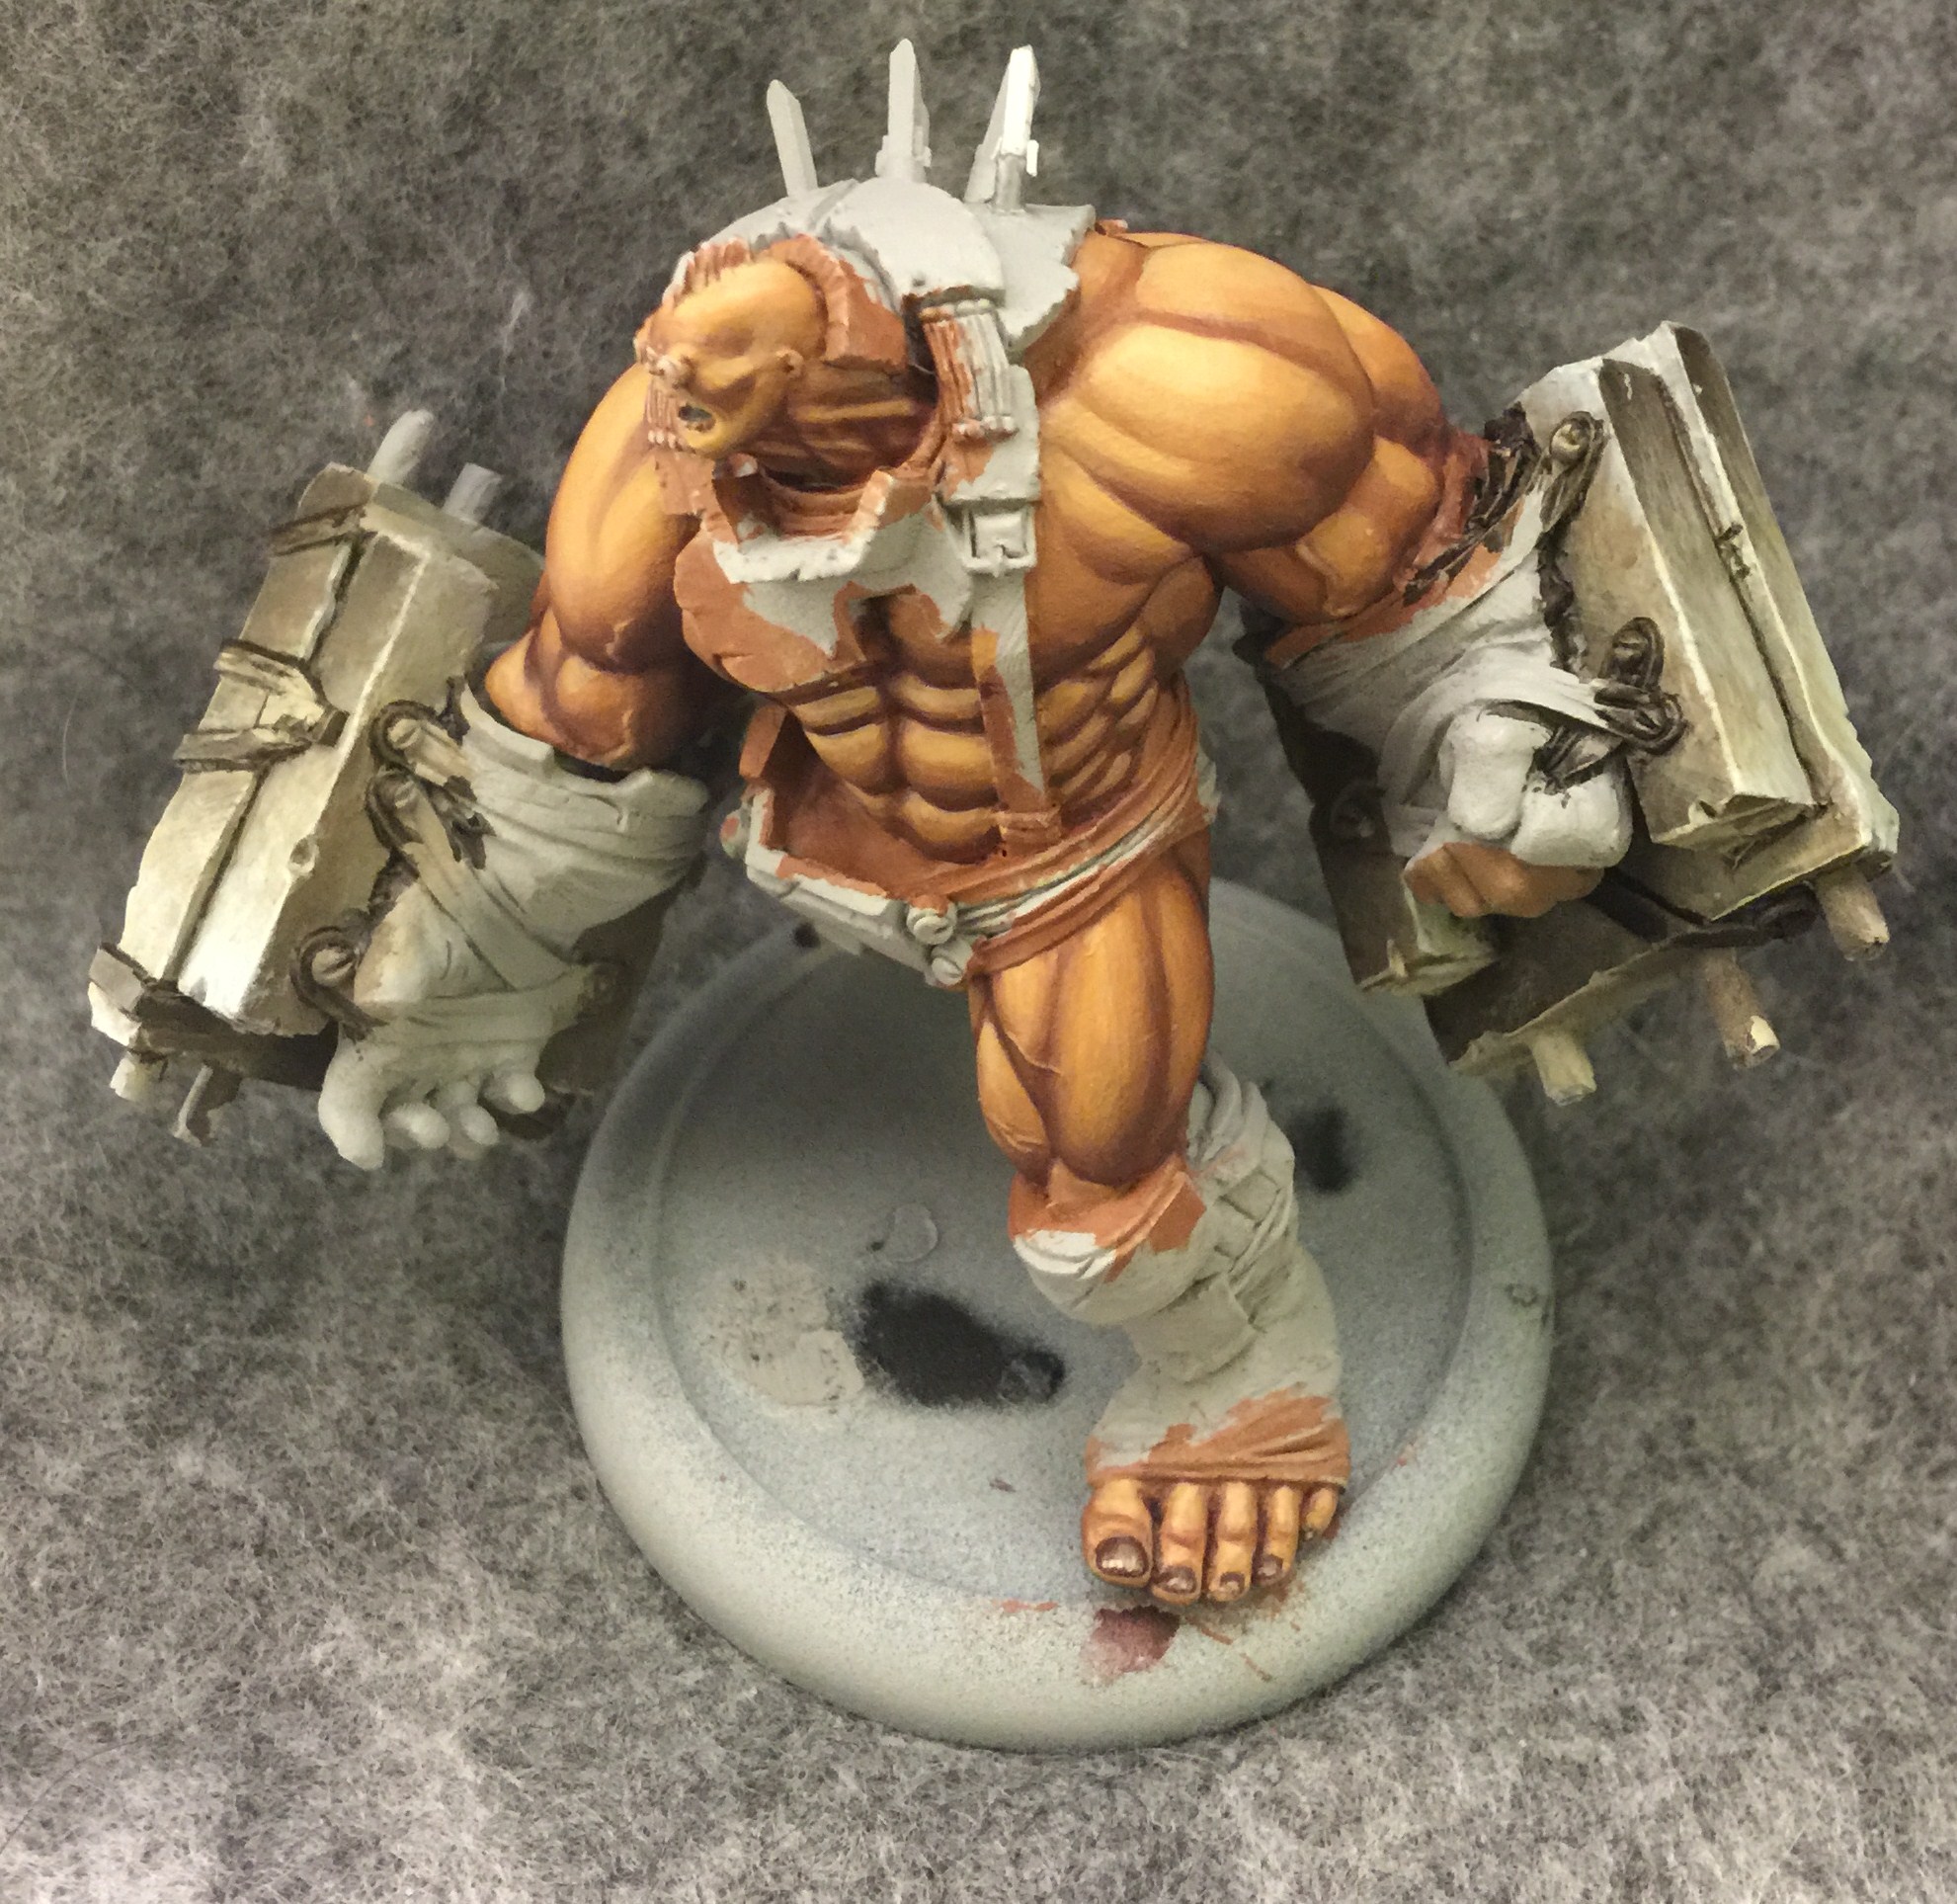
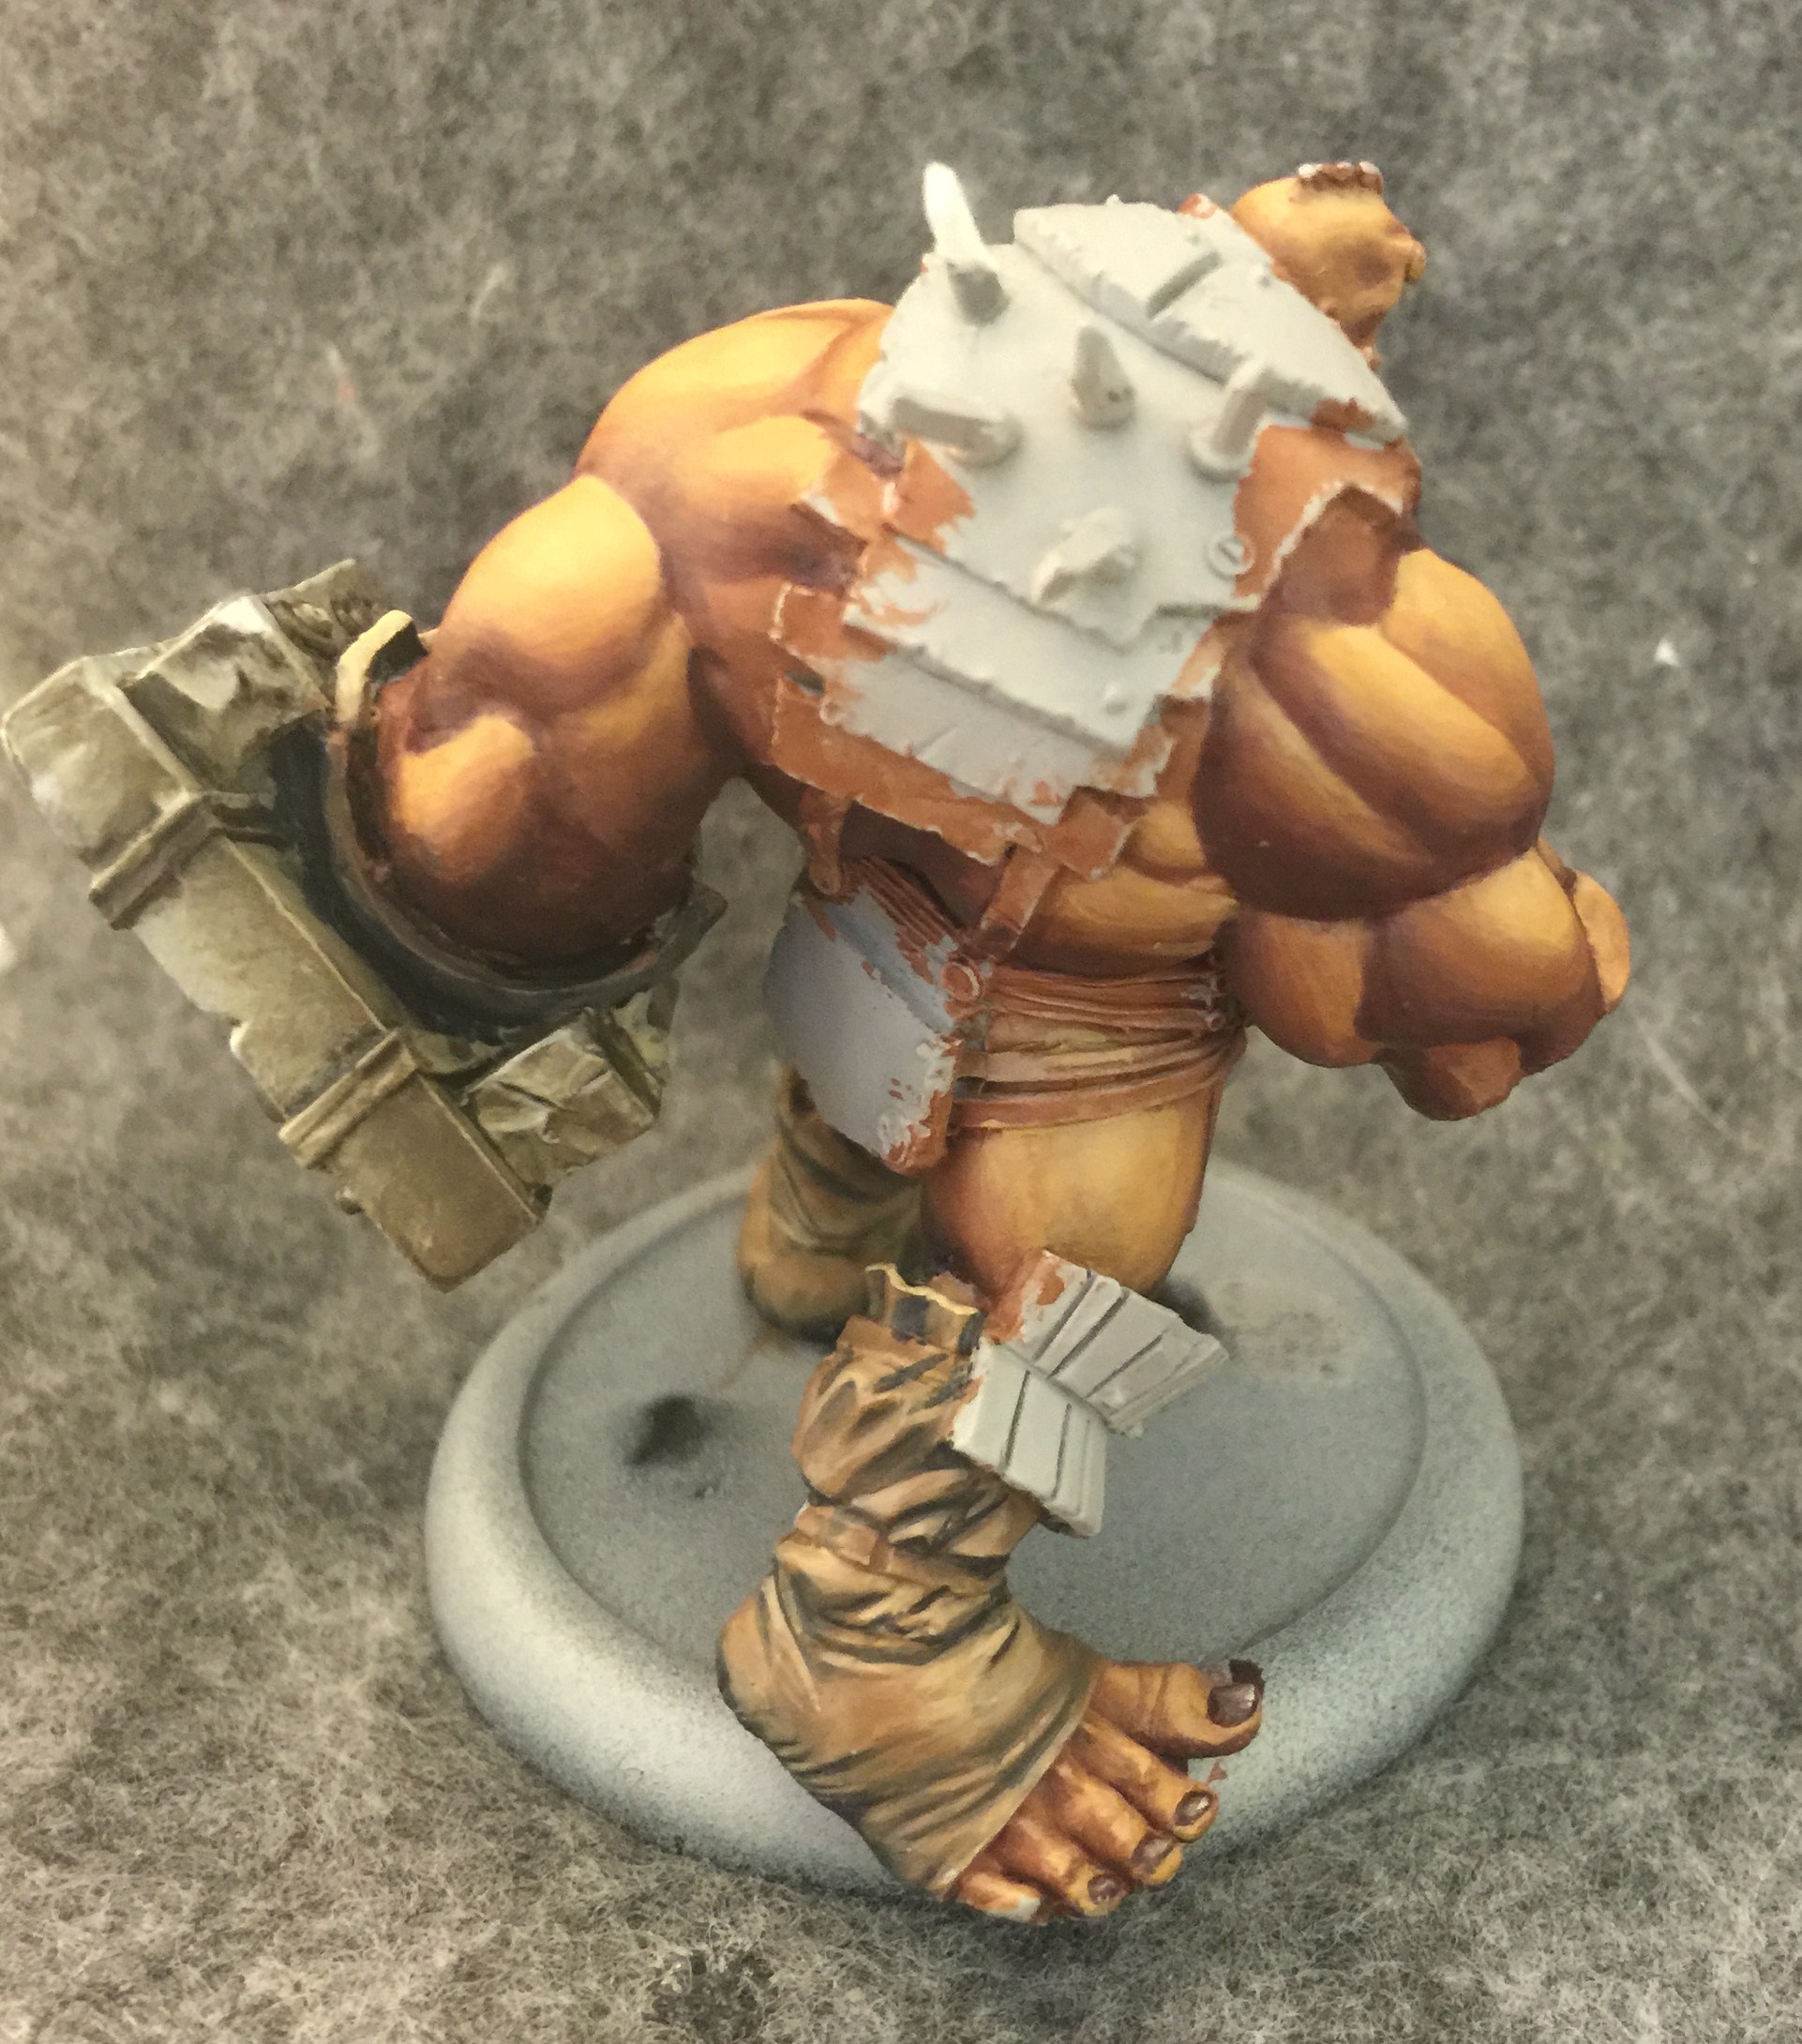
And that brings us to the metals. For these WiP shots I mostly focused on the center of Mongo’s back. The illusion of a round metal object is best created by having at least one stark highlight and it usually works best to put it right in the middle at the highest point on the model. For the colors I’m going with Trollblood Highlight and Cryx Bane Base. Metals reflect the colors around them so there’s technically no correct color to use for them, although iron/steel metallics definitely look convincing when done with shades of gray. It’s important to make sure there’s at least some color or they’ll look lifeless. In this case the Trollblood Highlight has some shades of pink in it while the Bane Base has a bit of green. They’re both colors I’ve never used before and I can’t resist trying new combinations nearly every time I do nmm. Sorry this shot is out of focus but it really shouldn’t matter since the values and colors still show through.
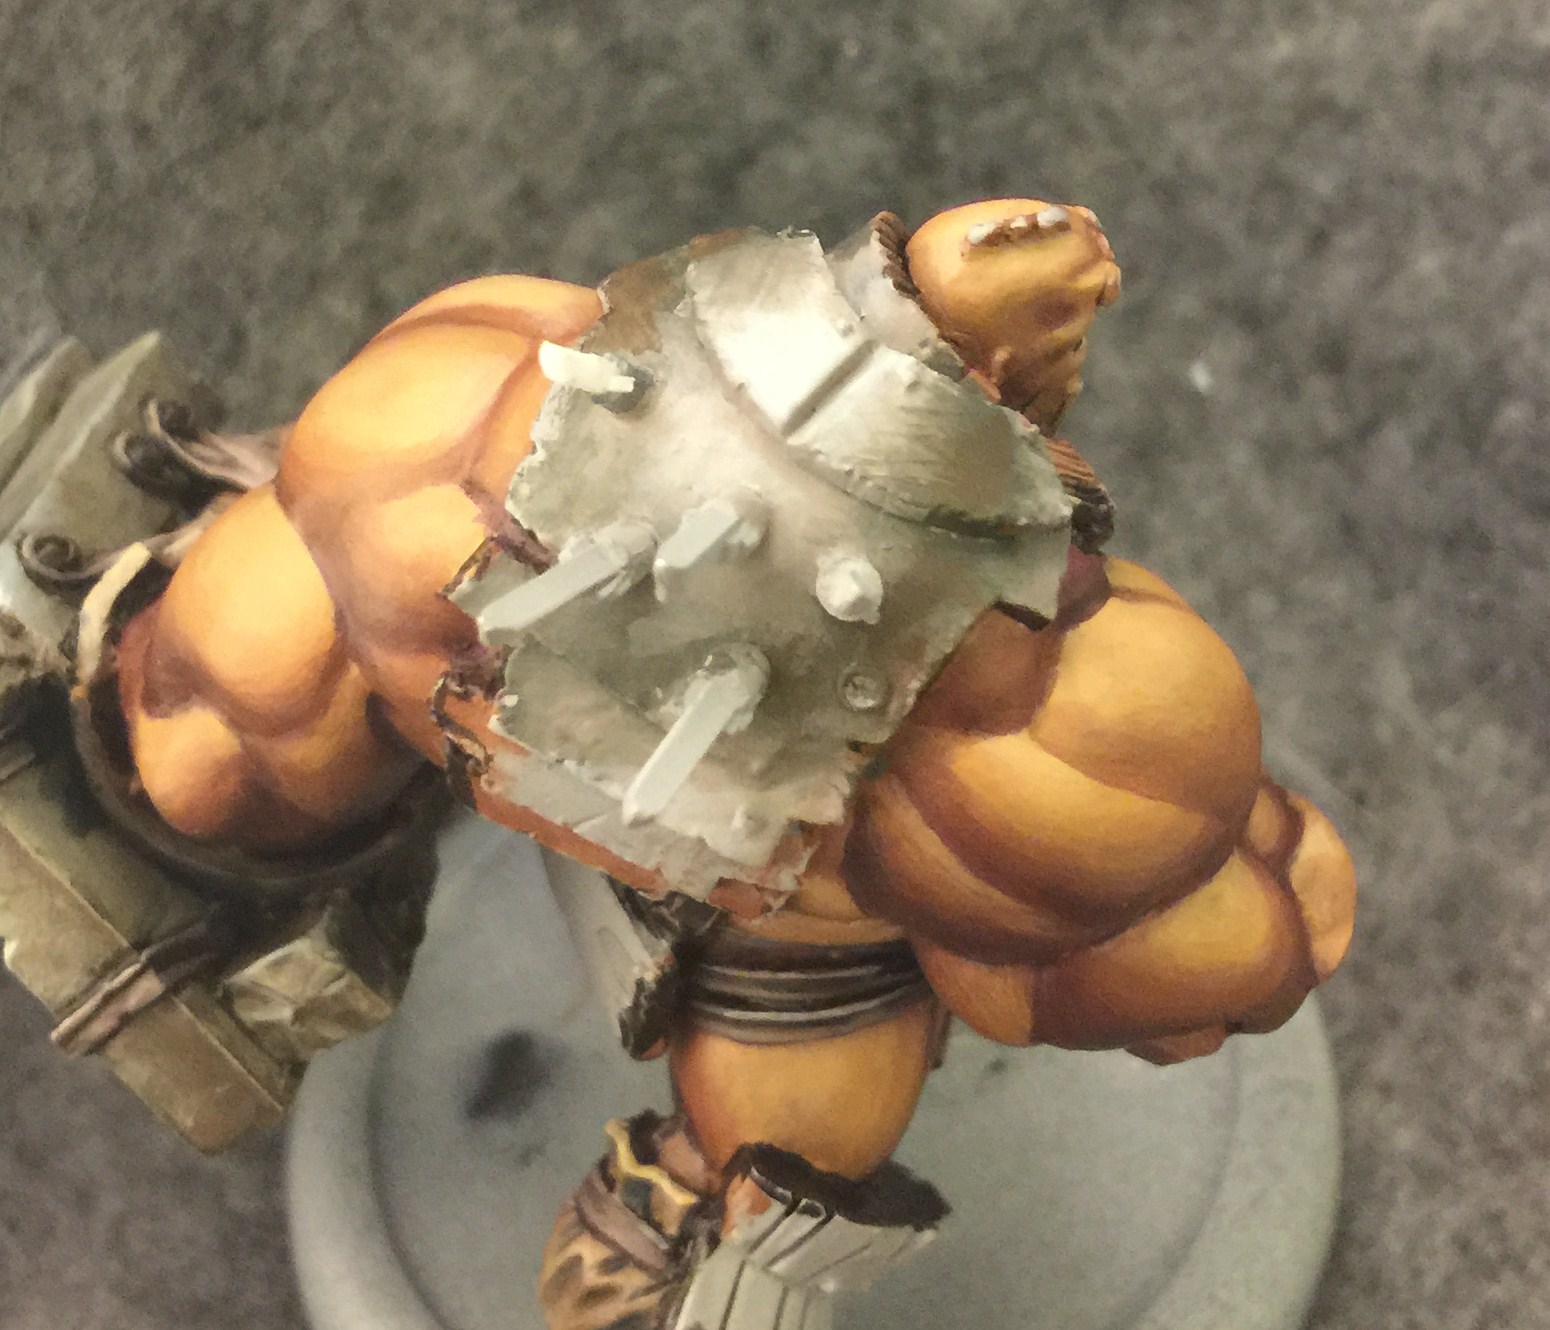
Now I’ve brought out the central highlight even more by blending it up to Menoth White Highlight. I’ve also added just a bit of Bloodtracker Brown in some of the darker areas to represent a bit of patina. I’m also adding some texture by aggressively adding some small streaks with very thinned out paint.
At this point I’ve smoothed out some of the transitions, added some Frostbite to some of the midtones, and added even more distressed texture. I’ve even added some deeper gouges by adding some thin lines of Frostbite or Menoth White Highlight with a darker line of warm black directly above. But I think it’s a little too much distressing.
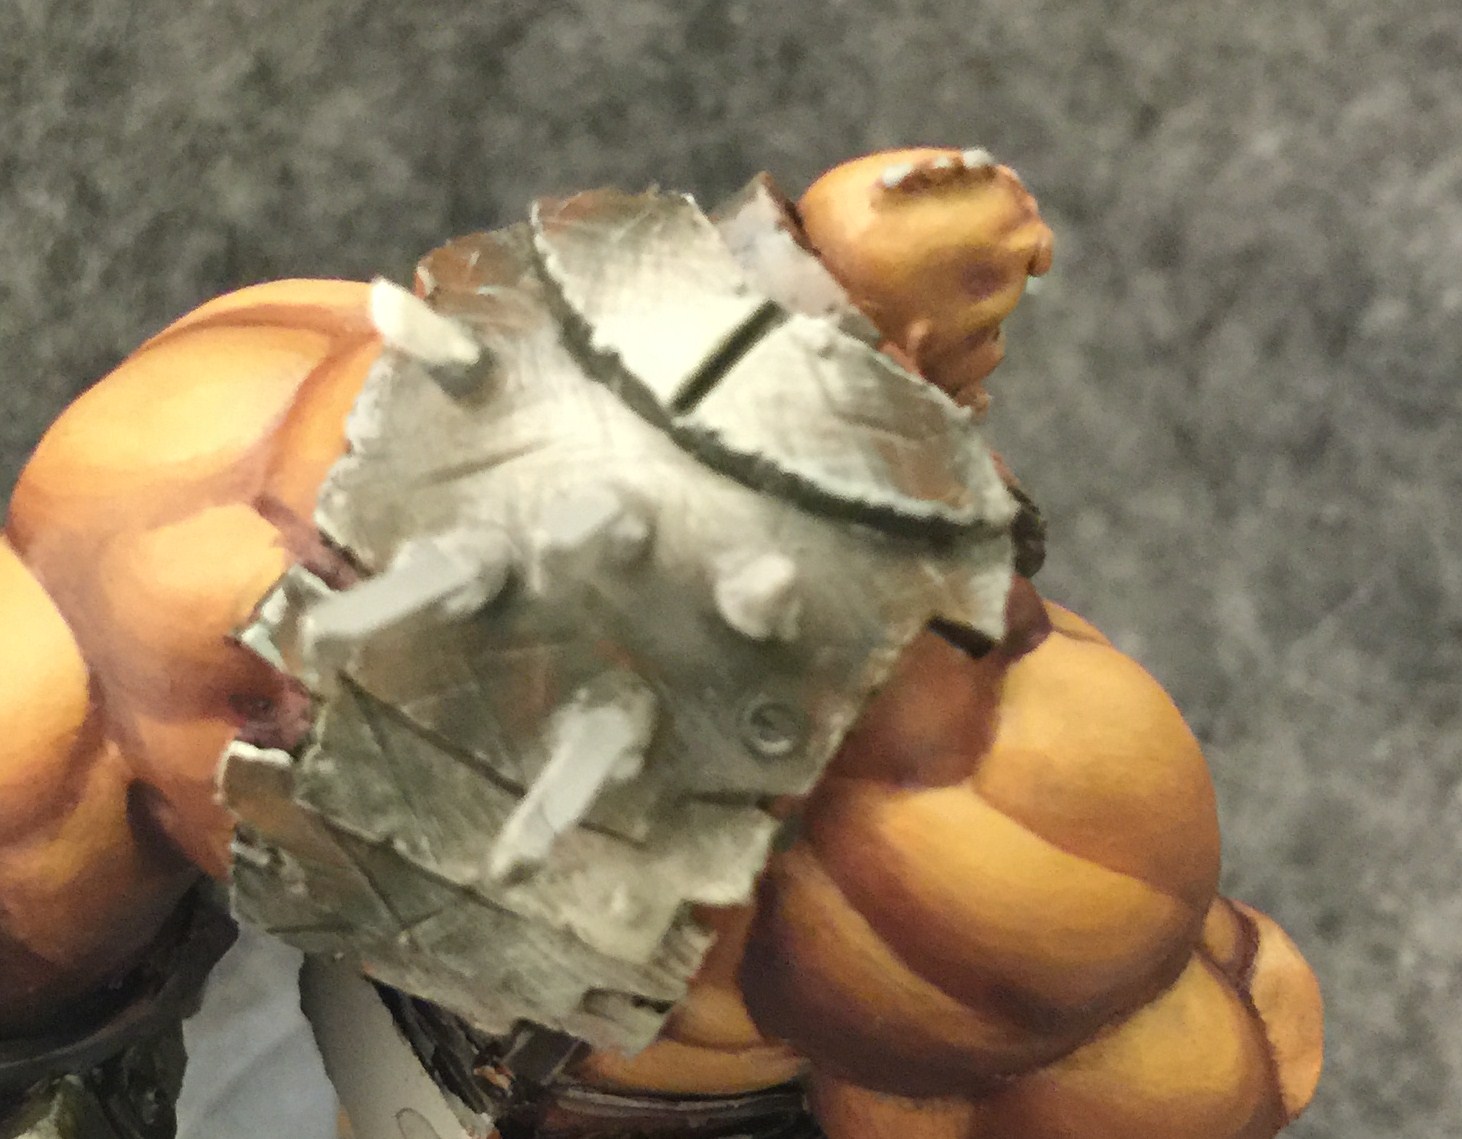
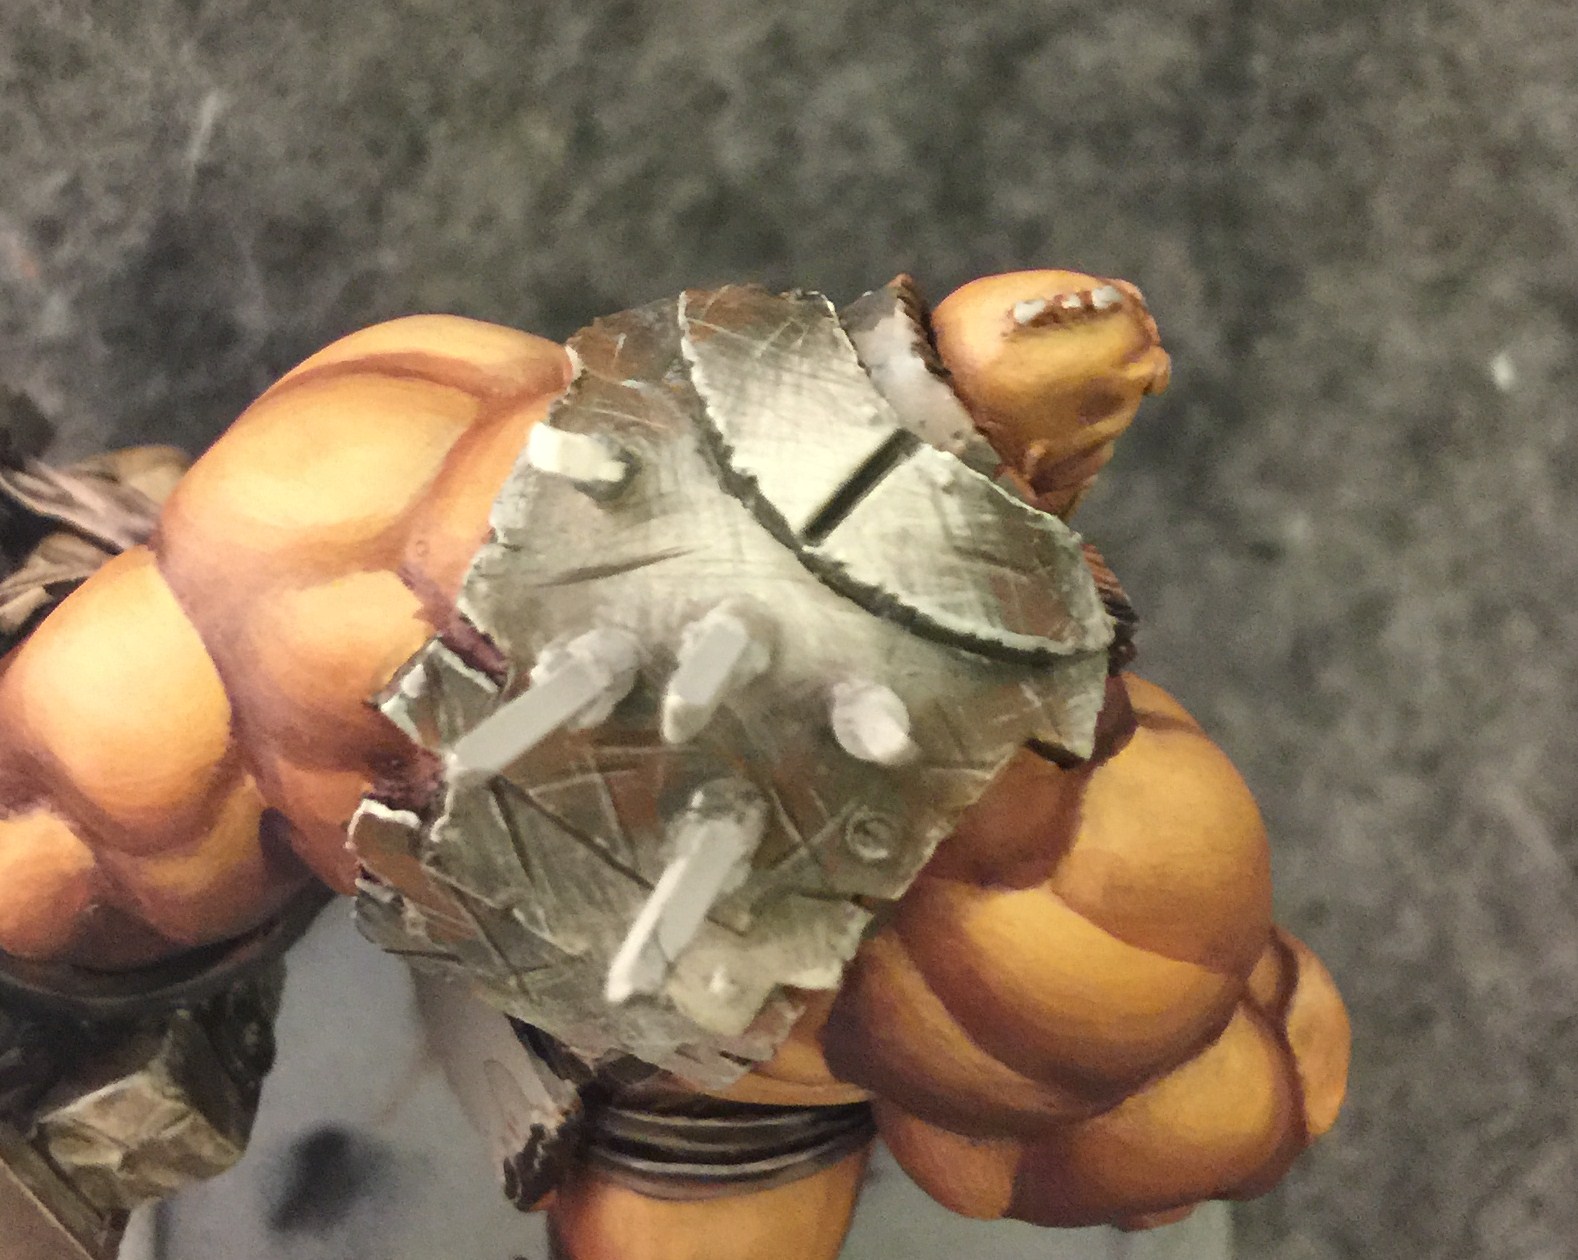
It’s actually not that hard to tone the distressing down some by adding just a few very thin glazes of the original colors. Since these go on super wet they also blend into one another quite easily. Unfortunately this is another shot that ended up out of focus. The spikes make it hard for my camera to know where it’s supposed to focus it seems. But there will be plenty of other shots of him to look at.
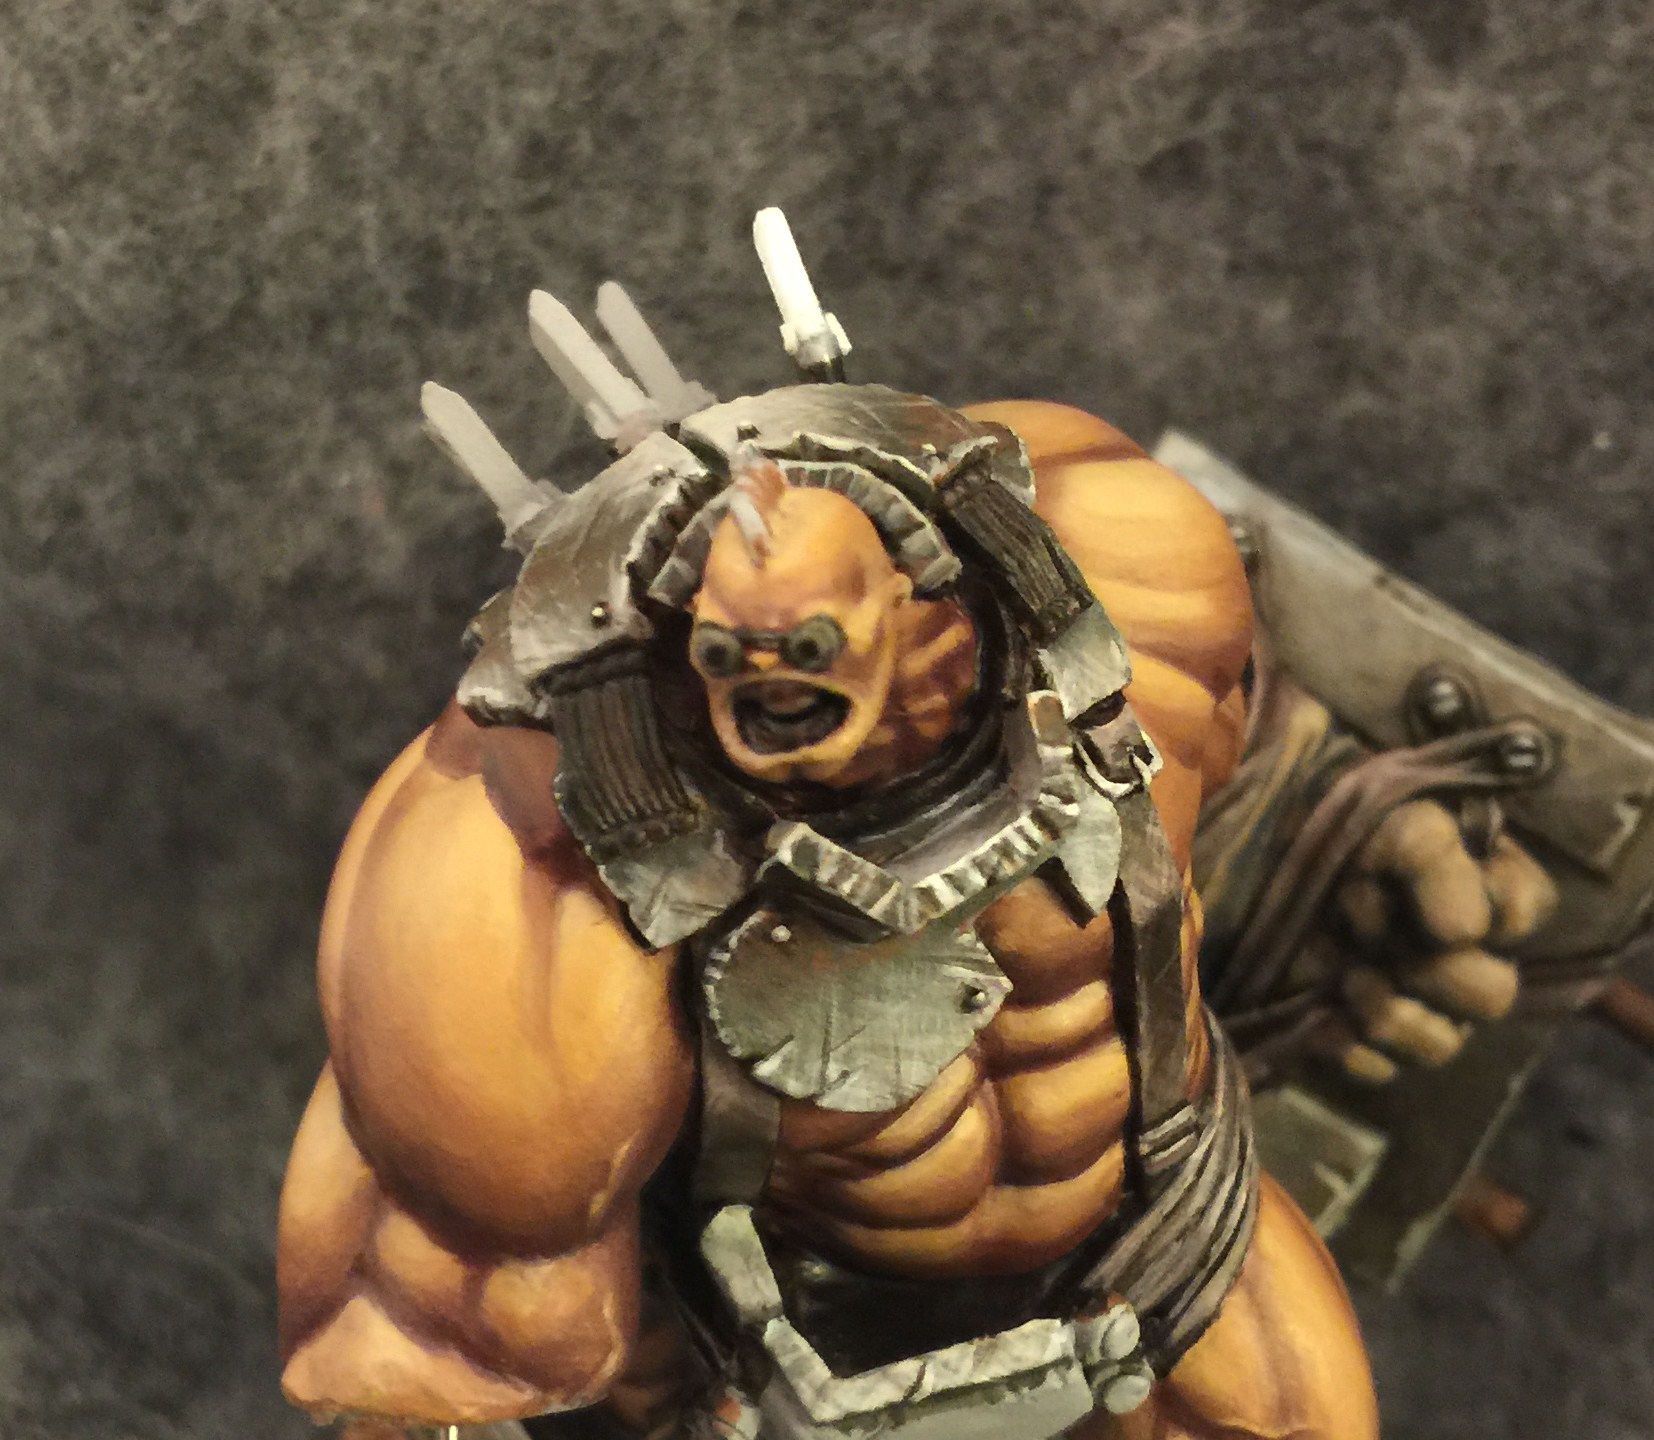
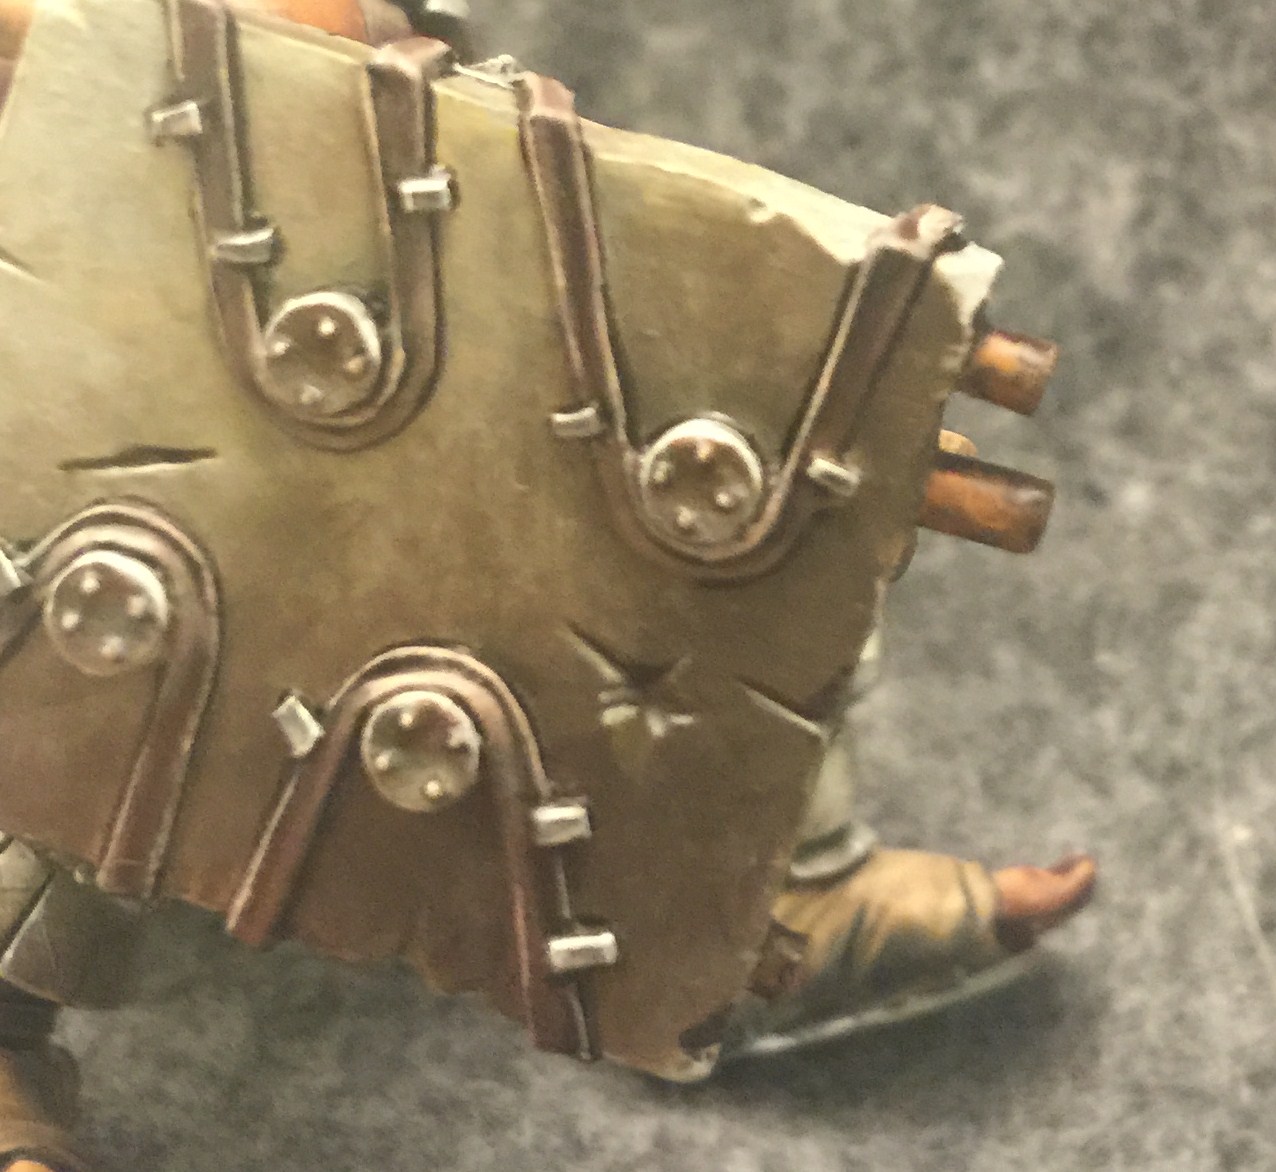
Looking at him from the front you can see the same style of painting applied to a flat rather than a round surface. The easiest way to give the illusion of metal on a flat surface is to start light at the bottom and blend it darker as it goes up. Then give it a stark highlight along the top edge. Now let’s focus on the goggles which have been given a basecoat of Cryx Bane Base.
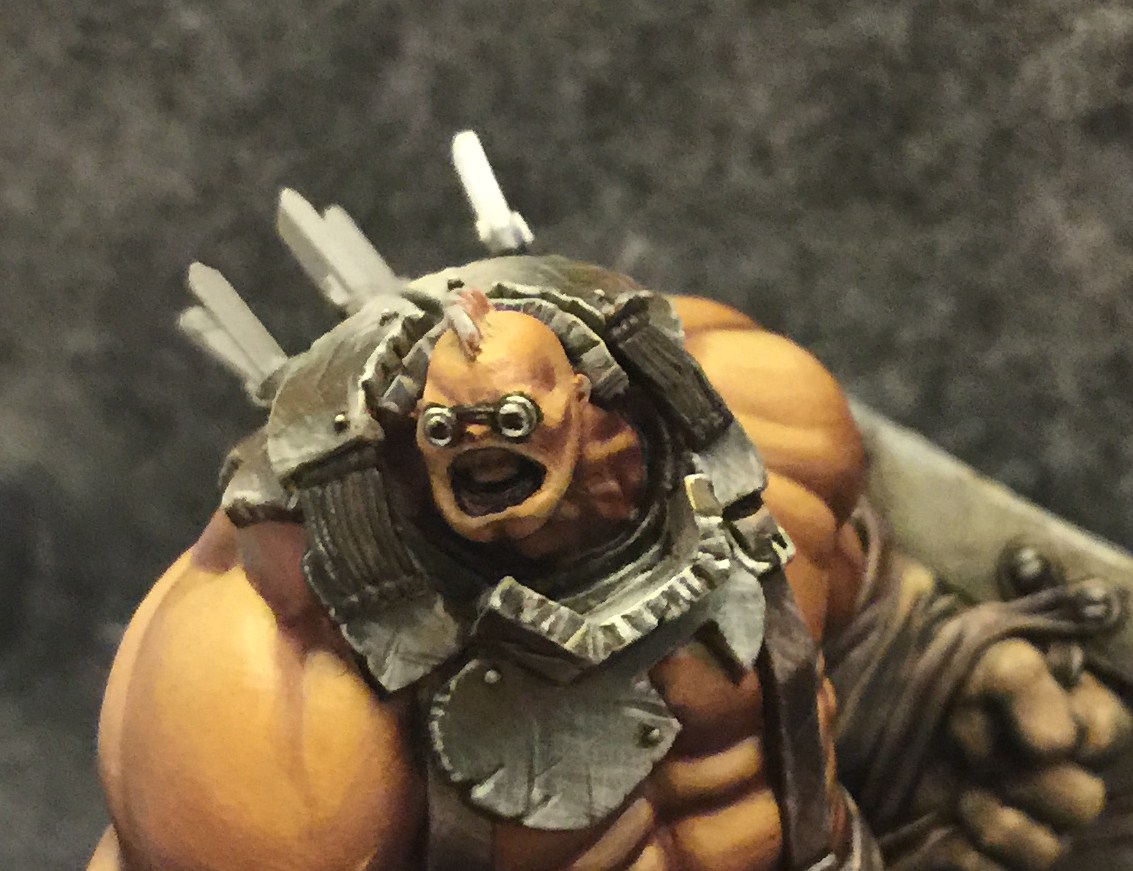
The round ring shapes of the goggles need to be highlighted in a similar way as Mongo’s back hump. They are blended up to a single bright point in the center with the top and bottom both getting the highlight since light would be reflected in both places.
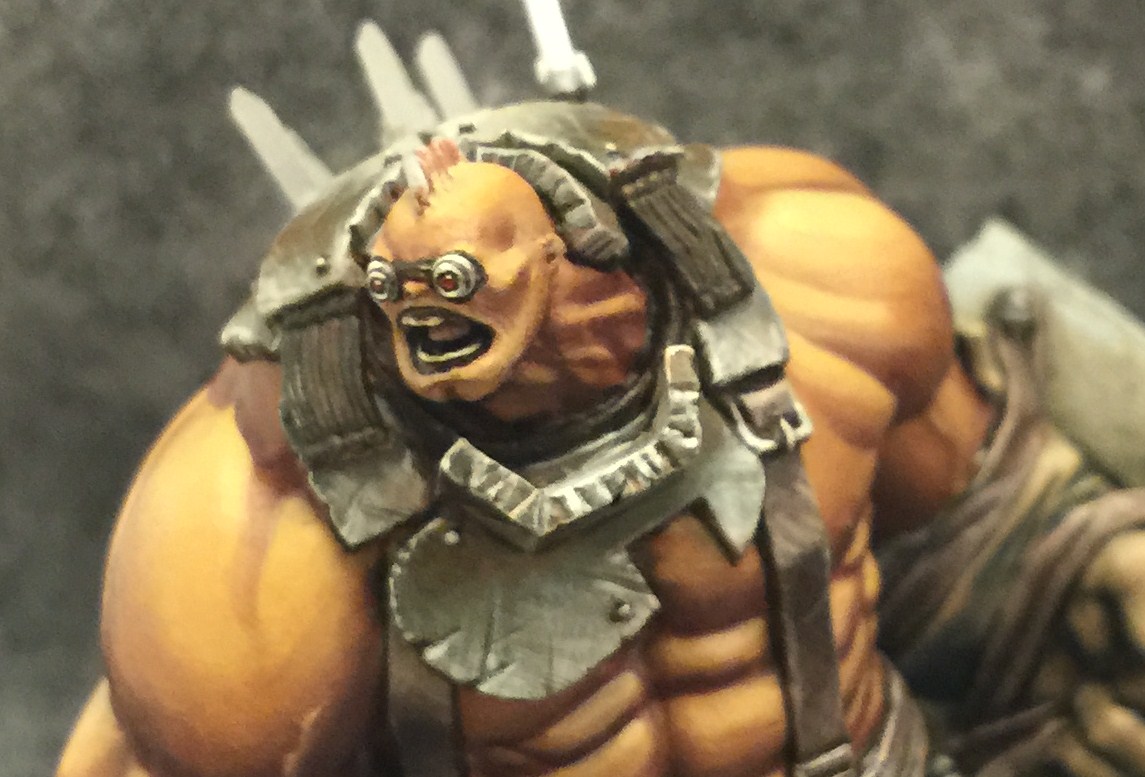
I decided to add some red inside to give just a bit of color. To give the appearance of a lens the red is darkest at the top and gets lighter as it goes down. A single point of white is added near the top as a reflection.
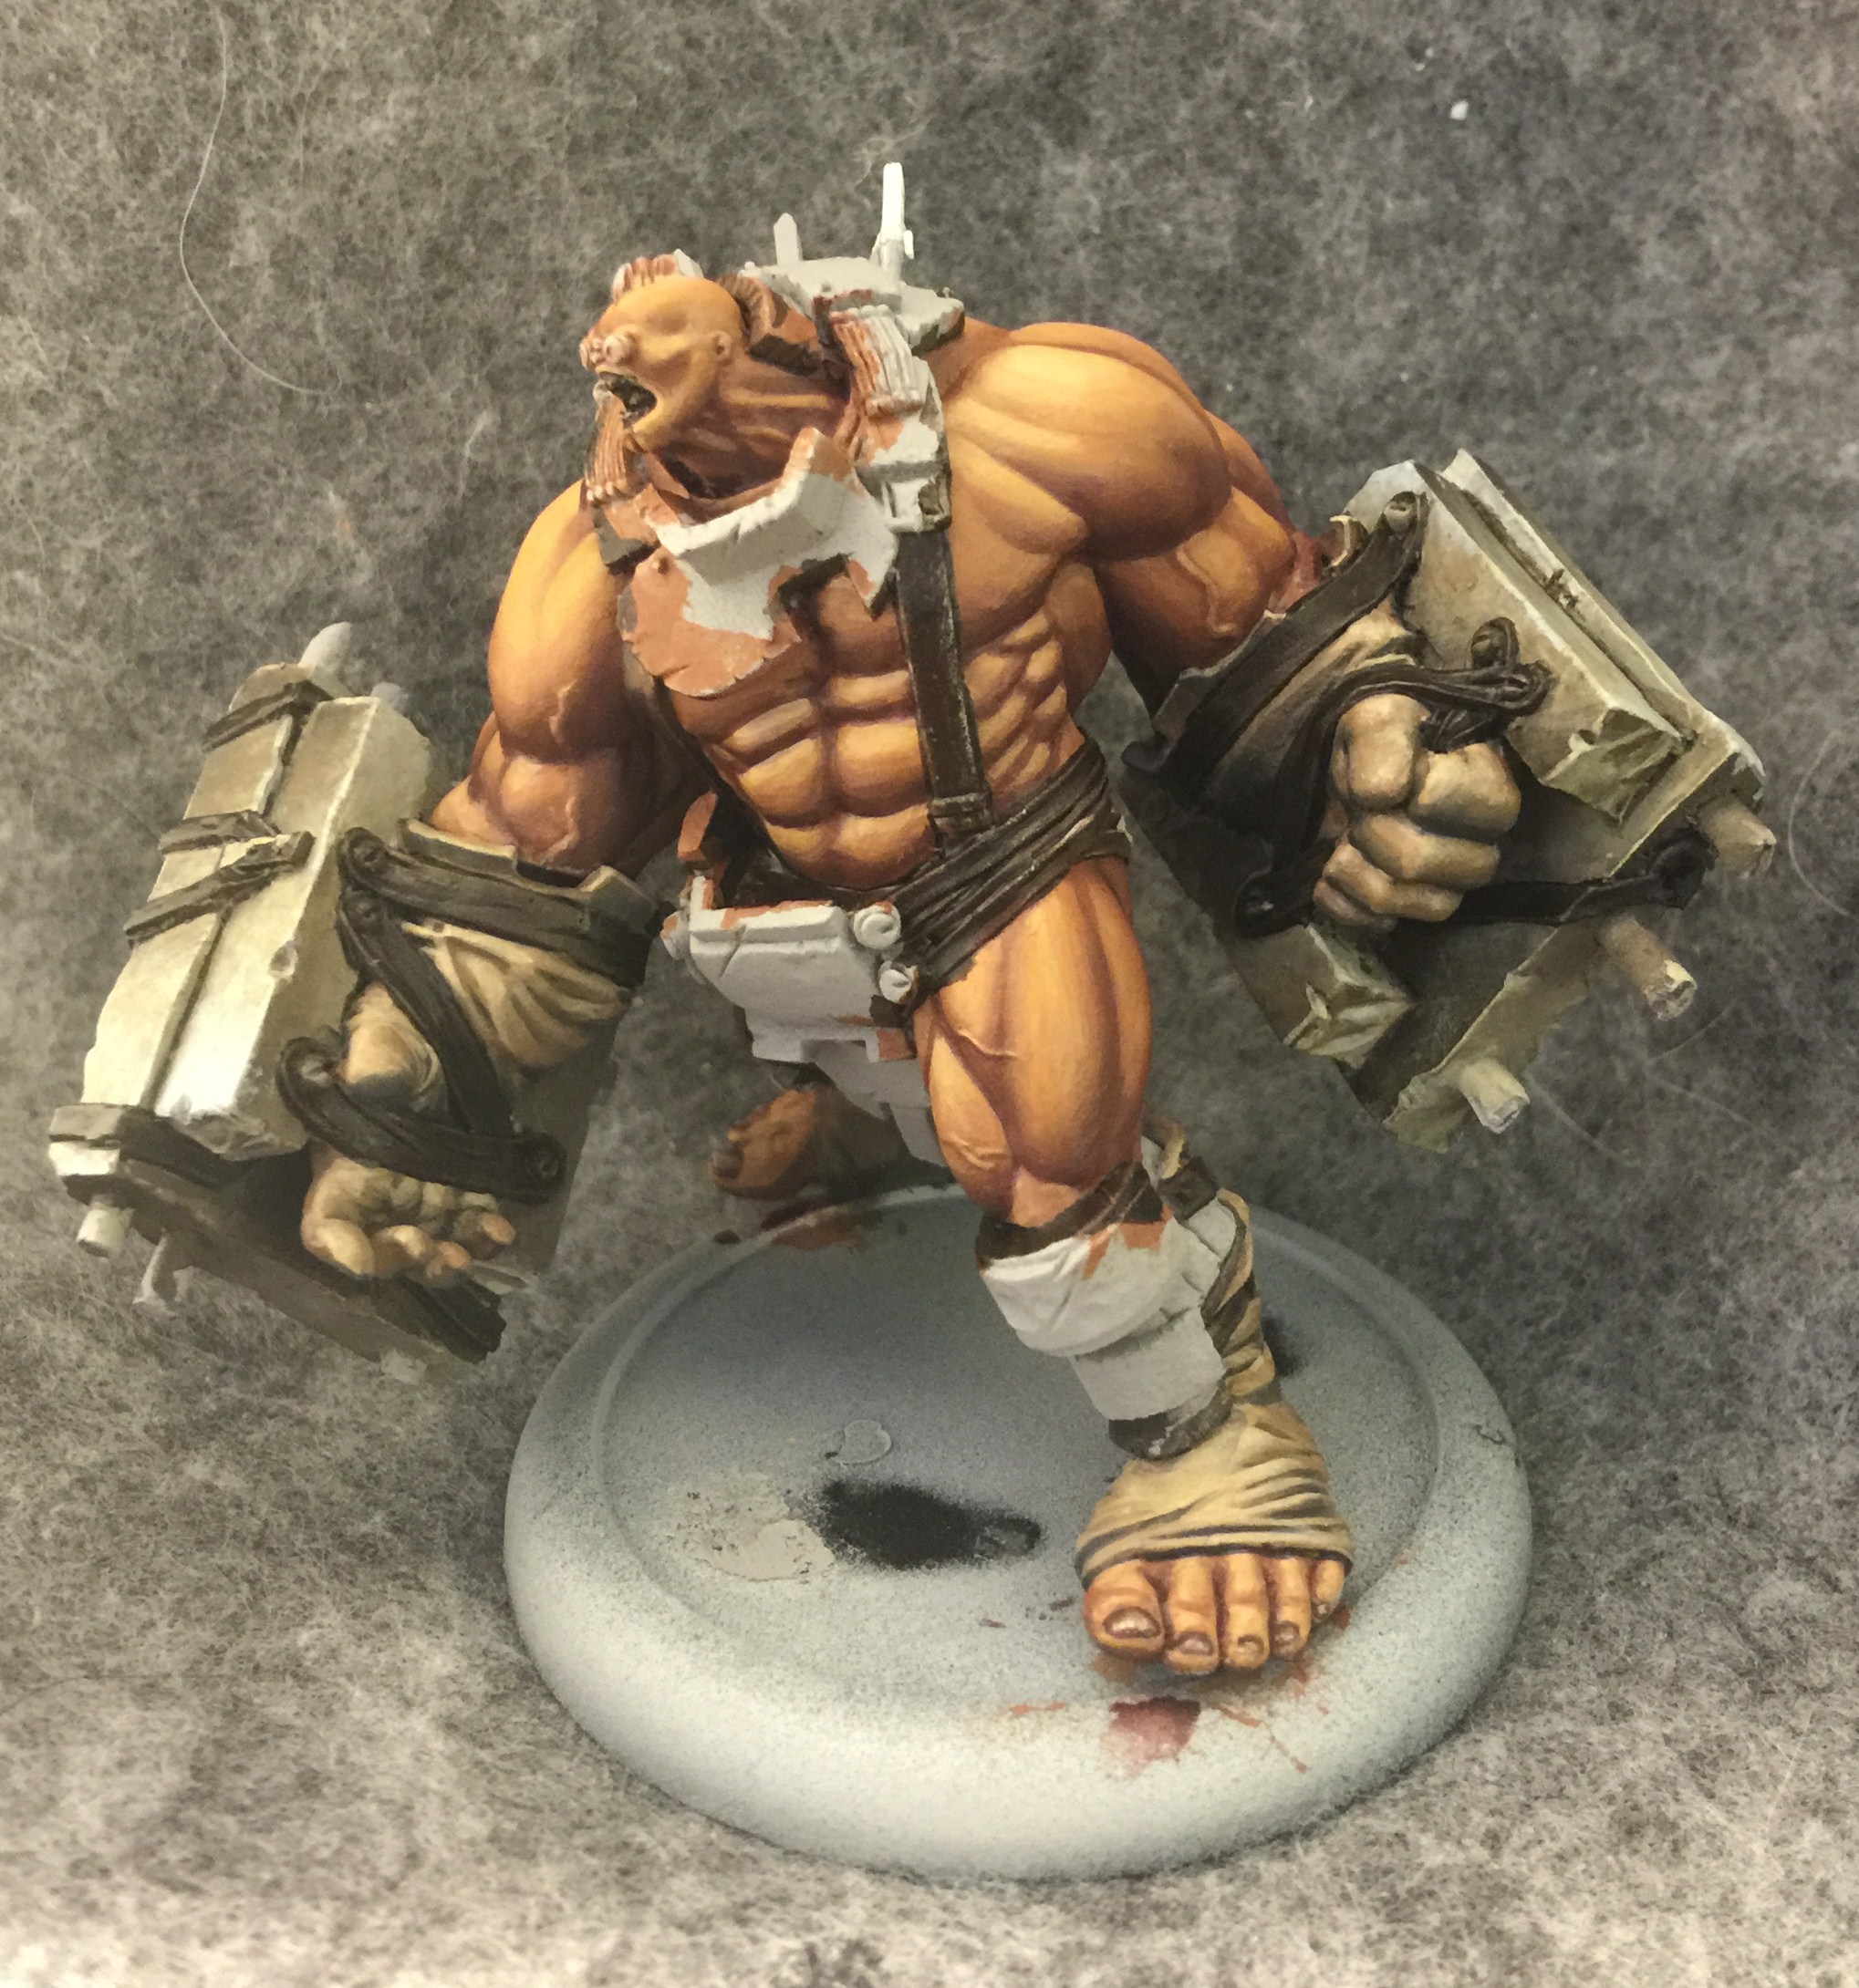
In a few places I’m going to go for a different kind of metal – a brass in this case. The basecoat is Battledress Green, lightened with Rucksack Tan and shaded with my Navy Mix.
Then I add some stark highlights and some distressing with Menoth White Highlight again.
The last kind of metal I’ll be doing today is the rusty kind: those iron bars sticking out of Mongo’s slabs. The rust is added by stippling some Blazing Orange around the bottom of an Umbral Umber basecoat.

Even though it’s rusty it’s still metal and so a thin line of highlight is added along the top edge. It starts as Frostbite and just at the very tip a bit of Menoth White Highlight is added. Using the side of the brush an incredibly thin line is added around the top half of the cylinder.

Mongo’s base was made and painted before he was along with the rest of the Outcasts that will be fighting beside him. It’s made from bits and pieces of a Pegasus Hobbies Siberclicks terrain set. The “pipes” are plastic tubes by evergreen scale models I think. To paint the base I splotched on three different colors in alternating, more or less randomly applied patches. I used Bloodstone, Sanguine Base, and Cryx Bane Base. They all went on while still wet so they blended into each other well enough. Once dry, i applied a thin layer of pure water to the whole base before stippling some Blazing Orange here and there, again more or less randomly. The water caused the paint to settle into the cracks naturally ad give a fairly realistic rust appearance. A light drybrushing of Bloodtacker Brown went over it next which helped even out the orange “rust” in the few places it appeared uneven. Then it was time for more very thin layers of drybrushing – first Thrall Flesh then just a bit of Menoth White Highlight to give the impression of those last vestiges of metal shining through. After Mongo was glued on I used the side of the brush to add a few final hotspots of highlight, as always with Menoth White Highlight.
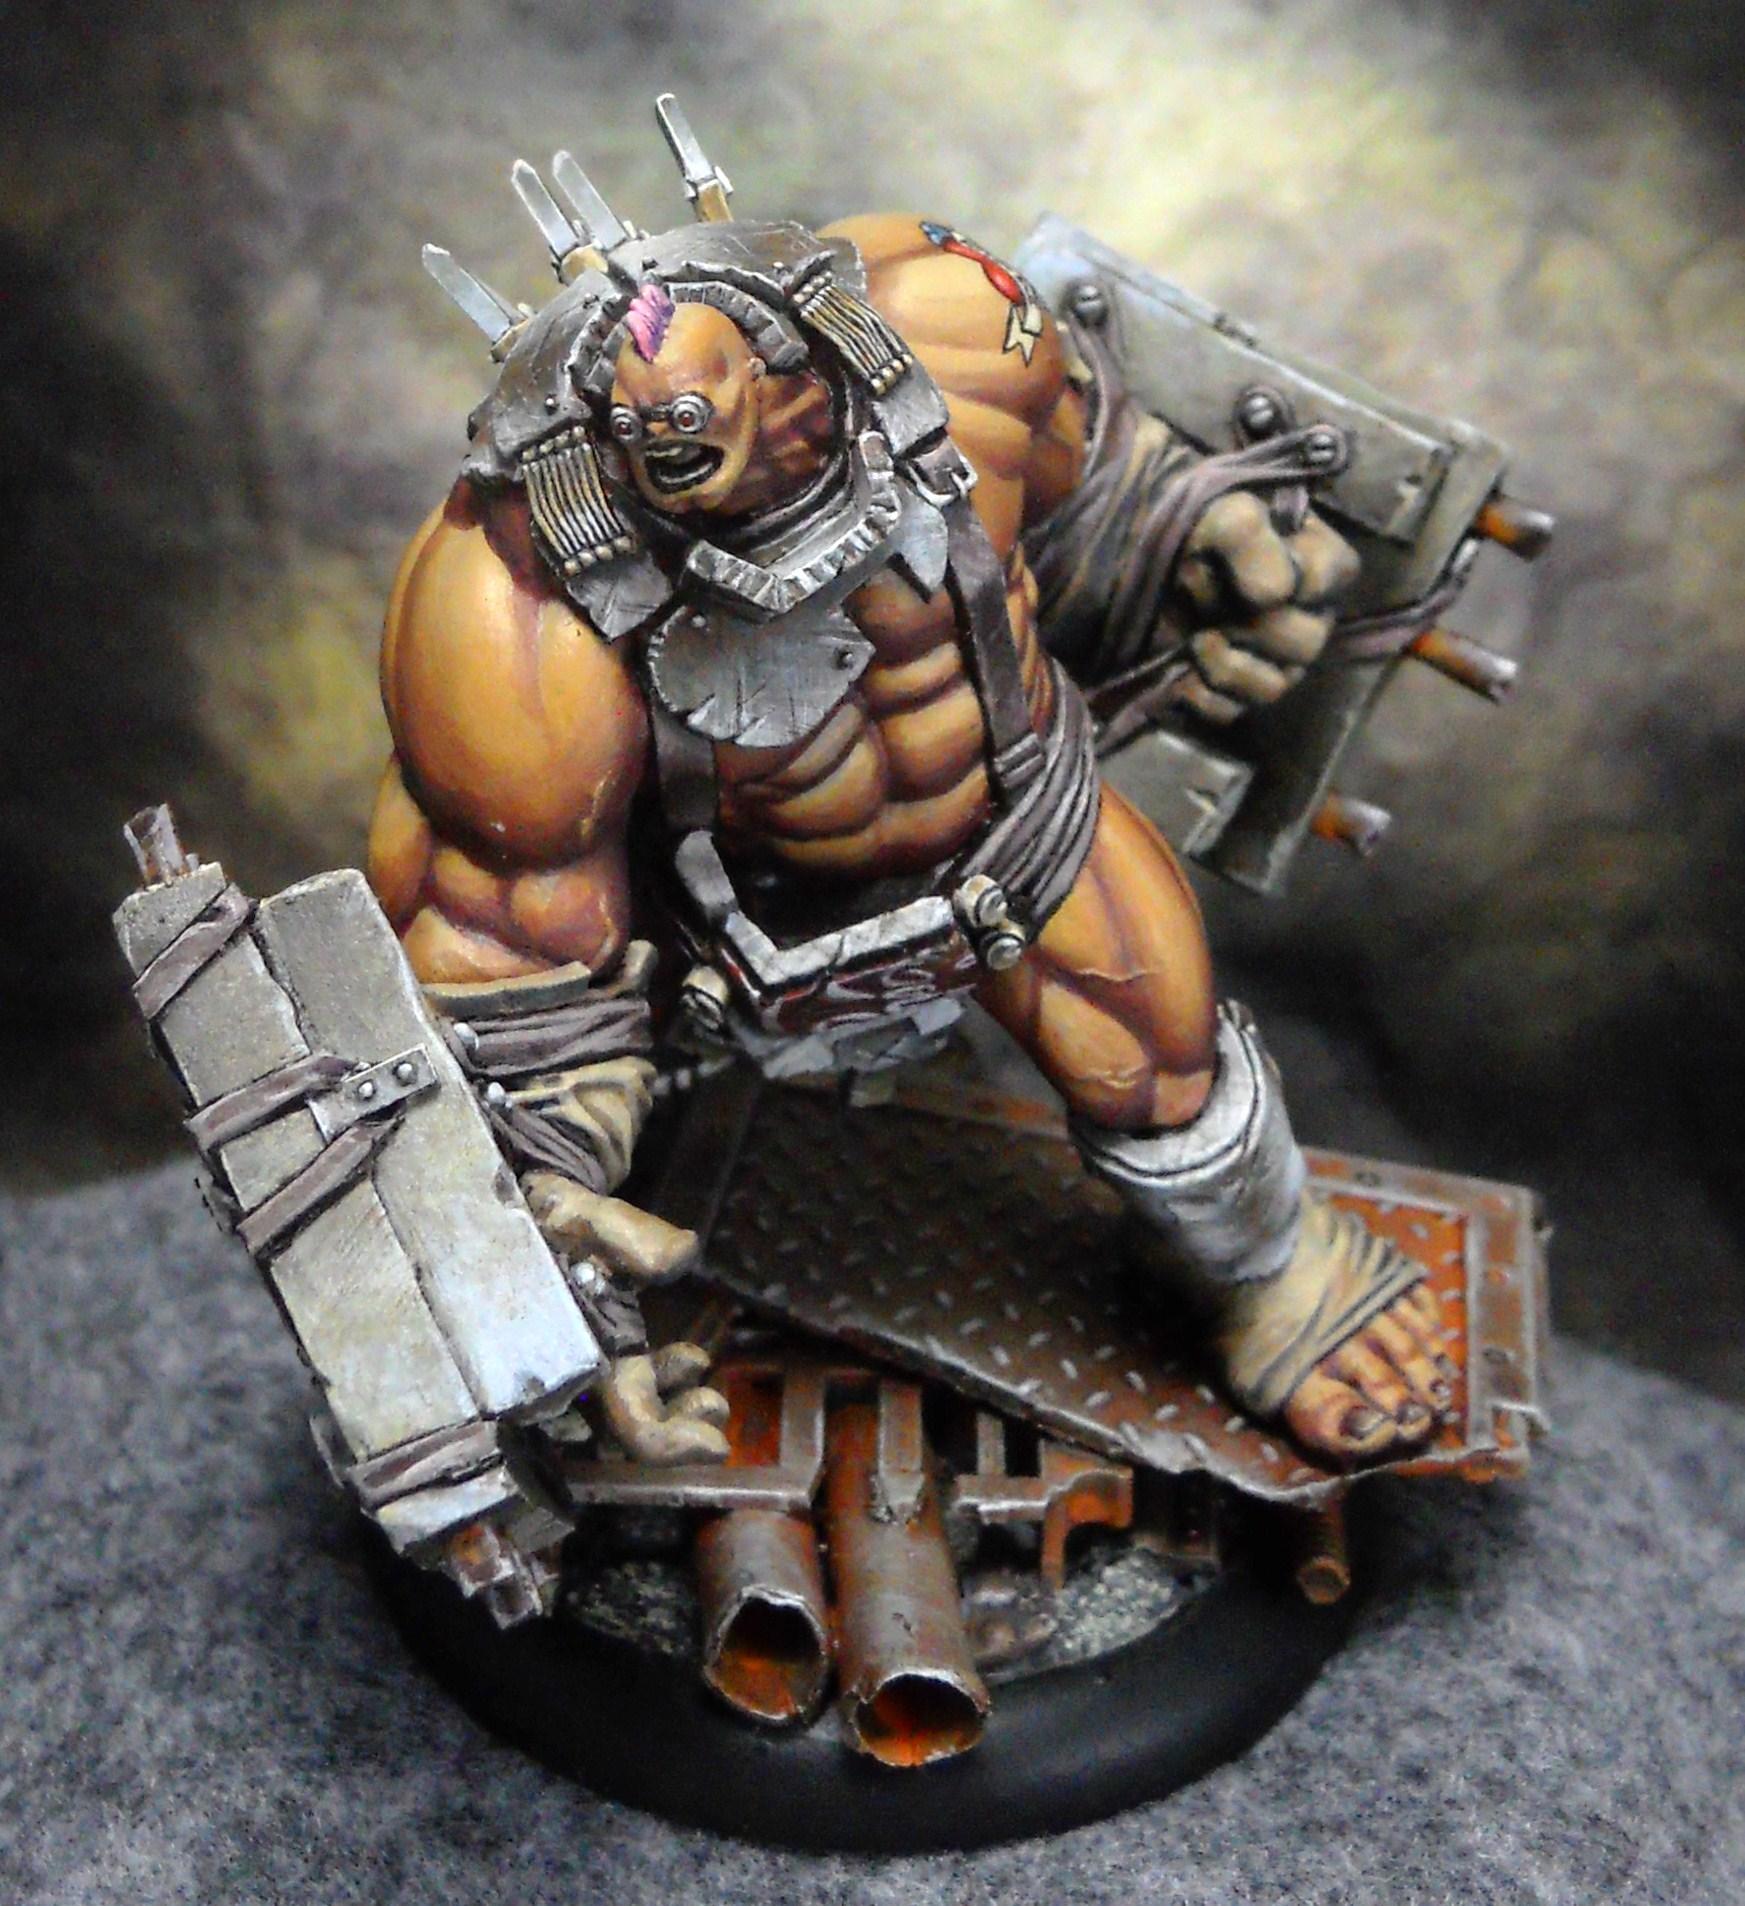
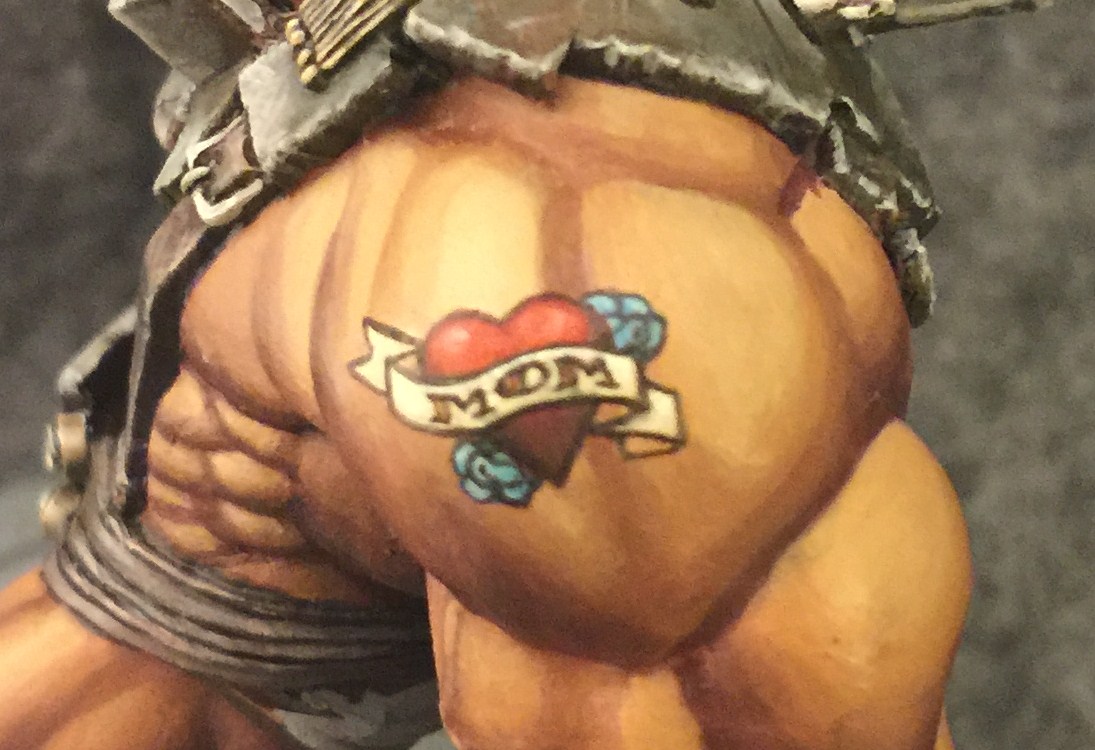
And that brings us back to the very first pic. This was done in a real lightbox with decent bulbs as opposed to the little one I keep by my desk, which is why the colors are a bit different. I think the only step I’ve missed was the pink hair. It’s Reaper Blush Pink with shaded with Beaten Purple.
You can check out a bunch of different angles in his CMON entry. Please vote on him if you have an account. In fact why not vote on all the minis in the contest. His Outcast Buddies are in there too.
As long as this article was, there’s still more. In part 2, I’ll be going over the freehand work I did on Mongo, so come back to see how I did his tattoo…
… and his belt buckle.
~Thanks for reading. Feel free to hit me up with questions, etc. in the comments.
