HOBBY: Them Bones


Warhammer and Warhammer 40k have a common theme that permeates them to the very core, skulls and bones. If you can paint them effectively, you can map out much of the work you’ll be doing on models for these two games rather quickly.
With many of the projects I go into I already have a good idea what the final product will look like from mentally mapping out the methods I’ll use and the colors. With bones, it can be as simple as four quick colors to give you your choice of depth and brightness. Keep in mind, this is just one way that I’ve found works for me 90% of the time, and that there are many other ways to go about it! Some even simpler than this!
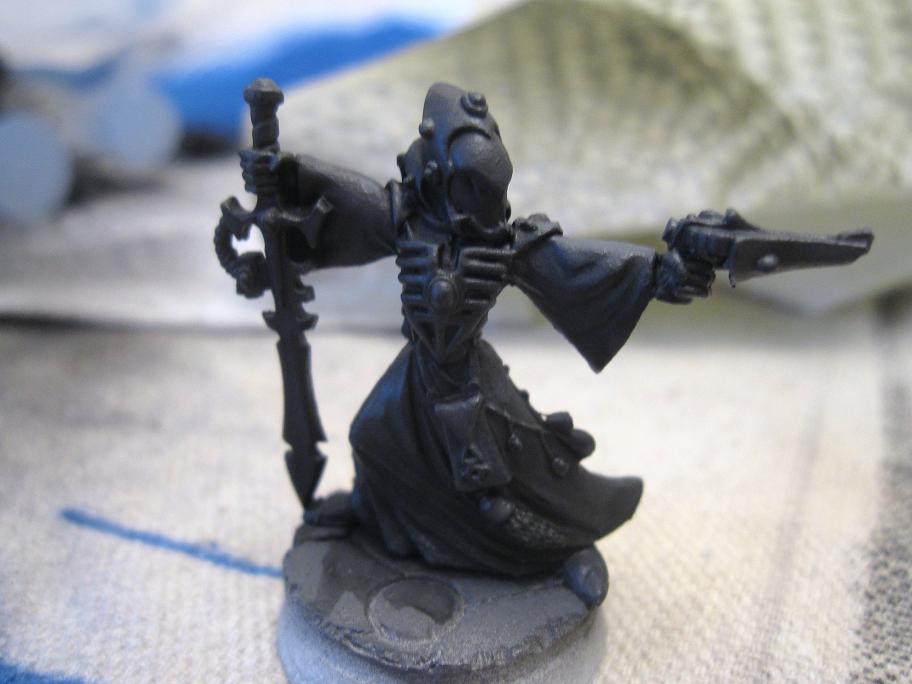
For the purpose of this tutorial I’m using an Eldar Warlock I have base here. It’s a dark dark base color and because of that, I’m going to be building the color up instead of shading it down as you would with a lighter base color.
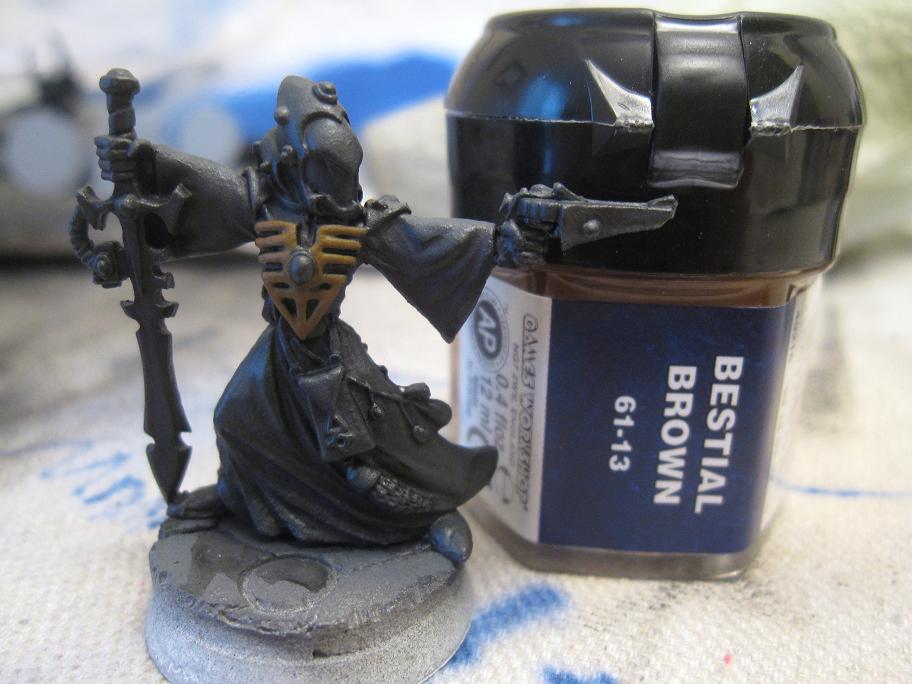
To start off I build the area up with Bestial Brown. Bestial Brown is good at covering a dark base color, but you still might need another pass if you’re doing a larger area. Should you be doing an even larger area, you might want to consider working from a lighter base color instead, using a different method entirely!
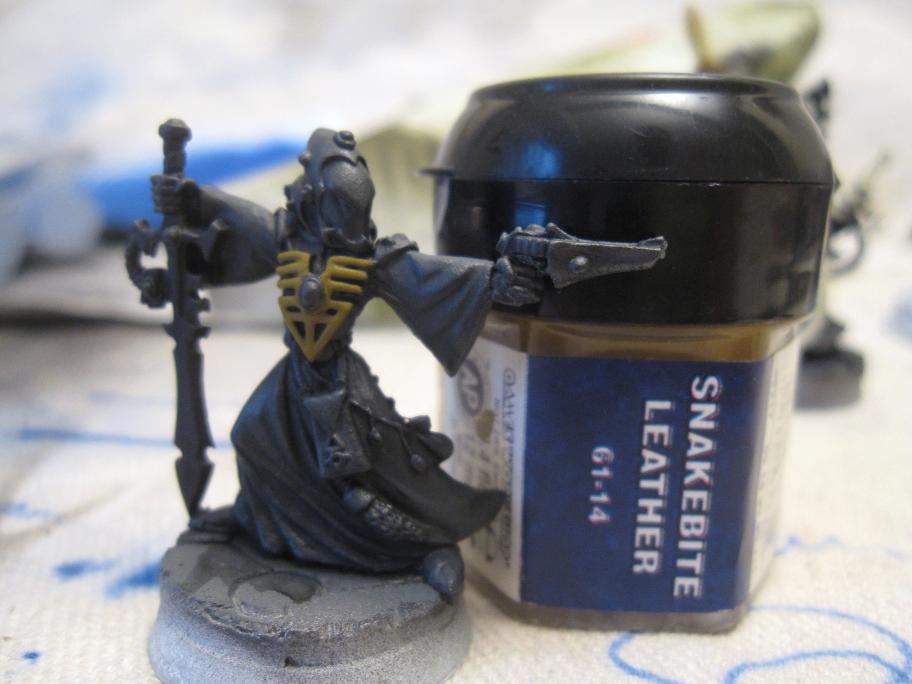
Here you can see the first stage of highlighting. I’ve built the color up a level with Snakebite Leather. With this stage begins your style choices. Do you cover all of the layer beneath or do you leave some showing? How smooth the transition is from color to color is completely painter dependent and will require more thinned layers with a steady hand should you want more gradient to show. I’ve simplified it some for the tutorial and covered all of the layer underneath to give a bit more contrast with the dark base colors.
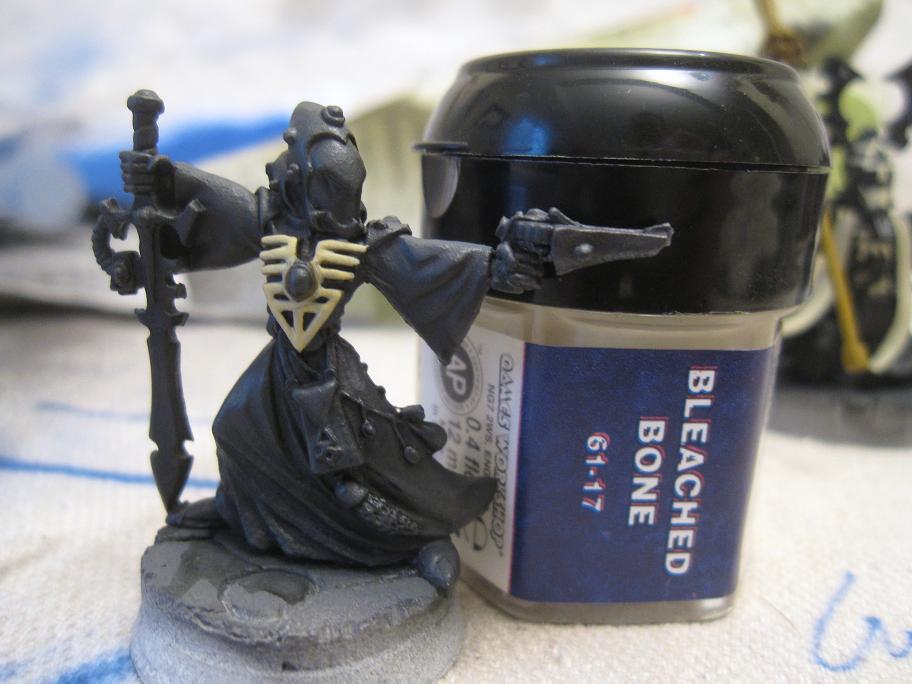
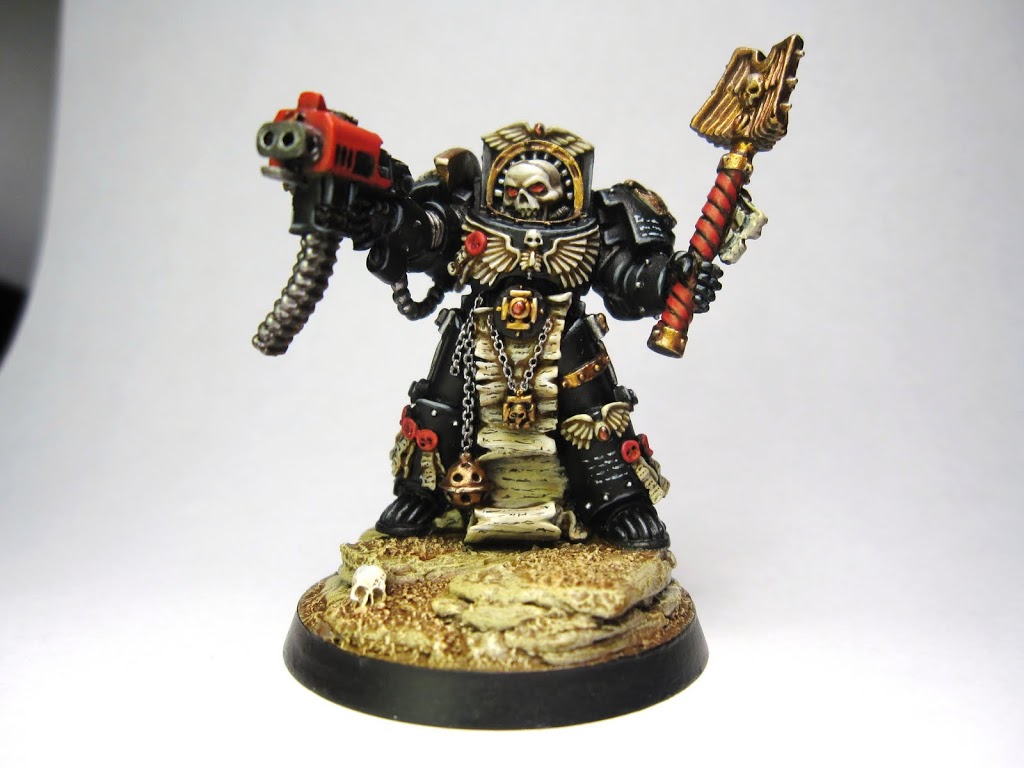
When I make the move to Bleached Bone, I tend to use the paints natural transparency to help the transitions. Using thinned layers to build highlights within the layer. Use this to your advantage and slowly build the color up giving a natural looking shade to the area. For a better understanding of this, take a look at the Chaplain in the photo at the top. His skull helmet is a good example of what I’m talking about.
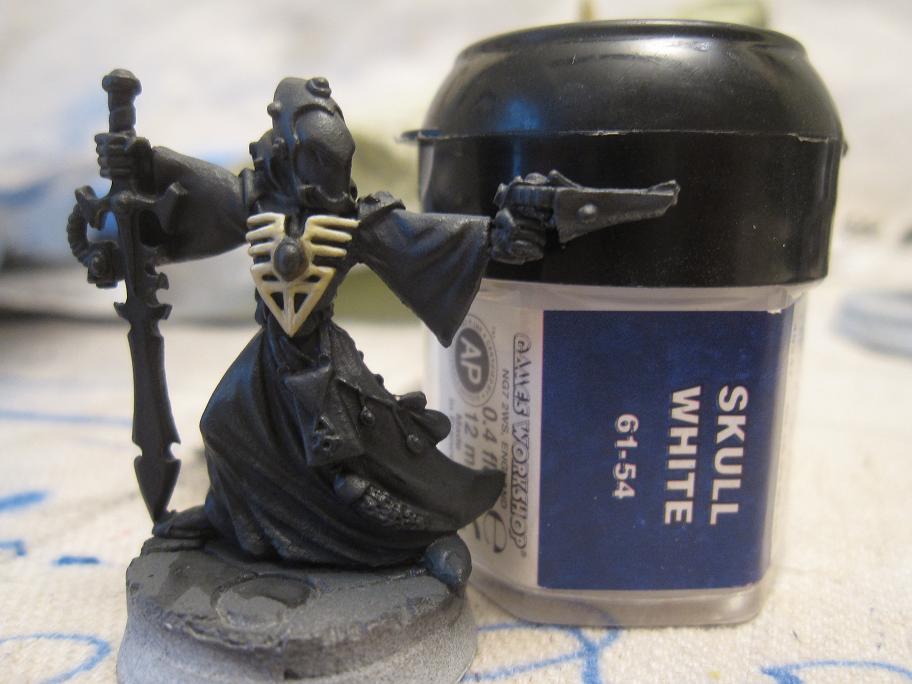
For the final highlight, I use Skull White sparingly along some of the upper edges of the area I’m painting. This is of course dependent on the look you want to achieve.
As with painting anything, this is all subjective and may or may not fit the project you are working on. Again, while a very simple ‘recipe’, you can get different effects with a bit more brush control and very thinned out layers, building transitions between the colors by glazing them on instead of using opaque, thick paint.
Want more? Then don’t forget to visit The Painting Corps for regular updates with tips for the newest wargamer to the most grizzled veterans. There’s something for everyone. Head over and join the conversation!


