Warmachine Hobby: Custom Nomads
4 Minute Read
Feb 8 2011

Advertisement
Guest article by Nick:
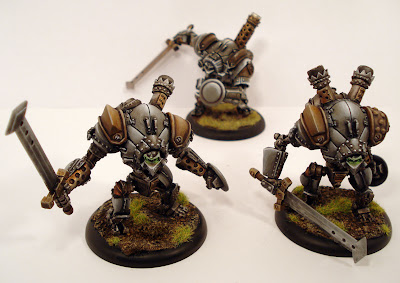
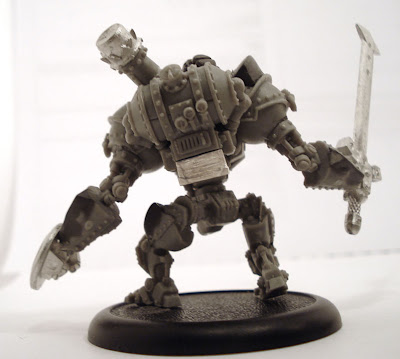
I can say without hesitation that the Nomad is my favorite jack in Warmachine. Mostly due to its low point cost, but also because it has the biggest sword in the game… probably. Here’s how I made mine.
Recently, Gentleben and I were discussing an idea for a pMagnus list that used as many Nomads as possible while still getting to Tier 4. Before he could finish explaining the idea, I had decided to steal it. But there was a problem. I own a single Nomad, and while the pose is very dynamic, it’s also a tough one to modify.
Recently, Gentleben and I were discussing an idea for a pMagnus list that used as many Nomads as possible while still getting to Tier 4. Before he could finish explaining the idea, I had decided to steal it. But there was a problem. I own a single Nomad, and while the pose is very dynamic, it’s also a tough one to modify.
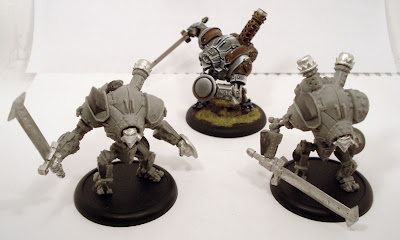
Enter the Cygnar plastic heavy warjack kit: The Nomad was originally designed by Cygnar so the chassis look quite similar.
This conversion will look good without any real modification. Just buy the bits from Privateer’s online store, glue them to a plastic Cygnar frame and you’re off. Even the smoke stack extensions fit perfectly.
Still, I wanted to take a bit more time on mine.

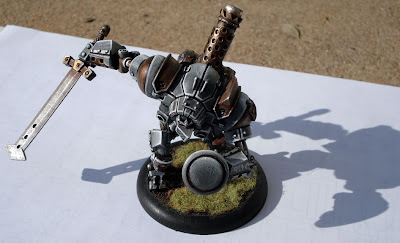
I also doubled up on the kit for good measure. My plan was to cut a smoke stack off one of the kits to better match my classic Nomad. It was tough to do in a tidy manner, so I sculpted a fuel filler cap or something on there.
Advertisement
The main point of this project is to achieve distinct poses for each jack. But they must each be instantly recognizable as Nomads. Tournament rules currently state that conversions must be comprised mostly of parts from the model they represent. While these don’t meet that criteria the conversion guidelines also state: “At his discretion, an event organizer can make exceptions to these rules to approve any reasonable conversion.” Since these clearly appear to be Nomads I don’t foresee any problems.
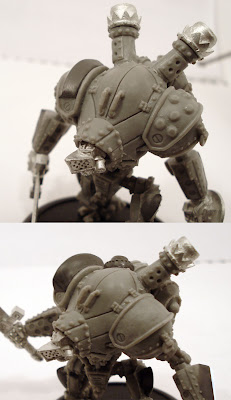
The shoulder pad rivets were much easier to cut off than I thought they would be. I didn’t completely trim down one of the pads. Instead I chopped the ends off to make the rivets look less domey/friendly.
The shoulder spike is a distinctive part of the original Nomad. Drop some brown stuff on the cleaned pad. Then, pinch your tongue with your index finger and thumb. It will keep them from sticking to the putty while you sculpt the form. Press the same fingers together and run them back and forth across the spike. This may take a few tries. Don’t feel bad if you start over once or twice, I did.
If you’re feeling adventurous you can add spikes to the arms and legs to better resemble the Nomad kit. The process is the same here on a smaller scale.
Bonus bit: My Khador Mortar team came with an extra ammo crate. Strangely, it looks like it was meant to be mounted below the Cygnar boiler. It’s a buck in the parts store and probably worth it. This gives the jack some character. Mercenary teams use these guys for war and labor.
Painting went really fast, as it does when you are working on something you are excited about. My old Nomad was painted more than 5 years ago, and it shows.
I plan on building one (or two) more of these guys for my pirate army. They will probably get Nomad arms though, to distinguish them more.
~ So that shows what you can achieve with just a little creativity and a few bits from the parts store. Hopefully this will inspire some folks out there to try to make their own creations.
Advertisement
Author: Ben Williams
Advertisement


