Privateer Press Behind the Scenes: Designing Ragnor


Privateer takes us behind the scenes – following a new character from text all the way to finished miniature. It’s VERY cool to see!
This process is broken up into two pieces, the text to 2d-design phase and the 3d sculpting phase.
2d Design – Mike Vaillancourt
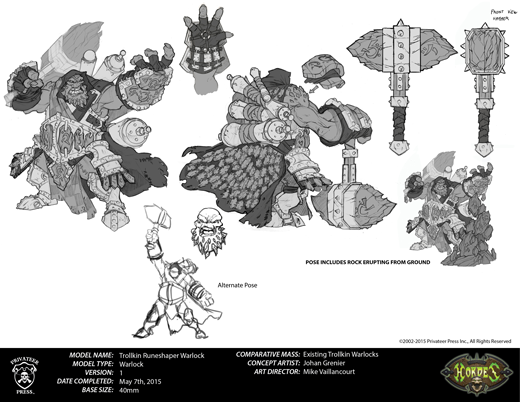
Every model starts with a written design brief that’s been vetted by Ed Bourelle, Will Shick, Jason Soles, Matt Wilson, and me. We each add creative input on the proposed look and feel of the model with any potential production or rules issues in mind. Once our written description has been approved as final, I send the written description and visual reference to the concept artist. In this particular instance, the concept artist was Johan Grenier. Johan had completed some fantastic Trollbloods work for The Iron Kingdoms RPG Unleashed book, so I knew he could bring Ragnor to life. These descriptions come well before the rules are locked in, so some points may not line up with what the model does in game. The key points for Ragnor were:
- He commands stone and earth.
- Use visual elements from the existing runeshaper models, such as elements of his armor and the stone tags both the unit and solo wear.
- He should be adorned with scroll tubes like the runeshaper unit models, Madrak Ironhide, Thornwood Chieftain and Hoarluk Doomshaper.
- He may be an albino.
- He’s a brawny fighter and should look far more like a warrior than a wizard.
- He should be heavily armored akin to Madrak Ironhide but with armor more reminiscent of the Runeshaper unit.
- He has a cloak with a layer of rune stones running down the back.
- He has a quill beard and carries a krielstone over one shoulder.
- He is armed with a long-handled magical krielstone hammer that creates explosions on impact with targets. It’s not a reach weapon, but it should come up to about his shoulder height when he’s standing.
After I sent those notes to Johan, he responded with the following sketches:
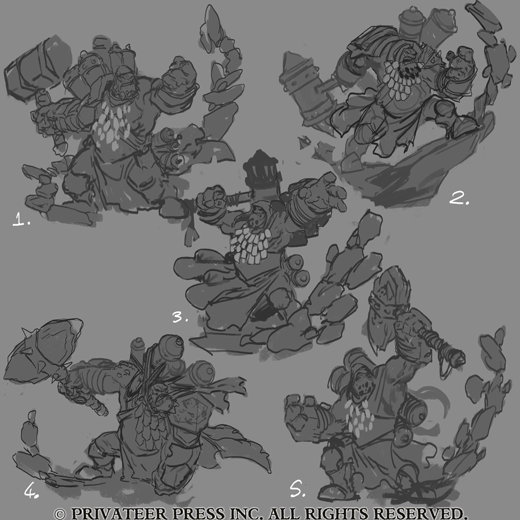
Johan’s sketches focused on the design of the figure and its movement. At this point, I sent out a preliminary email to the team with the written description and my feedback. My choices were sketch one and three. I liked what was going on in the first sketch the most, but I wanted to give him a hammer more like the one shown in three. Ed was a bigger fan of sketch three with five’s hammer and a few other changes (smaller scrolls and additional notes about how the rocks would work on his base). Sometimes the team agrees, and sometimes we disagree—that’s all part of the creative process. We typically wind up with a hybrid of everyone’s preferences that makes everyone happy. After sending all our notes to Johan, he sent back the following sketch:
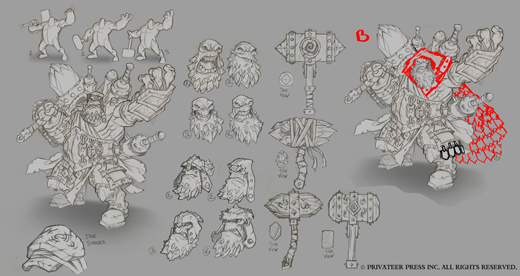
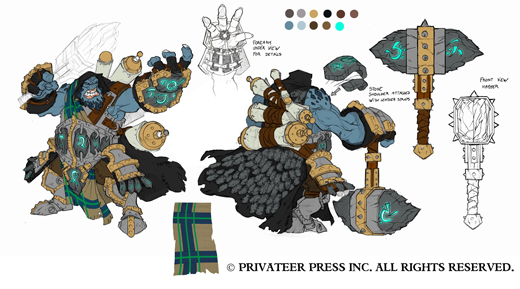
I did a quick red line sketch to illustrate the feedback we had for his cloak, and then we picked our favorites from the rest of his sketches. We really liked head four, and it was chosen as the winner. Other notes we had were:
- Explore the forearm and hammer a bit more.
- Adjust the belly armor with rings instead of chains.
- Change/clearly define the crotch flap so it looks like a symmetrical armor plate.
- Adjust eye orbits. (They’re too far apart.)

At this point, we ran into production /casting issues. The little dangling rune stones on the back of the forearm wouldn’t work, so they had to go. To combat the dangling bits on the armor skirt, I suggested throwing a strip of leather underneath them, and it did the trick. Now we had the basic overall design locked down, complete with a final hammer and initial pose.
After I’ve completed coloring in the concept art, we get the final concept that the sculptor, illustrator, and studio painter use for reference.
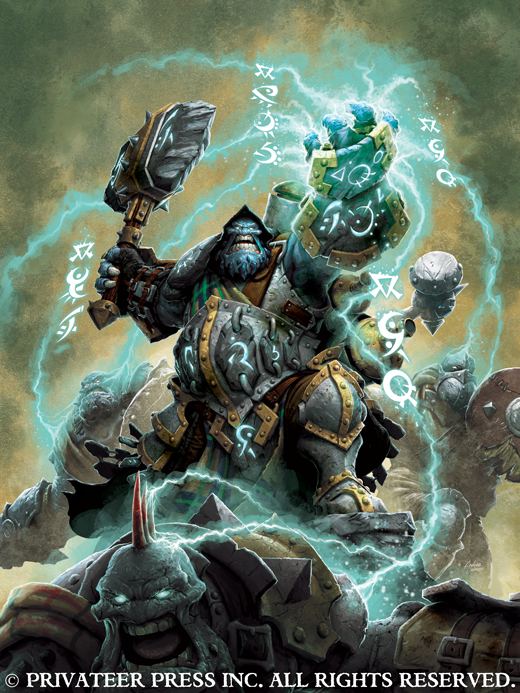
This is Ragnor’s final model entry illustration by Andrea Uderzo.
From this point, Ron Kruzie assigned the sculpt to Trollkin sculpting master, Brian Dugas. Brian will now take over and explain the process for sculpting this model to give you a better idea of how the feedback loop tends to work for sculptors vs. the 2D side.
3d Sculpting – Brian Dugas
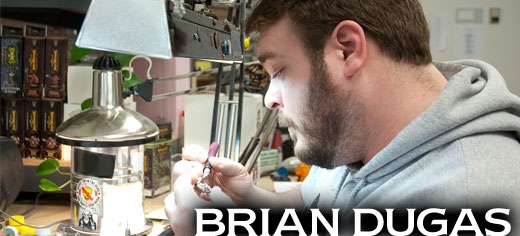
Hello there!
Many people believe the sculptor designs the model however they envision, but that’s notexactly how it works. There’s actually a pretty fine line that needs to be walked in order to give everyone what they want. When I’m assigned a sculpt, most of the design has already been set in stone, but I generally need to tweak a few things. I try to follow the final pose as much as possible, but production elements—like avoiding base overhang or keeping part counts low for optimized production—can make some changes necessary.
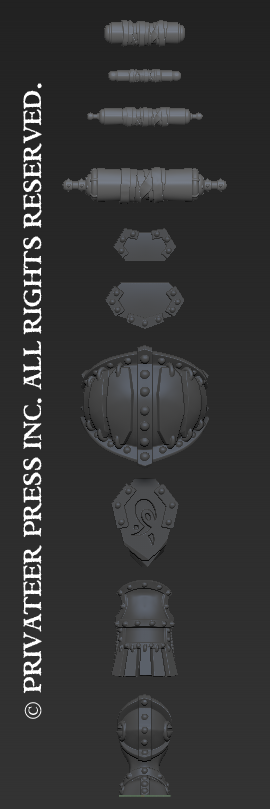
When I approach a sculpture, I like to think of it as a puzzle; I start with the pieces that provide the most information that provides the framework for the rest of the piece. For puzzles, this tends to be the edge pieces. My edge pieces are the armor, weapons, and accessories, so I start with them first. While I create these pieces, I’m thinking about how the overall pose will work, how many parts it might need, and how those parts are organized. When I was working on Ragnor, I was thinking about the striking burst of summoned stones in the concept art. Sadly, I realized there wasn’t room for them on the base or an effective way to incorporate them into the sculpt. Hopefully, we’ll see that element in an alternate sculpt down the road.
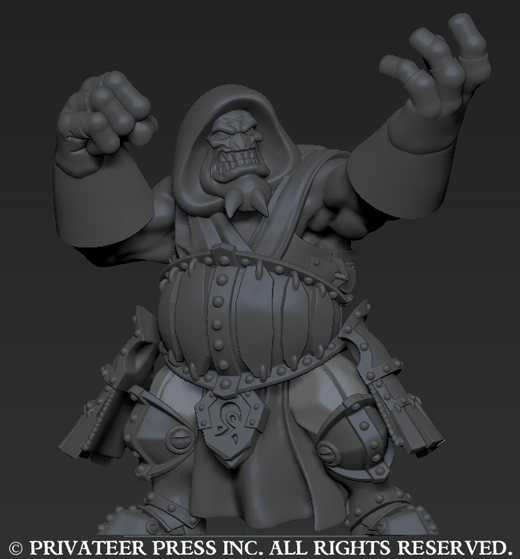
After I identified how everything would fit, I roughed out the sculpt in the chosen pose with the pre-made elements and ran it by Ron Kruzie, Mike Vaillancourt, and Ed Bourelle. I made the suggested changes and started finalizing and detailing the sculpt.

Voila! The sculpt was finished. It went through one final approval process to catch any missing details that might have slipped by and then it was off to the printer.
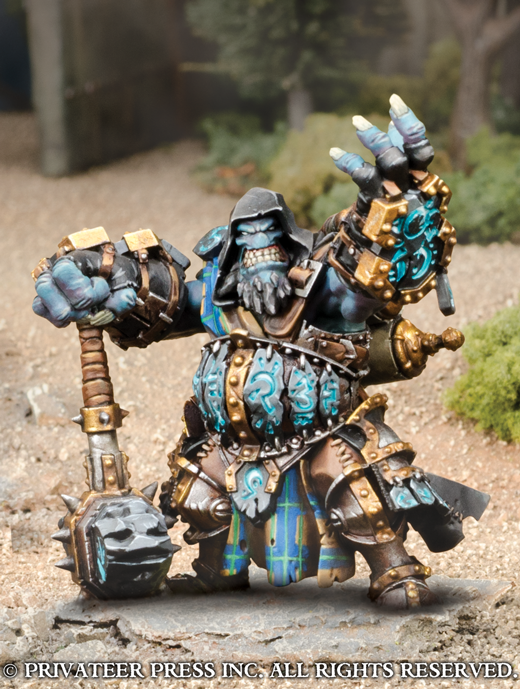
Personally, I had a great time making Ragnor. He was an interesting mix of design elements that were challenging (in a good way) to convert into a 3D sculpt. In the end, I think all these elements came together to make a compelling model that will really stand out in the middle of a war!
~That was a very cool ride wasn’t it?