BATTLE REPORT: Death Guard vs. Space Marines


Well Bulwark and I had a nice game this week. We hope to bring you more Battle Reports in the future so this post is a trial run.
We rolled up a Rescue (the mission with the 6 objectives, one of which is the real one and 5 are dummies), and agreed to a 2000pt game.
Armies
Bigred: 2000pt Death Guard Plaguespear
(white army in the pics)
Bulwark: 2000 Doctrine Marine Army Consisting of:
(grey/yellow army in the pics)
- Commander
- Chaplain
- 3x 10man Tactical squads with CCW/Bolt pistols (doctrine); 2 in Rhinos
- 2x 10man Devastator squads with 4x Missile launchers
- 3x Venerable Dreadnoughts in Drop Pods (doctrine)
- Vindicator
- Land Speeder
Bulwark’s is a tough army that can lay down the fire, strike aggressviely, and lay down the smack late game with the arrival of the 3 dreads.
The Game
Deployment:
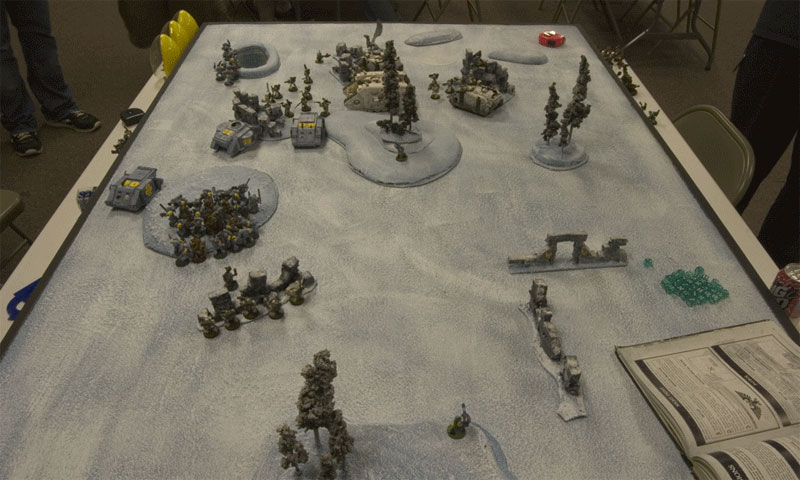
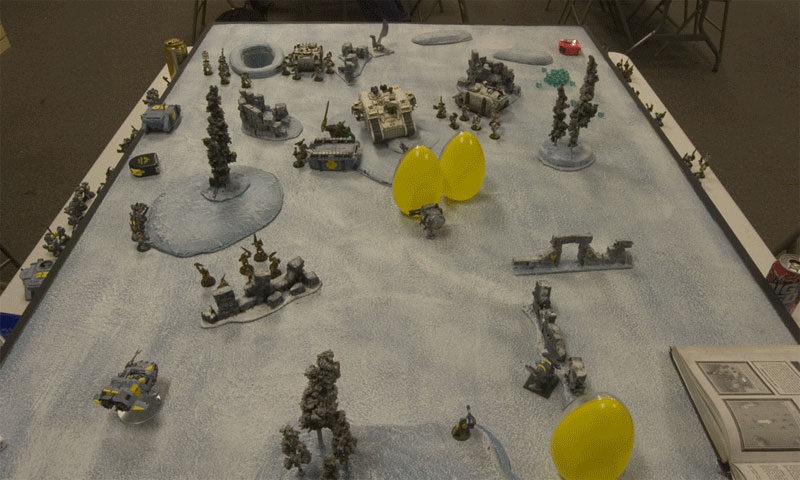
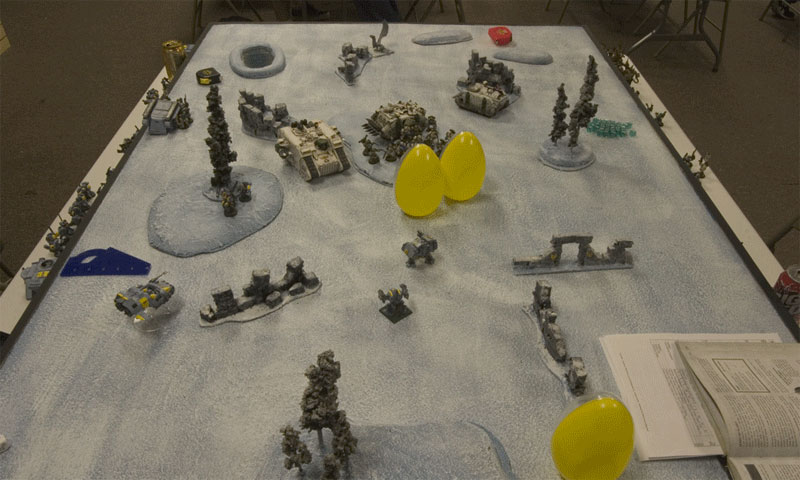
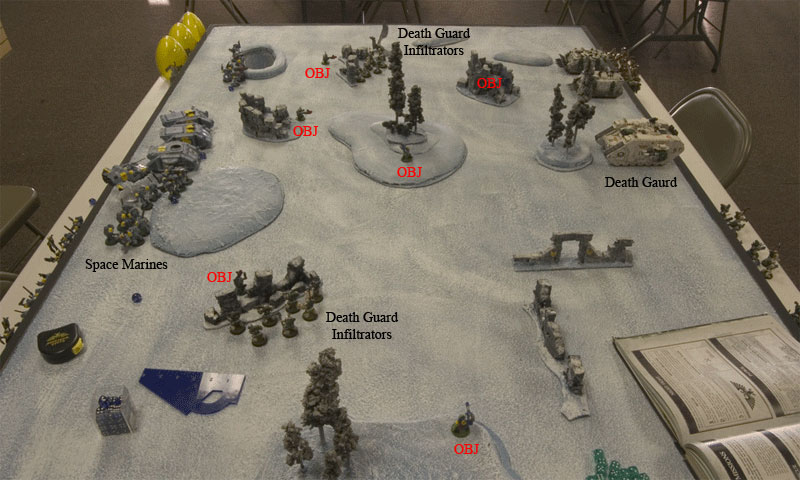 The 6 objective (marked by orks) were skattered roughly mid-field with 4 being concentrated on the Death Guard right flank (top of the picture). All terrain on the board is Height2: area terrain.
My Deathguard deployed behind cover in their vehicles middle of the deployment zone with 2 midfield infiltrating plaguemarine squads on the far left and right flank to support objective grabs. Bulwark’s Marines masssed behind the hill in the middle of his deployment zone with his Devastators sitting on his far left and right flank.
Turn 1 -top:
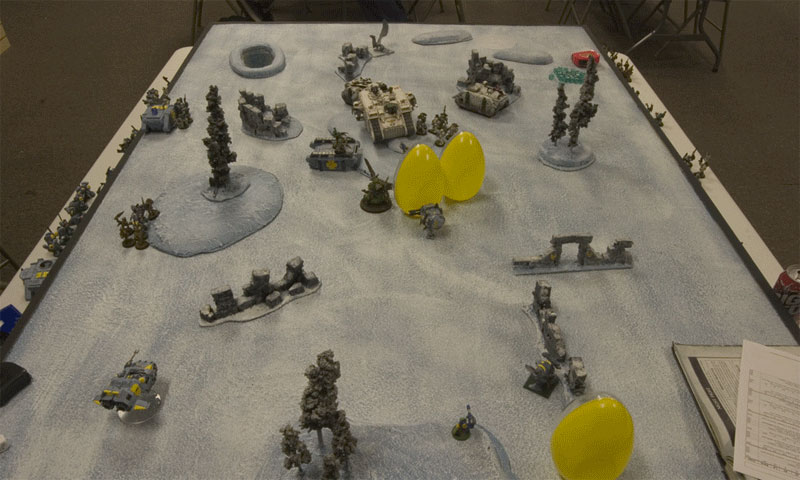
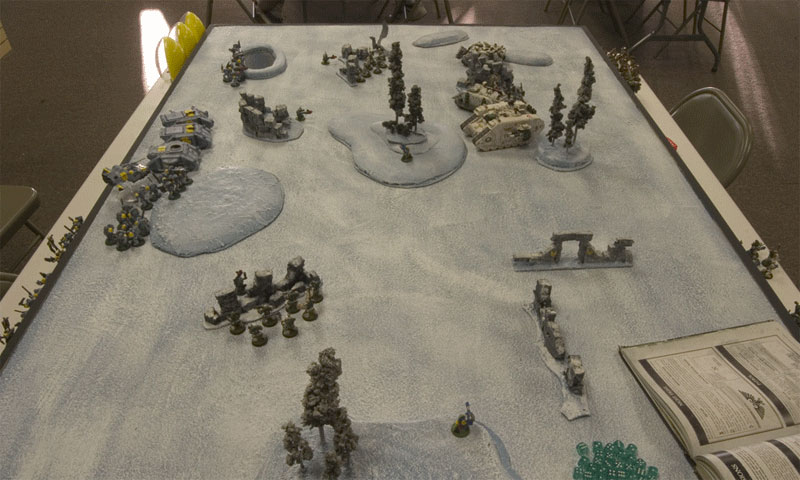 Roaring into action, The Death Guard armoured force moves up finding cover behind the large central forest. A rhino squad disembarks in some nearby ruins to uncover and objective…its a decoy. My infiltrators (both flanks) hold behind LoS blicking cover.
Turn 1 -bottom:
 Bulwark’s marines move into action to counter my armoured thrust. Two of his rhino squads (with his commander) move up to the far side of the midfield forest and one disembarks onto an objective behind it…decoy! That leaves 2 objectives in the sparsely populated Death guard left flank (bottom of picture), 1 on the far right flank, and 1 in the middle of the central mid-field forest. Some devastator fire finds a narrow fire corridor and destroy a DeathGuard rhino that had just disembarked it’s squad the previous turn.
Turn 2 -top:
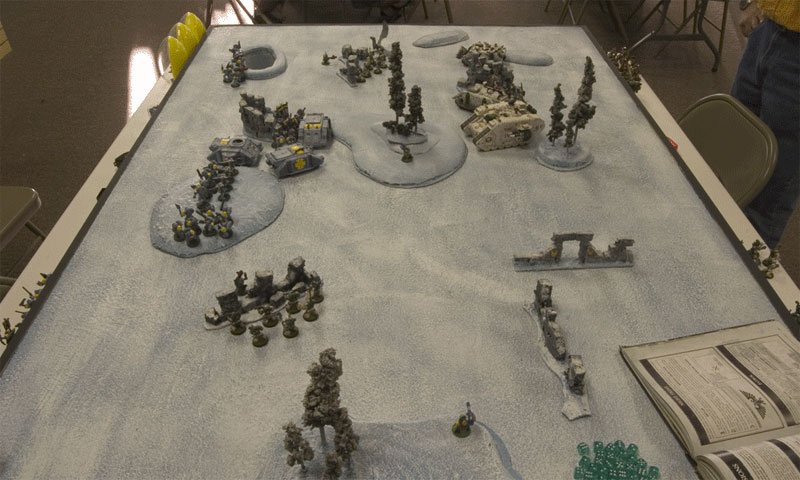
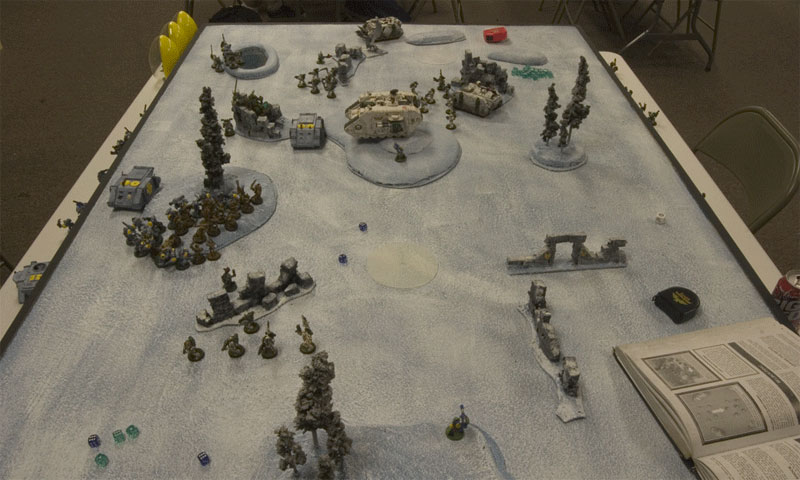
 Its time to get stuck in. The Deathguard Land Raider, moves up and unleashed its cargo of Possessed into the marines in the rear forest, supported by the infiltrators on the right flank. Both squads of rhino havocs advance and unleash a volley of plasma fire on Bulwark’s leftflank devastators, to some effect. On the Death guard left flank, the infiltrators summon down a squad of plaguebearers to assault the opposing devastator squad in the forest and move into cover to support them with rapidfiring weaons.
In the assault, the marines lose an entire squad including their commander against the rending possessed, and the plaguebearers stalemate agaisnt the already damaged devastators. The marines’s central front is weakening…
Turn 2 -bottom:
 Spring into action on the marines central front a vindicator pushes into area terrain, and blows a chunk of the possessed to bits, along with some nearby plaguemarines with assistance from the isolated and weakened marine dev squad on their far left. Bulwark’s chaplain and 2 supporting tactical squads race to charge into the plagebearers on their right flank to stabilize the lines, and inflict hurtful blow against the plaguebearers.
Turn 3 -top:
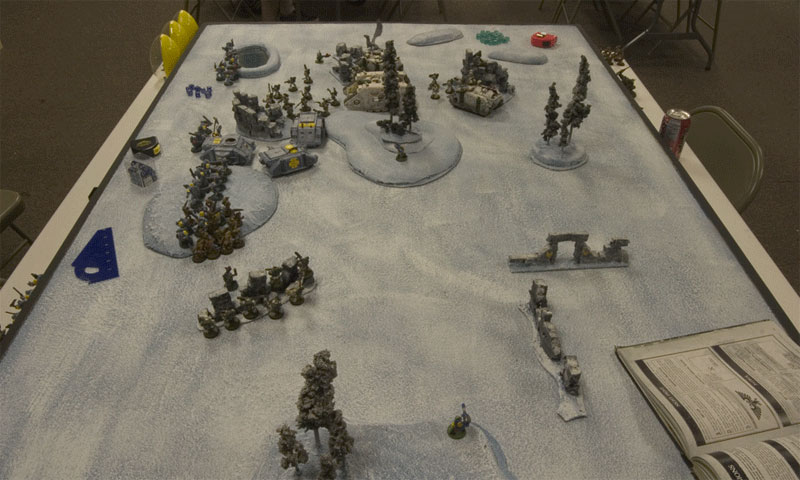
 With the Deathguard left flank weakened by the arrival of 20 more marines led by a chaplain, something must be done. Papa Nurgle provided and the nearby infiltrating squad summons another 12 daemons who slam into the combat… (look at the lower left forest in the pic) which now has over 40 models in it. With no more deamons to summon, the infiltrating squad now weakened by nearby landspeeder retures back behind their cover to wait out the outcome.
On the midfield, the possessed champion has unelashed the great unclean one who destroys the vindicator and eliminates the last of the marines central flank. The remaining dev squad on the far left marine flank is eliminated in HtH. Bulwark’s marines end the turn with no middle of left flank. On their right flank, disaster strikes as the plaguebearer assault was to much, and 2 of 3 squads break and flee the combat.
Turn 3 -bottom:
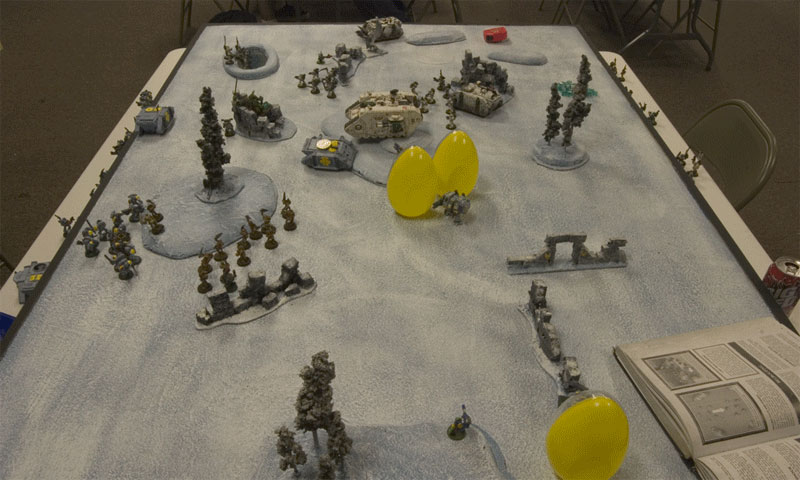 In the nick of time, all 3 of Bulwark’s venerable dreadnoughts arrive (in their festive Easter egg droppods). In a flurry of Assault cannon rounds, they eliminate the Death Guard left flank infiltrators. While they can not grab objectives (only infantry can), they have made the marine right flank almost impossible for the Death Guard to operate in, and are sitting near 2 of the remaining 4 objectives.
Turn 4 -top:
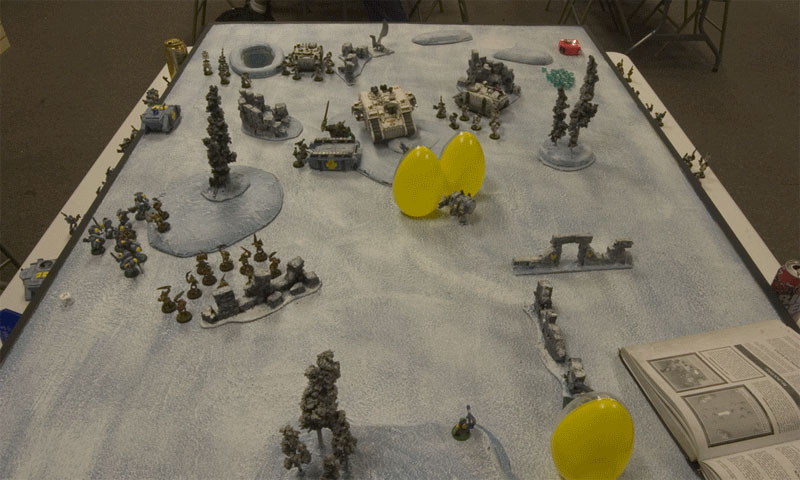 With the Marine force eliminated from the Death Guard central and right flanks they turn to reposition to claim the center and face the 3 venerable dreadnoughts. The Land Raider wheels into the central forest, supported by a havoc squad and the Great Unclean One, closing in and crippling the closest dreadnought directly in front of them. The remaining plaguemarines advance to their rhinos and prepare to embark to race across board if needed; unveiling the last far right flank objective…decoy!
On the Death Guard left flank, the plaguebearers leave the forest of the huge assault (staying within 6″ of the fleeing marines to make them continue to rout off the board, and unveil one of the left flank objectives…decoy! There are now only 2 objectives left… one in the central forest directly infront of the oncoming Deathguard forces, and one on the far Death Guard left flank over 3 feet away and behind 2 foul-tempered Imperial venerable dreds!
Turn 4 -bottom:
 There are not many marines left, but what remains stakes their claim to their one nearby objective (directly to the left of the bottommost droppod in the picture, in the forest) by blowing away all but a handful of the plaguebearers and advancing to place themselves between it and the Death Guard.
Turn 5 -top:
 Advancing further into the central forest, the Havocs uncover their objective….. And they HAVE IT!!! A load of tension is relieved from Bigred’s shoulders as Bulwark hunkers down and prepares to go down swinging. The Great Unclean One, advances on the nearest midfield Dred, to keep it from charging the havocs and locking up the objective. What is left of the plaguebearers, escort the 2 marine squads off the board (finally), and dive into the remnants of the Chaplain and his tattered squad to keep them out of the game for as long as they can. A second squad of Plaguemarines embarks in their Rhino and races to the central forest to consolodate their prize.
Turn 5 -bottom:
 With no chance of victory in hth, the dreadnoughts back off and with a remaining land speeder lay torrents of Assault Cannon fire into the GUO, and in a sickening heap of gore and filth, it slides to a steaming halt…dead. Bulwark shows a small grin, and the chaplain kills the last of the plaguebearers in hth, and advances as fast as they can to the central forest. They know they won’t make it in time.
Turn 6 -top:
 The 2nd Death Guard Rhino delivers its squad into the forest and they also reinforce the objective while the Land Raider moves off to trade fire with the Dreadnoughts to no effect… tick,tock…..
Turn 6 -bottom:
 With one final burst of AC fire more in defiance than determination, the Venerable Dreads lay into the Land Raider to no effect. With no chance of reclaiming the valuable prize, the 2 ancient machines along with their recon landspeeder escort their chaplain off the field.
Conclusions
Death Guard victory!!! A great time was had by all. It was a rough bitter slog and a nailbiter down to turn 5 when I FINALLY grabbed the objective. The Death Guard pulled through in the end, but that doctrine space marine list of Bulwark’s is a bear.
I hope you enjoyed the battle report and please leave any feedback or comments. We are always looking for better ways to present these to you guys.


