TACTICA: Death-Cult Assassins


“The Blood of Martyrs is the Seed of the Imperium.”
— Holy scriptures of the Ecclesiarchy
It’s amazing how a single new idea or viewpoint can change the game overnight. For me it happened when a veteran Witch Hunters player named Ouroboros discovered a new way to use Death-Cult Assassins. Sadly, the original post has been lost but his more recent and most excellent DCA Tactica is required reading for all WH players. Ouroboros was the first player to truly master the potential of Death-Cult Assassins. I only hope that I play long enough to help another player in the same way. Thanks again, Ouro! You rock!
DEATHCULT 101.
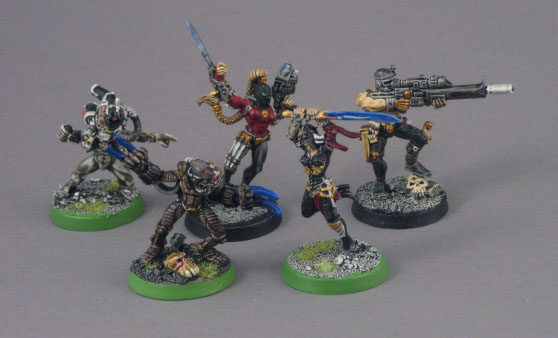
Death-Cult Assassins are, point-for-point, the most reliable and effective Assassins in the game. They are Fearless, Infiltrating, 2 Wound, WS5, I5, S4, 4-Power-Weapon-Attacks-on-the-charge maniacs with 5+ Invulnerable saves. For 40pts, they are one of the best bargains on the table.
If this article accomplishes nothing else, I hope to establish a collective noun for Death-Cult Assassins. A gaggle of geese, flock of flamingos, a pride of lions and … a demise of Death-Cult Assassins. That’s my favorite so far. If you have any suggestions, leave them as comments.
WHEN TO USE A DEATHCULT ASSASSIN.
A demise of Death-Cult Assassins can work in any Imperial army, but they are most effective in Witch Hunter and Daemonhunter armies where multiple Elite slots can be spent on additional Assassins. Combining DCAs with a Culexus or Eversor (or more DCAs!) multiplies the effectiveness of the unit dramatically. Every Imperial player should own three DCAs; every Inquisitorial player needs a minimum of six.
Like the Eversor, the best time to use Death-Cult Assassins is when you want your opponent more focused on his deployment zone than on yours. Used with a strong shooting army, Assassins in his backfield forces your opponent to keep his assault forces in his deployment zone to fend off the assassins or risk being rolled up by them. This gives your long-range weapons and extra round or two of shooting.
It’s rare to see Death-Cult Assassins used as allies in Imperial armies, which is a shame. Since Imperial players can only take a single Elite ally, they tend to select a flashy Imperial Assassin over a less exciting Death-Cultist. I hope that this Tactica proves that DCAs are a viable alternative to the popular Callidus and Vindicare Assassins.
DEPLOYING YOUR DEATH-CULT ASSASSINS.
The single most important key to using DCAs effectively is deploying them properly. If you deploy them badly, they’ll be completely wasted. In this section I’ll discuss the three most common deployment scenarios.
1. Opponent has no close combat infiltrating units.
2. Infiltration is not allowed.
3. Opponent has scary infiltrating units.
Scenario #1: You are facing an opponent with no dangerous infiltrating units (he may have a unit of Space Marine Scouts or Eldar Rangers, but nothing that can assault your army). This is by far the most common circumstance and the best case scenario for your DCAs. In this situation, deploy your Assassins on a flank 12.0001″ away from you opponent (preferably 6.0001″ into area terrain). Place them all on the same location, but there’s no need to put them closer than 3″ to each other (this will discourage the odd barrage). Resist the urge to go after multiple targets, your Assassins are much more effective working as a team.
Note: Always deploy your Assassins on a flank and never in the middle of the board (even if there’s a “perfect” spot). Flanking minimizes your opponent’s shooting (fewer units will have range and LoS) and it makes it difficult for your opponent to counter-attack. If you have a fast army, then use the refused flank tactic. This is extremely difficult for a less mobile opponent to counter.
Scenario #2: In Alpha missions, the Infiltration special rule is not allowed. In my experience, the vast majority of games use Infiltrate but you don’t want to get caught with your pants down. No worries; you have the best counter-attack unit in the game. And if there’s an objective nearby, few units are better at keeping them clear of enemy models than DCAs.
In this instance, you want to deploy the DCAs near the location where you think your opponent is most likely to assault or in a location where the Death-Cultists can help you secure an objective.
Note: I typically put my DCAs behind a piece of terrain away from units likely to be targeted with indirect fire. Death-Cultists as counter-attack are fantastic if you are facing Deep Striking Terminators.
Scenario #3: If your opponent is using an all Infiltrating based army (Imperial Guard Light Infantry, Infiltrating Chaos Space Marines, Ork Kommandos, Kroot, etc.) or an army with large Infiltrating assault units, then you’ll want use your Death-Cult Assassins to deny deployment locations to your opponent.
By spreading out three DCAs, you can grab three prime Infiltration locations. This forces your opponent to choose a less favorable location (sometimes you can force your opponent to deploy his Infiltrators deep into his own deployment zone). In this scenario, your Assassins won’t have a huge impact on the game but you’ve dramatically slowed down an all-Infiltrating opponent.
Note: Allowing your a lone DCA to get assaulted can backfire by giving your opponent’s unit a Massacre move toward your army. It’s best to keep them out of assault and harrass shooting units (or even AV10 armor) than to let them get assaulted.
Dirty Trick #1: All-Infiltrating armies are seasonal, especially in clubs where Gamma-level missions are the rule. Here’s how to discourage it: take a Culexus and 6 DCAs. Deploy your army widely to prevent enemy infiltration in your deployment zone. Then use your DCAs to narrow your opponent’s infiltration choices (it’s pretty easy to force him into a very small area). Then concentrate your Culexus and remaining DCAs on one location to break his units. Losing infiltration will most likely cost him the game because his badly deployed infiltrators will be too slow to engage your army. It’s like shooting fish in a barrel.
I used this tactic in conjunction with a Death-Watch Kill Team (Librarian with Fury of the Ancients). I managed to keep his entire army pinned for several turns. Then my DCAs hit en masse. They won combats and their reduced LD forced them to fail their morale check. So my DCAs swept them or escorted them off the board. I was able to destroy 2000pts of my opponent’s army with less than 1000pts of my own models. After a few of these games, the all-Infiltrating armies became less common.
HOW TO USE DEATH-CULT ASSASSINS.
Using Death-Cult Assassins is a lot like using an Eversor, so take a few minutes to go over that Tactica. To quickly summarize, your targets are infantry units (stay away from things that you can’t hurt or that can leave combat), determine your goal before you deploy them (have a plan), don’t assault units protected by cover and don’t get caught out in the open (the two fastest ways to lose your DCAs).
Unless you are playing a non-Ordos army, DON’T use Death-Cultists alone. Combine them with other Assassins or Infiltrating units. I prefer to use an Eversor but the Culexus is also effective, as is more DCAs. Nothing makes a veteran player sweat like staring down 9 DCAs.
Note: Remember that each DCA is a separate unit. That means you need to roll Difficult Terrain check, Massacre checks, etc. individually. This is easy to forget.
Death-Cult Assassins attract a lot of shooting. At first glance this seems to be bad (T3, 5+ save, can be targeted unlike an IC), but you can use it to your advantage. Since each DCA is independent, the most a unit can do is kill a single DCA. For 40 points, DCAs are pretty tough to kill (2 wounds and a 5+ Invulnerable), but if he’s lucky and kills one all he nets is 40 points (probably a lot less than if he shot at one of your other units).
Note: Make sure to ask your opponent which DCA he is targeting. Once he realizes that he can only kill one (and that it has 2 wounds and a 5+ Invulnerable save) he will usually change targets.
If you do get a wounded Death-Cultist, make sure he isn’t the closest target to your enemy (generally by making sure another DCA is closer). This forces him to take a Target Priority check to target the wounded Assassin. This is a great way to spread wounds around without losing combat effectiveness.
DEATH-CULTISTS IN ASSAULT.
After deploying your DCAs, the next most important key to success is mastering the assault. Just like with deployment, you need to know your goal before you assault. There are two ways to use DCAs in close combat: in “tie-up” mode or in “sweeping advance” mode.
If you want to “tie-up” the enemy unit without destroying it (e.g., you don’t want to get shot on your opponent’s turn), then put all of your DCAs close to each other and assault on an extreme edge. This will clear the killzone at I5 (often eliminating your opponent’s attacks) and prevent a Sweeping Advance. Since you Pile-In first, this lets you continue to control the momentum in the following assault phase (allowing you to set up a Massacre move into another nearby unit). If he falls back, each DCA can consolidate in a different direction.
In “sweeping advance” mode, the goal is to make sure that your opponent keeps models in base contact with your DCAs. I do this by assaulting models that he doesn’t want to remove (special weapons, icon bearers, ICs, etc.).
Let’s take a demise of six Death-Cultists as our example (I’m still liking the collective noun). Each of the DCAs is a separate unit. So each of them rolls for difficult terrain separately (nice when you “really need a 6”), each of them assaults the closest enemy not engaged by a friendly model, etc. Moving the DCAs into Assault takes great care. If you aren’t careful, you may prevent one or more of your Assassins from getting into base contact (which is bad). As a rule, you want to move the DCA furthest from the combat first. This maximizes the number of models you can engage and allows your DCAs to penetrate deeper into the enemy unit.
Note: I rarely put my DCAs in contact with an Independent Character when I charge (unless I think I can kill it at I4). This denies the IC attacks in the round you charge. No need to give those pesky ICs any advantage.
Once you have your DCAs in base contact, you have to remember that each one is a distinct unit. That means you have to use the Multiple Combats rule (BGB, p45) to determine each of the Assassins killzone. This gets pretty confusing when your six DCAs are assaulting multiple enemy units.
Resolve your attacks one Death-Cultist at a time. This may be a bit frustrating, but it’s important. In this case, you are resolving 24 attacks, four at a time. Make sure your opponent removes casualties from the correct killzone. Don’t worry if he removes one touching another DCA; all of your attacks happen at I5 so as long as there are enemies in the killzone, you will get all of your attacks.
In most cases, you are hitting on 3s and wounding on 4s. With 24 attacks, this will kill 8 MEqs on Inititiave 5! Nasty. If your opponent has any attacks back, he must put those attacks against a single Death-Cultist that is in base contact with his unit. So if you are assaulting a single unit, the most he can kill is one DCA. This almost guarantees that you win the close combat.
Note: There’s a tactic in my Culexus Tactica called “Bag of Hammers”. If you plan on taking DCAs, it’s worth a read.
WINNING CLOSE COMBATS WITH YOUR DEATH-CULTISTS.
If you assault a single unit with multiple Death-Cult Assassins, you will win the close combat. Almost 100% of the time. So it’s important to know what to do when you win.
If there are no enemy models in base contact with your DCAs, then your opponent will make a morale check (remember each DCA counts as two models for outnumbering). If he fails, he will fall back.
DIRTY TRICK #2: If you have multiple DCAs in a close combat and your enemy falls back, split off one of your DCAs to “escort” the unit off the board. Keep the DCA within 6″ of the enemy and he can’t regroup. Have your other DCAs go after the next unit. It’s annoying, but effective.
If you won close combat and you still have DCAs in base contact with your enemy, you get to try a Sweeping Advance. Your opponent rolls a d6 and adds the unit’s Initiative. You roll a d6 for each Death-Cult Assassin and add 5. If any of the results equal or exceed the enemy unit’s result, the unit is run down. This is how DCAs win games.
Note: Remember that “if a unit takes enough wounding hits in one Initiative step to cause one or more wounds on every engaged model, the attacking player nominates one engaged model to make the first save” (Armor Saves, BGB p41). Since all of your attacks happen at Initiative 5, this can be useful against an enemy with Invulnerable saves.
CONCLUSION.
Death-Cult Assassins are a fantastic addition to any army. They are fun and reliable and very deadly. I hope this has given you a new look at an old staple. If you have any stories of your experiences playing with or against DCAs, please leave them as comments!
Next time: Daemonhosts…


