Capitol Imperialis: 40k scale
4 Minute Read
Feb 28 2008


Advertisement
Yes, I am making a Capitol Imperialis, and yes, I probably should seek help.
Seeing something on paper, and reading how large it’s dimensions in 40k would be, is quite different that seeing the actual beast in real life. I had no idea how much of the actual table top this thing will take up. It’s so large, I had to move it’s construction off of my hobby table and onto the kitchen table. You can imagine the rather interesting conversations that has caused with my wife.
 But lets start from the beginning. All things need a plan. And the bigger they are, the more planning they require. I decided to construct it in 7 stages.
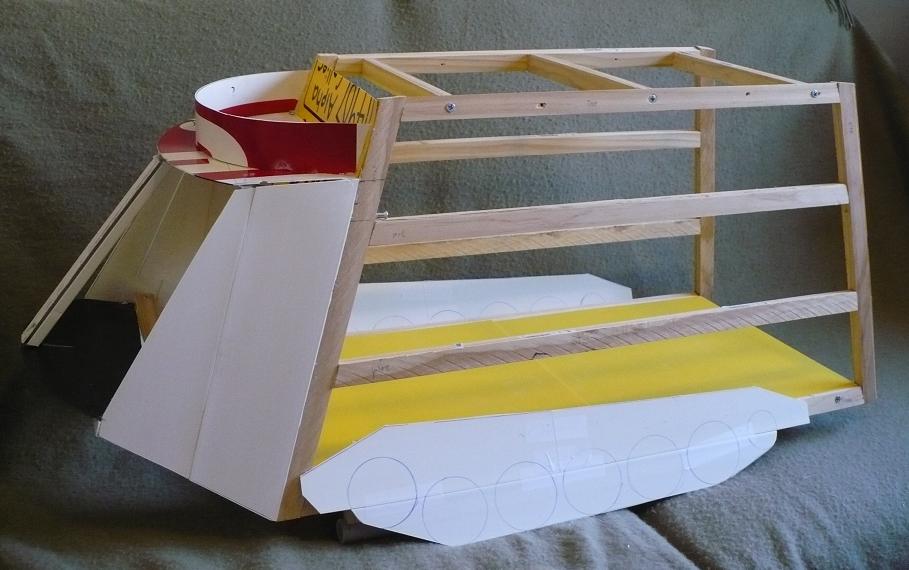
 The first stage was the basic frame of the cargo area. This had to be sturdy enough to not only support its own weight, but also the weight of an army stored inside. Oh, did I forget to mention BigRed convinced me to have it double as an army transport case? So yes, it had to have a sturdy frame that you could hold from the top and not have everything come spilling out of the bottom. I went with wood for the frame. It is solid enough to support the weight, easy enough to cut into the correct shape, and very inexpensive (36 cents a foot at home depot). But working with wood presented it own challenges. Wood does not take to superglue. It is porous enough to absorb most of the glue before it has time to cure. Because of this, I had to use either wood screws or hot glue when attaching anything to the structure.
The second stage is the front. This one is tricky. Lots of odd angle and curves have to fit together just right. It’s much harder than it looks. If you look closely at some of the pictures you can tell that the left side is slightly higher than the right (oops). This part is mostly plasticard with just enough supports to keep it from getting smashed during transport.
The next stage is the wheel sections. As robust and bulky as they look on the picture, if the whole weight of the CI was resting on them, they would snap off in no time. To prevent this, I attached a pair of skids directly to the frame. I originally planned on short stubby legs, but they would tear up any table we played on. Two 16″ long pvc pipes run underneath the CI, just to the inside of each tread section. Finding twelve wheels in the right scale and with the right look presented its own problem. After some digging, I went with furniture leg rubber cups (the things you put under the legs of tables and couches to keep them from moving around) with some random electrician bits. Trust me, they look good. For the treads, I stuck with the the tried and true Caterpillar Spacers, though the last time I was at Home Depot, they didn’t have any. I hope I can still find them.
I’m still undecided on how I want to build the crenellations on top. My original though was to use a hot wire and cut them out of foam. but that would make them too irregular. I’d like to find some sort of preformed block that I can stick up there. maybe .5″ x .5″ x 1″. I’m also going to make use of the hatch that exists on the original model. This will be removable (or have a hinge and folds up) so you can reach in and grab the top support strut and use it as a handle to carry the CI.
The ramps should be pretty easy. Some thick plasticard, a few hinges and some embellishments. If I am up to it, I may use a some various sized tubes on the back ramp to look like hydraulics. I’m also not sure how to keep the front hatch closed; probably magnets.
The next step is the guns. I haven’t given too much thought to these yet. I already found a good housing for the volcano cannon (a small plastic bowl). I’m going to base the gun’s barrel off the ones that forgeworld uses for their shadowswords, rather than the one on the epic model. The side sponsons are still a mystery to me. I don’t like the looks of the ones on the original. I’ll probably make them like the ones on the IG tanks, only larger and with a gun facing to the rear and the side. That brings us to my next problem, the sponson guns themselves; anyone have 6 extra plasma cannons they aren’t using?
The last step is the armored sides. This should be pretty easy. Each side will be a thick plasticard sheet that can be removed for easy access to the inside. On the outside I will cover it with squares of thin plasticard for the armor plates. I’ll have to break down and get a pounce wheel to do the rivet work on them. Rather than the large stone block appearance of the epic Capitol Imperialis, I’d like to have it resemble the armor plate look of the baneblade (10,000 rivets and all).
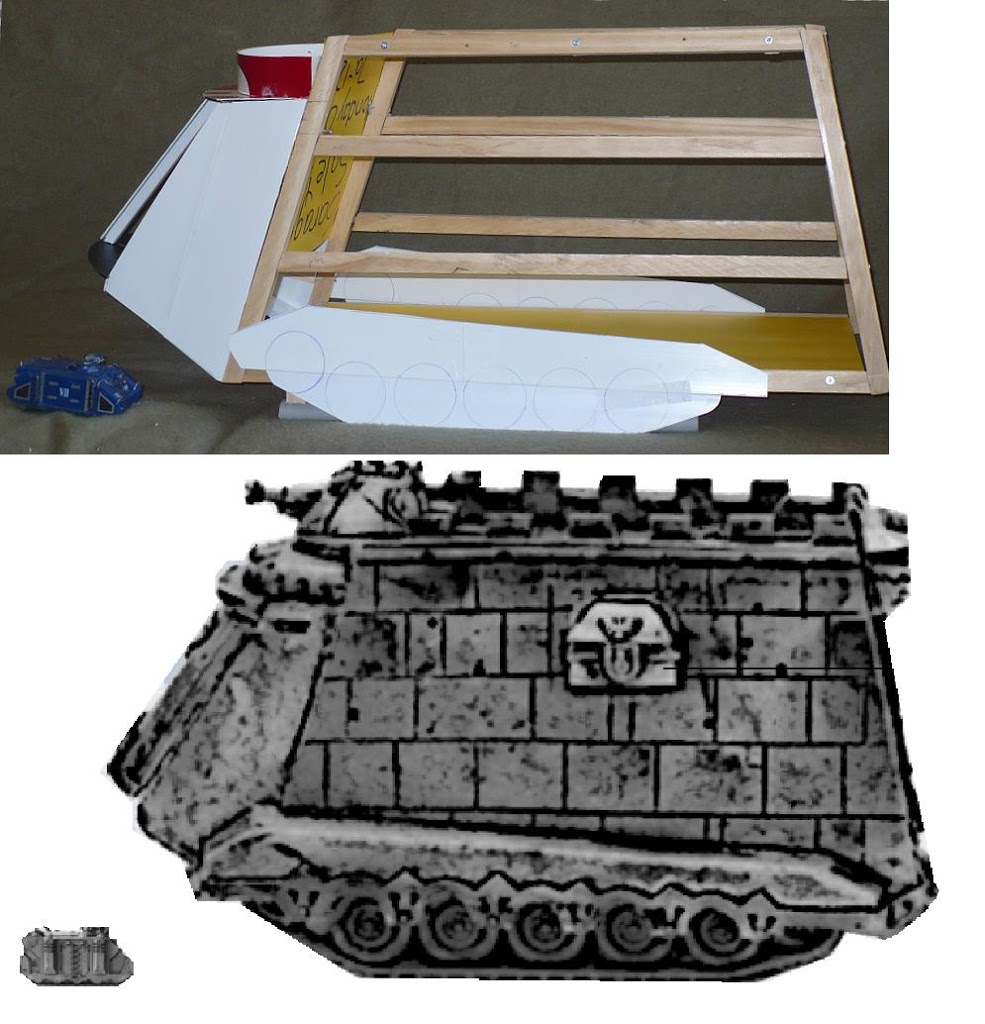 As you can see from this comparison shot, the scale looks just about right. Once I get the crenellation around the top, it should be a good fit.
As you can see from this comparison shot, the scale looks just about right. Once I get the crenellation around the top, it should be a good fit.There is still a lot of work to be done. I hope I can have it out before our next big campaign.
Author: Guest Columnist
Advertisement


