40K HOBBY: To Superdetail a Stompa – Part 2

A guestpiece by John Crowdis, taking us through the assenbly painting and weathering of an Ork Stompa using Forgeworld’s IA Masterclass book.
Once the conversions were done, it was time to move onto the painting. I had painted the crew earlier in the process, doing them alongside another set of miniatures. I find it’s often best to do the crew when mixed in with other minis, simply because I’m less tempted to cut corners on them to do the big fancy model.
With the different sub-assemblies intact, I base-coated everything with GW’s Chaos Black. I am not particularly wedded to one primer or another. For a time I experimented with Duplicolor’s Black Sandable Primer. It works well enough, but is really a very dark grey as opposed to an authentic black. Given that I was working with a Goff colour scheme, I wanted a good, solid black as my starting colour.
Chipped and Worn Paint:
The first part of the model I wanted to work was to try out the “Hairspray Technique” that Phil Stutcinskas pioneered. In the end, this effect would be very subtle, but is very hard to duplicate with other painting techniques. I saw Orks as being less concerned about preserving their paint jobs, and so certain parts of the model would take a significant amount of wear and tear.
I masked off the lower parts of the model, as the worn paint effect I was looking for would look out of place on the upper parts of the model. I have a dual-action airbrush, and roughly sprayed Dark Flesh across the lower parts of the model and the feet. I then used Macharius Orange though the airbrush in smaller patchy dots. As a combined effect these would show worn/oxidized metal showing through paint wearing away on the lower parts of the model. Once finished, I then took GW’s Purity Seal, and gave it a good coat and let it dry.
Once it was dry, I then took some conventional hairspray, and coated the part of the model that I had just painted/varnished. After the first coat of hairspray had dried, I then did a second coat and let it dry. At this point it’s important to note that I named GW’s Purity Seal specifically, as it is a Lacquer Satin varnish. The hairspray won’t bond to the Purity Seal, where it will bond to acrylic varnishes. This lack of bonding property is important to the next step. Phil Stutcinskas has commented on military modelling sites that GW’s Purity Seal is the best for getting this kind of effect.
After the hairspray dried, I airbrushed the areas with Chaos Black. I always used Tamiya’s X-20A thinner to thin down GW’s acrylics… it’s one of the recommendation from the Forgeworld Book. Works very well. After quickly cleaning the airbrush, enough time had passed to move onto the next step. Using warm water and one of GW’s larger brushes, I first soaked the area by brushing water over the whole area. I then came back, and began to rub a bit more on various areas of the treated area on the model. The paint would strip away, revealing parts of the Dark Flesh/Machiarius Orange. The worn metal effect is hard to see in pictures, but it works well. I’ve since used it to great effect on other models… and it can be used very effectively for doing Whitewash winter camo on tanks.
Basecoating the Rest of the Model:
After the water had dried from the paint removal, I removed the masking from the lower parts of the model. I then airbrushed a coat of Future/Johnson’s Klear over the part of the model to seal it in, and then once that had dried, I airbrushed Vallejo’s Model Air Matte Varnish (Acrylic) to bring everything back down to a matte finish.
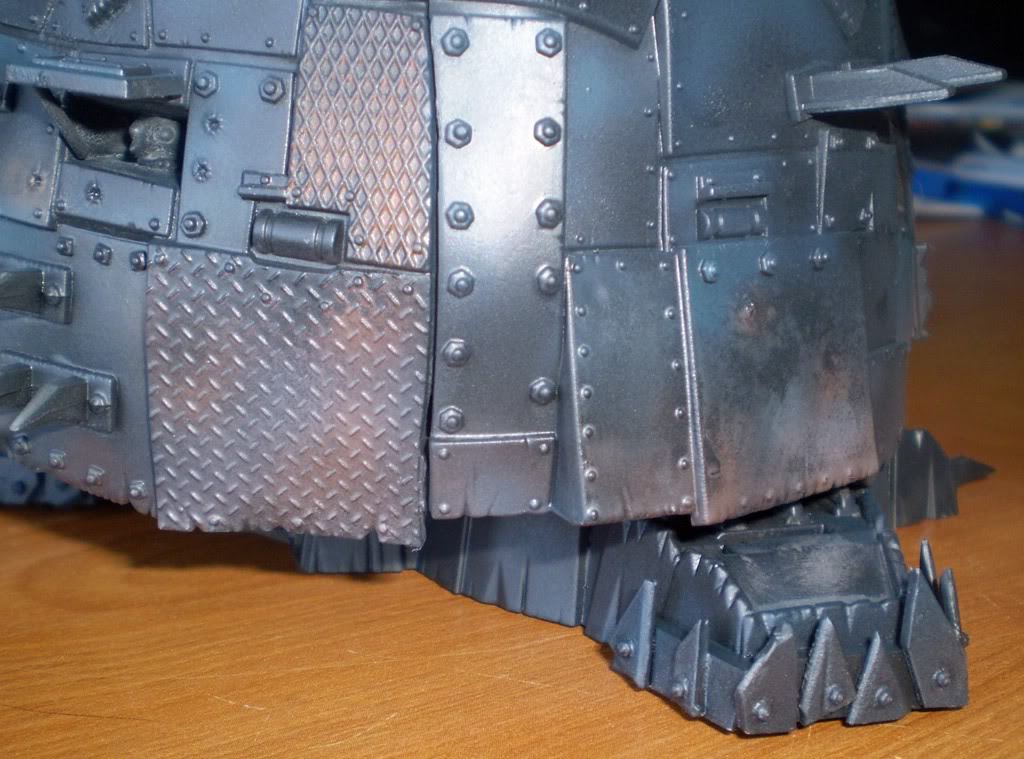
I began by roughly airbrushing any area of the model that would be left as bare metal with a rough coat of Scorched brown and then a patchy highlight of Dark Flesh. This included most of the weapon arms, the arm pits, and the underside of the Stompa. I masked off areas that I didn’t want paint.
Once that was done, I removed the masks and set up a new set of masks to allow me to paint the exhaust pipes, upper skull banner, and the glyph plates. Using Fortress Grey, I roughly airbrushed it onto the various areas… it was important NOT to get a smooth finish, because I was looking to simulate a non-shiny-yet-to-be-oxidized metal.
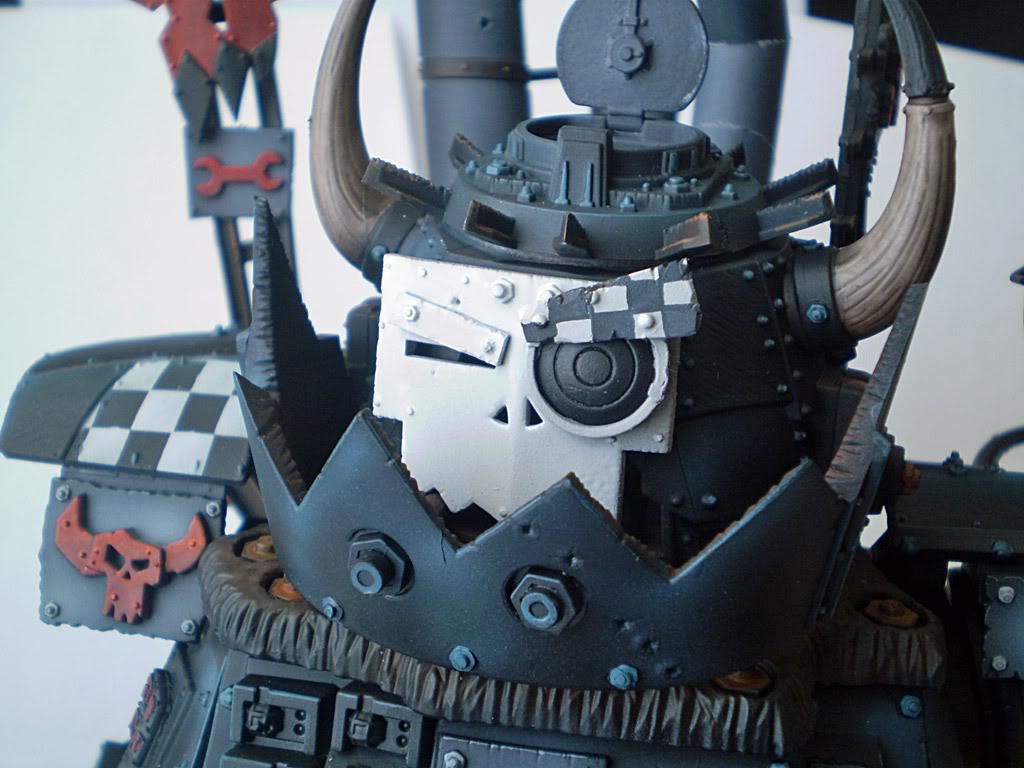
Keeping the masks to the brown areas that I had painted earlier, I then masked off the Fortress grey parts, and set to work on airbrushing the black. I decided to use the airbrush to highlight the various black panels using Privateer Press’ Formula p3 Coal Black to work as my black highlight. I treated each panel individually, using a piece of card with a 90 degree cut out of it to place in the upper corner as I moved along. I would highlight the upper edge of the panel, keeping the lower edge dark. After the first highlight, I came back with Ice Blue mixed with Coal Black, and did the same thing, but tried to keep it lighter and thinner.
With the black finished, it was time to do the red. Using a similar technique, I airbrushed a mix of Mechrite Red & Blood Red evenly airbrushed on and then once that was done, I then poured the mix out of the airbrush (I have a gravity feed) into a small container… do a quick clean of the airbrush to make sure paint doesn’t congeal in the cup… I then added some more blood red to the mix and thinned to the appropriate consistency… sprayed more towards the upper corners… and then I repeated the step of pouring out and remixing, but added golden yellow to the mix, as I would have more paint left over as I was not painting as much in the way of surfaces… I then would airbrush higher in the corners. I was also careful to have masked off anything I didn’t want red overspray on. After the larger parts were done, I hand painted the smaller icons and pieces using the same mixes of reds.
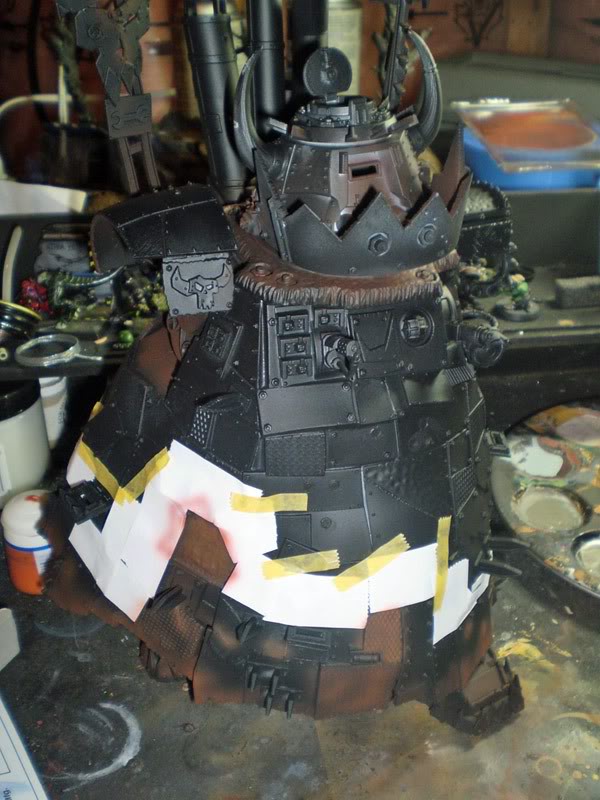
Once the red was done, it was time to move onto the white areas including the checks:
I did some masking to create checks and an oversized Grim icon on the model today, which makes it look much more finished than it has before. I used a combination of Tamiya’s 6mm wide masking tape cut into small squares, plus 3M’s “blue” masking tape which has a “low” tack value to cover larger areas. I would lay a piece of masking tape down onto the cutting matt and cut it into squares and then individually stick them to the mode before airbrushing.
The large grim icon was created by laying two wider pieces of blue masking tape side-by-side drawing the grim icon onto it and cutting those pieces out and carefully applying it to the model.
The “white” is actually a Dheneb Stone base airbrushed, with two successive layers of p3’s Menoth White Highlight (an off white) added into the mix and sprayed over the top corner of the areas I wanted white.
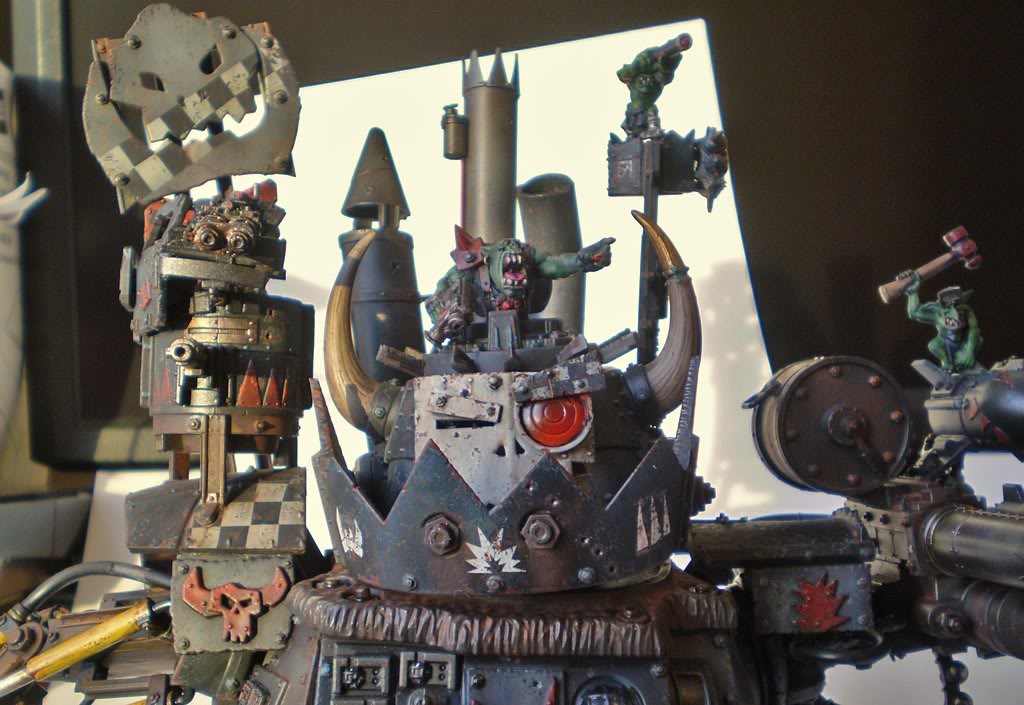
After the checks, I came back to do “Contrast Detail” by individually painting rivets, bolts, hinges, and hatches at a much lighter highlight than what was around it. On the black, I used Ice Blue with a bit of Coal Black mixed in, on the reds I used Blood Red/Golden Yellow, and the White was pure Skull white.
At this point, the result had the Stompa looking far too clean. Even Eldar vehicles weren’t this clean! Decals were next, and then, weathering. Lots of weathering.
~Stay tuned for the next installment coming soon!


