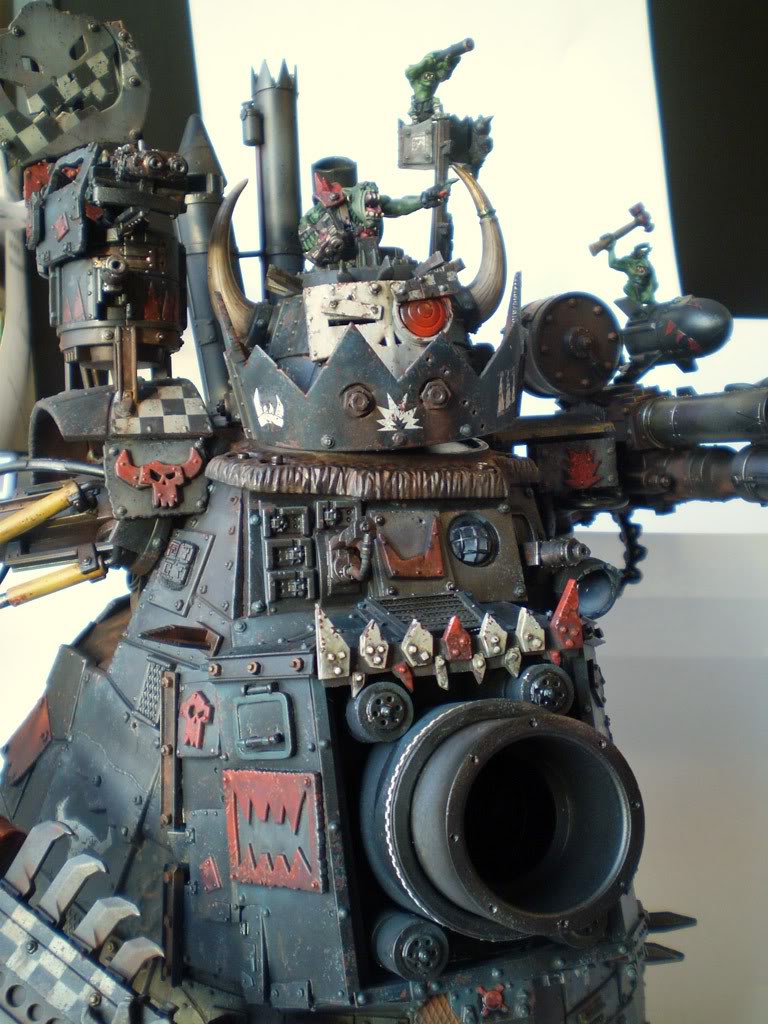
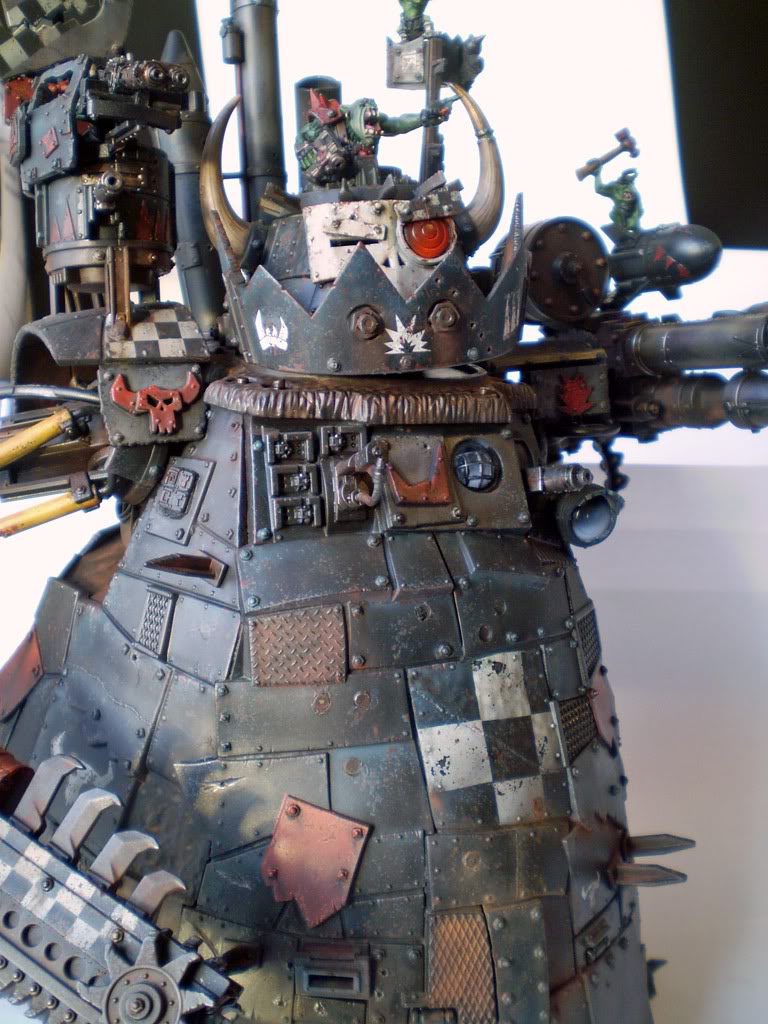
40K HOBBY: To Superdetail a Stompa – Part 3

A guestpiece by John Crowdis, taking us through the assenbly painting and weathering of an Ork Stompa using Forgeworld’s IA Masterclass book.
Decals
Often decals are left as the very last part of the model, but when doing realistic weathering, they need to be in place prior to those steps. Otherwise the decals will look far too clean and out of place on the model. Fortunately, adding the decals can incorporate a step before moving onto the weathering. Decals apply best to a smooth glossy surface. To prepare for that, I used the airbrush to apply a coat of straight Future/Johnson’s Klear. It works quite well as a gloss finish, and doesn’t stink up the room like canned spray varnishes can. Even so, spray ‘ard coat works just as well. The other advantage is that this helps to prepare the model for the first layer of weathering using oil paints. Once the decals were applied, I brushed on some ‘ard Coat to seal them into place.
Fading
Fading is a technique that creates the subtle effect of paint slowly losing its vibrancy due to exposure to the sun, wind, dust, and other environmental elements.
The trick for doing fading is to use oil paints related to the colours they are intended to colour. In this case, I used turquoise, dark blue, titanium white, parchment, and burnt umber over black, while using titanium white, parchment, yellow, red and burnt umber over red shades. Working section-by-section you apply the oil paints undiluted in small dots over the area. Keep lighter paints on the upper and lighter areas of the section, while the darker shades more towards the recesses. You really won’t need a lot of dots… less is more.
Once the dots are applied, take a fresh brush, dip it in white spirit or similar odourless oil paint thinner. Paint the white spirit onto the model in a downward motion until the various dots of the oil paint disappear. When it dries it lightens and “wears” the paint beneath it. Once this was done, let the thinner dry. Oil paints can take a long time to dry, but once the thinner is dry, you can apply a coat of matte varnish. I used Vallejo’s Model Air Matte Varnish through my airbrush. This sets it up nicely for applying the chipping effects.
Chipping
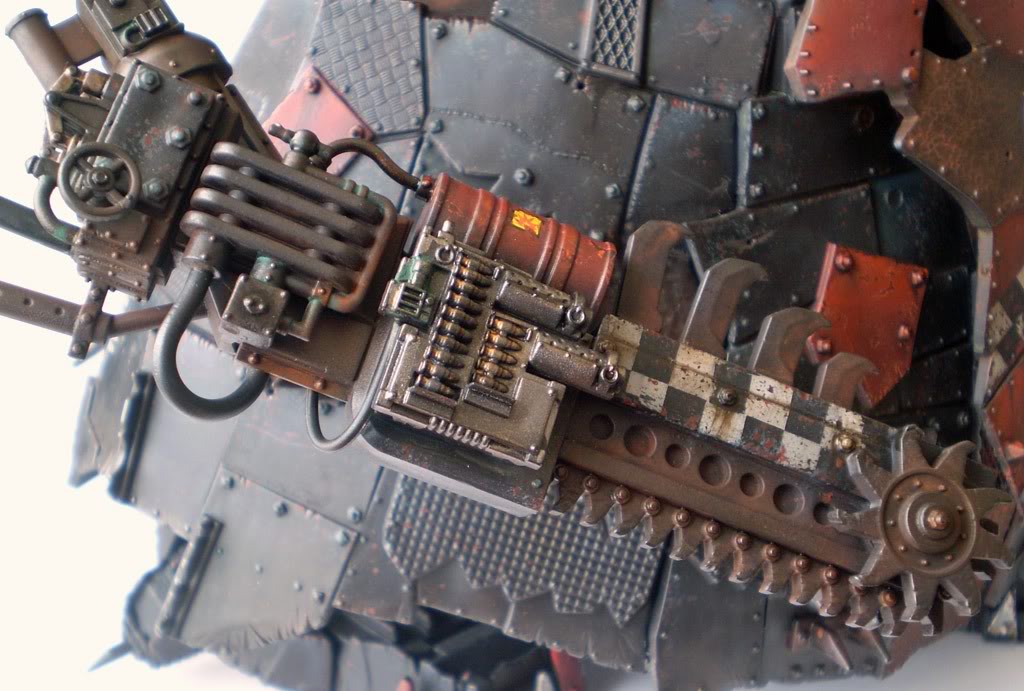
Chipping can be achieved any number of ways. In the case of the Stompa, I used a sponge to apply the chips. The sponges that come in the GW blister packs is all you need. It works quite well. The idea is to take a lighter shade of the colour you are chipping, and then very lightly sponge on the paint in different places that would receive wear and tear. After I applied the initial chips, I then came back using dark flesh to paint inside the larger of the chips to show the exposed rusted metal underneath. This can be time consuming, but the end results are definitely worth it.
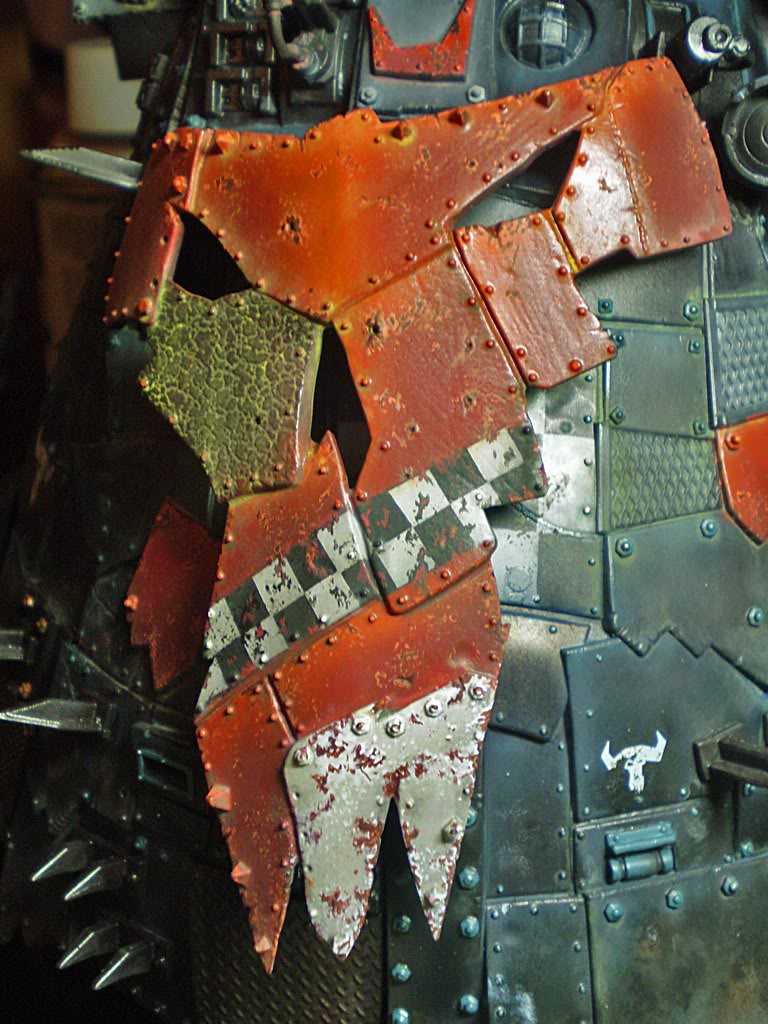
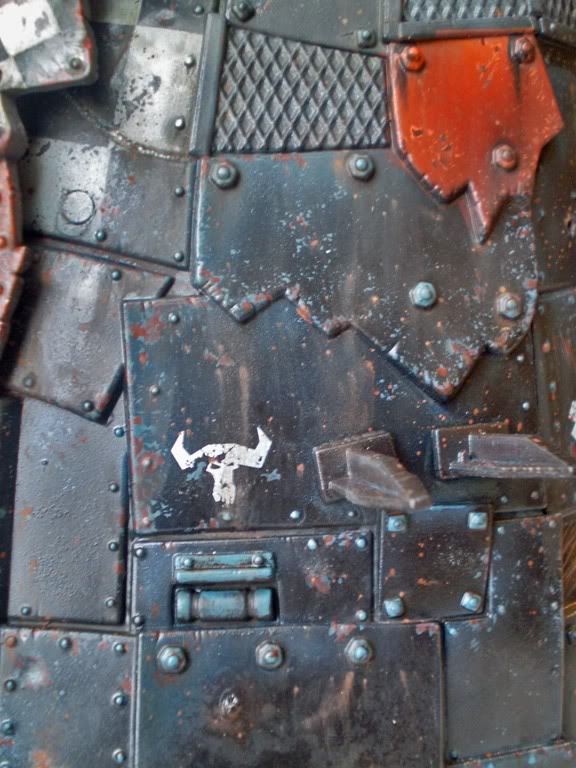
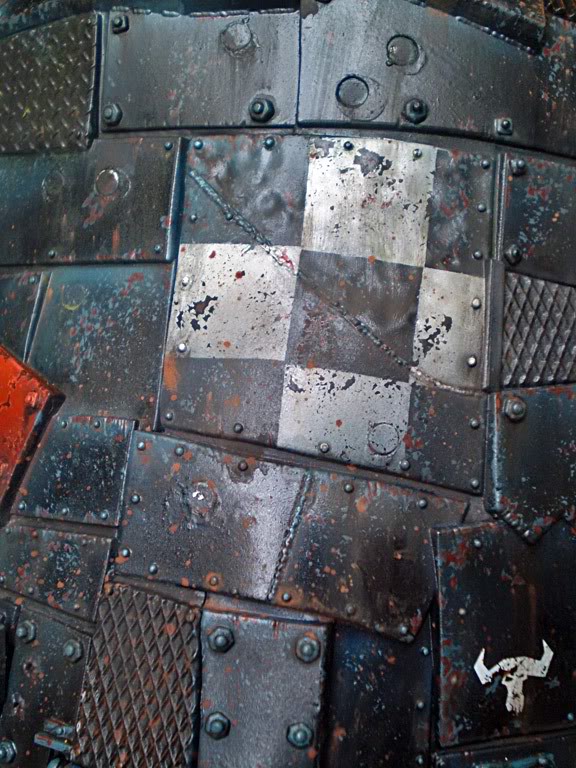
Oil Washes for Definition, Dirt & Grime
After chipping, I coated the model again with a layer of gloss varnish. As a simple rule matte varnish is used under acrylic paints, gloss varnish under oils. Creating an oil wash is the same as it is for acrylics, except white spirit is the thinner. For the dirt/grime wash, I used a mix of burnt umber and lamp black, thinned down substantially. Oil washes should be best applied as a “pin” wash, applying the wash by loading up the brush with wash, and then touching the details of the model. The nature of the wash will have it flow naturally around the details of the model. Don’t worry if you apply too much, the second part of this will take care of it.
The next step is to let the washes dry enough so that the glossy sheen of the thinner is no longer visible. Oils can take a while to dry, so this can even be done almost a day later if necessary. Take a brush that is dry of any paint or thinner, and then begin softening and blending the oils that have collected around the details. The idea is to get rid of any hard edges that you might have. If you need to, lightly dampen the brush with thinner. For dirt around rivets that is washing down, pull the oils in a downward direction. Like the chips it can be time consuming, but definitely worth it.
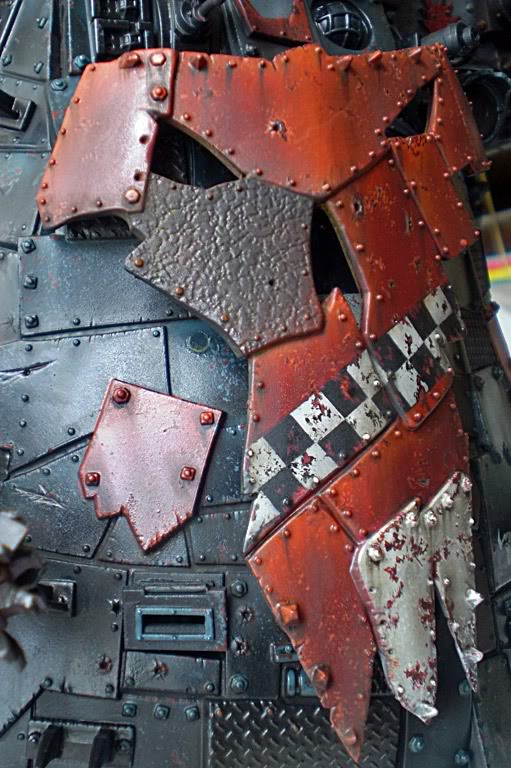
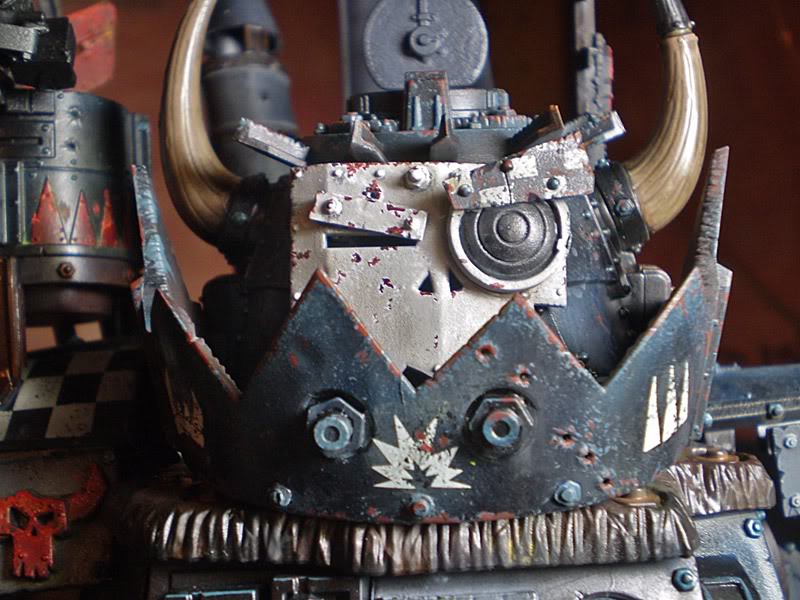
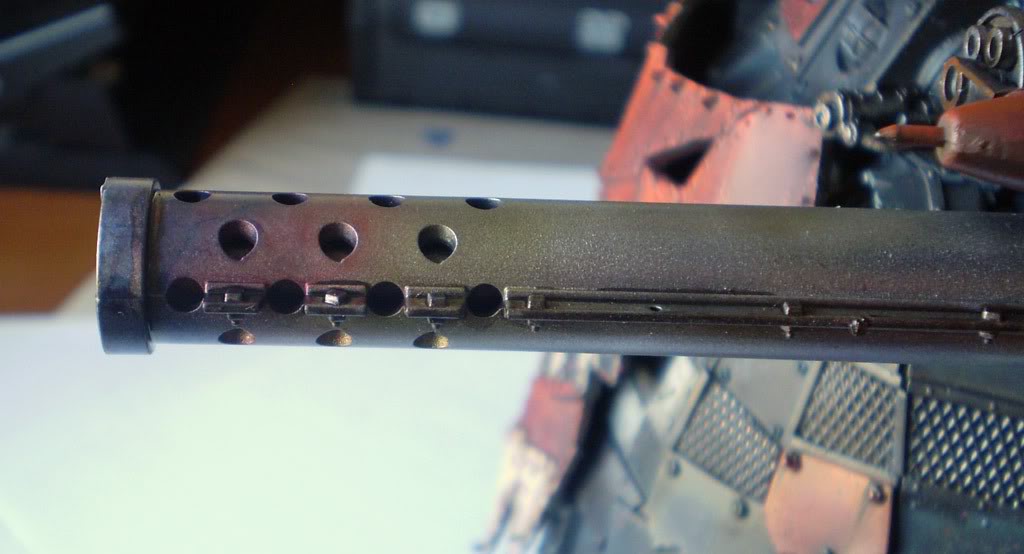
Rust
To protect the previous layer of washes, I sprayed another coat of Future/Johnson’s Klear as a gloss coat. This rust technique is largely the same as detailed in the Forgeworld Book. Mix rust-coloured weathering powders with burnt umber oil paint and some white spirit/mineral spirit thinner. Dip your brush into the mix, and then on the edges of a piece of cardboard or popsicle stick, flick it towards the model. Immediately after this airbrush a small amount of pure thinner onto the area which will soften it up. After doing this to the whole model, you can come back and use a dry brush to pull the larger rust spots downward to show staining and streaking.
If you find the rust too much, you can always apply a coat of varnish, which will soften the effects of the weathering powders/rust.
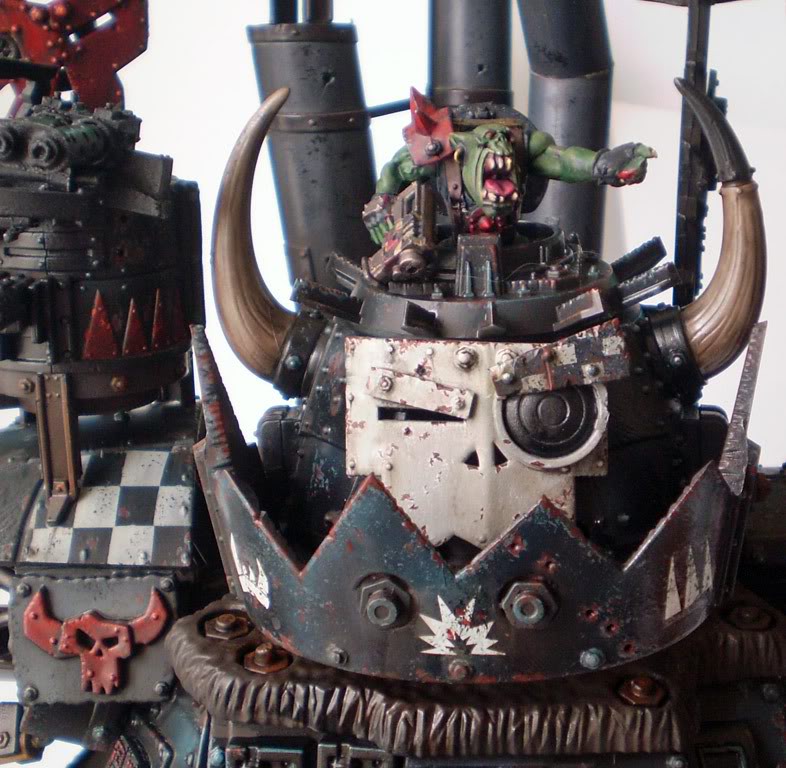
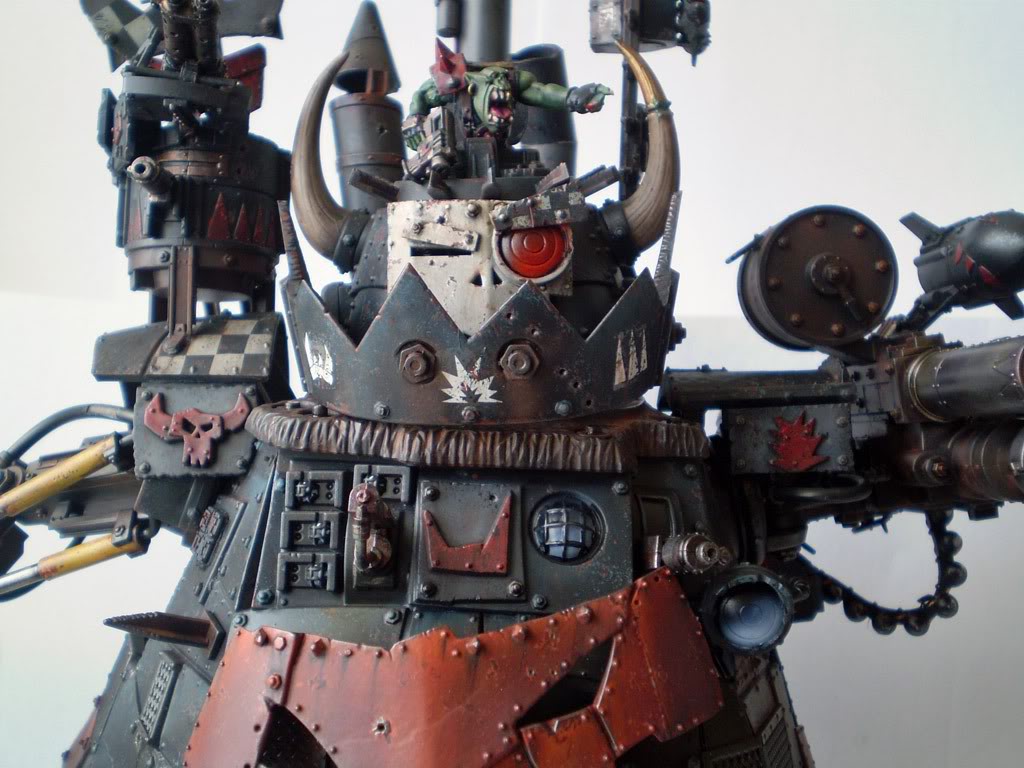
Polished Metals:
The dethkannon is a signature part of the piece. I chose to airbrush metallics through it to give a nice smooth finish. First with Tin Bitz, then Boltgun metal, and then a random pattern with Mithril silver. For much of the other metallics, a brush gives far better control. The heat distortion was done by airbrushing successive layers of yellow, red, purple and blue inks in smaller bands. Eventually, an airbrush of black on the tip of the cannon would show the carbon scoring.
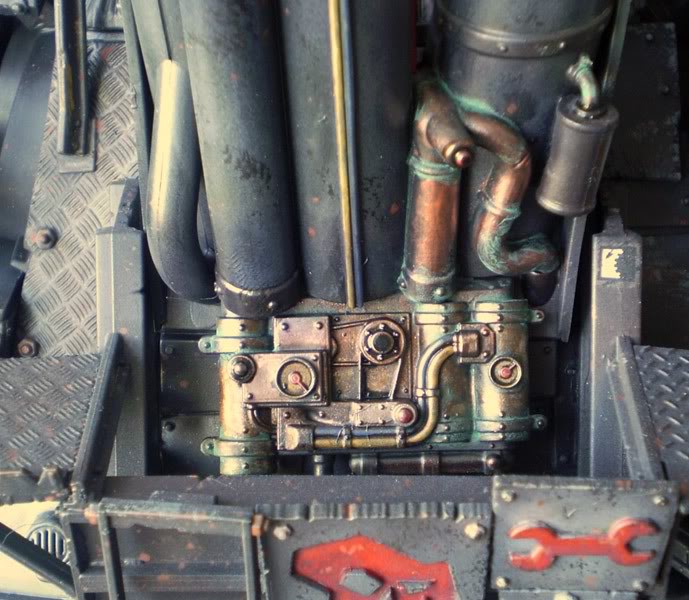
Verdigris on Brass Metals:
The verdigris effect on the brass/bronze & copper parts of the model were achieved by mixing blue and green weathering powders with hawk turquoise, ice blue, and thinned down with water and a bit of rubbing alcohol to form a wash. Apply this to the recesses and edges of the brass areas. You won’t need much. After it dries, you can soften and work the remaining weathering powders to blend out the edges.
This can also be done with oil paints as well, mixing the Blue and Green weathering powders with Turquoise paint and white spirit thinner. This allows more flexibility in blending the powders later, similar to the dirt and grime washes earlier.
Metal Edges
This is quite a simple effect that can be achieved by shaving a 4B pencil, rubbing your finger in the shavings and then rubbing areas that you want to have as worn metallic effects… either the edges of blades, textures on treadplate, or any the parts of a model. You can use the pencil itself around bullet holes or other damage to give it a slightly metallic sheen.
Lenses
Lenses on the model were done by masking off the larger lenses and using the airbrush to blend the paint to lighter colours towards the bottom right of the lens. I used shadow grey and ice blue for the glass-type lens on the searchlight, and various shades of red for the Stompa’s “Gaze of Mork” eye.
General Dirt
Weathering powders here are your friend. Make sure that you coat the model with matte varnish before you do this stage. The key is to get a good mix and blend. Use white spirit to mix and blend the powders on the model, and then let it dry. The challenge is once the powders are dry, they will come off on your fingers, and they will disappear or be greatly reduced if you apply a matte varnish over them. The best thing that I have found so far is to airbrush Mig Production’s “Fixer” over the model, which will hold the pigments in place, but not make them disappear.
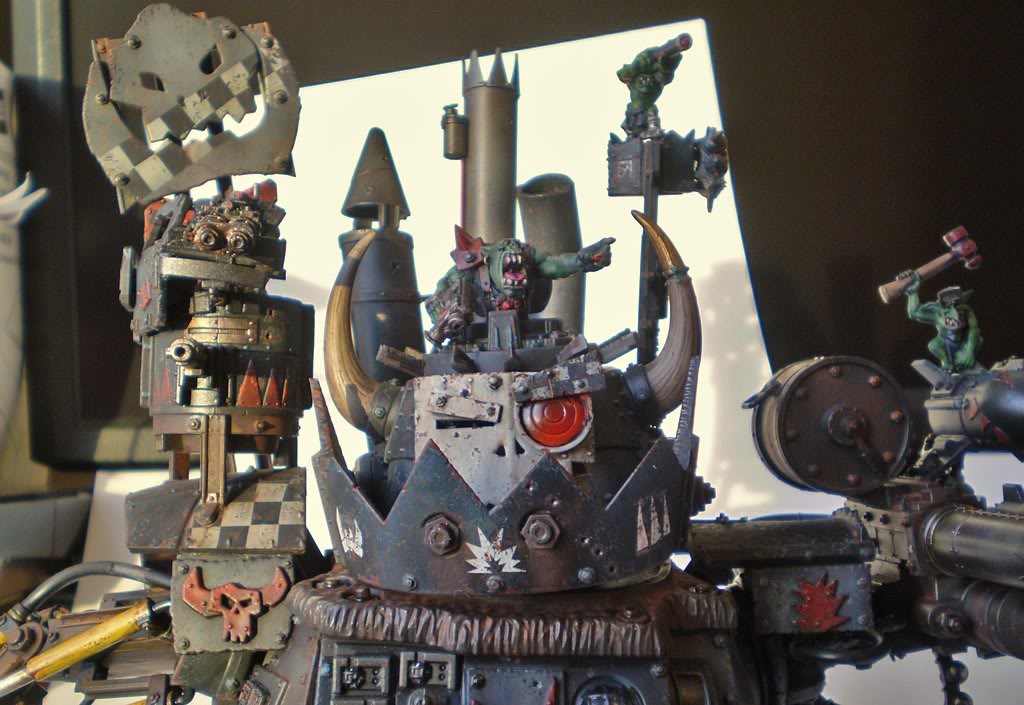
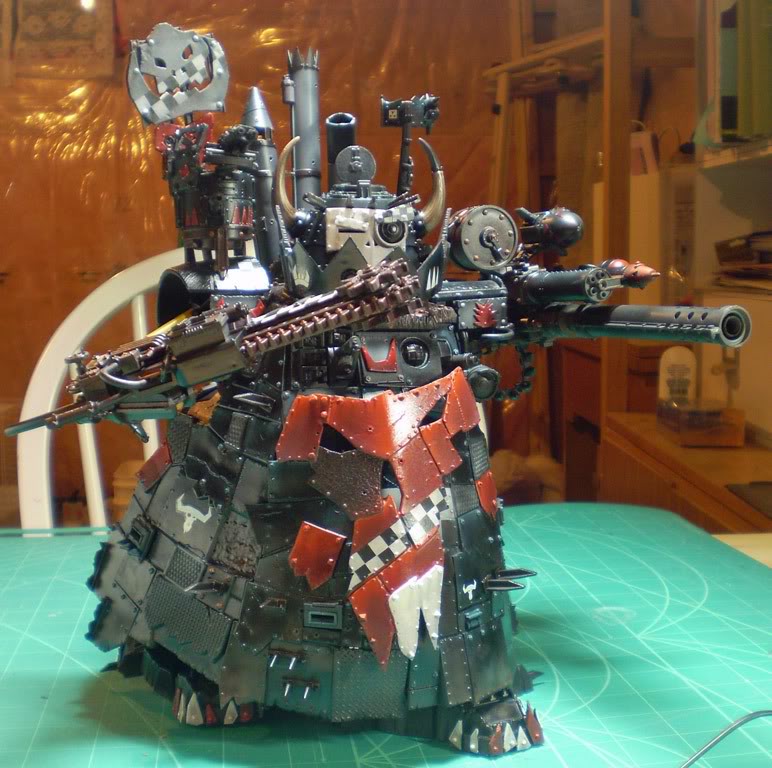
Here are some final pictures:

~Thats it guys! I look forward to your comments and hope this gives you all ideas for your next project.


