FoW Tactics: Tricks With Fortifications

Good afternoon gentlemen (and FoW players also); our topic for the next few minutes will be how to get the best use out of static fortifications whilst defending a position in Flames of War.
This article will presume that you understand the various fortification types and their associated rules; the aim here is not solely to restate the purpose of these fortifications, but to provide insight into how to best achieve their purpose.
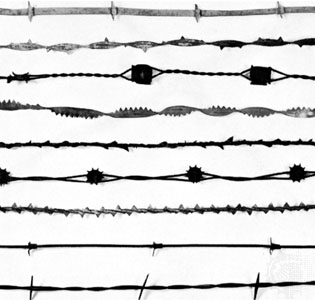
Wire
Wire is useful primarily for breaking up infantry assaults across its breadth. The ideal placement of wire, then, is 4.1″ from your lines. This is so that infantry cannot move up to the wire and then assault over it in the same turn, before you are able to fire on them; set up at least 4″ from all of your teams, the wire forces enemy infantry to be exposed to the maximum amount of fire in your turn before they can assault. This placement has the added benefit of meaning that Goliaths used to destroy your wire will not hit your trenches.
A secondary use for wire is as a poor-man’s minefield for use against armored fighting vehicles. Wire cannot bog or otherwise harm a Tracked vehicle, but does slow them to 8″ movement on the turn the wire is overrun; if an enemy platoon was depending on its 16″ Light Tank move to cover-hop, then barbed wire can be just the thing your antitank guns need to prevent that.
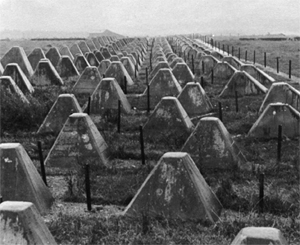
Trenches
Trenches serve a lot of purposes and are, in this author’s opinion, the best bang for your fortification buck possible. You almost can’t have too many. The primary purpose of trenches is, obviously, to provide your infantry and man-packed guns with cover and allow them to maintain that protection as they move around within the trench network. It goes without saying, then, that the more trenches you have, the more places your men can go to!
Trenches are secondarily useful as a cheap way to stop enemy Wheeled vehicles, like recon units, from entering a particular area. Trenches are better than wire for this task because they are more or less indestructible. They are also difficult for half-tracks, which, while not nearly as much of a deterrent, can make some difference.
It is nearly always useful, if you have enough trench lines extra, to connect your board edge with your forward trenches in missions that use the Reserves rule. This is so that you can move your Reserve platoons onto the board At the Double in relative safety.

As a last note, it is an obvious but little-used fact that, should you have very few trench lines available, it is usually best to set them up about 5″ behind (not on) the spot where you envision your front lines being. This is because your troops will likely be starting the mission in Foxholes in any event, and your limited trenches will be put to best use as secondary fallback points. Now the enemy will have to dig you out of bulletproof cover twice instead of once!
Gun Pits
There’s not much to say about Gun Pits, as their use is fairly straightforward. Do keep in mind, however, that they Conceal anti-aircraft guns (which Foxholes do not) and they pose the same mobility problems to guns and Wheeled vehicles that trench lines do.
Minefields
Minefields are a situational fortification that, in this author’s opinion, have little place in take-all-comers Festungs/Sturm/etc. lists. Minefields are difficult for non-Pioneer troops to cross, but pathetically easy for Pioneers to deal with and quite expensive points-wise. Where they shine is in the Fortification missions, wherein they can be chosen (or not chosen) once the table size and terrain layout are known quantities.
If a table has “choke points” – that is, points of open ground flanked by Very Difficult or Impassable terrain where enemy forces will be required to advance – minefields are worth every point. Trying to cover a relatively open axis of advance with mines is a losing game, however, because the enemy can simply go wherever the minefields aren’t.
The terrain will largely dictate where you place your minefields, so I have no advice on that score. I do recommend, however, sparing a barbed wire section for the front of every minefield you place, to create delay should the enemy try to use Pioneer troops to neutralize it. Remember, all non-bunker fortifications ever do is delay; they are not going to stop anybody cold and are mere aids to your mobile troops.
Antitank Ditches
These fortifications, unlike minefields, can be relied upon to do their job in spades. There are no dice to roll or chances to take; it’s very simple: tanks. Can’t. Go. The reason they exceed minefields in effectiveness is that it is almost impossible to actually remove them from the map without a bulldozer. Pioneers can do it with a Supply Vehicle and enough time, but what many players fail to realize is that a supply vehicle is a different type of team from the infantry Pioneers, and can be singled out when the platoon is shot at. They also (more obviously) have poor saves. This means that as long as you’ve kept your wits about you, no Pioneer platoon should ever get to your lines with an intact supply vehicle.
They do share with minefields, though, the quality of only being useful on certain board setups and against certain opponents. They are heinously expensive fortifications, best used singly to cut off attractive routes rather than in multiples in vain attempts to close off large sections of open table. These are another fortification best left to the Fortification missions rather than take-all-comers lists.
The last thing to note about them is that, if at all possible, they should be covered by MG fire en enfilade rather than from directly behind them. This is because they offer concealment and bulletproof cover to infantry and man-packed gun teams. If they can’t be covered en enfilade, make sure your wire and trench placement accounts for them as possible mustering points for enemy infantry assaults.
Bunkers
Save the best for last, children. Bunkers are the most dramatic part of any fortified defense, because they are the only fortification that bites back! However, some of them aren’t particularly good at it and others can’t take it as well as they can dish it.
Pillboxes
These are about as tough as they come, but because of that are very costly. Pillboxes are better protected than nests against most weapons (in theory); in practice, though, the most effective ways to neutralize nests (infantry assaults and Bunker Busters) work just fine against Pillboxes! For this reason even these mightiest of fortifications are best used conservatively, as defense is the art of conservation.
If you can swing it, the best way to use a pillbox is NOT to plonk it down near your front lines facing out towards the enemy. You are really asking to be Bunker Busted or assaulted by infantry if you do things this way. Keeping in mind that only the firing slits on a bunker can actually be targeted (by assault or by shooting), good FoW players arrive swiftly at the same conclusion the Germans in Normandy historically did: face the bunkers sideways along your lines (looking at each other, put another way), and build walls to prevent shelling from in front of your lines. This way your bunkers can support your lines, but are much less vulnerable to being neutralized than normal. If you have 2 or more AT bunkers, it also means that attempting to Bunker Bust one (remember, they can only be shot from 16″ away) exposes rear armor to the other.
Another good way to use a pillbox when faced by Bunker Buster units is to deploy it 14″ behind your infantry lines, facing out towards the enemy. AT bunkers especially benefit from this treatment; as long as your infantry hold the Bunker Busters can’t get to them, and they can certainly get to the Bunker Busters. Why not 16″ or more? Well, so that if any Nests are up near the front lines, your Pillboxes will be able to participate in defensive fire against assaults on the Nests. (Defensive Fire has a maximum eligibility of 16″, remember.) You never know when 2 extra dice might matter.

Nests
These are Pillboxes’ poor cousins, but they also cost half as much or even less. They can be armed with a variety of weapons, but none of those weapons can credibly attack tanks, so for the sake of generality it’s best to consider all Nests HMG nests. Nests, unlike pillboxes, are vulnerable to basically anything that can get within 16″ of them; in the popular Late War period, weapons with good firepower are a dime a dozen and Nests are easily neutralized. A platoon of just 4 Shermans driving to within 16″ of a Nest and firing in that same turn will destroy it, on average. So what do you do?
Well, first of all, don’t sweat it too much. Your Nest didn’t cost much and was probably worth it just as a headache to the enemy. The thing to do is to place your Nests so that some other part of your force reaps the benefits if they are engaged – either AT Pillboxes or PaK40s or something else. This is the approach I recommend; Nests are great for making your infantry positions impregnable to other infantry until tanks clear the way, and if you are dictating to your opponent where his tanks must go, you’re halfway winning already.
Second, you can always use your Nests in the manner described for Pillboxes above (placing them well behind your lines). With a 24″ range they can still contribute to the battle somewhat without risking being shot, but will very likely be excluded from Defensive Fire and will be unable to keep the bad guys off your infantry.
Third would be to place Nests covering the objectives obscured from your opponent’s start area by LOS-blocking terrain, rather than covering your line of resistance. This drastically alters the mission from a stand-up fight in some depth, to practically two different games: in the first game, the attacker destroys your mobile forces at the front; in the second, he must fight your bunkers on the objectives using his depleted forces and without the benefit of non-mobile troops. This is a very risky method for a number of reasons, but it works great on forces like GoW Strelkovy or British artillery-based forces that can roll up guns to fight Nests in your front lines or even in the mid field, but don’t have a hope of overcoming a network of Nests deep in the rear areas.
Hopefully it’s been instructive. The floor is yours; what’s your favorite way to make use of the Fortifications rules? Do Sturm and Festungs have any place in FFA/Encounter games? Do you favor Nests or Pillboxes for anti-infantry work, and why?


