Hobby: Painting Heavy Armour – Part One

 |
Tanks are an integral part of Imperial and Chaos armies in the 40k universe. But how can one paint vehicles quickly and effectively?
by schoolcormorant
Many of the tricks and tips I have learned about painting 40k vehicles has come from the scale modelling community, in which some of the finest painters ply their trade. Prior to 2008 and the publication of Forge World’s Imperial Armour Model Masterclass much of the technique was shrouded in mystery, with occasional ideas gleaned from the Internet.
Since this book was published, airbrushes, powder pigments, paint thinners, hairspray and oil paints have become more widely used in the 40k hobby community. I now present part one of my own condensed methodology behind painting a vehicle from concept to completion.
The build
First, the building of your vehicle benefits from some forethought. It is not desirable to handle the vehicle overmuch during painting. For one the paint can be rubbed off, and two you can deposit grease on the vehicle which is unsightly in the first case, and unhelpful in the second seeing as often these stains will affect the finish on your model.
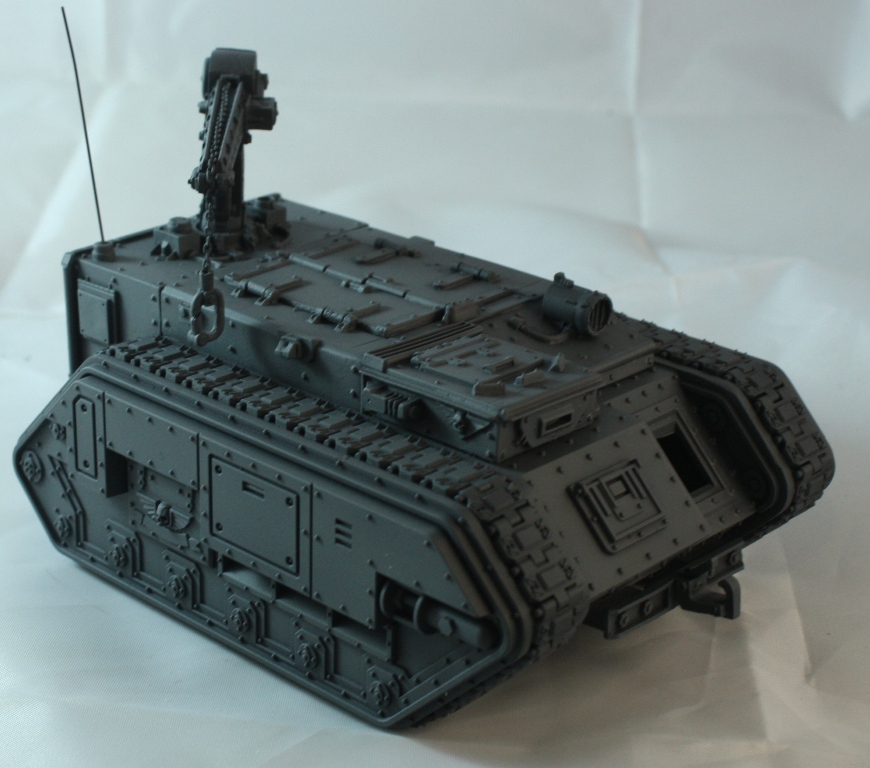
Therefore, it is sometimes advisable to leave items off the model and undercoat and paint them separately. Examples from my own experience include stowage items on the vehicle, crew, hull mounted weapons (heavy bolters/stubbers etc) and searchlights.
Undercoat
Once your model is ready, undercoat it with black. Black is used as it is the ultimate shadow, and in the deepest recesses of the vehicle, black is occasionally desirable. Undercoat the model as usual, taking care to cover every area on the tank, be sure to move the model about and hit it from as many angles as possible.
 |
| As you can see, I have left the heavy bolter off the model, easier to paint seperately. |
Factory Painting
The first job will be application of the paint. As we know, we can paint higher areas lighter colours than lower ones, thus giving an impression of ‘depth’. This is fine and dandy for infantry figures, but how do we extrapolate to a largely cubic medium such as a tank? The answer is, colour modulation.
Colour modulation allows us to apply lighter colours to the higher points in both a decreasing volume and area without having to pick and choose said areas – this makes painting tanks much easier.
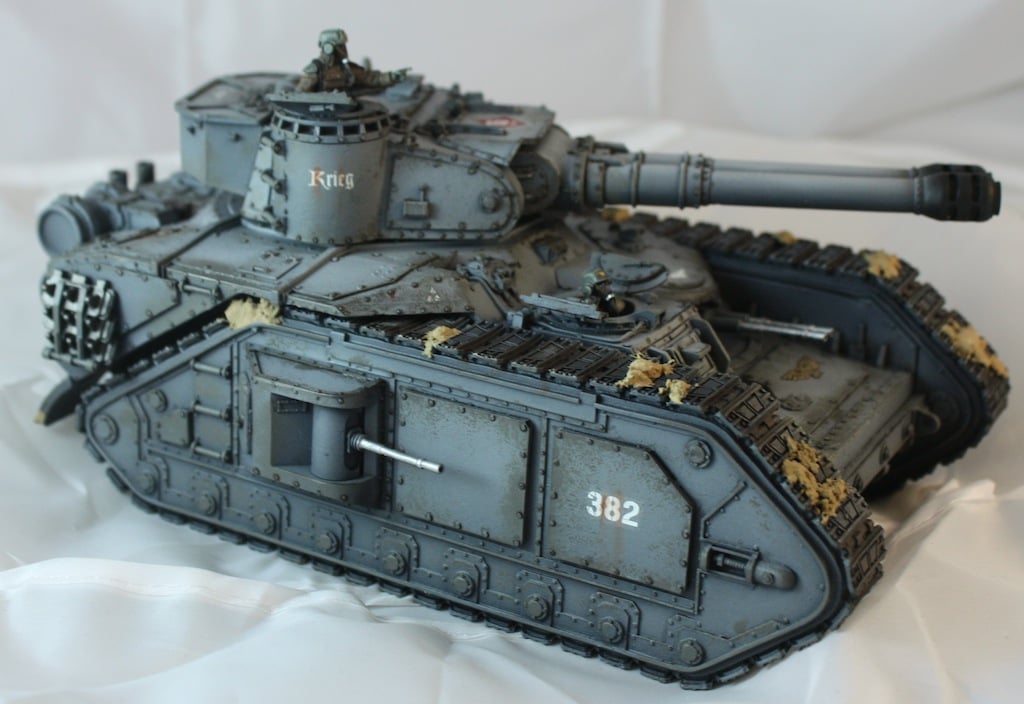
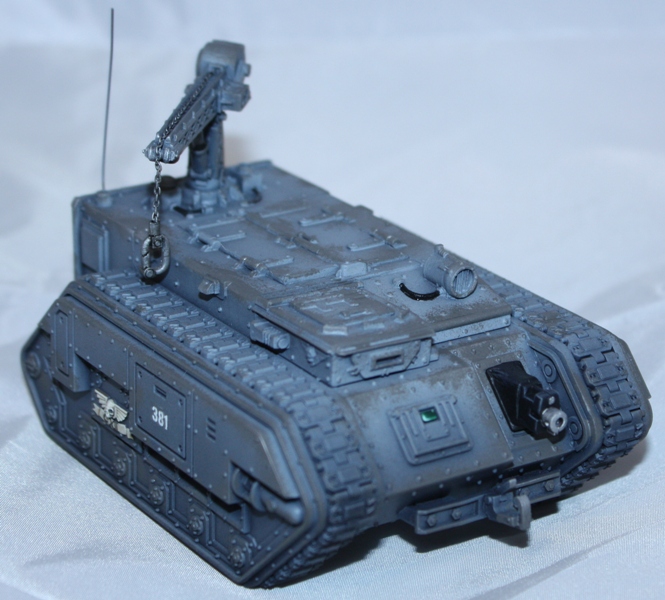
Initially one wants to choose the colour scheme, in the case of my Macharius Vanquisher, pictured above, I wanted a functional grey look. This decision reflects the organisational, utilitarian nature of the Death Korps of Krieg and contrasts nicely with my brown camouflaged Navy detachment.
I started by airbrushing the entire tank Mechanicus Standard Grey.
 |
| Mechanicus Standard Grey all over the model. |
I then used Dawnstone (GW’s new Codex Grey). To apply this second colour, I started half way up the side of the tank, with the airbrush generally pointing about 45 degrees down towards the tank, this allows the lighter colour to hit at a tangent and prevents it from accessing recesses and the undersides of areas, focusing on the uppermost portions.
 |
| Dawnstone applied, look at the front of the vehicle, where the visor is, you can see graduating colour on the sloped surface. |
The final colour chosen was Administratum Grey. I again sprayed down towards the tank focusing on the top sections of the vehicle.
 |
| Administratum Grey applied. |
Decals
We now have a canvas to work from. The next thing to do is apply any transfers or iconography to the vehicle. My method of applying transfers is one I’ve decided is best through trial-and-error. First, choose the transfers and cut them out. In general I would say do not cut them too close to the actual marking, the reason for this is that the eye is drawn to the hard edges of colour on the transfer – e.g. the ‘382’ numbers on the tanks flank. At that edge the white does not fade, but changes to the grey of the tank instantaneously. If you had cut the transfer along that instantaneous boundary the colour change would also alert the eye to a finish change, i.e. gloss to matt. So give yourself some room around the markings of the transfer.
Apply gloss varnish to the areas you will apply transfers, again, give yourself plenty of room, it will look stark at the moment but don’t worry about it. I tend to do 2-3 layers of gloss varnish depending on the surface – flat surfaces require less, rounded surfaces more. Soak the decal in water for a few seconds and slip it from the sheet, apply it to the area, by taking some water on a brush tip you can reposition the decal until it is in the correct position. Use a soft damp brush to squeeze the underlying water away from below the transfer and leave to dry out.
Once this is dry, apply more gloss varnish, I like to thin mine down a little bit to prevent any brush strokes forming over the transfer. Again leave to dry.
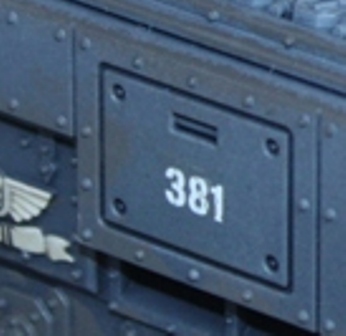 |
| Blown up pcture of the decal, as you can see at this magnification there is a hint of an outline of the transfer, but this is not visible normally. More importantly, you can see the matt finish is congruous across the transfer and the vehicle itself. |
Chipping
The next step is to damage the vehicle. In most environments a vehicle will be susceptible to wear and tear. In a factory, tanks are hit with an ionised primer coat, ranging in colours from grey, red, yellow or green. This primer coat is extremely hard wearing and glues itself to the vehicle. This colour will show up when your colour (in this case, grey) is worn from the tank. I do not use any wild colours for this, it doesn’t tend to look brilliant with a bright colour. I choose a green-brown, Stormvermin Fur.
We sponge this onto the vehicle, particularly in areas highly prone to wear, gantries, access hatches, steps and handles. Do not use too dense a sponge or the effect will be lost – blister pack sponge or hobby case sponge is ideal. Dip it into paint and then sponge most of it off before applying. This step is helpful to us also as it helps delineate edges.
 |
| As you can see, the chipping has broken up a lot of the edges. I have painted in a lot of the other details such as the visor lens, icons on the tank flanks and also the hazard stripe markings on the rear – shown below. |
I then, in preparation for weathering spray the tank liberally with Purity Seal, I use Purity Seal as it is readily available to me. I have not used any other satin varnishes, but I have no complaints with this particular product. You should now notice that the tank and the transfer/decal areas have melded into one.
The tank is to all intents and purposes painted. But it looks rather plain, how do we bring out some more of the details? Well, you’ll find out in the second part…
I’d love to hear people’s opinions and any further ideas on painting vehicles. To see more of my work, why not head over to my blog – The Spring Offensive


